everyday food made simple

Let’s all pause for a moment and discuss how important it is for you to make these for breakfast this weekend. I’ve made a few variations of breakfast rolls that I’ve shared with you in the past (you can find them here, here, here, and here), but today we’re ditching the rolls and making something I’ve never made before… pull-apart bread.
IMG_4424 copy

And before we get too crazy with the variations, let’s start with a simple and classic flavor: cinnamon + sugar with a vanilla glaze/dipping sauce.

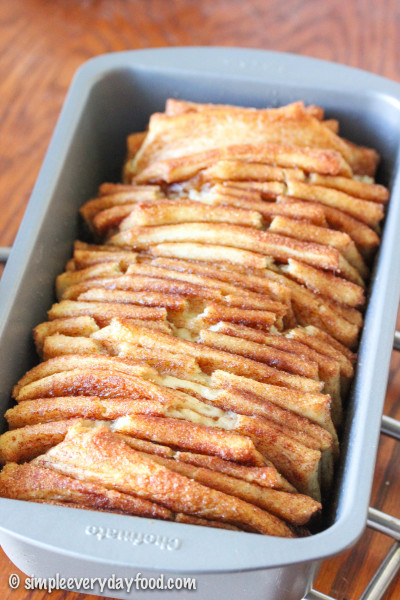
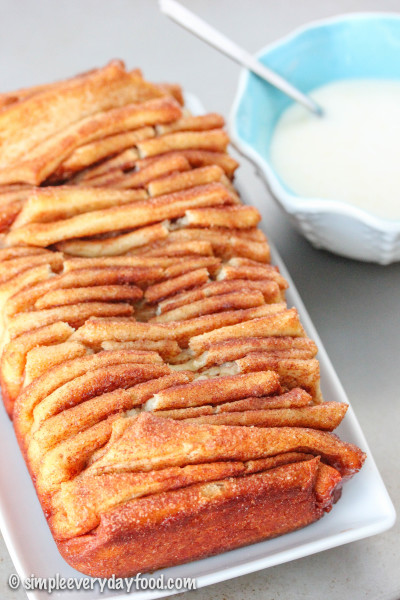
The beauty of the pull-apart bread is its non-uniformity. No matter how exact you cut all your dough squares, not every piece of those squares is going to rise in the same exact way. The result is this beautiful vertically layered bread with pieces sticking out in every which way, making it that much more fun to peel away a piece, dunking it in the sticky sweet glaze, and shoving it in your mouth.
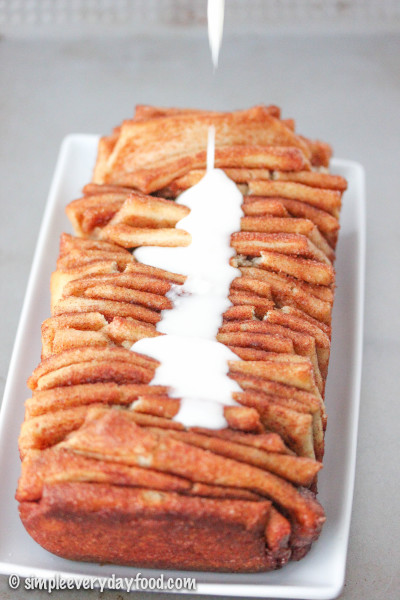
IMG_4444 copy

IMG_4458 copy

I’ll forewarn you that this post is a little bit lengthy, but please don’t let the number of steps intimidate you or hold you back from making this! I took step-by-step photos for you to go along with each step (located at the end of this post) to make the instructions easier to understand. I also added a few comments of my own (which I italicized) based on my own preference for you to use as a reference. There’s a lot of “making and waiting” involved, but once you get things started it goes by fast. Please trust me when I tell you that you need to make this bread because it’s actually pretty easy to make and it’s so fun to eat!
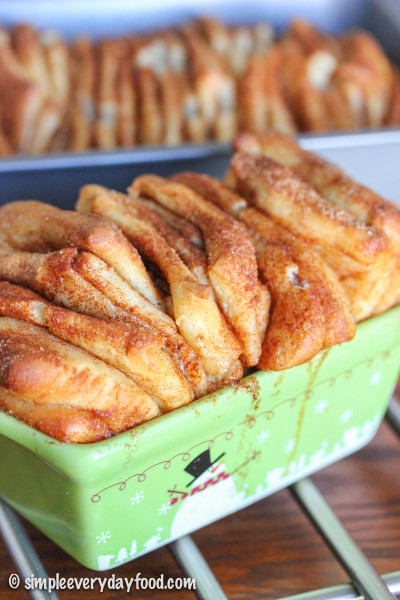
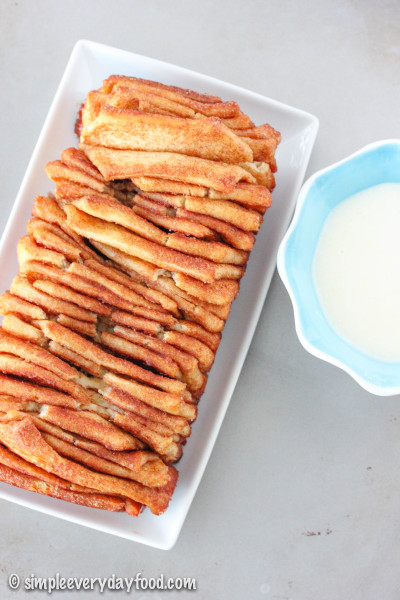
IMG_4400 copy

IMG_4437 copy

On a semi-related note: this was my very first time taking step-by-step photos for a recipe that  required a few more steps than the usual posts that appear here on SEF, and it really made me appreciate all the talented food bloggers out there that include photos for each step in very post (my favorite is probably Simply Scratch – Laurie’s blog is beautiful and inspiring) – it really is a lot harder than it seems! It doesn’t help that my kitchen has zero natural lighting, so I had to run back and forth between the living room, dining room, and kitchen the entire time, trying to beat the sun and finding the best angle to shoot these photos.

Hats off to all the bloggers out there that take such wonderful step-by-step photos for people like me to admire and learn from.

cinnamon pull-apart bread
Print
For the dough
  1. 2 cups skim milk
  2. 1/2 cup vegetable oil
  3. 1/2 cup granulated sugar
  4. 1 teaspoon vanilla extract
  5. 2 and1/4 teaspoons (1 packet) active dry yeast
  6. 4 and 1/2 cups all-purpose flour, divided
  7. 1/2 teaspoon baking powder
  8. 1/2 teaspoon baking soda
  9. 2 teaspoons salt
  10. 1/2 cup (1 stick) unsalted butter, melted and cooled
For the cinnamon sugar mixture
  1. 1 and 1/2 cups granulated sugar
  2. 3 tablespoons ground cinnamon
  3. 1/2 teaspoon ground nutmeg
For the icing
  1. 1 and 1/2 cups powdered sugar
  2. 1/4 cup heavy whipping cream
  3. Pinch of salt
Instructions
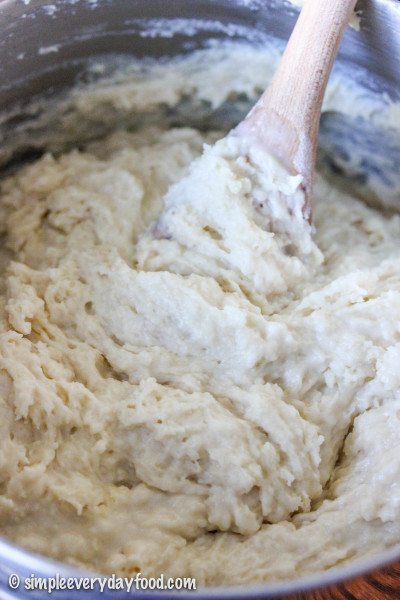
  1. To make the dough, combine milk, oil, vanilla extract, and 1/2 cup sugar in a large saucepan. Heat it until very hot but not boiling. Turn off heat and allow to cool slightly until it's just warm to the touch. Sprinkle in the yeast and add 4 cups of flour. Stir to combine, then put lid on the pot and allow to rise for 1 hour in a warm, draft-free area until doubled in size.
  2. During this time, generously coat a 9 x 5 x 3-inch loaf pan with the melted butter and set aside. In a medium bowl, combine the ingredients for the cinnamon sugar mixture and set that aside as well.
  3. After 1 hour, stir in additional 1/2 cup flour, along with the baking powder, baking soda, and salt. If dough is overly sticky, stir in up to an additional 1/2 cup of flour - I added in 1/4 cup increments. the dough should be slightly sticky but should not stick to your hands as you handle it.
  4. Roll out dough onto a floured surface into a roughly 12 x 20" rectangle. Brush on melted butter so that it covers all the dough (I totally didn't skimp on this step - the butter is what makes the cinnamon sugar mixture stick to the dough!).
  5. Sprinkle a generous coating of the cinnamon sugar mixture onto the buttered dough... it may seem like a lot, but let's face it - there's no such thing as too much cinnamon sugar! Reserve about 2-3 tablespoons of the mixture.
  6. Cut the dough vertically into approximately 2" wide strips (you'll get about 6-8 of 'em), then stack all the strips into one stack. Cut the stack of strips into 2" wide squares. Tilt your loaf pan vertically and start stacking your dough squares into your buttered loaf pan. Don't cram too many squares in your pan since you'll need to allow room for them to rise some more... you may have some squares leftover.
  7. Sprinkle the tops with more cinnamon sugar... because there's never enough of that stuff! Cover with a dish towel and allow to rise in a warm place for 30-45 minutes, or until dough have risen to double the size.
  8. In the meantime, preheat oven to 350 degrees. Place the pan in the oven and bake for 30-35 minutes or until the center is cooked through. Check dough at 20 minutes to make sure the top isn't browning too fast.. if it is, cover with aluminum foil for the remainder of the baking time.
  9. Remove the pan from the oven when it's done and let cool for 20 minutes. Run a knife along the edges and take the bread out of the pan and transfer to a serving plate. Mix together the icing ingredients and drizzle over the top*. Serve warm and enjoy!
Notes
  1. * If desired, you can reserve about half of the glaze and use it as a dipping sauce.
Adapted from The Pioneer Woman
Simple Everyday Food https://www.simpleeverydayfood.com/
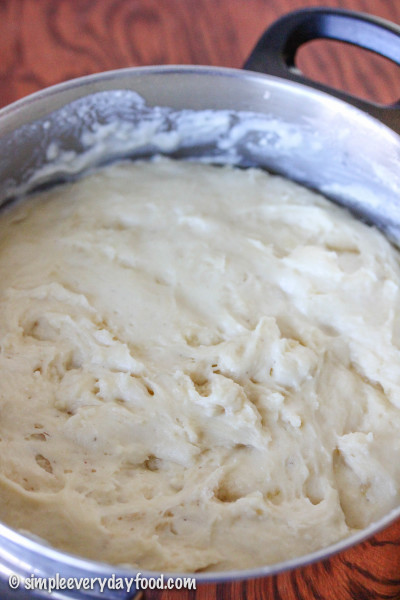
1. To make the dough, combine milk, oil, vanilla extract, and 1/2 cup sugar in a large saucepan. Heat it until very hot but not boiling. Turn off heat and allow to cool slightly (I made this before I purchased a candy thermometer and used the old-school touch-and-feel method. It’s “cool” enough when you can stick your hand in it without getting burned – think warm bath water). Sprinkle in the yeast and add 4 cups of flour. Stir to combine, then put lid on the pot and allow to rise for 1 hour in a warm, draft-free area until doubled in size (below are the Before and After shots).

IMG_4304 copy   IMG_4309 copy

2. During this time, generously coat a 9x5x3-inch loaf pan with the melted butter and set aside. In a medium bowl, combine the sugar, cinnamon, and nutmeg. mix, and set aside.

3. After 1 hour, stir in additional 1/2 cup flour, along with the baking powder, baking soda, and salt. If dough is overly sticky, stir in up to an additional 1/2 cup of flour – I added in 1/4 cup increments. the dough should be slightly sticky but should not stick to your hands as you handle it.

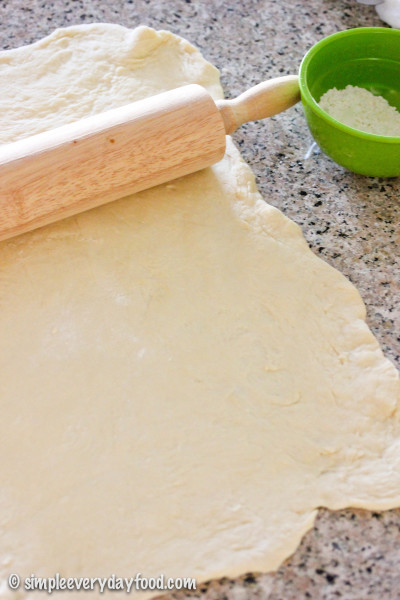
4. Roll out dough onto a floured surface into a roughly 12×20″ rectangle. Brush on melted butter so that it covers all the dough (I totally didn’t skimp on this step – the butter is what makes the cinnamon sugar mixture stick to the dough!).
IMG_4320 copy

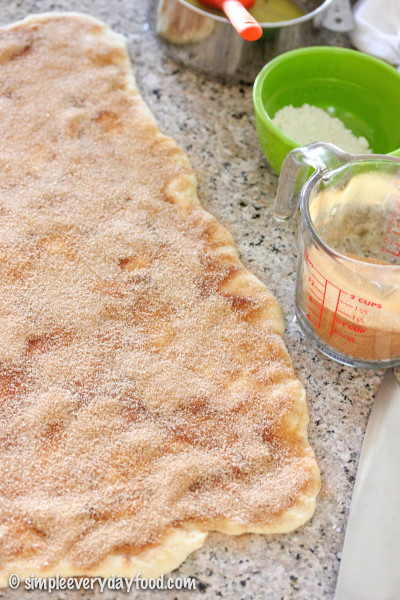
5. Sprinkle a generous coating of the cinnamon sugar mixture onto the buttered dough… it may seem like a lot, but let’s face it – there’s no such thing as too much cinnamon sugar! Reserve about 2-3 tablespoons of the mixture.
IMG_4331 copy

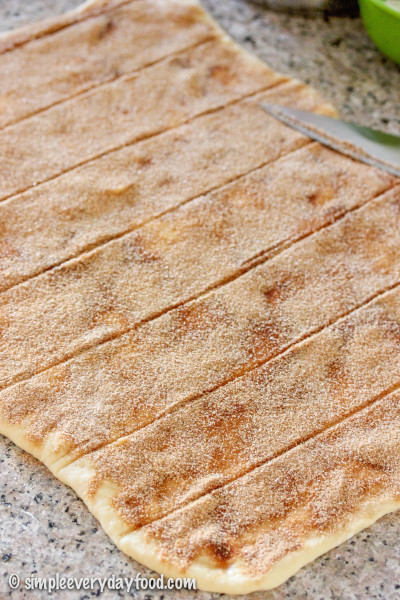
6. Cut the dough vertically into approximately 2″ wide strips (you’ll get about 6-8 of ’em)…
IMG_4339 copy

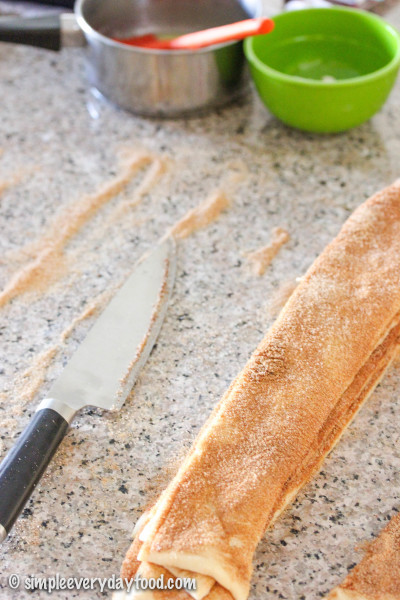
7. …Then stack all the strips into one stack.
IMG_4347 copy

8. Cut the stack of strips into 2″ wide squares (if you’re OCD like me, you’d take a ruler and measure and score marks on your dough prior to cutting. I also trimmed off the edges so I’m left with nicely uniformed squares… because uniformity is what makes my world go round).
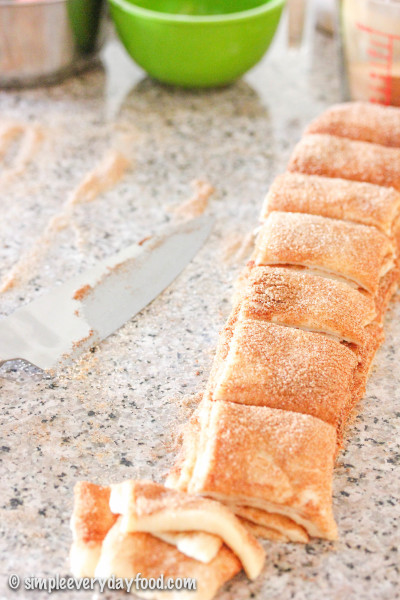
IMG_4354 copy

9. Tilt your loaf pan vertically and start stacking your dough squares into your buttered loaf pan. Don’t cram too many squares in your pan since you’ll need to allow room for them to rise some more… you may have some squares leftover (I used my leftover squares and some of the trimmed edge pieces to make a mini pull-apart loaf!).
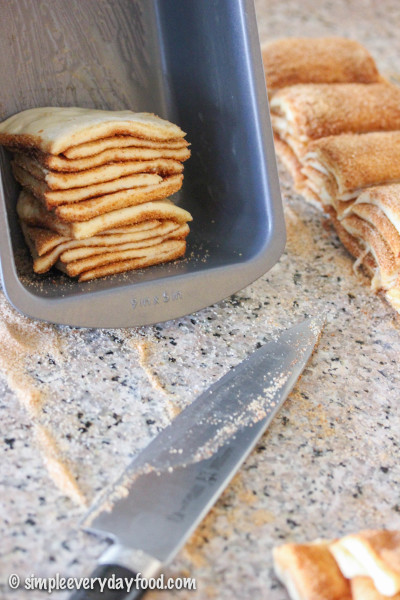
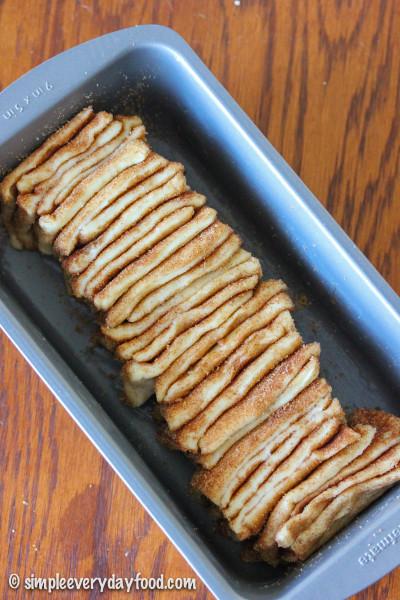
IMG_4358 copy   IMG_4378 copy

10. Sprinkle the tops with more cinnamon sugar… because there’s never enough of that stuff! Cover with a dish towel and allow to rise in a warm place for 30-45 minutes, or until dough have risen to double the size.
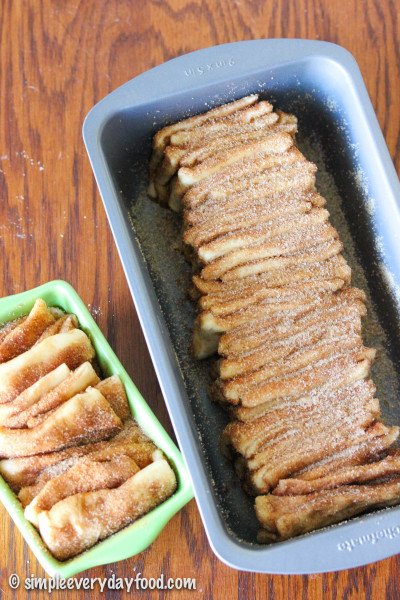
IMG_4388 copy

11. In the meantime, preheat oven to 350 degrees. Place the pan in the oven and bake for 30-35 minutes or until the center is cooked through. Check dough at 20 minutes to make sure the top isn’t browning too fast.. if it is, cover with aluminum foil for the remainder of the baking time.

12. Remove the pan from the oven when it’s done and let cool for 20 minutes. Run a knife along the edges and take the bread out of the pan and transfer to a serving plate. Mix together the icing ingredients and drizzle over the top. Serve warm and enjoy!

Recipe adapted from The Pioneer Woman

© Simple Everyday Food. All images & content are copyright protected. Please do not use any of my images without prior permission. If you want to republish this recipe, please re-write the recipe in your own words, or kindly link back to this post for the recipe.

Sharing is caring! Email this to someonePrint this pagePin on PinterestShare on YummlyShare on FacebookShare on Google+Tweet about this on Twitter

fluffernutter donuts

My coworker Katie, who’s from Massachusetts, recently informed me that their state sandwich is the fluffernutter sandwich (do you think they say it with an accent? Like a “fluffanutta” sandwich?). She told me that creamy peanut butter + marshmallow fluff sandwiched between two pieces of white bread was what her mom made her for an after school snack growing up, and it was basically the best thing ever.

I’ve never actually had a fluffernutter sandwich before and boy was I missing out.

These donuts are soooo good!

fluffernutter donuts

The peanut butter-based donuts are soft and fluffy and bursting with rich peanut butter flavor. One bite into and I bet you’re going to be all like OMGthisissogoodcanIhaveanotherone. I probably could’ve taken a whole dozen of these pre-frosted donuts and been happy about it. But this is a fluffernutter donut after all, and no donut is ever complete without a sweet sticky glaze on top… especially one that’s made with marshmallow fluff that transforms the entire donut from a peanut butter donut into a fluffernutter donut.

A fluffernutter donut you guys! It can’t get any better than this.

fluffernutter donuts

fluffernutter donuts

But wait! It totally did… you know what I did? Yep, I drizzled more peanut butter on top. Gooey, creamy melted peanut butter that I could’ve just slurped up with a straw.

fluffernutter donuts

fluffernutter donuts

And if you’re going to eat half a dozen donuts for breakfast, you might as well eat donuts that are healthier, right? To keep the cake soft and fluffy, we’re using protein-packed Greek yogurt, so naturally these are good for you. At least that’s what I’m telling myself.

fluffernutter donuts

Don’t worry, I won’t judge if you eat the entire pan – I almost did. #sorrynotsorry

After we demolished these donuts, I made myself fluffernutter sandwiches for breakfast for about a week straight. #truestory

baked fluffernutter donuts
Print
For the donuts
  1. 1 cup all-purpose flour
  2. 1 teaspoon baking powder
  3. 1/4 teaspoon salt
  4. 1/3 cup creamy peanut butter
  5. 2 tablespoons low-fat plain Greek yogurt
  6. 1/2 cup brown sugar, packed
  7. 1 large egg, at room temperature
  8. 1/3 cup skim milk
  9. 1 teaspoon vanilla extract
For the frosting
  1. 1 tablespoon butter, at room temperature
  2. 1/4 cup marshmallow fluff
  3. 1/2 cup powdered sugar
  4. 1-2 teaspoons heavy cream
  5. 1/4 teaspoon salt
  6. A few extra tablespoons of peanut butter, melted, for drizzling (optional)
Instructions
  1. Preheat the oven to 350 degrees. Generously spray your donut pan with nonstick cooking spray. Set aside. In a medium bowl, combine the flour, baking powder, and salt. Set that aside, too.
  2. Using an electric mixer fitted with the paddle attachment, beat the peanut butter, Greek yogurt, and brown sugar on medium speed, scraping the sides and bottom of the bowl with a spatula if necessary. Add in the egg, milk, and vanilla and beat for another 1-2 minutes until combined. Slowly add in the flour mixture and mix on medium-low speed until batter comes together. Bake for 9-11 minutes, or until an inserted toothpick comes out clean (mine took exactly 11 minutes). Remove donuts from oven, let cool for 3-5 minutes in the pan, then transfer to a wired cooling rack to cool completely.
  3. While the donuts are cooling, make the frosting: using an electric mixer, beat the butter, marshmallow fluff, powdered sugar, 1 teaspoon of heavy cream, and salt on medium speed until smooth. If the frosting looks too thick, add another teaspoon of the heavy cream. Dip the tops of the donuts in the frosting, letting the excess drip off, then place the donuts back on the rack for any extra frosting to run off. Drizzle the melted peanut butter over the tops. Donuts can be stored in an airtight container at room temperature for up to 3 days.
  4. Makes 9 donuts
Adapted from Buns In My Oven
Simple Everyday Food https://www.simpleeverydayfood.com/
Recipe adapted from Buns In My Oven

© Simple Everyday Food. All images & content are copyright protected. Please do not use any of my images without prior permission. If you want to republish this recipe, please re-write the recipe in your own words, or kindly link back to this post for the recipe.

Sharing is caring! Email this to someonePrint this pagePin on PinterestShare on YummlyShare on FacebookShare on Google+Tweet about this on Twitter

grapefruit poppyseed muffins  

So the other day we had a real life FRIENDS episode played out in our house.

For all you FRIENDS fanatics, remember the episode where Phoebe’s smoke detector started beeping so she thought taking the battery out would fix it but the stupid thing kept on beeping anyway? Then she got so mad she whacked that thing into pieces but the smoke detector still refused to die?

Yeaaaaaaah. That totally happened this week. Our smoke detector in the spare room started beeping one morning while we were getting ready for work, but after a half hour of beeping, it stopped. On the way back from the gym that day, I asked the mister if we should stop by the store to get batteries for it… he figured since it had stopped beeping, we should be fine… NOT.

PSA: If your smoke detector ever ever ever beeps, please please please for your own insanity’s sake, CHANGE THE BATTERIES. Seriously.

Because later that evening, the dang thing started beeping again. Brian ripped the thing off the ceiling and guess what? It kept beeping. We then decided that maybe taking the battery out would maybe fix the problem… except it didn’t. So we tossed it in the garage, hoping to be able to sleep in peace without getting woken up by the fire department (you know, like how they woke Phoebe up because she tossed hers down the trash chute?).

But wait, it gets better! Five minutes after we laid down, the smoke detector in the hallway started beeping… no joke. Seriously. It’s like they talk to each other…

“Hey hallway detector! I’m getting banished to the garage so keep the beeping going!” Ugh.

Needless to say, we had a terrible night’s sleep (we were just too lazy to get back out of  bed to rip the other one off), and we woke up super grouchy.

You know what would’ve made my morning a little bit more tolerable? These muffins.

grapefruit poppyseed muffins

grapefruit poppyseed muffins

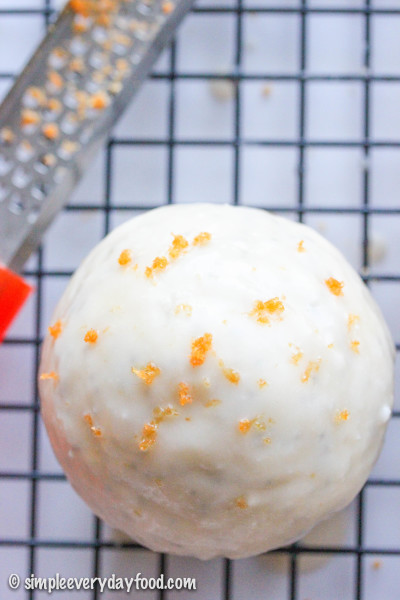
They’re so citrusy and so easy to make! Each bite you take is like taking a bite of summer – light, sweet, and tangy all rolled into one, each double dunked – yes! double dunked – into a sweet glaze that will make you want to lick the bowl clean.

grapefruit poppyseed muffins

grapefruit poppyseed muffins

So the moral of the story is this: either 1) always change your smoke detector’s batteries when daylight savings time comes around like you’re supposed to, or 2) always keep a spare battery around the house.

But if you don’t and your smoke detector beeps at you all night, I sure hope you have these on hand for the next morning… you’ll need it.

grapefruit poppyseed muffins

If you’re looking for other breakfast items, you can check out where I keep all my other breakfast recipes here.

grapefruit poppy seed muffins
Print
For the muffins
  1. 2/3 cup granulated sugar
  2. Zest from 1 large grapefruit (plus more for garnish, if desired)
  3. 1/3 cup vegetable oil
  4. 1/8 cup poppy seeds
  5. 2 teaspoons grapefruit juice
  6. 2 teaspoons vanilla extract
  7. 1 large egg, at room temperature
  8. 2 and 1/2 cups all-purpose flour
  9. 3 and 1/2 teaspoons baking powder
  10. 1 teaspoon salt
  11. 1 and 1/4 cups milk
For the glaze
  1. 4 tablespoons unsalted butter, melted and cooled
  2. 2 and 1/2 cups powdered sugar
  3. 1 teaspoon vanilla extract
  4. 4~5 tablespoons grapefruit juice
Instructions
  1. Preheat oven to 350 degrees. Thoroughly spray 15 muffin tins with cooking spray, set aside.
  2. In the bowl of an electric mixer, combine the sugar and grapefruit zest. Rub together with your fingers until fragrant. The texture should resemble somewhat like wet sand.
  3. In a medium bowl, combine the flour, baking powder, and salt. Set aside.
  4. Add in the oil, poppy seeds, grapefruit juice, vanilla, and egg. Mix on low speed until just combined. Alternately, add in the flour mixture and milk, starting and ending with the flour mixture until just combined. Do not overmix.
  5. Using a medium cookie scoop (about 1.5 tablespoons), fill each well with muffin batter, about 2/3 full. Bake for 17-20 minutes, or until an inserted toothpick comes out clean. Cool for 5 minutes before removing them onto a cooling rack to cool completely.
  6. While muffins are cooling, make the glaze: combine all the glaze ingredients in a medium bowl. Dip the tops of each cooled muffin in the glaze and return it to the cooling rack. Let glaze set for 10 minutes, then dip the muffins in the glaze again for a thicker coating of glaze. Top with additional grapefruit zest, if desired. Muffins can be stored in an airtight container for up to 5 days.
  7. Makes 15 muffins
Adapted from Girl Versus Dough
Simple Everyday Food https://www.simpleeverydayfood.com/
Recipe adapted from Girl Versus Dough

© Simple Everyday Food. All images & content are copyright protected. Please do not use any of my images without prior permission. If you want to republish this recipe, please re-write the recipe in your own words, or kindly link back to this post for the recipe.

Sharing is caring! Email this to someonePrint this pagePin on PinterestShare on YummlyShare on FacebookShare on Google+Tweet about this on Twitter

Hey guys! Guess what?

Today we’re celebrating a special day that’s coming up tomorrow and I’m quite excited about it.

IMG_5398 copy

I’ll give you a few hints:

  1. It’s going to be a two-year celebration
  2. It involves something that started out as an idea, which turned out to be a hobby
  3. It involves food (lots and lots of food), lots of time in the kitchen, hours of time spent on learning photography and techie things, and a little space I own here on the internet

That’s right, you guessed it! Tomorrow will be Simple Everyday Food’s 2nd blogiversary! Can I get a whoop whoop?!

IMG_5402 copy

IMG_5409 copy

This little site of mine started out as an idea, and after a few encouragements from the mister, I bit the bullet two years ago, signed up for my own domain name, and BOOM! SEF was born. Fast forward throughout the years, this little corner of mine here on the world wide web has slowly became my happy place where I get to temporarily run away from everyday stresses, let loose, and be creative. I still have so much to learn in regards to the food blogging business, but SEF wouldn’t be able to continue to grow without all my supporters and those that I constantly learn from every single day.

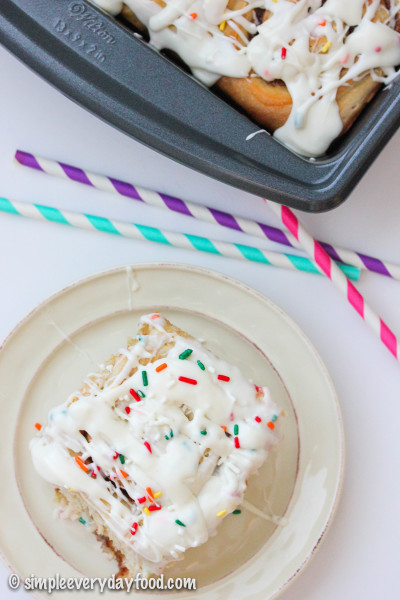
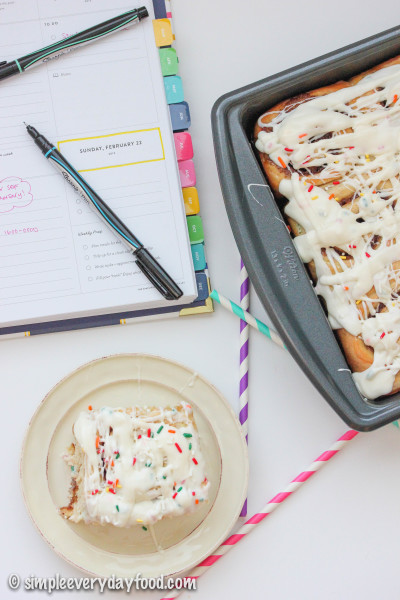
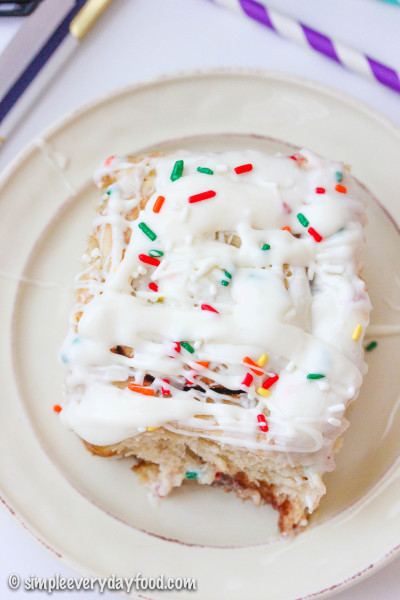
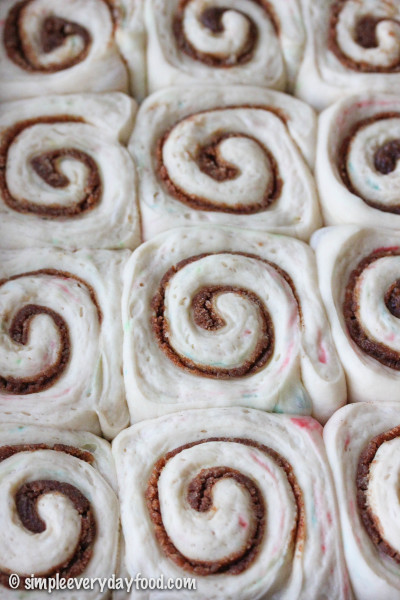
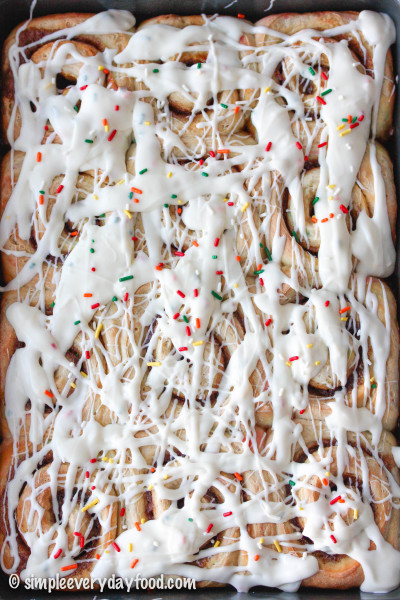
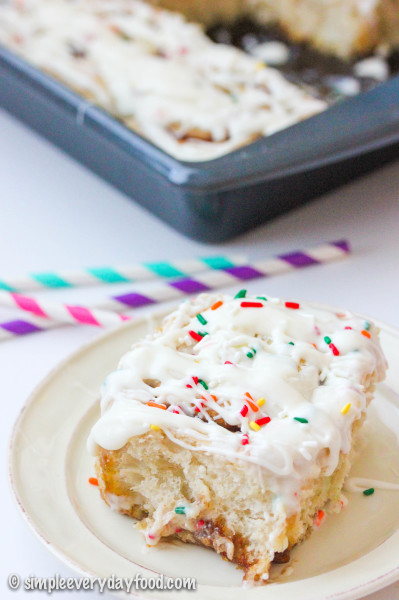
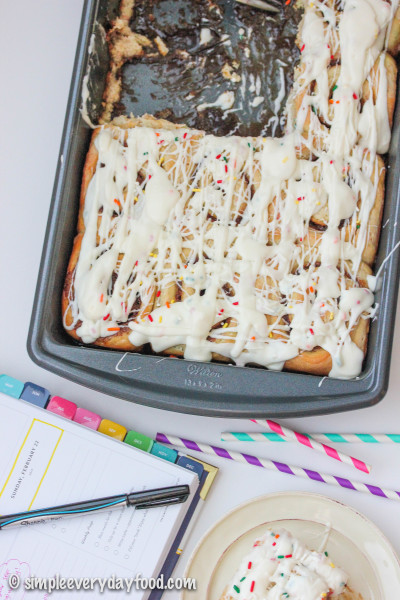
So it’s only appropriate that we celebrate this special occasion with sprinkles. Lots and lots and looooots of sprinkles. And instead of a cake, we’re celebrating with some soft and fluffy cinnamon rolls. Homemade cinnamon rolls dotted with plenty of sprinkles baked to melt-in-your-mouth perfection, generously drizzled with a sweet and creamy cream cheese frosting with sprinkles, to be exact.

IMG_5374 copy

IMG_5388 copy

IMG_5396 copy

A big thank you to all of you who have been part of this journey – I wouldn’t be here without you guys! xoxo

IMG_5415 copy

overnight funfetti cake batter cinnamon rolls
Print
For the rolls
  1. 2 and 1/2 cups water
  2. 1 tablespoon active dry yeast
  3. 1 teaspoon salt
  4. 1 box funfetti cake mix (I used Pillsbury)
  5. 5-6 cups all-purpose flour, plus more for dusting
  6. 1 teaspoon vanilla extract
For the filling
  1. 1 stick (8 tablespoons) unsalted butter, melted and cooled
  2. 2 and 1/2 cups dark brown sugar
  3. 2 tablespoons ground cinnamon
For the glaze
  1. 2 and 1/2 oz light cream cheese, softened to room temperature
  2. 3 tablespoons milk
  3. A splash of vanilla extract
  4. 1 and 1/2 cups powdered sugar
  5. rainbow sprinkles for garnish, if desired
Instructions
  1. Heat water in a microwave safe bowl until it reaches ~120-125 degrees F. Sprinkle in the yeast and salt and give it a good stir. Let sit for 5 minutes until foamy.
  2. In the bowl of an electric mixer, combine the cake mix and the 5 cups of flour, stir to combine. Using a dough hook attachment, slowly add in the yeast mixture and vanilla extract. Turn on the mixer and mix on low, gradually increasing the speed to medium-low. Knead the dough for about 5 minutes or until the dough is elastic and pulls away from the sides of the bowl. If the dough is still too sticky, add in additional flour, 1/4 cup at a time, until it no longer sticks to you hand (I only used about 1/2 cup of extra flour). Remove dough and place in a lightly greased bowl, cover and let rise until it doubles in size, about 1-2 hours.
  3. In the meantime, combine the brown sugar and cinnamon in a medium bowl and set aside. Grease two 9x13" baking pans and set those aside as well.*
  4. Once the dough has risen, divide the dough into two portions so it's easier to work with. Turn half of the dough onto a lightly floured surface and roll into a rectangle, approximately 11x15" (or in my case, my dough always turns out to be a large blob instead). Brush half of the melted butter onto the dough, covering every single inch if possible. Then generously sprinkle half of the brown sugar/cinnamon mixture evenly on top.
  5. Starting on the long end, tightly roll up the dough and cut dough into 10-11 slices, about 1.5-2" thick each. Place into prepared baking pan. Repeat with the other half of the dough.
  6. Cover baking pans and let rise overnight on your kitchen counter.
  7. The next morning, bake rolls in a 400 degree oven for 15-20 minutes or until golden brown (mine took exactly 15 minutes). Remove from oven and let cool.
  8. While the rolls are cooling, make the glaze: beat the cream cheese in an electric mixer until smooth and creamy. Add in the milk and vanilla extract and beat until incorporated. Slowly add in the powdered sugar and beat until smooth. Drizzle over rolls and sprinkle with additional rainbow sprinkles, if desired. Rolls taste best the same day, but can be stored in an airtight container at room temperature for up to 5 days**.
  9. Makes 20-22 rolls
Notes
  1. * If you only have one 9x13" baking pan like me, you can always use a 9" pie plate along with the baking pan.
  2. ** You can always freeze one pan of the rolls after they've cooled from the oven, then wrap well and freeze. Thaw out in the refrigerator or at room temperature, make the glaze, and heat rolls in microwave until warm.
Adapted from Something Swanky
Simple Everyday Food https://www.simpleeverydayfood.com/
Recipe adapted from Something Swanky; glaze recipe adapted from Well Plated

© Simple Everyday Food. All images & content are copyright protected. Please do not use any of my images without prior permission. If you want to republish this recipe, please re-write the recipe in your own words, or kindly link back to this post for the recipe.

Sharing is caring! Email this to someonePrint this pagePin on PinterestShare on YummlyShare on FacebookShare on Google+Tweet about this on Twitter

I am determined to make as many lemon-flavored recipes as I can before the summer ends. In case you missed it, here are some of the “summery” recipes I have made within the past 3 months:

overnight blueberry sweet rolls with lemon glaze

IMG_2819 copy

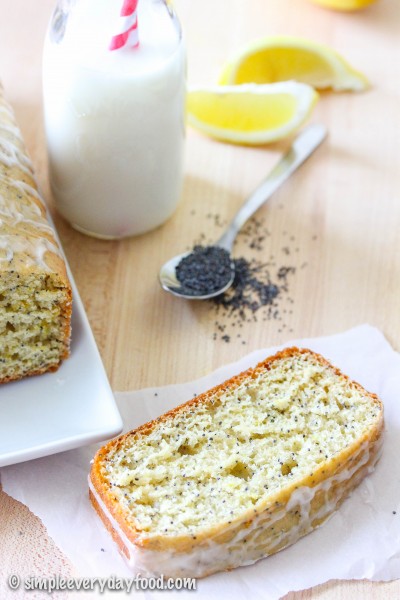
lemon poppy seed loaf cake

IMG_3514 copy

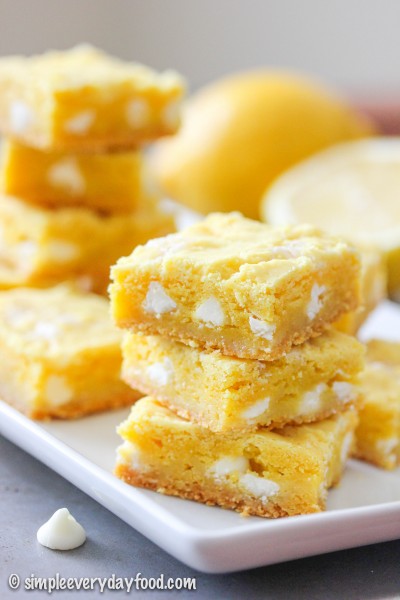
lemon gooey bars

IMG_3451 copy

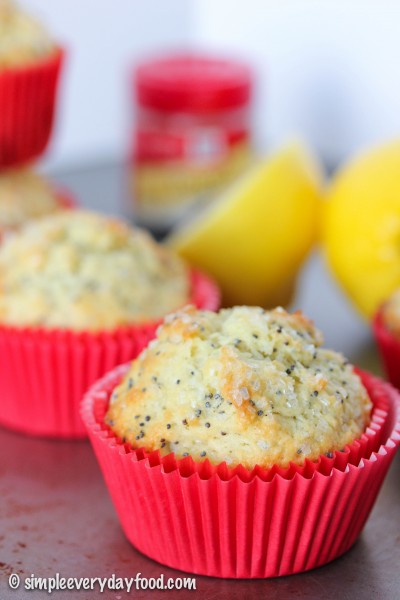
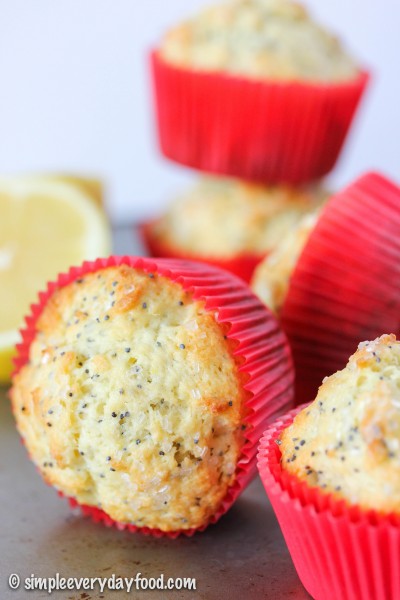
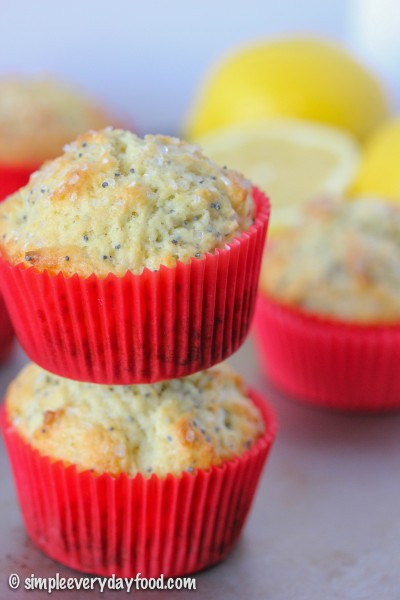
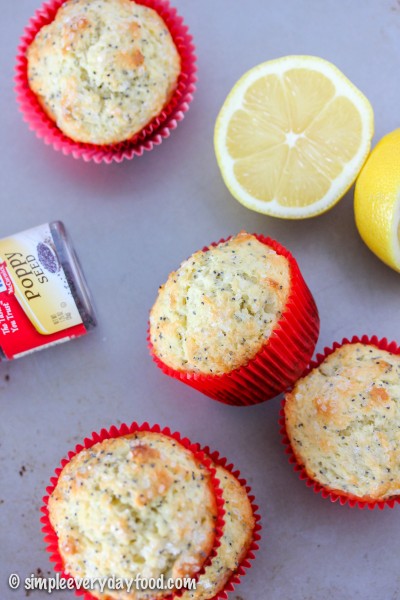
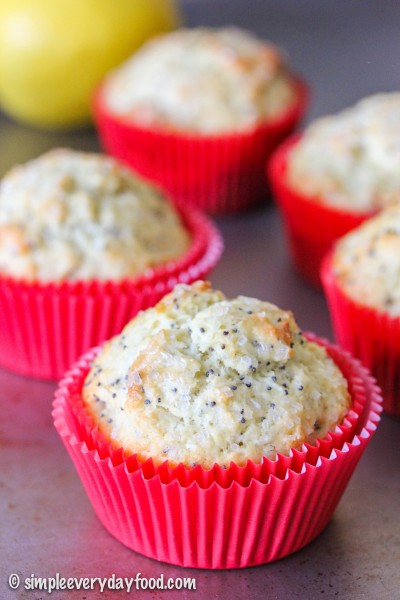
And now I present to you: lemon poppy seed muffins!

IMG_3338 copy

IMG_3360 copy     

My breakfast eating habits seem to go in phases. I tend to eat a lot of the similar things for breakfast weeks in a row, then I’ll get sick of it, move on to something else, and eat that for a few weeks until I get sick of that and find something else to obsess over. A few weeks ago, I was eating breakfast burritos every morning like they were going out of style, then it was smoothies.

Lately, it’s been muffins. Specifically, homemade muffins.

IMG_3344 copy

These muffins are not only delicious and require no fancy electric mixer, but they also freeze very well, meaning that you can make them in huge batches, freeze them, and reheat them in the mornings when you’re rushing out the door. What I have been doing is taking a few out to thaw out in the fridge overnight, then heating them up in the microwave the next morning.

IMG_3354 copy

IMG_3348 copy

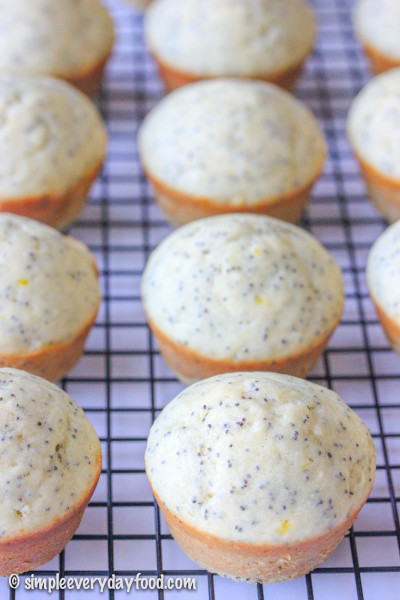
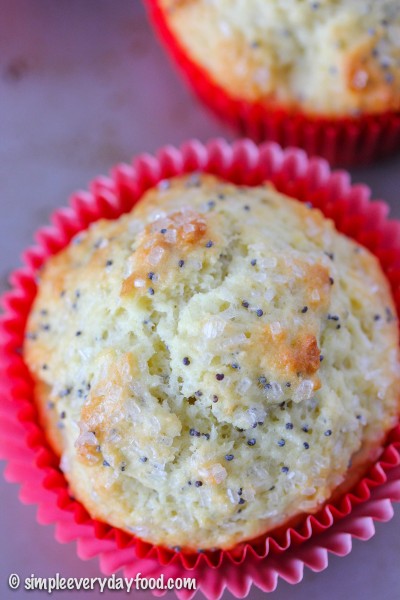
Reheating them doesn’t take away any of the textures of flavors! The insides remain moist while the muffin tops remain crunchy thanks to the sparkling sugar topping (the best part of a muffin!). Every bite is is citrusy and lemony, while the earthy poppy seeds pop in your mouth. The different textures create a delicate balance, like a well-rehearsed dance in your mouth… are you salivating yet?

IMG_3333 copy

One thing to note before making these is to make sure everything is at room temperature. Make sure your melted butter is not scorching hot and has cooled down prior to adding the eggs – unless you’re a fan of scrambled eggs in your lemon poppy seed muffins…. the batter will also be pretty thick, so roll up your sleeve and use those muscles! BUT – do not overmix! Overmixing will cause the muffins to be dense and dry and not as tasty.

Fill the muffin tins about 3/4 full and generously sprinkle the tops with some sparkling sugar. If you do decide to freeze them, throw them in the microwave and heat until the insides are completely heated through prior to serving.

lemon poppy seed muffins
Print
Ingredients
  1. 2/3 cup granulated sugar
  2. Zest and juice of 1 lemon, separated
  3. 2 cups all-purpose flour
  4. 2 teaspoons baking powder
  5. 1/4 teaspoon baking soda
  6. 1/2 teaspoon salt
  7. 3/4 cup plain Greek yogurt
  8. 2 eggs, at room temperature
  9. 1 teaspoon pure vanilla extract
  10. 1/2 cup (1 stick) unsalted butter, melted and cooled
  11. 2 tablespoons poppy seeds
  12. sparkling sugar, optional
Instructions
  1. Preheat oven to 400 degrees. Line a muffin pan with liners and set aside.
  2. In a large mixing bowl, rub the sugar and lemon zest together with your fingertips until fragrant (or until the sugar granules are moist). Add in the flour, baking powder, baking soda, and salt. Mix until combined.
  3. In a separate bowl, thoroughly whisk the Greek yogurt, eggs, vanilla, lemon juice, and melted butter together. Pour the liquid mixture into the flour mixture and stir just until combined. DO NOT OVERMIX (the batter will be thick). Gently stir in the poppy seeds. Divide the batter evenly into the muffin cups, filling each about 3/4 full. Sprinkle tops with sparkling sugar, if desired.
  4. Bake for 16-18 minutes until the tops are just starting to brown, or until an inserted toothpick comes out clean. Remove from oven and let cool for 10 minutes before removing them onto a wired cooling rack to cool completely.
  5. Muffins can be stored in an airtight container for up to 5 days at room temperature, or frozen to be eaten at a later date.
  6. Yield ~15 muffins
Notes
  1. If reheating the frozen muffins, each microwave is different so the time it takes to reheat may differ.
Adapted from Two Peas and Their Pod
Simple Everyday Food https://www.simpleeverydayfood.com/
Recipe adapted from Two Peas and Their Pod

© Simple Everyday Food. All images & content are copyright protected. Please do not use any of my images without prior permission. If you want to republish this recipe, please re-write the recipe in your own words, or kindly link back to this post for the recipe.

Sharing is caring! Email this to someonePrint this pagePin on PinterestShare on YummlyShare on FacebookShare on Google+Tweet about this on Twitter