everyday food made simple

At my job, my coworkers love finding a reason to do potlucks:

Birthdays.

Going away parties.

Holidays.

Big events (i.e. SuperBowl)

And oh why not, let’s just do a potluck just because.

Who doesn’t like potlucks? It’s the perfect opportunity for people to make their signature dish (or try making new ones) and bring recipes to share with others.

This week, I decided to try out a new truffle recipe – people at my job are suckers for sweets. Our nurses love to bake – cookies, cupcakes, cake, brownies, bread… you name it, someone in our ER can make it. Usually when we do a potluck, we have about 2-3 savory dishes and 5-6 different desserts.

Yeah, we’re probably not the healthiest bunch of healthcare workers lol.

I’m generally known to make something “different” when it comes to dessert – other people like making traditional, classic desserts like brownies or chocolate chip cookies. I like to make peppermint chocolate cupcakes, sugar cookie cupcakes with orange buttercream frosting, and gingerbread whoopie pies.

Last time I made some mint chocolate truffles and received rave reviews from my coworkers, so this time I decided to stick with truffles but change it up a bit. I saw this recipe a while back and have been waiting for the perfect opportunity to make them – well, I’m glad I didn’t disappoint my coworkers, because this was a big hit this past weekend too.

IMG_0878

IMG_0866

IMG_0867

IMG_0868

IMG_0871

frosted animal cracker truffles
Print
Ingredients
  1. 1-13 oz package of frosted animal crackers
  2. 6 oz light cream cheese, softened
  3. 8 oz almond bark
  4. white chocolate chips or sprinkles for decorations
Instructions
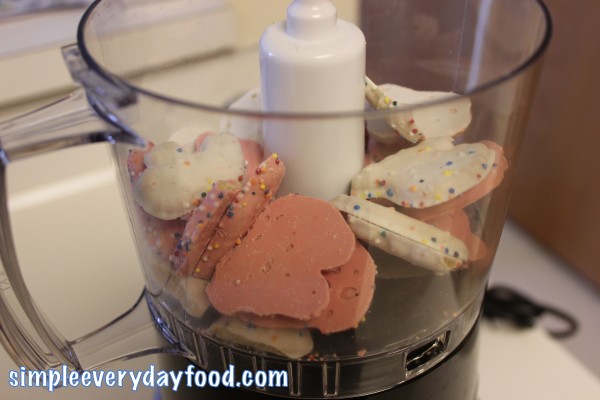
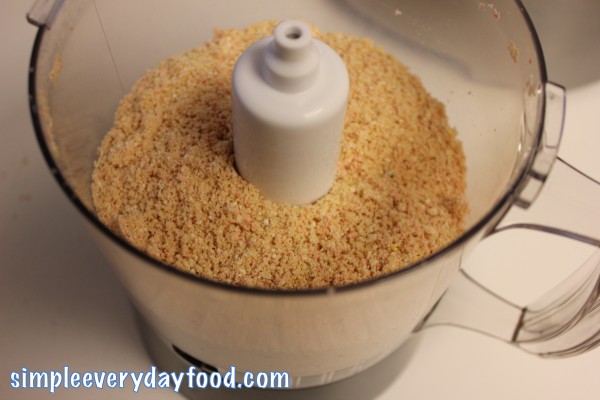
  1. Using a food processor, pulse the crackers until they turn into fine crumbs.
  2. Add in the cream cheese and mix until thoroughly combined - you can use your hands, but I used an electric stand mixer to make the process easier.
  3. Roll the mixture into 1" balls and place onto a parchment-lined baking sheet. Chill in the fridge for 30 minutes.
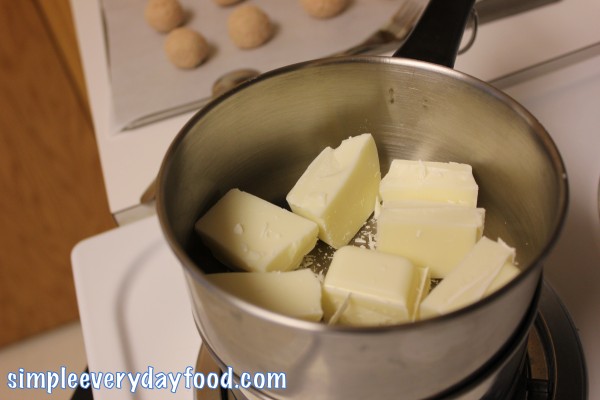
  4. While the cookie balls are chilling, make the candy coating: melt the almond bark in a double boiler over medium-low heat, stirring constantly to make sure you don't burn it.
  5. Dip the cookie balls in the melted almond bark, one at a time, until evenly covered. Return back onto parchment paper and return into refrigerator and chill for another 30 minutes.
  6. If desired, melt some white chocolate chips over a double boiler with a few drops of food coloring. Add the melted mixture into a Ziploc bag. Cut the corner of the bag with a pair of scissors and drizzle over truffle balls.
Notes
  1. I dipped half of my cookie/cream cheese balls into the plain melted almond bark, then added a few drops of pink food coloring into the remaining melted almond bark and dipped the rest of the cookie balls in them to get truffles with two different colored coatings.
Adapted from Cookin' Cowgirl
Simple Everyday Food https://www.simpleeverydayfood.com/
IMG_0876

IMG_0873

IMG_0872

Can you tell I was mildly obsessed at how pretty these truffles turned out?

I’m sure we’re going to have another potluck soon – I’m already searching for the next new dessert recipe I can try. Cupcakes? Cookies? Either way, I’m sure my coworkers will all gladly be my guinea pigs :)

Recipe adapted from Cookin’ Cowgirl

Sharing is caring! Email this to someonePrint this pagePin on PinterestShare on YummlyShare on FacebookShare on Google+Tweet about this on Twitter

So I thought I would satisfy my baking itch by making Bentley some doggie treats… yep I was wrong, because the first thing I did this morning after eating breakfast was to look for cookie recipes.

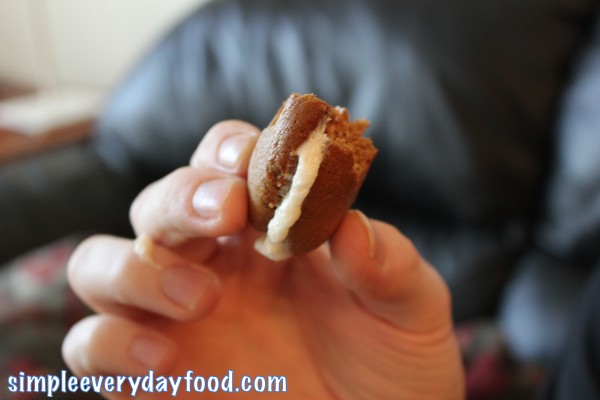
I have a very tasty soft and chewy gingersnap cookie recipe that I like to make during the holidays – I’m not saying these gingerbread cookies are bad – I’m just thinking next time I’m going to try making this recipe with the gingersnap recipe I already have. I think with the combination of the yummy buttercream filling, it’ll be amazing. Nonetheless, I’ve never made whoopie pies before, and I was quite impressed at how these turned out.

IMG_0825

IMG_0833

IMG_0837

And they’re pretty to look at :)

IMG_0836

Who said gingersnaps are only for Christmastime?

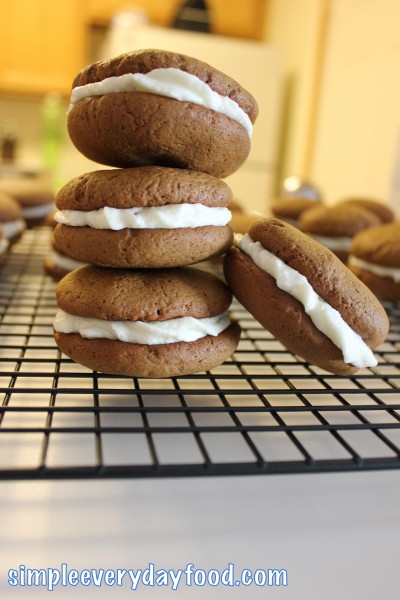
gingerbread whoopie pies with vanilla buttercream filling
Print
For the Cookies
  1. 3 3/4 cups all-purpose flour
  2. 1 teaspoon salt
  3. 1 1/2 teaspoons ground ginger
  4. 1 teaspoon ground cinnamon
  5. 1/4 teaspoon ground nutmeg
  6. 1/4 cup vegetable shortening
  7. 1 stick butter, softened
  8. 3/4 cup light brown sugar
  9. 1 large egg
  10. 3/4 cup molasses
  11. 3/4 cup milk
For the Filling
  1. 1 stick butter
  2. 2 cups powdered sugar
  3. 2 tablespoons milk
  4. 1 teaspoon pure vanilla extract
For the Cookies
  1. Preheat the oven to 375.
  2. In a medium-sized mixing bowl, combine the flour, salt, baking soda, and spices. Set aside.
  3. Using an electric mixer, combine the shortening, butter and brown sugar; beat until the mixture is smooth and fluffy.
  4. Add the egg and mix thoroughly.
  5. Add half of the flour mixture to the butter mixture and mix to combine.
  6. Mix in the molasses, the remaining dry ingredients, and the milk.
  7. Drop 1 tablespoon of dough onto parchment-lined baking sheets, leaving 2 inches between. Press the dough down until it's about 1/4" thick.
  8. Bake the cookies for 12 minutes. Remove and cool completely on a cooling rack.
For the filling
  1. Beat butter with mixer on high until light and fluffy.
  2. Add powdered sugar, 1/2 cup at a time, and continue to mix until combined.
  3. Pour in the milk and vanilla. Beat on high until mixture is at a fluffy consistency.
  4. Scoop frosting into a piping bag, pipe a dollop of frosting onto the bottoms of the cookies and sandwich it with another cookie. Press together until frosting is visible on the sides.
Notes
  1. If you don't have a piping bag, you can simply use a spatula or spoon to spread the frosting onto the cookies.
Adapted from Diethood
Simple Everyday Food https://www.simpleeverydayfood.com/
Well, now that I’ve satisfied that baking itch, I have two containers full of sweet sitting around the house. I guess whoever is working tomorrow is in luck :)

IMG_0834

IMG_0848

Enjoy!

Recipe adapted from Diethood

Sharing is caring! Email this to someonePrint this pagePin on PinterestShare on YummlyShare on FacebookShare on Google+Tweet about this on Twitter

I know everybody has their own preference on how they like their cookies… some like them crispy, some like them soft, and well, some just eat them raw.

I’m not a fan of eating raw cookie dough – I can’t get over the fact that I’m eating raw eggs, and the texture weirds me out a little. I don’t like my cookies crispy either. When I think “cookies”, I think of soft and chewy cookies… not hard and crispy that may break a tooth when you bite into it.

That being said, I’m definitely a fan of soft and chewy cookies. When I say “soft and chewy”, I don’t mean gooey and half-raw in the middle to where it starts to break apart when you hold it with two fingers… I mean medium-well done and with a soft center.

Now that we’ve got my definition of “what a good cookie should taste like” out of the way, here’s a little story behind why I was so excited to make these cookies today:

At the place I work at, the only place to get something within the building that’s open late is Subway. For those that need a little reminder, Subway doesn’t just make subs. They also makes cookies… pretty good ones in fact. Even though they do have classic chocolate chip cookies, M&M cookies, and white chocolate macadamia nut ones, my favorite is their white chocolate chip and cranberry cookies.

Huh? Really?

Don’t get me wrong, every once in a while I love to indulge in some good ole fashioned chocolate chip cookies, but for some reason, their white chocolate cranberry ones are the only ones I eat there. The sweetness of the chocolate with the slight tartness of the cranberries are a match made in heaven… not the mention they’re always soft and chewy, just the way I like it.

IMG_0652

In my opinion, these cookies come pretty dang close to the ones from Subway. They hold up pretty well in the freezer too, so save some dough and you can have yummy cookies within 8 minutes at a later time!

Ingredients:

  • 1.5 sticks of unsalted butter at room temperature
  • 3/4 cup brown sugar
  • 1/4 cup granulated sugar
  • 1 egg at room temperature
  • 2 teaspoons vanilla extract
  • 2 cups flour
  • 2 teaspoons cornstarch
  • 1 teaspoon baking soda
  • 1/2 teaspoon salt
  • 3/4 cup white chocolate chips
  • 3/4 cup dried cranberries

Directions:

  • Preheat oven to 350 degrees. Line a cookie sheet with parchment paper.
  • In a bowl, combine the flour, cornstarch, baking soda, and salt.
  • Using an electric mixer, cream the butter and the sugars at medium speed until fluffy. Mix in the egg and vanilla extract. Turn the speed down to low, and slowly add the flour mixture to the butter mixture. Mix until thoroughly combined.
  • Stir in the white chocolate chips and cranberries.
  • Cover and let it sit in the refrigerator for about an hour.
  • Drop balls of cookie dough onto the lined baking sheet and bake for 8 minutes. It is important not to bake for more than 9 minutes. Remove from oven and cool on a wired cooling rack.

IMG_0658

Note: like I mentioned before, these unbaked cookie dough balls freeze pretty well. I saved some and put them in a freezer Ziploc bag for next time :)

Enjoy!

Recipe from Sally’s Baking Addiction

Sharing is caring! Email this to someonePrint this pagePin on PinterestShare on YummlyShare on FacebookShare on Google+Tweet about this on Twitter

I love cupcakes.

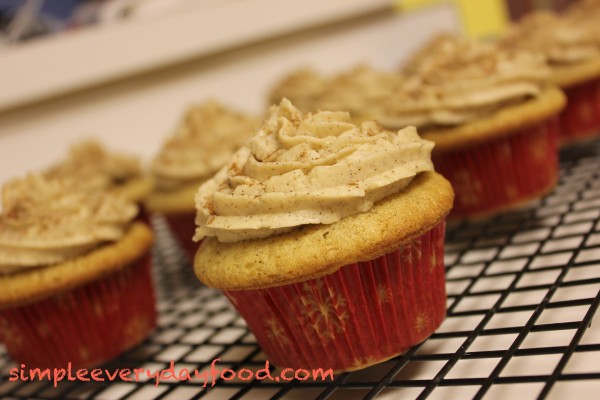
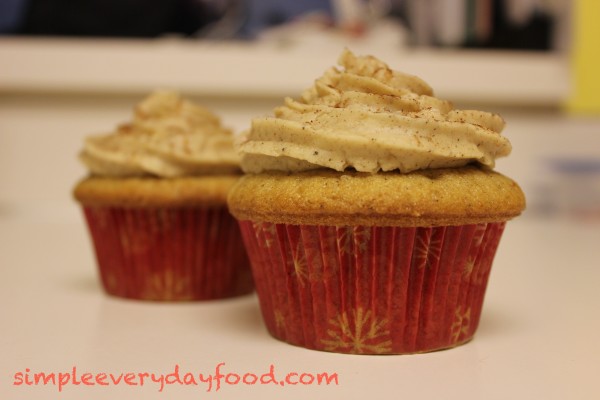
It’s perhaps one of my favorite kinds of desserts ever. They’re little portion-regulated desserts complete with cake, frosting, and decorations. Pretty to look at, yummy to eat. Rest assured folks, this will not be the last cupcake post you see on here. If I could bake cupcakes for a living, I totally would.

Now, this recipe is pretty simple. The directions are straight-forward, and there’s really not a whole lot of weird ingredients to it either. It also only yields about a dozen cupcakes, which, if you are only cooking for two people like I am, it’s nice because then there’s not a whole lot of cupcakes sitting on the counter for days tempting you :)

If you love chai tea, this is the recipe for you!

IMG_0618

Ingredients:

  • Chai spice mix:
    • 1 1/2 teaspoons ground cardamom
    • 1 1/2 teaspoons ground cinnamon
    • 1/2 teaspoon ground ginger
    • 1/4 teaspoon ground cloves
    • 1/4 teaspoon ground nutmeg
  • Cupcakes:
    • 1/2 cup butter, at room temperature
    • 1 cup sugar
    • 2 teaspoons vanilla extract
    • 2 eggs
    • 2 teaspoons chai spice mix
    • 1 1/4 cups flour, sifted
    • 1/2 cup buttermilk
    • 1/2 teaspoon baking soda
    • 1/2 teaspoon apple cider vinegar
  • Buttercream frosting:
    • 1 cup butter, at room temperature
    • 1 teaspoon vanilla extract
    • 2 cups powdered sugar
    • the remainder of the chai spice mix
    • 1 tablespoon cold milk, or more if needed to thin out the buttercream

Cupcake directions:

  • Preheat oven to 325 degrees. Line cupcake pan with liners.
  • In a small bowl, combine the chai spice mix.
  • In an electric mixer, cream the sugar and butter. Add the vanilla extract, then beat in the eggs, one at the time, until combined.
  • Add 2 teaspoons of the chai spice mix, then fold in the flour and buttermilk alternately until combined.
  • In a small bowl, combine the baking soda and vinegar, then add that to the batter mixture. Mix until combined.
  • Spoon batter into cupcake pan, about 3/4 full, and bake for about 18-20 minutes (or until toothpick comes out clean).
  • Remove from cupcake pan and cool on wired cooling rack.

Buttercream directions:

  • In an electric mixer, beat the butter until creamy. Add the vanilla extract and remaining chai spice mix. Mix well.
  • Beat in the powdered sugar, about 1/2 cup at a time, until it’s all thoroughly combined.
  • If the frosting is too thick, add 1-2 tablespoons of milk at a time, until desired consistency is reached.
  • Pipe buttercream frosting onto cooled cupcakes.

IMG_0612

Enjoy!

Recipe adapted from The Culinary Enthusiast

Sharing is caring! Email this to someonePrint this pagePin on PinterestShare on YummlyShare on FacebookShare on Google+Tweet about this on Twitter

So for the longest time, I thought “coffee cake” contained coffee… until I came across this recipe. Apparently, “coffee cake” got its name from:

  1. being served alongside with coffee as a gesture of hospitality when you have guests over, or
  2. eaten during a coffee break

Ha! Silly me. I guess you learn something new everyday.

In my defense, every time I see a cake in the form of “coffee cake”, the name only calls it “blah blah blah cake“. Not “blah blah blah coffee cake“.

Since we’ve been on a “healthy diet” for the past two weeks, I only found it fair to reward ourselves with something sweet and healthy at the same time – blueberries are good for you even in dessert, right? Anyway… this coffee cake is delicious and it’s really simple to make.  I didn’t even bother using my KitchenAid mixer for it because it really didn’t require a whole lot of mixing. There are a few steps that you need to do before assembling the whole cake together, but trust me, it’s totally worth it (not to mention how amazing your house smells while it’s baking!).

Ingredients:

  • For the struesel:
    • 1/4 cup brown sugar
    • 1/4 cup granulated white sugar
    • 1/4 cup flour
    • 3 tablespoons butter, at room temperature
    • 1 teaspoon cinnamon
  • For the cake:
    • 1.5 cups all-purpose flour
    • 2.5 teaspoons baking powder
    • 1/2 teaspoons salt
    • 1 egg, beaten
    • 3/4 cup white sugar
    • 1/3 cup butter, melted
    • 1/2 cup milk
    • 1 teaspoon vanilla extract
    • 1.5 cups frozen blueberries

Directions:

  • Preheat oven at 375 degrees
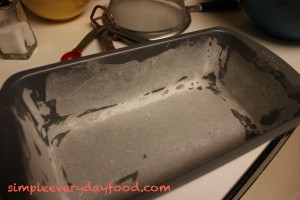
  • Grease and flour a cake pan or loaf pan – I used a 5 x 9″ loaf pan

IMG_0515

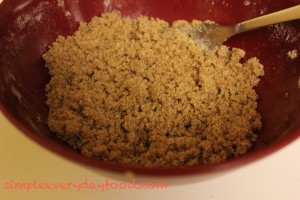
  • Combine the ingredients for the streusel topping until crumbly, set aside – some people prefer to mash the butter up with a fork.. I find it way easier to crumble and mix everything up with my hands. Don’t be afraid to roll up your sleeves and get your hands dirty!

IMG_0510

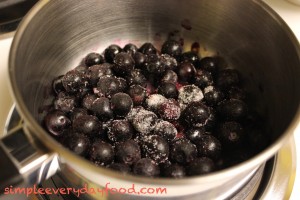
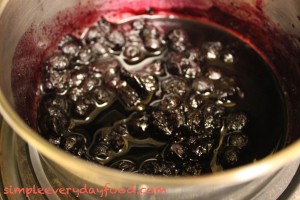
  • In a small saucepan on medium heat, combine 1 cup of the frozen blueberries with 1 teaspoon of sugar. Stir constantly while mashing up the blueberries with a spoon to release all the juice. Heat until the liquid has thickened. Remove from heat. Once cooled, strain the blueberry syrup mixture into a bowl so you’re only left with the syrup. This may take some patience since the syrup is slightly thicker and may take some time to get through the strainer. You should end up with a couple tablespoons of liquid.

IMG_0509

IMG_0511

  • In a bowl, sift together the flour, baking powder, and salt. In a separate bowl, add the sugar to the beaten egg, then add the melted butter. Add milk and vanilla. Then mix in the flour mixture.
  • Pour about half the batter into the greased and floured pan. Add the remaining 1/2 cup of frozen blueberries, then top with half of the streusel.

IMG_0517

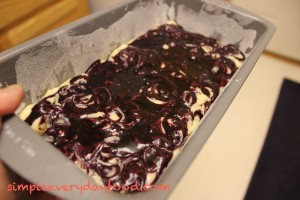
  • Top with remaining batter and drizzle the strained blueberry syrup over the top. Swirl with a toothpick to mix in the syrup with the batter. Top with remaining streusel.
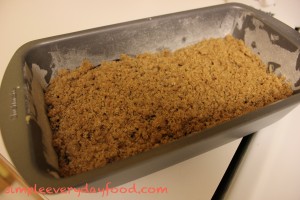
IMG_0521

IMG_0523

  • Bake for 35-45 minutes, or until a toothpick comes out clean.
  • Cool on wire rack. Serve and enjoy!

My husband was too eager to cut into the cake and try some, so I wasn’t able to get a picture of the finished product. Just an excuse to make it again in the future! Here is, however, a picture of my clean plate!

IMG_0524

Our house smelled just like a Cinnabon factory. I can’t wait to make this in the summer time with all the windows open, just to see how many people I can get to gather outside our house! Ha! :)

Recipe adapted from Just A Pinch Recipes

Sharing is caring! Email this to someonePrint this pagePin on PinterestShare on YummlyShare on FacebookShare on Google+Tweet about this on Twitter