everyday food made simple

I don’t know about the rest of the country, but the weather here in Minnesota has been nothing but gorgeous the past few weeks. Every day has been sunny with a few puffs of clouds in the sky, and somewhere between 75-85 degrees. After a long, brutal winter, I was more than ready to dust off the boxes where my summer shorts and tank tops have lived for the past 7 months and bring them back into my regular clothing “circulation”. It’s always a monumental day when I deem the weather warm (and stable) enough to pack up my winter boots, and put all my scarves, gloves, hats, and jackets away in the closet…. it signifies the arrival of warmer weather, longer days, shorts and flip flops, grilling, ice cold lemonade, and everything summer is about.

You know what else is a universal icon of summer? S’mores.

IMG_3522 copy

IMG_3516 copy

For someone who doesn’t care for camping, I really am a big fan of s’mores – I even have an entire section in my recipe book dedicated to all things s’mores! It’s without a doubt my second favorite flavor combination of all time. It lands in 2nd place because nothing – I mean nothing – can top mint + chocolate in my world. Whoever decided to sandwich a toasted gooey marshmallow with some chocolate in between graham crackers is a genius.

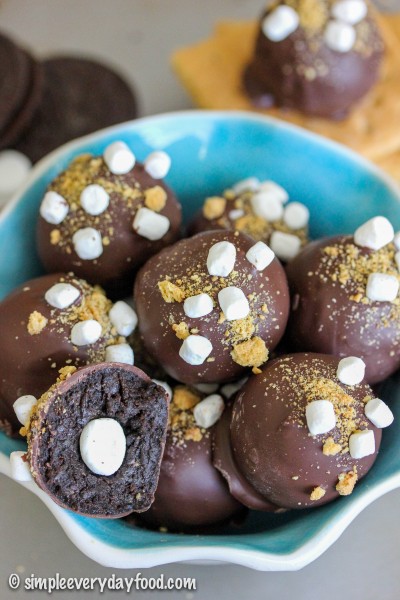
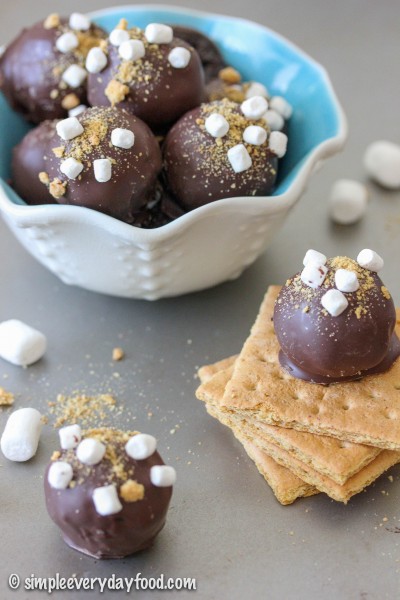
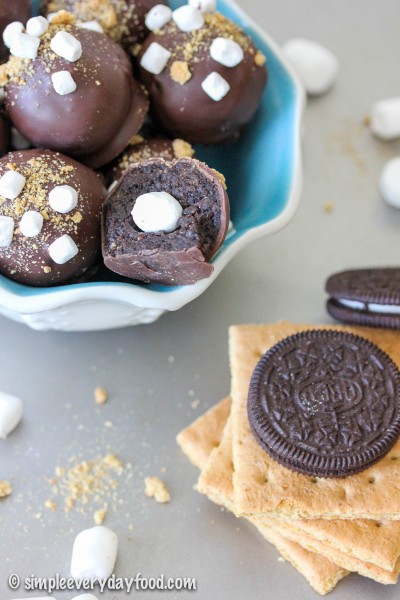
These truffles are super easy to make and requires no baking at all! All you really need is a food processor, which means they’re quick… and you won’t even have to make your house any hotter by turning on the oven. I modified the original recipe by adding several squares of graham crackers into the Oreo/cream cheese base, just to amplify the s’mores flavor, and let me tell you, everyone thought these were deeeelicious!
IMG_3531 copy

It even has a little mini marshmallow surprise inside when you take a bite out of it!

IMG_3519 copy

IMG_3521 copy

I have made several different kinds of truffles in the past, but these hands down take the crown – they are without a doubt the best tasting truffles I’ve ever made. It’s a bold statement, but that’s how good they were. They were so good that Brian alone ate 4 of them one day when I was at work, and I ended up having to make another batch of them to share with my coworkers!
IMG_3539 copy

IMG_3525 copy

Oreo s'more truffles
Print
Ingredients
  1. 15 original Oreo cookies
  2. 6 graham cracker squares, divided
  3. 2.5 oz low fat cream cheese
  4. ~11 mini marshmallows
  5. 8 oz chocolate CandiQuik
  6. ~2 tablespoons marshmallow bits (optional)
Instructions
  1. In a food processor, pulse 2 squares of graham cracker squares until it turns into fine crumbs. Place in a small bowl and set aside.
  2. In the same food processor, pulse the Oreo cookies and the remaining 4 graham cracker squares until roughly crumbled. Add in the cream cheese and pulse on HIGH until the mixture comes together. The mixture turns into a doughy consistency and should not be crumbly - you should easily to able to form them into balls without it falling apart in your hands.
  3. Roll the mixture into balls (about 1-1.5 tablespoon each) and place on a parchment paper-lined baking sheet. Take each ball and make an indentation in the middle with your thumb, and place a mini marshmallow in the center. Reform the truffle mixture back into a ball, making sure the mixture encases the mini marshmallow entirely. Repeat with the rest of the truffles. Place the truffles in the refrigerator to chill.
  4. While your truffles are chilling, make the candy coating: using a double boiler, melt the CandyQuik until smooth. Working one truffle at a time, place a ball in the CandyQuik while spooning the chocolate over the truffle with a spoon. Gently lift the ball up with a fork and gently tap off the excess candy coating.
  5. Place the truffle onto the baking sheet and immediately garnish with graham cracker crumbs and marshmallow bits. Repeat with the rest of the truffles. Return decorated truffles into refrigerator to chill. Store in an airtight container in a cool dry place for up to 5 days (if they even last that long).
  6. Makes 11 truffles
Adapted from Crazy for Crust
Simple Everyday Food https://www.simpleeverydayfood.com/
I personally love to use CandyQuik to coat all my truffles. You can also use the Wilton candy melts or Almond Bark if those are the kind you prefer. I also personally prefer to melt all my chocolates and candy coatings over a double boiler rather than throwing them in a microwave or directly over a heat source – I’ve tried microwaving them in the past, but they just never seemed to work as well for me as using a double boiler. However, if you have better luck than I do with a microwave or over a stove, feel free to do it that way – it’s probably faster anyway :)

Recipe adapted from Crazy for Crust

© Simple Everyday Food. All images & content are copyright protected. Please do not use any of my images without prior permission. If you want to republish this recipe, please re-write the recipe in your own words, or kindly link back to this post for the recipe.

Sharing is caring! Email this to someonePrint this pagePin on PinterestShare on YummlyShare on FacebookShare on Google+Tweet about this on Twitter

After close to a two-month hiatus from SEF, I’m glad to announce that I’ll start posting more on a regular basis! In the past few months, I’ve successfully passed my boards, settled into a nice routine on the new job, read a few books, and finally had some time to relax and not stress about anything. It was nice, but I’m excited to be back – SEF has been a little neglected and could really use a little TLC…

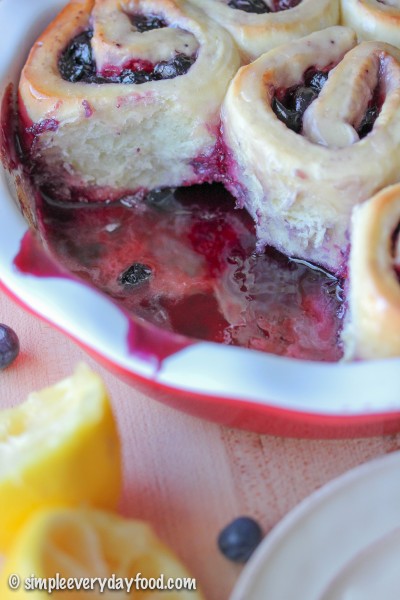
Last year, I conquered my fear of baking with yeast, and successfully made my first ever homemade cinnamon rolls! Ever since, I’ve made several different renditions of some sort of breakfast “rolls” on weekends both Brian and I have off together. These blueberry sweet rolls are perhaps one of my favorite ones I’ve made so far!

Yep, you’ve heard me correctly – juicy blueberries bursting with flavor, combined with a sweet tangy lemon glaze.. it’s practically heaven!

IMG_2819 copy

IMG_2838 copy

IMG_2844 copy

Just like the cinnamon rolls I’ve previously made, these are also overnight sweet rolls, meaning you won’t have to get up extra early for any type of prep work.

Now, onto a few technical things before you dive on in to make these this weekend:

  • When you toss the blueberries into the sugar/cornstarch mixture, it’ll seem like you’ll have a lot of sugar left on the bottom. Don’t panic! The blueberries will slowly absorb the sugar and cornstarch while you’re making the dough.
  • After you spread out the blueberries onto your dough, you’ll feel like there’s really not a lot of blueberry filling. The blueberry mixture will not completely cover the entire surface of the dough, and that’s totally okay. It’ll be plenty as you try to roll up the dough tightly – this really was the hardest part for me! They were harder to roll because the blueberries will seem like they have a mind of their own and would be rolling all over the place.
  • If you’re the impatient kind and can’t help but peek at how much your rolls have risen every two hours (ahem), don’t be alarmed if they don’t seem like they’re doing much after 4-6 hours. Because we’re using frozen blueberries in the filling, it’ll make the dough colder in temperature, therefore it’ll take a little bit longer for it to rise.

As the dough rises overnight, something magical happens: the frozen blueberries release their juices, and you get a delicious pool of blueberry juice on the bottom of the pan as a result. When you check on the rolls in the morning, you may notice the juices are practically half-overflowing to the top of the pan – this is okay! Because the juices will thicken as they bake, which is perfect if you like a little extra blueberry goo to go with your sweet rolls :)

IMG_2814 copy

IMG_2837 copy

IMG_2824 copy

overnight blueberry sweet rolls with lemon glaze
Print
For the rolls
  1. 2 and 3/4 cups all-purpose flour
  2. 3 tablespoons granulated sugar
  3. 1 teaspoon salt
  4. 1 package dry active yeast
  5. 1/2 cup water
  6. 1/4 cup milk
  7. 2.5 tablespoons unsalted butter
  8. 1 large egg, at room temperature
For the filling
  1. 1 and 1/3 cups frozen blueberries
  2. 1/4 cup granulated sugar
  3. 1 teaspoon cornstarch
For the glaze
  1. Juice from half a lemon
  2. 1 cup powdered sugar
  3. 1-2 tablespoons milk
Make the filling
  1. Combine the frozen blueberries, sugar, and cornstarch in a medium-sized bowl. Toss to coat and set aside. There might seem to be a lot of sugar on the bottom - don't worry!
Make the dough
  1. Set aside 1/2 cup flour. In the bowl for an electric mixer, combine the remaining flour, sugar, salt, and yeast together. Stir until combined. Attach the dough hook attachment onto your mixer.
  2. In a medium microwave-safe bowl, heat the water, milk, and butter together in the microwave until the mixture is hot to touch and the butter is melted. Pour the butter mixture into the flour mixture and stir on medium speed. Then add the egg and only enough of the reserved flour to make the dough. I used the entire 1/2 cup, but you may not use it all. You'll know you've added enough when the dough is soft, pulls away from the sides of the bowl, and is no longer sticky.
  3. On a lightly floured surface, knead the dough for 5 minutes. Place the dough ball in a lightly greased bowl, making sure all surfaces of the dough ball is lightly greased. Let sit for 10 minutes.
  4. While your dough rises, make the filling by tossing the ground cinnamon and sugar together in a small bowl.
  5. After the 10 minutes, roll out your dough into roughly a 14"x8" rectangle. Give the blueberry mixture a final toss, and spread them evenly across the dough. Roll up the dough tightly and cut into 9-10 even pieces, about 1.5" each. Place into a lightly greased 9" pie pan, making sure you leave enough room between each roll for it to rise.
  6. Loosely cover the pan with aluminum foil and let it sit overnight, up to 12 hours, at room temperature. The rolls should have doubled in size when you check on them the next morning.
  7. When you're ready to bake them the next morning, preheat the oven to 375 degrees. Bake for 25-27 minutes, covering the top with aluminum foil 15 minutes into baking to prevent excessive browning on top.
  8. While the rolls are baking, make the glaze by mixing the powdered sugar, 1 tablespoon of milk, and lemon juice in a small bowl. Add more milk if the glaze is too thick.
  9. When the rolls are done baking, remove from oven and drizzle them generously with the glaze. Rolls are best served warm and on the same day, even though they can be stored in an airtight container for up to 3 days.
  10. Makes 9-10 rolls
Adapted from Sally's Baking Addiction
Simple Everyday Food https://www.simpleeverydayfood.com/
My oh my were these good! Sweet, fluffy rolls with blueberries that are just bursting in flavor, combined with a tangy, sweet, tart lemony glaze – I can’t think of a more perfect way to start a morning!

IMG_2817 copy

If you happen to have a few extra leftovers, place it in the microwave and heat it up for 10-20 seconds* until warm. The congealed blueberry juice on the bottom will liquefy again and the rolls will taste just as good as they were when they came out of the oven!

*the amount of time the rolls need to be microwaved may depend on the model and type of the microwave you have

Recipe adapted from Sally’s Baking Addiction

© Simple Everyday Food. All images & content are copyright protected. Please do not use any of my images without prior permission. If you want to republish this recipe, please re-write the recipe in your own words, or kindly link back to this post for the recipe.

Sharing is caring! Email this to someonePrint this pagePin on PinterestShare on YummlyShare on FacebookShare on Google+Tweet about this on Twitter

You may have noticed the lack of posts the past few weeks. I have been super stressed about my national boards exam that’s coming up in three weeks, so I have been using all my free time to cram as much information into my little head as possible. As a result, SEF has been neglected for quite some time. I have decided that I’m going to wait until my exam is over to take better care of SEF and dedicate more time to writing more posts. I have already created a bunch of recipes (10, to be exact) and have photographed my creations; however, since I spend most of my time editing them and creating blog posts, I’m going to put them on hold until April 13th. I promise SEF will be updated on a more regular basis after that – there will be some pretty delicious blog posts coming in the near future!

So, as my gift to you until April 13th, I present to you this wonderfully easy recipe that involves one of everyone’s favorite kitchen gadget – the Crockpot.

My favorite soups of all time are as follows (in no particular order):

  1. baked potato soup
  2. Olive Garden’s zuppa toscana
  3. creamy chicken and wild rice soup

Throughout the past 10 months SEF has existed, I managed to recreate and blog about #1 and #2 on that list. Naturally, it was time for me to find a family-approved recipe for creamy chicken and wild rice soup.

IMG_2536 copy

IMG_2508 copy

And this recipe is definitely going to be recreated again (and again) throughout the year. Brian and I both agreed it was so delicious that we were calling dibs on leftovers for work. Good thing this recipe yielded an entire Crockpot of soup! Even then, it still didn’t last more than 3 days in our house…

Rewind to about a year ago: I attempted to make chicken and wild rice soup on the stove… And that attempt had failed miserably. It tasted weird, had a funny consistency, and ended up getting dumped in the trash. Needless to say, my confidence in making creamy chicken wild rice soup was a little shot after that, and we both had to scramble and find something else to eat that night.

I think Brian was also a little skeptical when he heard I was going to try to give our favorite soup another try in the Crockpot. I can’t lie, I think I was too. But it was freezing cold outside, I was feeling lazy, and comfort food in the Crockpot was all that I really wanted for dinner.

IMG_2530 copy

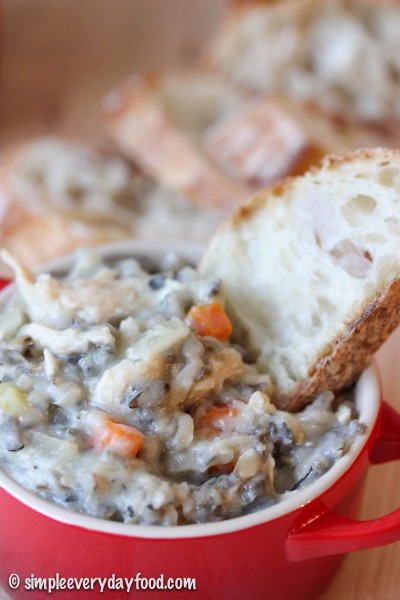
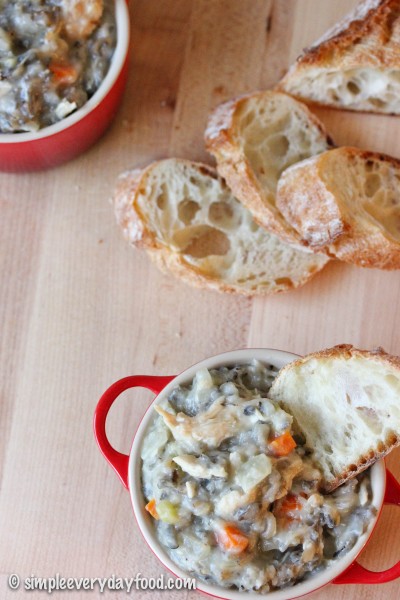
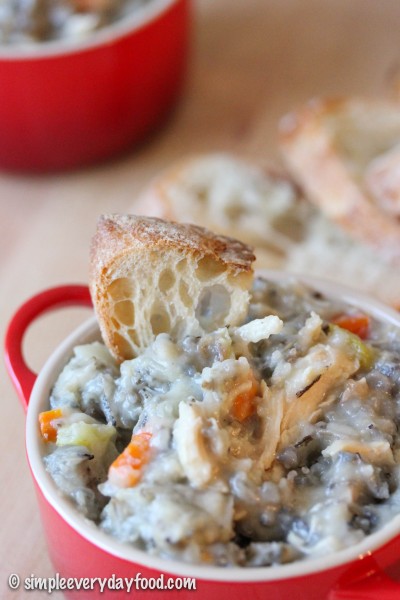
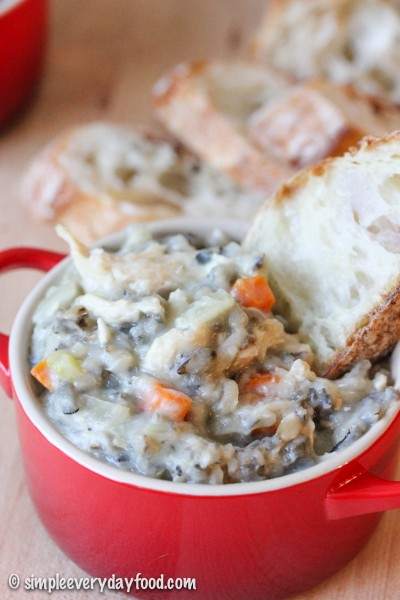
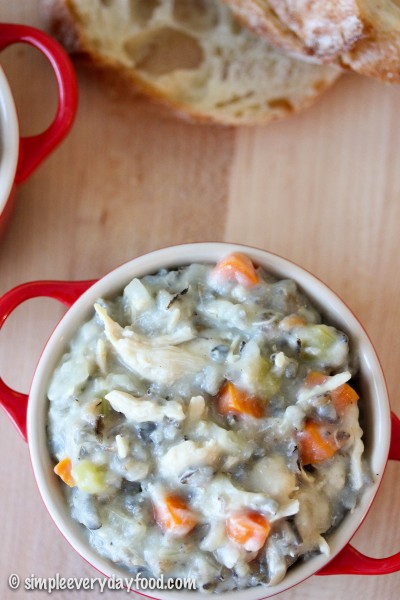
This soup is amazing! It’s incredibly creamy and it’s filled with hearty vegetables and tons of juicy shredded chicken. Have you ever had Panera’s chicken and wild rice soup? If you haven’t – try it. It’s delicious. It’s the only soup we ever get there, and this TASTES JUST LIKE IT.

I’m still in awe at how good this soup is, and even better – how easy it is to make!

The steps are pretty simple: throw the veggies, wild rice, chicken stock, and chicken into the Crockpot. Let them sit and hang out and get to know each other for 7 hours. When the chicken is fork tender, take it out and shred it with a fork. Put it back into the Crockpot to soak up more of the yummy juices. Meanwhile, you make the creamy base on the stove…. this is where you should pay attention, simply because it took me three tries to get it right. Trust me, you’ll thank me later :)

When making your creamy base on the stove, melt the butter over low heat. Then add in the flour, 1/4 cup at a time, whisking constantly throughout each addition. The milk must also be added only 1/2 cup at a time as well. This is suuuuuper important – the first few times I tried, I added all the flour in at once, whisked, and added all the milk in at once. Somehow it just doesn’t work that way – it became super lumpy and gross, and I contemplated whether we should just make it “chicken and wild rice soup” instead of “creamy chicken and wild rice soup”. The stubbornness in me wasn’t about to let some butter and flour stand in the way of me and my dinner, so 3 sticks of butter later, I finally got the results I wanted.

The trick is to whisk constantly on LOW heat. When I say constantly, I mean it – whisk that sucker the entire time. Don’t walk away from the stove. Don’t even go on Instagram or Facebook. It’ll seem like it’s taking forever for the mixture to start bubbling, but I promise patience pays off in the end.

IMG_2540 copy

crockpot creamy chicken wild rice soup
Print
Ingredients
  1. 1 cup uncooked wild rice
  2. 1 pound boneless skinless chicken breasts
  3. 3 medium carrots, peeled and diced
  4. 1 small onion, diced
  5. 2 celery sticks, diced
  6. 6 cups low sodium chicken broth
  7. 1 heaping teaspoon poultry seasoning
  8. 1/2 cup butter
  9. 3/4 cup flour
  10. 2 cups milk + 2 additional cups
  11. Salt and pepper
Instructions
  1. Place the diced carrots, onion, and celery in the crockpot, then place the chicken breast on top. Sprinkle poultry seasoning over the chicken.
  2. Rinse the wild rice, and add to crockpot. Then add in the chicken broth. Cover and cook on low for 6-7 hours, until chicken is fork tender. Remove chicken onto a cutting board, let cool and shred with two forks. Add the shredded chicken back into the crockpot.
  3. In a saucepan, melt the butter, then add the flour, 1/4 cup at a time, and cook until it starts to bubble. Slowly whisk the milk in with the flour mixture, 1/2 cup at a time, just until it starts to thicken. Add this to the rice and chicken in the crockpot, stir to combine. If mixture is too thick, add additional milk (or water) until it reaches the desired consistency. Serve immediately.
  4. Serves 6
Adapted from Pinch of Yum
Simple Everyday Food https://www.simpleeverydayfood.com/
So there. Next time there’s a snowstorm in the forecast and all you want to do is snuggle on the couch in warm fuzzy blankets drinking hot peppermint cocoa in front of the fireplace, I’ve got dinner covered for you (trust me, I wouldn’t be surprised if we had a snowstorm in April here in Minnesota).

IMG_2533 copy

IMG_2506 copy

Recipe adapted from Pinch of Yum

© Simple Everyday Food. All images & content are copyright protected. Please do not use any of my images without prior permission. If you want to republish this recipe, please re-write the recipe in your own words, or kindly link back to this post for the recipe.

Sharing is caring! Email this to someonePrint this pagePin on PinterestShare on YummlyShare on FacebookShare on Google+Tweet about this on Twitter

Instead of writing a blog post on what my life has been like lately (because who would want to listen to me talk about my day when that’s what husbands are for), I decided to write about a few “new” things in my life that are more worth talking about…

1.  What’s new: Books

The Goldfinch

I initially saw a fellow food blogger post this book on her Instagram feed months and months ago, and a few months later, it was listed as one of the “Top 10 books” on People magazine, and since anything that makes it on Instagram and People magazine must be good, I decided to give it a try. I’m only about 10% into the 770-page book, but so far I like it. Not quite the page-turner I was hoping it would be, but it’s good enough to keep me interested in reading a few chapters every night. I’ve heard from multiple people that it does turn out to be quite a good book in the end, so I’m hoping things will pick up a bit the more I get into it.

Since we’re on the subject of books, can I just say that my books-I-want-to-read list on Amazon is growing by the week? It started out as 14 books. Then it grew to 20. Now it’s currently sitting at 29 books. That’s going to be a lot of money spent on books. 

#nerd4life

Where I’m going to find the time to read 29 books, I don’t know, but I’ll keep you posted.

2.  What’s new: Things

I’m in love with this honey pot from Le Creuset. They also have a garlic keeper that is also on my “Want” list on Amazon (Yes I already have one. No there’s nothing wrong with the one I have… all Le Creuset products are just automatically cooler in my world).

3.  What’s new: TV shows

      Worst-Cooks-logo.jpg

New seasons for Survivor and The Amazing Race have started. I’m digging the new Brawn vs. Brains. vs. Beauty thing Survivor is doing this season…. it’s about time they change things up a bit. I think I would totally belong in the Brains tribe – I’m too big of a nerd not to. I’m also very excited that one of my all-time favorite Food Network shows – Worst Cooks in America, is back on again. Have you ever watched that show before? It’s awesome. I’m Team Anne all the way!

4.  What’s new: Weather

I think the state of Minnesota was saving their warm weather for after we have “sprung forward”, because it has been in the high 40s for the past two days, and everyone is loving it. People can finally go out without a heavy winter coat. They are now driving with windows down (bless their brave souls – I’ll wait til May to do that). Just yesterday I went to the gas station and two ladies carried out a total of 6 Slurpies.

#youknowitswarminminnesotawhen: 1) 40 degrees is considered a “heat wave”, and 2) people are walking around in shorts and a hoodie slurping on cold blended beverages.

Everyone came out of their winter hibernation and are now out and enjoying the sunny warm(er) weather. It’s amazing what a 10-degree jump in temperatures can do to your psyche… even Bentley is in love with this warm up since he got to go to the dog park two days in a row!

With winter, cold, snow, and salt on the roads also comes with everyone’s favorite – potholes. Not just your ordinary little potholes – these are potholes big enough to swallow my car. I hit a ginormous pothole on the way to the coffee shop a few weeks back and I thought the whole front wheel of my car was going to break off. I think my heart jumped to my throat, my hands got super sweaty, and I probably mumbled a few curse words under my breath.

The interstates are just as bad. Driving on the highway is like driving Mario Kart trying to dodge the slippery banana peels. Except I not only have to watch out for banana peels (patches of black ice), I also have to swerve and avoid hitting potholes that can break my car. I have already learned where all the major potholes are on my route to work – I can probably draw you a map of where each one is located (and if it’s towards the left or right side of the lane). It takes talent to be able to drive anywhere without your teeth clattering half the way to your destination.

5. What’s new: Food

These.

Have you seen these before? I saw it on commercial last week and decided to give it a try. It also comes in a sharp white cheddar flavor, but I think the cheddar ranch is my favorite. I was actually pleasantly surprised – they do have the texture of a “chip”. Not chip as in potato chips, but like a cracker chip. It’s got a nice crunch to it, which I actually prefer more than the original flakier Cheez-Its. They are also extremely addicting. I catch myself reaching into the box eating one after another after another after another. Even when my brain tells me it’s enough, my mouth still tells me it needs more….

Sharing is caring! Email this to someonePrint this pagePin on PinterestShare on YummlyShare on FacebookShare on Google+Tweet about this on Twitter

IMG_3185 copy 

It’s funny how fast our body adjusts to a new routine. Just two months ago, I was used to going to bed at 2:30 a.m. and sleeping in until at least 10:30. By the time I finally get myself out of bed, it’s usually around 11. Back then, I didn’t have to work until 5 p.m. so on the days I actually eat breakfast (I had a bad habit of drinking coffee for breakfast), I took my time making something delicious and nutritious… usually some sort of an egg sandwich or scrambled eggs with a side of greens and some rice.

Just one month into my new job, the only time I get to spend my sweet time deciding on what to have (or not have) for breakfast now are the weekends. My new job requires me to be up at 4:00 a.m… keep in mind that before February 3rd, 2014, I have never gotten up at 4 a.m. for anything. This whole “getting up early in the morning” thing has been brand new for me. I have also realized that at 4 a.m., neither my mind nor my body are awake enough to even lift a frying pan to cook anything on the stove. This is why this past weekend, I decided to make a batch of easy breakfast muffins as a quick and easy breakfast option. These are especially helpful on the days where I end up hitting the snooze button 9 times, as it can easily be packed in my lunchbox for me to eat once I get to work.

IMG_3178 copy

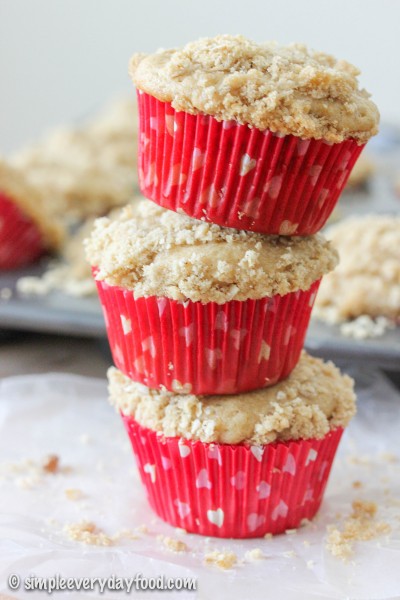
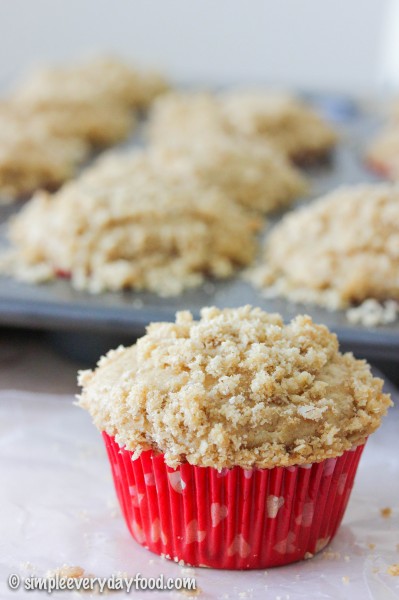
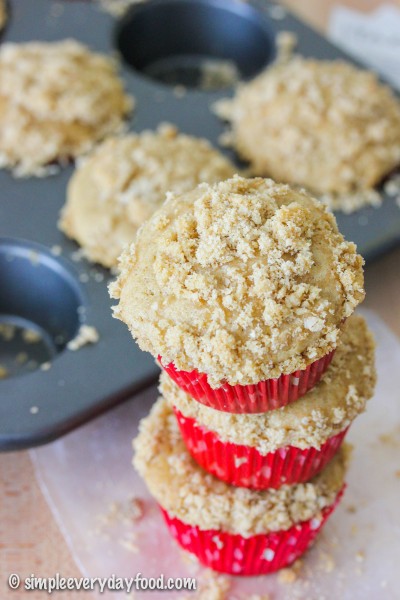
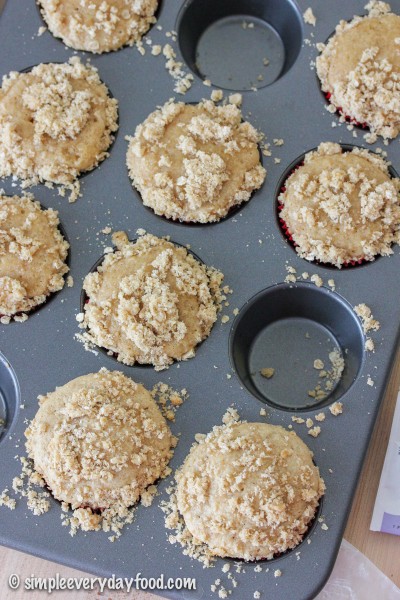
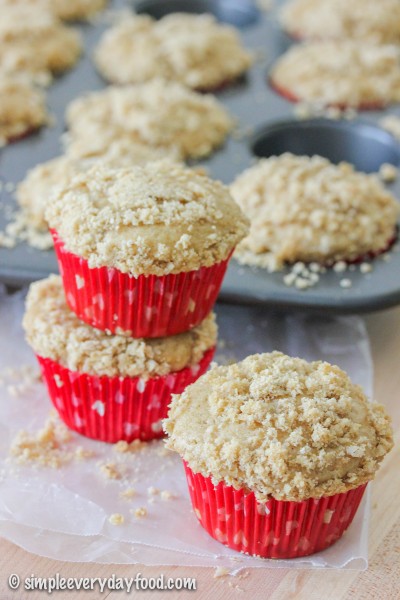
Today I present to you: earl grey breakfast muffins with a streusel topping. That’s right, you’ve heard read correctly – on top of these spongy soft muffins lays a generous layer of crunchy, buttery, sweet streusel topping, because let’s face it – muffins are good, but muffins with streusel topping? Even better.

IMG_3193 copy

IMG_3176 copy

You know what’s even better? The fact that these muffins can easily be made without a mixer. Just a few bowls, a spatula/whisk, and some arm strength is all that’s required. Now I’m going to share a little secret: the key to making the batter is to make sure that all your ingredients are at room temperature... this includes your eggs and sour cream and everything else. I melted my butter and brewed my earl grey tea around the same time, and let both of them sit to cool for at least 20 minutes until it’s no longer warm to the touch. During this time, I occupied myself with catching up with my Instagram feed, picking up a dozen dog toys off the living room floor, vacuuming, and reading a few pages of my new book (The Goldfinch).

Once all the components are ready, the mixing and assembly literally only takes about 10-15 minutes, then bake these in the oven until an inserted toothpick comes out clean. This took 24 minutes in our oven, but every oven is different so start keeping an eye on it around the 20 minute mark.

IMG_3186 copy

Because these muffins freeze well, I divided these them into two batches – one for now and one for later. I kept about half on the counter and literally snacked on them all day, while the other half was stored in an airtight container in the freezer… you know, for mornings where you’d rather trade “time to eat breakfast on the couch” with “10 more minutes of sleep under some warm covers” (which for me, is almost everyday). If you’re anticipating a busy morning, take a few of these out to thaw overnight. Otherwise pop them in the microwave for half a minute or so, or until they’re warm and ready to eat.

The fact that there’s a slight hint of earl grey tea in it also makes me think it’ll keep me going in the morning since it technically contains a small amount of caffeine. It’s all mental, I tell ya.

IMG_3188 copy

earl grey breakfast muffins
Print
For the streusel
  1. 2/3 quick cooking oats
  2. 2/3 cup brown sugar
  3. 2/3 cup all-purpose flour
  4. 1/4 teaspoon salt
  5. 5 tablespoons cold butter, cut into cubes
For the muffin batter
  1. 2 cups all purpose flour
  2. 1 teaspoon baking powder
  3. 1/2 teaspoon cinnamon
  4. 1/2 teaspoon salt
  5. 1/4 teaspoon baking soda
  6. 3 large eggs, at room temperature
  7. 3/4 cup granulated sugar
  8. 1/2 cup (1 stick) butter, melted
  9. 3/4 cup sour cream
  10. 1/3 cup strongly brewed Earl grey tea
  11. 1 teaspoon vanilla extract
To make the streusel
  1. Combine the oats, brown sugar, flour, and salt in a medium sized bowl. Using a pastry cutter or two forks, work in the cold butter until the mixture resembles coarse crumbs (I found it easier to use my hands to mix everything together after initially incorporating the ingredients with a pastry cutter). Set aside.
To make the batter
  1. Preheat the oven to 350 degrees. Line approximately 16 muffin tins with liners.
  2. In a medium-sized bowl, combine the flour, baking powder, cinnamon, salt, and baking soda. Stir until combined.
  3. In another larger bowl, whisk the sugar and butter until mixed. Then add the eggs, one at a time, until combined. Then add in the sour cream, Earl grey tea, and vanilla extract. Stir some more. Then slowly add in the flour mixture and mix until everything is thoroughly incorporated.
  4. Scoop batter into muffin tins about 1/2-3/4 full. Top with a generous amount of the streusel topping. Bake for 22-24 minutes, or until an inserted toothpick comes out clean. Store an an airtight container for up to 5 days (or put them in a freezer and simply thaw out in room temperature for a later date).
  5. Makes 16 muffins
Adapted from Food Network Magazine
Simple Everyday Food https://www.simpleeverydayfood.com/
Recipe adapted from Food Network Magazine

© Simple Everyday Food. All images & content are copyright protected. Please do not use any of my images without prior permission. If you want to republish this recipe, please re-write the recipe in your own words, or kindly link back to this post for the recipe.

Sharing is caring! Email this to someonePrint this pagePin on PinterestShare on YummlyShare on FacebookShare on Google+Tweet about this on Twitter