everyday food made simple

I always seem to hop on the holiday baking train a few days late. Rarely do I ever find myself getting ahead of the game and baking things in anticipation of the upcoming holiday. Don’t ask why – it has always been a problem and I don’t think I plan on fixing that problem anytime soon. I have too many things to take care of, and right now baking ahead of schedule just isn’t as important as things such as studying for boards, spending time with family, working a full-time job, making sure everyone is fed and happy at the dinner table, and squeezing in time to run errands and do housework (I absolutely despise doing laundry).

[It’s soooo hard to work full-time and find time to cook, bake, photograph, edit, write, and post blog posts! I’m open to any advice, tips, and tricks anyone can give me!]

To me, this blog isn’t about making and posting a number of holiday desserts in anticipation of a holiday… don’t get me wrong, I admire (and am a little jealous of) all the talented food bloggers out there that are able to do so, and if I ever have the opportunity to make a full-time income off of SEF, I’d do it in a heartbeat. However, my current lifestyle simply does not allow such extensive food blog planning, so you guys will just have to put up with whatever my little heart felt like making at the moment… even if that means making Valentine-y red velvet desserts days and days after the holiday is over :)

IMG_3150 copy

So, about these whoopie pies.

IMG_3134 copy

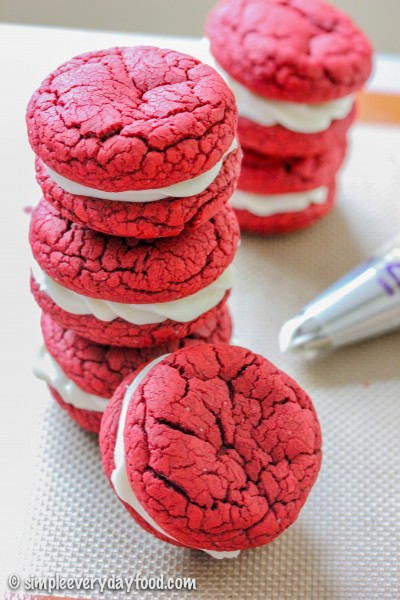
I always like to think of whoopie pies as soft, puffy, big fat Oreos. Except these are thicker and softer than an Oreo cookie and has at least twice as much filling. And they’re soooo easy to make! I was itching to bake something the other day and just wanted a super simple recipe that didn’t require a long list of ingredients and a bunch of steps to follow. These really are not that complicated at all. The directions can be condensed into 6 simple steps:

1.  Make cookies

IMG_3115 copy

(Oooh… those crinkles. I absolutely looooove crinkly cookies!!)

2.  Bake cookies

3.  Make filling

4.  Pipe filling

IMG_3118 copy

5.  Sandwich cookies

IMG_3159 copy

6.  DEVOUR! (with a big glass of ice cold milk is highly recommended)

See? Simple. So simple that a monkey can do it. Okay, maybe not a monkey, but it is a really straight-forward recipe. l I even made these a “double stuffed” whoopie pie by generously piping the cream cheese frosting on BOTH cookies, because well, who doesn’t like extra frosting?! If you don’t have a piping bag, you can also just smear the frosting on the bottom of the cookies using a spoon, knife, spatula, or any kind of kitchen utensil you have handy before sandwiching them together.


IMG_3127 copy

IMG_3145 copy

I think I could’ve probably eaten the cookies by themselves without the cream cheese frosting – they were so soft and so moist and so good! They even remained soft and moist in an airtight container three days later! My favorite way of eating them was twisting them open and eating each half of the sandwich with a little bit of cookie and a little bit of frosting.

red velvet whoopie pies
Print
For the cookies
  1. One 16.25-oz box of red velvet cake mix
  2. 2 eggs
  3. 1/2 cup vegetable oil
For the frosting
  1. 1/4 cup (1/2 stick) butter, softened to room temperature
  2. 8 oz cream cheese, softened to room temperature
  3. 2 teaspoons milk
  4. 1 teaspoon vanilla extract
  5. 3 cups powdered sugar
Instructions
  1. Preheat oven to 375 degrees. Line two baking sheets with parchment paper or silicone baking mats and set aside.
  2. Using an electric mixer, combine all the ingredients for the cookies until well mixed. Roll the cookie dough into dough balls 1" in diameter. Place dough balls ~2" apart and bake for 8 minutes, or until the tops of the cookies start to crack. Remove from oven and let cool completely.
  3. While the cookies are cooling, make the frosting: combine the butter, cream cheese, milk, and vanilla extract in a large bowl. Then add the powdered sugar, one cup at a time, making sure the mixture is well-mixed in between each addition.
  4. Spread a generous amount of frosting on the bottom of all the cookies*, and pair cookies up together, pressing gently to sandwich them together. Store an an airtight container for up to 5 days.
  5. Makes about 13 cookies
  6. *I spread the frosting on the cookies using a piping bag and a starred tip. If you don't have piping supplies, you can also simply spread the frosting onto the bottom of the cookies with a knife, offset spatula, a regular spatula, or whatever kitchen utensil you have handy.
Adapted from Six Sisters' Stuff
Simple Everyday Food https://www.simpleeverydayfood.com/
Recipe adapted from Six Sisters’ Stuff

© Simple Everyday Food. All images & content are copyright protected. Please do not use any of my images without prior permission. If you want to republish this recipe, please re-write the recipe in your own words, or kindly link back to this post for the recipe.

Sharing is caring! Email this to someonePrint this pagePin on PinterestShare on YummlyShare on FacebookShare on Google+Tweet about this on Twitter

IMG_2733 copy  

It’s no secret that I’m a sucker for chocolate. Not just a plain old boring milk chocolate bar, mind you, but fancy dark chocolate with different flavors infused in it – mint chocolate, dark chocolate cherry, chai chocolate, birthday cake chocolate, coconut chocolate…. The kind where you have to spend more than $3.50 for a small little chocolate bar. Yeah, I’m fancy.

I especially loooove dark chocolate with a hint of orange – dark chocolate with bits and pieces of candied orange peels throughout – it really is a match made in heaven! Since it’s hard for me to get my hands on certain fancy brands, Lindt’s chocolates are one of my go-tos when I’m in the mood to indulge.

photo 1

I see it as getting my daily vitamin C intake along with some antioxidants – it’s a win-win situation – no?

This cookie is kind of the opposite of what these candy bars are about. Instead of orange infused chocolate, it’s more of an orange cookie with a hint of chocolate. Instead of using regular chocolate chips, I used some 70% dark cacao chips instead to give the cookie a more intense dark chocolate flavor, that way you can eat a few without feeling like you’re going to slip into a sugar coma.

IMG_2720 copy

IMG_2727 copy

These cookies are soooo soft! They’re soft and moist. Not cakey, and not chewy either. Just soft. Like melt-in-your-mouth soft, thanks to the small amount of cream cheese added to the batter. One thing to note about these cookies is that when you mix everything together, the batter will be SUPER sticky. You’re probably going to think that something went wrong – nope! It’s just the way it is. And for that reason, I strongly suggest mixing everything together with a mixer… unless you’re trying to gain some arm strength – then more power to you, you overachievers.

orange chocolate chip cookies
Print
Ingredients
  1. 1/2 cup (1 stick) unsalted butter, softened to room temperature
  2. 3-oz low fat cream cheese, softened to room temperature
  3. 1/2 cup granulated sugar
  4. 1 egg, at room temperature
  5. 1 teaspoon vanilla extract
  6. 1 teaspoon grated orange zest
  7. 1 cup all-purpose flour
  8. 1/2 teaspoon salt
  9. 1 cup 60% dark cocoa chocolate chips
Instructions
  1. Preheat oven to 350 degrees. Line baking sheets with parchment paper or silicon baking mats.
  2. In a medium bowl, combine the flour and salt. Set aside.
  3. Using an electric mixer, cream together the butter, cream cheese, and sugar. Add in the egg an mix until smooth. Add in the orange zest and vanilla, stir until incorporated. Slowly add in the dry ingredients to the butter mixture. Mix until combined. Stir in the chocolate chips.
  4. Drop heaping tablespoonfuls of the dough onto the prepared baking sheets. The dough will be very sticky - this is normal! Bake for 12-14 minutes or until the edges just begin to brown slightly. Store in an airtight container for up to 7 days.
  5. Makes 16-18 cookies
Adapted from Taste and Tell Blog
Simple Everyday Food https://www.simpleeverydayfood.com/
IMG_2732 copy

Next time when I make these, I think I’m going to roughly chop up the dark chocolate chips prior to adding them into the batter. That way there will be more chocolate dispersed throughout the dough, and the chocolate will be nice and gooey and melty when you take them out of the oven.

Okay, I need to go find myself some chocolate now….

Recipe adapted from Taste and Tell Blog

© Simple Everyday Food. All images & content are copyright protected. Please do not use any of my images without prior permission. If you want to republish this recipe, please re-write the recipe in your own words, or kindly link back to this post for the recipe.

Sharing is caring! Email this to someonePrint this pagePin on PinterestShare on YummlyShare on FacebookShare on Google+Tweet about this on Twitter

If you haven’t heard, I was offered a brand spankin’ new full time job about a month ago and just started it this week ! I’m super ecstatic about it, as I wasn’t really expecting to be able to find a job (at a place I really wanted to work at) this fast, just a few weeks after graduation. Of course, I wasn’t able to do it without the help of some wonderful people I listed as my references. As far as I know, a few of them were contacted by this employer, and they must’ve wrote a bunch of nice things about me, and I’m forever grateful about it :)

This will be my first ever full-time big girl job, and I took the entire process very seriously (more than usual) – from the initial submission of my resume and cover letter, to the actual interview, and the thank you letters thereafter – I applied everything I have learned in my career capstone class and meticulously read and reread everything prior to hitting the “submit” button. I’m glad a little bit of networking and hard work pays off… I love it so far!

This whole journey really made me realize that no matter where you go in life and what big milestones you have achieved, you really can’t get there without the help of people along the way – whether they are friends, family, coworkers, or even strangers… many people played a part in this job hunting process, and even now, I feel just as grateful as I did the day I was offered the position.

Ever since I was little, my mom had ingrained in my brain that it is important to express your gratitude towards those that have helped you in life. And that’s why the day after I got this new job, I decided to make some sweets for those people who took time out of their busy schedules to write recommendation letters for me. I figured if they were kind enough to take time to write nice things about me, the least I can do is take time out of my day to make a little something to show them how much I appreciate their efforts.

IMG_3006 copy

IMG_3012 copy

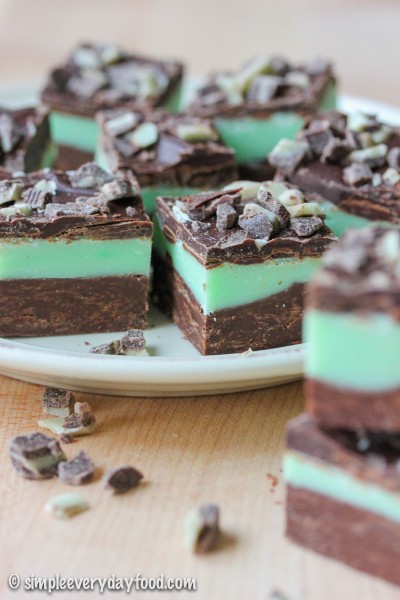
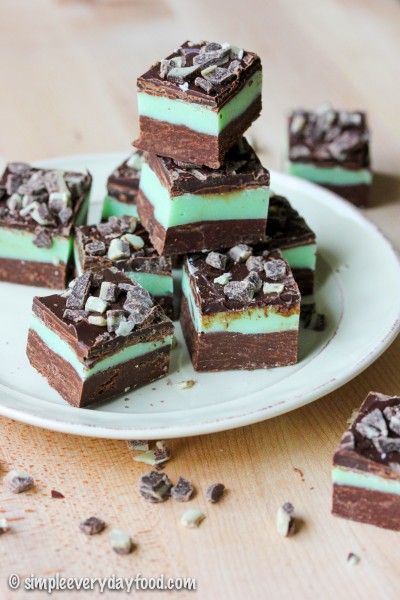
I would’ve made cookies, but one of my references happened to be gluten free, which is why I decided to make fudge instead. I’ve never made fudge in my entire life before, but since it’s a new year, and new years are all about trying new things, I decided to give it a whirl. And since I’m still on this mint chocolate craze, mint chocolate fudge it was (it’s only my favorite chocolate combination, if you haven’t figured that out already).

IMG_3009 copy

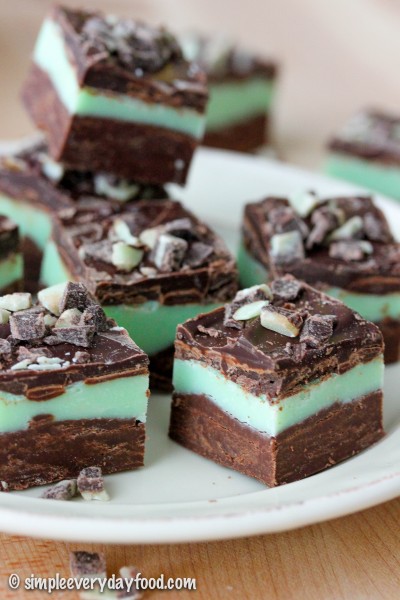
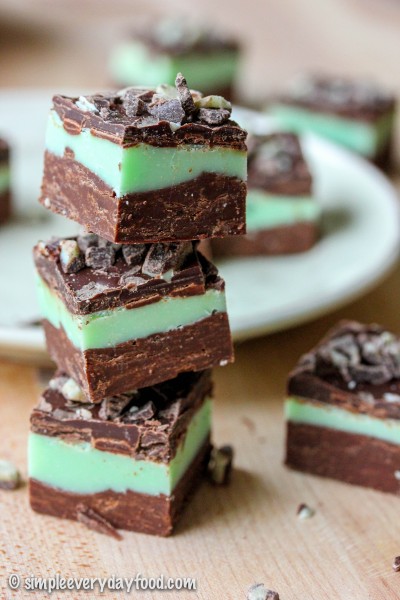
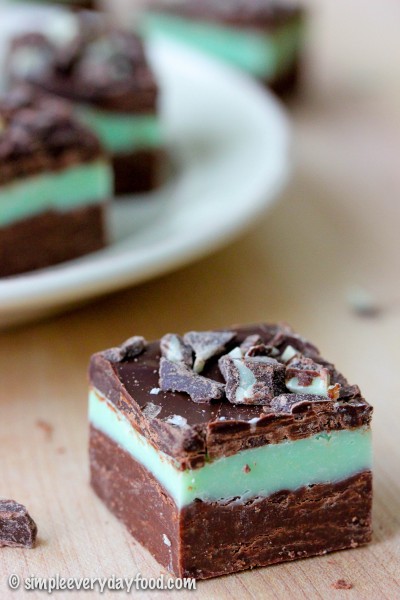
These little fudge squares are just like giant Andes mints and they’re so easy to make! The bottom layer consists of sweet chocolate chips with condensed milk, followed by another fudgey layer of white chocolate chips, a little bit more condensed milk, peppermint extract, and a few drops of food coloring. The thin top chocolate layer has a nice little crunch, which contrasts nicely with the bottom two smooth velvety fudgey layers. Heaven, I tell ya.

IMG_3027 copy

IMG_3028 copy

I have never had luck with melting chocolate in the microwave or directly over a heat source. It just somehow never works for me, so for all chocolate-melting recipes, I always always always melt my chocolates using a makeshift double boiler over low heat – it heats the chocolate up a lot slower, but it also gives me less anxiety. I take it as a fair trade off.

If you’ve never made fudge (like me) before, I just want to warn you that when you melt the chocolate chips with the condensed milk, the mixture is going to be thick. I was expecting the mixture to be nice and smooth and runny like melted chocolate, but nooooo… it was thick. So thick that the only good utensil to stir it with is with a sturdy wooden spoon.. and that if you stir it constantly, your arm is going to get tired. I initially thought my chocolate had seized up on me, and I started to get very frustrated. Mind you this was at 9:30 a.m. and I’m pretty sure Brian decided to stay the heck away from the kitchen for the rest of the morning.

Moral of the story: chocolate chips + condensed milk = thick mixture (read: don’t freak out).

IMG_3025 copy

mint chocolate fudge
Print
Ingredients
  1. 2.5 cups semi-sweet chocolate chips, divided
  2. One 14-oz can sweetened condensed milk, divided
  3. 1.5 cups white chocolate chips
  4. 1 teaspoon peppermint extract
  5. 2-3 drops green food coloring
  6. 1 teaspoon shortening
  7. 1/2 cups Andes Creme de Menthe Baking Chips
Instructions
  1. Line an 8x8" baking pan with aluminum foil and spray generously with nonstick cooking spray. Set aside.
  2. Using a double boiler, melt 1.5 cups of the semi-sweet chocolate chips with 3/4 cups of the sweetened condensed milk over low heat. Stir occasionally until smooth, then pour mixture into the baking pan. Spread mixture evenly (I used an offset spatula), and place in the fridge to chill.
  3. While the chocolate mixture is chilling in the fridge, melt the white chocolate chips with the remaining sweetened condensed milk over a double boiler over low heat, stirring until smooth. Remove from heat and add in the peppermint extract and green food coloring. Stir until the mixture is even in color, then pour mint layer evenly over chilled chocolate layer and place back into the refrigerator.
  4. Melt the remaining 1 cup of semi-sweet chocolate chips and the shortening over a double boiler. Stir until smooth. Pour evenly over the mint layer, top generously with Andes Creme de Menthe baking chips, and chill in fridge for at least 3-4 hours until set.
  5. Cut into small squares before serving and store in the refrigerator for up to two weeks.
  6. Makes about 36 small squares
Adapted from Sally's Baking Addiction
Simple Everyday Food https://www.simpleeverydayfood.com/
Even though I’m not a big fudge fanatic, everyone who were able to get their hands on a little piece of this decadent minty goodness all said it was phenomenal!

Recipe adapted from Sally’s Baking Addiction

© Simple Everyday Food. All images & content are copyright protected. Please do not use any of my images without prior permission. If you want to republish this recipe, please re-write the recipe in your own words, or kindly link back to this post for the recipe.

Sharing is caring! Email this to someonePrint this pagePin on PinterestShare on YummlyShare on FacebookShare on Google+Tweet about this on Twitter

I know I haven’t done one of these in months and months – will you forgive me? My last quarter in school was so hectic and busy that it seemed like my life was on autopilot – I simply went through the same motions every day in an attempt to stay above water.

Going to class, full time internship, studying for exams, getting homework done, finding (healthy) things to eat every day, coming up with ideas for blog posts, making food for blog posts, taking pictures for said food, finding time to blog about them, and taking care of the house and family (furry babies)… I barely had enough time to sleep. Someone told me sleep is for the weak. Who needs it anyway?!

Boy am I glad my life is kind of getting back to normal – here are some things that have been going on in my life latley…

1. 2014 WINTER OLYMPICS

           2014-winter-olympics-logo

Who else is excited for the XXII Olympic Winter Games that’s coming up in less than 10 days?! This girl sure is. I look forward to the 17-day festivities every four years – it’s way more exciting than any major sporting event in my little world. Forget the Superbowl, forget the Summer Olympics, and forget the FIFA World Cup – the Winter Games rank #1 on my all-time list. Short track and long track speedskating are definitely my two favorite events. It was the whole reason I got into the sport of speedskating to begin with 12 years ago. I remember watching the 2002 Salt Lake games in high school and immediately falling in love with the sport – I thought to myself, “this sport is so cool. I want to do that.” A few months later, I owned my very first pair of speedskates and never turned back since. What are your favorite events to watch? Snowboarding, skiing, bobsledding, skeleton, and luge are some of my other favorites… basically any sport that involves going down a track/slope in insanely fast speeds. (logo from thelogofactory.com)

2. READING FOR FUN

It has been a long time since I had the chance to sit down and read books “for fun”. I used to feel guilty about sitting on the couch for a few hours every night reading on my Kindle, simply because I felt like time spent reading should be better spent doing homework or studying or something “productive”. I have come to the conclusion that I simply cannot sit and relax for a night without feeling guilty. It’s a serious problem and I hate it. I hate sitting on the couch doing “nothing” (reading, watching TV) because I feel like I’m wasting time. Time that could be used to do productive things like studying, doing laundry, cleaning the kitchen, brainstorming recipe ideas, writing blog posts, or organizing my life. These two books are new additions to my Kindle library. I’ve already finished “The Husband’s Secret” and have just started “Divergent“. The Husband’s Secret is a super easy book to read – it’s one of those that you can finish within a day or two and will leave you thinking. Divergent is the first book of a trilogy, and it is coming out as a major motion picture this March, so I figured why not give it a try… supposedly it is sorta similar to the Hunger Games trilogy, which I liked, so I’m hoping I’ll like this one too.

the_husbands_secret  index 

3. KITCHEN MAKEOVER

If you follow me on Instagram, you’ll know that we are currently in the process of giving our kitchen a makeover. A few months ago, it started with new appliances after our refrigerator decided it was time to die on us. Then a few weeks ago, we installed our new granite countertops along with a new sink and faucet. Then we bought a few dozen sheets of glass/stone mosaic backsplash, so getting that installed would be next on the agenda.

4. MY INSTAGRAM ADDICTION

“Hi, I’m Amy. And I’m addicted to Instagram.” Seriously, out of all the available social media networks that I’m a part of (Facebook, Twitter, Pinterest, LinkedIn), Instagram has got to be my favorite. I love being able to document my everyday life through pictures with a simple caption. I also love following a variety of people that I normally wouldn’t follow on Twitter simply because, who would want to scroll through a bunch of words when they can scroll through a bunch of fun pictures instead? It’s fun to show friends and family a glimpse of my everyday life, and seeing what other people’s lives are like in return. (that sounded just a tad creepy, but I promise I’m not a stalker!)

5. LIFE PLANNER

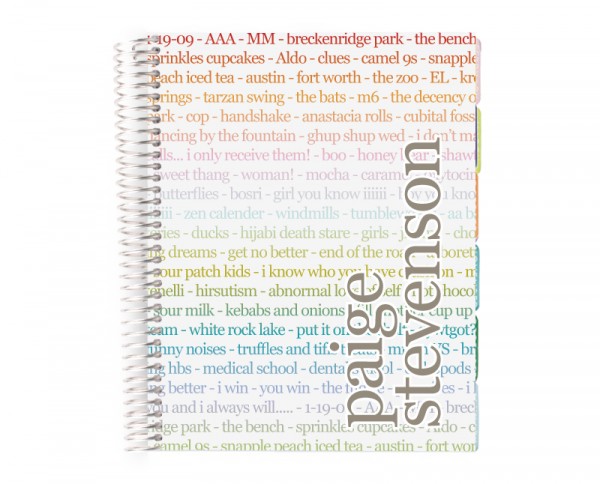
Even though I’m now done with school and it seems like there’s nothing worth writing in a planner other than the days that I work, I still catch myself feeling lost and overwhelmed without one. Although I consider myself a tech savvy individual and it’s easy and convenient to simply put things down on my computer’s calendar and have it synced to my phone, there’s still something about being able to physically write things down on a traditional planner that makes me feel a little bit more organized. Like I have my life together. And for that reason, I decided to get a Life Planner this year, after hearing so many wonderful things about it from the blogging world. It doesn’t hurt that the pretty colors make it that much more inviting and fun to use…. not that that was a factor in determining which one I ended up getting………[ahem]

p17uvr4bdg135q1bnjq1a9lnkuq39

6.  SUPERBOWL SUNDAY

Who will you be rooting for this Sunday when the Broncos take on the Seahawks? Our house is rooting for the SEAHAWKS, since, well, we’re practically in love with that city. We also have a few delicious finger foods planned and while Brian watches the game, I will be looking forward to all the commercials!

Have a great weekend everyone!

Sharing is caring! Email this to someonePrint this pagePin on PinterestShare on YummlyShare on FacebookShare on Google+Tweet about this on Twitter

I know we’re a good month into 2014 already – is it too late to start a list of new year resolutions? In case it’s not too late for me to hop on the new year resolutions train, I have compiled a list of things I’d like to improve on during the remaining 11 months of 2014.

 31525_20131210_124434_newyears11

On a side note – can you believe 2014 is already 1/12 over?! I can’t. I also can’t believe Target already has Easter candy out on their shelves. I mean c’mon, February isn’t even here yet. We haven’t even had Valentine’s Day either. And what’s up with rack fulls of summer bikinis? Seriously – Target does know that this is Minnesota, the land of 30-degree weathers up until May, right?

Oh yeah. Back to resolutions… unlike some of my friends, I didn’t come up with this list on New Years Eve. These aren’t necessarily the “typical” things people put on their list (i.e. stop smoking, go to the gym more, get in shape, etc… <— although those are good too!)… These are things that have been on my mind for quite some time now, and since I’m done with school and will be having a “regular” schedule to my life, this will be the year that I accomplish some of my goals that I’ve always wanted to do.

So in case you were wondering what goals I have for 2014, here they are:

  • Be better at creating photo memories of our lives. I have always had the tendency to go a little shutter happy (I get it from my mom) – I had to upgrade to a 16G iPhone because I simply had too many pictures on my old 8G phone that I didn’t have enough space to update my apps. However, I haven’t been developing pictures and creating photo books as much as I would like either, so all the pictures of our past 3 years together have been kept on my phone. Now that I have more time on my hands, I want to spend more time creating tangible photo book memories for us. As great as the digital age is, there’s still something about flipping though actual pictures and reliving memories that makes it better than looking at pictures on your computer screen. This leads me to my next resolution…
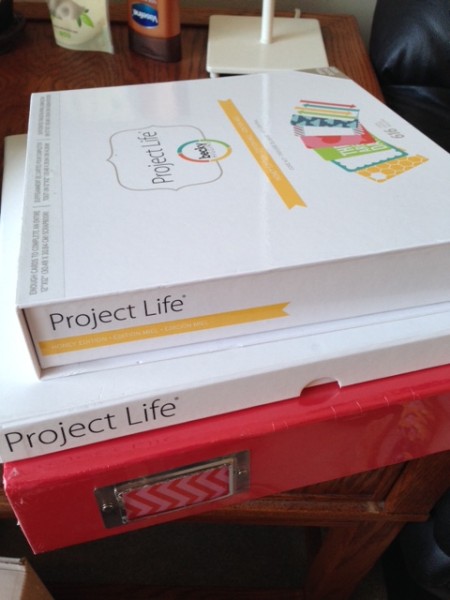
  • Project Life. After reading multiple other bloggers rave about how simple and easy this system is, I took the plunge and bought myself an album, a core kit, and some photo pocket pages! Once upon a time, I attempted the traditional scrapbooking thing, but quickly realized that 1) I didn’t have time to sit around cutting and pasting and designing a single page, 2) I found out that buying all the supplies quickly drains your bank account, and 3) I simply was not creative enough to come up with cool ways to “decorate” a page. My analytical, logical left-sided brain just was not capable of being creative. I’m also hoping the simplicity of PL will motivate me to take more pictures, develop more pictures, and take time out every month to document big things that happen in our lives.

              Project life

  • Be more adventurous. This year marks the first year that I officially enter the real world and no longer have to worry about homework, school, exams, and papers. I’m (optimistically) hoping that this means I will have more free time on my hands. Now that I can relax and enjoy my days off, I want to go out and do fun things outside…. things that I’ve always wanted to do for years (and things that I haven’t been able to do because of school). I’ve always wanted to go rock climbing. I’ve always wanted to go to a shooting range. I’ve been itching to go snowshoeing. I’ve always wanted to go for a long drive up north in the fall and take beautiful pictures of the fall colors. I want to go pick a pumpkin and carve it – I’ve never carved a pumpkin before (can you believe that?). I want to go mini golfing, lay out in the sun, have barbeques with friends, and take my bike out for a spin. The list can go on and on, but you get the idea.
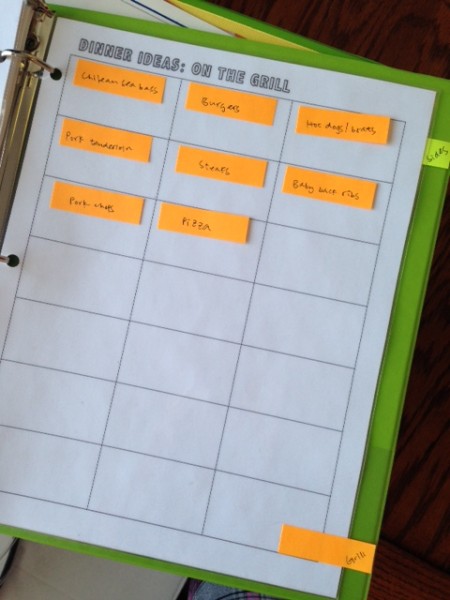
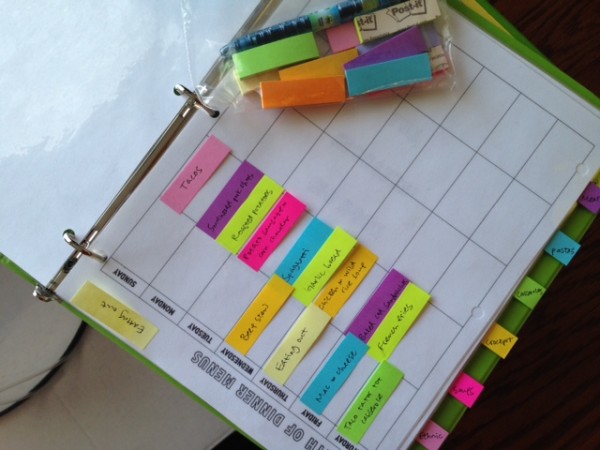
  • Menu plan. Although we do a pretty good job at menu planning every once in a while, I would like for it to be more consistent, since “what’s for dinner?” seems to be the world’s most difficult question in our house. I recently created a Menu Planning binder after a little inspiration from Pinterest, so I’d like to put that in use more and plan 1-2 weeks worth of dinner menus ahead of time to make life a little bit easier. This is what my menu planner looks like – of course, a little bit of colorful sticky notes doesn’t hurt either :)

             Menu 2

             Menu 3 

             Menu 1

  • Improve my food photography skills. This one is pretty self-explanatory. I know my photography skills have come a long way since SEF started a year ago, but I know I still have a long ways to go. It’s quite funny how much food (blogging, styling, photographing, and the making of food) has taken over my life – I think about it almost every single waking moment. When I wake up, I think about what I’m going to make today. Before I fall asleep, I think about what I need to make the next day. I also think about food nonstop throughout the day. When I watch TV, it’s usually about food. Even the books I read involve some aspect about food. I want to learn more about the lighting and styling of food, since we all eat with our eyes, right?
  • Learn how to make macarons. This actually has been on my bucket list for quite some time now. I have a few macaron recipes, but I just never really had the time courage to attempt them. Maybe this will be my year…
  • Learn how to make bread. The only bread I have ever made are my mom’s banana bread. I’m hoping I can expand my horizons and learn how to make homemade bread that isn’t just plain old banana bread.
  • Be better at brushing Bentley’s teeth on a regular basis. No one likes brushing their pet’s teeth. And 9 times out of 10, the dog hates it just as much as we do. Bentley’s definitely one of those dogs and brushing his teeth is a two-person job. All he does is lick the toothpaste and gnaw on the toothbrush. I swear most of the time his teeth isn’t properly brushed, and everybody is left annoyed and frustrated. I know how important it is to brush your pet’s teeth. I know that periodontal disease is the #1 dental disease in canines. I know boxers are especially prone to certain dental problems. And most of all, I know how much it can potentially cost (financially) if your pet’s teeth are not properly taken care of. For all those reasons, I want to be better at brushing Bentley’s teeth on a regular basis this year. Even if it seems like all he did was swallow the toothpaste, I have to remind myself that anything is better than nothing, and that plaque and tartar can form within hours of eating. Hopefully diligent teeth-brushing will save us some dental cleaning bills in the future.

So that’s it, folks! Those are my major goals for 2014. Do you usually come up with new year resolutions? What are they? Do you follow them?

Sharing is caring! Email this to someonePrint this pagePin on PinterestShare on YummlyShare on FacebookShare on Google+Tweet about this on Twitter