everyday food made simple

Food. It’s what brings people together in this world. It’s part of each country’s culture, and it also has a tendency to define and shape one’s eating habits and preferences later in life. And often times, it is attached to some sort of a memory.

photo(2)

The smell of certain foods as you’re walking down the street, the sight of certain foods you see on TV, magazines, or billboards, can all elicit some sort of a response deep down from the limbic system in your brain. When you eat certain foods, it may remind you of a special occasion or bring back certain memories.

Maybe it was the first time you tried something and liked it. Maybe it brought you back to your childhood. Maybe it reminded you of mom’s home cooking. Maybe you got really sick after eating it and never wanted to eat it again. Maybe you ate that same thing for three weeks in a row and would be totally fine if you’d never see that food for the rest of your life.

…you get the idea. What I’m basically saying is that food has the power to transport us back to a place and time, which is exactly what happened when I took the first bite of today’s recipe.
IMG_2989 copy

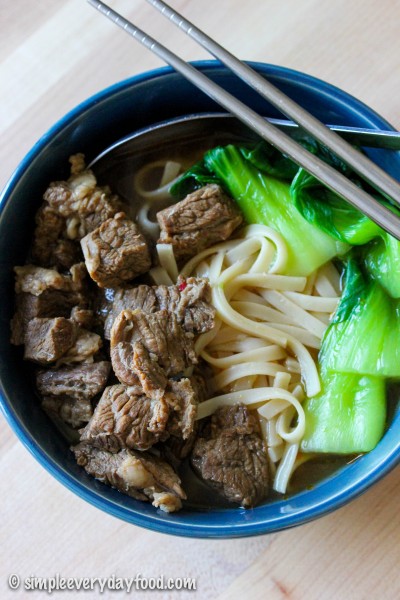
The Taiwanese beef noodle soup is something the Taiwanese is proud of. Along with bubble tea, it was originally created in Taiwan, and is often named in the top 5 things people need to try when visiting the country. It’s so popular that it has its own festival! Other famous items from the island include stinky tofu, oyster omelet, braised pork rice, shaved ice, pineapple cake…… I can go on and on, but I know that’s not why you’re here (but if you’re interested, you can get a list of must-eats here, here, and here).

Many older generations of Taiwanese people do not eat beef. The reason behind it is because Taiwan used to be a big farming country, and oxen and water buffalo were the main farm animals that helped the farmers with their crops every year. Naturally, many farming families found it wrong to eat the meat from those who had a hand in helping them grow crops, subsequently helping them put food on their tables.

Growing up, all my grandparents didn’t eat beef. My mom (until this day), also strongly insists that we don’t eat beef at all. My sister, my dad, and I have never been able to eat beef whenever we are out with my mom. It’s just how it is – no ifs, ands, or buts.

Even though my dad grew up with parents who didn’t eat beef, as he grew older, he would occasionally eat beef every once in a blue moon when the craving came. My dad, who knows me best in our family, always knew that I would also have cravings for beef that were often left unfulfilled because of our “house rules”.

I remember back in middle school, I would always stop by his work to head home together for the day. We would walk down the bustling busy city streets in the hot humid summer evenings together, his briefcase strap over his shoulder, and he would put his arm around my shoulder and say, “why don’t we go get some beef noodle soup for dinner?”

It was like a secret between the two of us – we would secretly go out for beef noodle soup, and we would never tell mom. This usually happened when my mom wasn’t able to make it home in time for dinner – whenever she asked what we had for dinner, we would always tell her, “oh, we just had some noodles, that’s all.” We were sneaky like that, and he was my partner in crime… we were little rebels who broke mom’s rules together.

I’m pretty sure my mom never found out about our rule-breaking behaviors… I guess she does now – sorry mom!

Anyway, the whole point of walking dragging you down memory lane is to tell you that this noodle soup is divine. The moment I took that first sip of the broth, I was transported back to 10 years ago, secretly eating beef noodle soup at some mom-and-pop shop with my dad. This recipe is spot-on on flavor… I was in heaven.
IMG_2999 copy

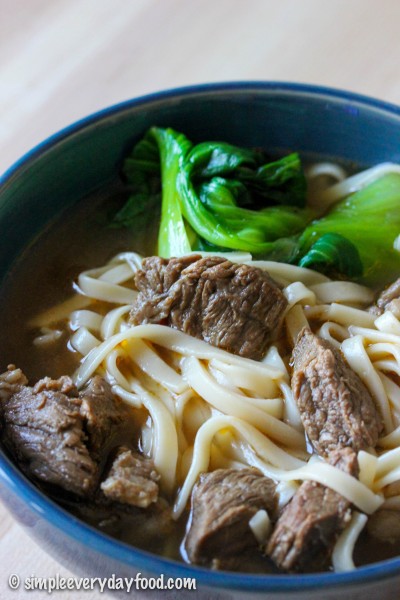
The broth is nice and salty, the beef is tender with just the right amount of fat on it, and the noodles are nice and chewy. It really is the perfect combination! The ginger, garlic, peppercorns, star anise, soy sauce and the doubanjiang are the base for the broth that you slowly cook your beef in for the next 2.5 hours – the smell will make your mouth water, but it’s 110% worth the wait!

I chose to cook the noodle in a separate pot. I also cooked some baby bok choy to go with it as well. If you can’t get your hands on baby bok choy, some spinach or napa cabbage would work too. Once everything is ready to be served, then place the noodles in a large bowl, and ladle the beef and broth into the bowl. Top with your veggies, and you’ve got yourself a bowl of authentic Taiwanese beef noodle soup!

IMG_2998 copy

Next time my parents come visit, I’m going to make this to share with my dad… behind my mom’s back, of course :)

taiwanese beef noodle soup
Print
Ingredients
  1. 3 tablespoons EVOO, divided
  2. 2-2.5 lbs boneless beef chuck, cut into 1" cubes
  3. 6 large slices of ginger
  4. 6 cloves of garlic, smashed
  5. 2 medium plum tomatoes, finely diced
  6. 2 tablespoons granulated sugar
  7. 1 tablespoon Sichuan chili bean paste (doubanjiang - I found mine at the local Asian grocery store)
  8. 1 cup Chinese rice wine
  9. 1 tablespoon black peppercorns
  10. 2 whole star anise cloves
  11. 3/4 cup soy sauce
  12. 2 and 1/2 quarts water
  13. 2 lbs Asian wheat noodles, cooked
  14. A handful of baby bok choy, spinach, or napa cabbage, if desired
Instructions
  1. Heat 1 tablespoon of EVOO in a large, heavy-bottomed pot (I used a Dutch oven) over medium-high heat. Add the beef to the pot in a single layer and cook undisturbed for 3-4 minutes until browned. Then stir and cook until all the sides are nicely browned. Transfer to a plate and repeat the process again with 1 tablespoon of EVOO and the remaining beef. Transfer beef to the plate and set aside.
  2. Add the remaining tablespoon of EVOO to the same pot and heat over medium-high heat. Add in the sliced ginger and garlic cloves, stirring frequently until fragrant, about 2-3 minutes. Add in the diced tomatoes and stir for another minute. Then add in the sugar and stir until the sugar is dissolved. Finally, add in the chili bean paste (doubanjiang) and stir until the mixture starts to bubble.
  3. Add the beef back to the pot, then add the rice wine and cook for 1 minute. This would be a good time to scrape up all the yummy brown bits crusted on the bottom of the pot. Add in the star anise, peppercorns, soy sauce, and water. Bring the mixture to a boil, then reduce the heat to a simmer, cover, and cook for about 2.5 hours, or until the beef is tender.
  4. Using tongs, remove the all the beef cubes from the broth and set aside. Carefully strain the soup over a mesh strainer into another similarly sized pot to catch the ginger, garlic, star anise, etc. Pick up any small beef cubes from the strained mixture, then return the beef cubes back into the broth.
  5. If desired, heat the soup back up over medium heat and wilt some greens with the soup.
  6. When ready to serve, place noodles on the bottom of individual serving bowls. Ladle the soup and beef chunks into bowls. Serve immediately.
  7. Serves 4-6 people
Adapted from Serious Eats
Simple Everyday Food https://www.simpleeverydayfood.com/
Recipe adapted from Serious Eats

© Simple Everyday Food. All images & content are copyright protected. Please do not use any of my images without prior permission. If you want to republish this recipe, please re-write the recipe in your own words, or kindly link back to this post for the recipe.

Sharing is caring! Email this to someonePrint this pagePin on PinterestShare on YummlyShare on FacebookShare on Google+Tweet about this on Twitter

A few weeks ago, the temperature here in the Twin Cities Metro area dropped all the way down to -20 degrees (-35 with the windchill factor). If you follow me on Instagram, you were probably sick of seeing me post pictures of how cold it was.

photo 2

(note the -61 degree F wind chill factor)

Needless to say, I was not at all thrilled.

All I craved were something sweet and decadent for breakfast, hot steaming coffees throughout the day, and hearty soups and warm comforting casseroles for dinner. That’s when I decided cinnamon rolls sounded like the perfect breakfast idea for a cold snowy morning.

These cinnamon rolls can easily be make the night before. You let it sit on the counter to rise overnight, place it in the oven for 30 minutes the next morning, and voila! Warm steamy gooey cinnamon rolls drenched in a sweet sticky glaze, ready to be devoured. You can also make these the morning of, but let’s face it – why get up early to make breakfast when you can get it ready the night before and spend an extra hour or two curled up in warm blankets the next morning?!

IMG_2578 copy

IMG_2573 copy

I know a lot of people are afraid of working with yeast – I’ll admit it, I was too… until now. I’ve always felt like yeast is a tricky little thing to bake with. It just seemed like a very sensitive ingredient… if you don’t pay enough attention to it, your whole plan might fail. However, these cinnamon rolls are suuuuuper easy! Even I, a making-anything-with-yeast-rookie was able to successfully execute this recipe – which means that there’s not excuse you won’t be able to!

I think my favorite part of my first-ever-cinnamon-roll-making-experience was the smell of these rolls before and during the baking process. I absolutely loved waking up to the sweet smell of rising yeasty dough, and the fact that it made my house smell like a Cinnabon factory while they cooked in the oven.

IMG_2555 copy

Hot, gooey, pillowy, soft, melt-in-your-mouth goodness, complete with a sweet vanilla glaze that will have you licking every single one of your fingers afterwards!

IMG_2591 copy

homemade overnight cinnamon rolls
Print
For the rolls
  1. 2 and 3/4 cups all-purpose flour
  2. 3 tablespoons granulated sugar
  3. 1 teaspoon salt
  4. 1 package of active dry yeast
  5. 1/2 cup water
  6. 1/4 cup milk
  7. 2 and 1/2 tablespoons unsalted butter
  8. 1 egg, at room temperature
For the filling
  1. 3 tablespoons unsalted butter, softened to room temperature
  2. 1 and 1/2 heaping tablespoons ground cinnamon
  3. 1/4 cup granulated sugar
For the glaze
  1. 1 cup powdered sugar
  2. 1-2 tablespoons milk
  3. 1 teaspoon vanilla extract
Instructions
  1. Set aside 1/2 cup flour. In the bowl for an electric mixer, combine the remaining flour, sugar, salt, and yeast together. Stir until combined. Attach the dough hook attachment onto your mixer.
  2. In a medium microwave-safe bowl, heat the water, milk, and butter together in the microwave until the mixture is hot to touch and the butter is melted. Pour the butter mixture into the flour mixture and stir on medium speed. Then add the egg and only enough of the reserved flour to make the dough. I used the entire 1/2 cup, but you may not use it all. You'll know you've added enough when the dough is soft, pulls away from the sides of the bowl, and is no longer sticky.
  3. On a lightly floured surface, knead the dough for 5 minutes. Place the dough ball in a lightly greased bowl, making sure all surfaces of the dough ball is lightly greased. Let sit for 10 minutes.
  4. While your dough rises, make the filling by tossing the ground cinnamon and sugar together in a small bowl.
  5. After the 10 minutes, roll out your dough into roughly a 14"x8" rectangle. Spread the softened butter all over. Sprinkle the cinnamon sugar mixture on top - be generous! Add more if needed.
  6. Roll up the dough tightly and cut into 10 even pieces, about 1.5" each. Place into a lightly greased 9" pie pan, making sure you leave enough room between each roll for it to rise.
  7. Loosely cover the pan with aluminum foil and let it sit overnight, up to 12 hours, at room temperature. The rolls should have doubled in size when you check on them the next morning.
  8. When you're ready to bake them the next morning, preheat the oven to 375 degrees. Bake for 25-27 minutes, covering the top with aluminum foil 15 minutes into baking to prevent excessive browning on top.
  9. While the rolls are baking, make the glaze by mixing the powdered sugar, 1 tablespoon of milk, and vanilla extract in a small bowl. Add more milk if the glaze is too thick.
  10. When the rolls are done baking, remove from oven and drizzle them generously with the glaze. Rolls are best served warm and on the same day, even though they can be stored in an airtight container for up to 3 days.
  11. Makes 10 rolls
Adapted from Sally's Baking Addiction
Simple Everyday Food https://www.simpleeverydayfood.com/
IMG_2563 copy

Now that I have conquered my fear of baking with yeast, don’t be surprised if you see more bread, pizza dough, and sweet rolls recipes on here in the future :)

Recipe adapted from Sally’s Baking Addiction

© Simple Everyday Food. All images & content are copyright protected. Please do not use any of my images without prior permission. If you want to republish this recipe, please re-write the recipe in your own words, or kindly link back to this post for the recipe.

Sharing is caring! Email this to someonePrint this pagePin on PinterestShare on YummlyShare on FacebookShare on Google+Tweet about this on Twitter

IMG_2656 copy 

Just because the holiday season was sooooo last year, doesn’t mean that we should wait another 11 months to start making anything involving peppermint and chocolate. I have stocked up enough Andes peppermint baking chips and Hershey’s mint chocolate chips to last for the next 3-4 months.. so don’t be surprised if you see a post or two (or three… or four) about mint chocolate desserts on SEF this spring!

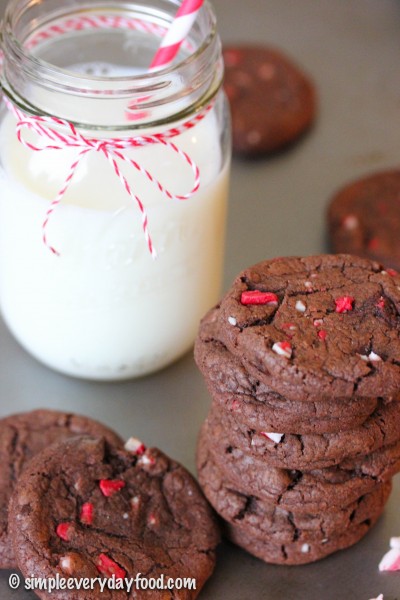
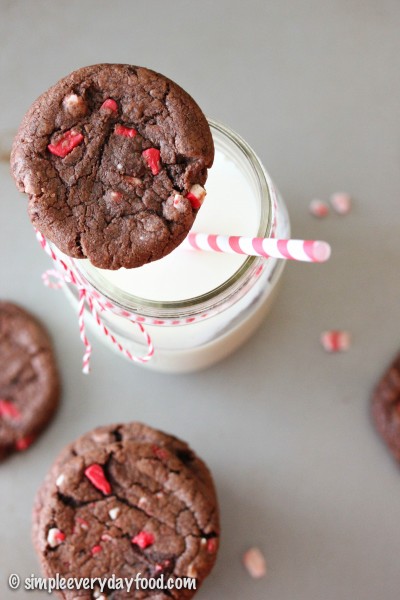
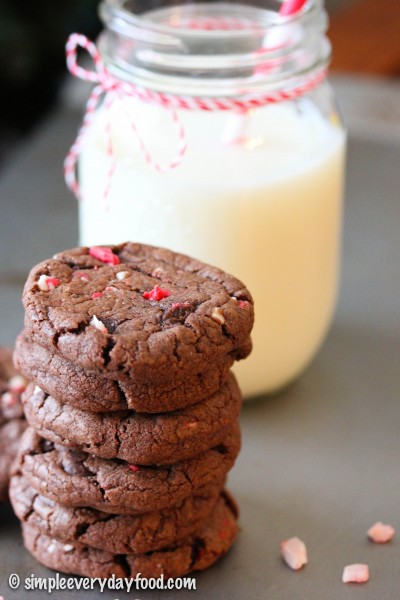
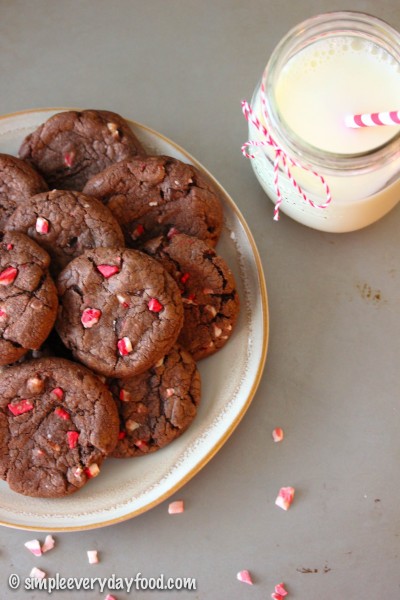
Remember these amazingly decadent gooey bars I made a while back? Well, today I have created a cookie version of those bars, and they’re equally as delicious! It’s a chocolate cookie base with tons of crunchy peppermint chips sprinkled throughout, so you’re guaranteed plenty of crunchy minty chocolatey goodness in each bite!

IMG_2660 copy

IMG_2658 copy

I also added extra semi-sweet chocolate chips into the batter simply because, well, you just can’t have too much chocolate in a cookie! Although it’s not required, it is highly recommended since it makes the chocolate flavor even more pronounced (read: even more amazing).

Soft, chewy chocolate cookies with bits of mint crunchiness in each bite – I bet you won’t be able to eat just one!

IMG_2674 copy

Just like all my other cookie recipes, I took these out 2 minutes prior to the regular recommended baking time, gently pressed the tops with the back of a fork, and put them back in the oven to cook for another 1-2 minutes. I do this a lot for cookies that don’t naturally spread out a whole lot during their time in the oven, just to achieve a nice crinkly cracked top in the end. I have tried just pressing them down after removing them from the oven completely, but I realized that they the end results aren’t as nice as taking them out after cooking them for 80% of the recommended time.

peppermint chocolate pudding cookies
Print
Ingredients
  1. 1 cup (2 sticks) unsalted butter, softened to room temperature
  2. 3/4 cup packed brown sugar
  3. 3/4 cup granulated sugar
  4. 2 eggs, at room temperature
  5. 2 teaspoon vanilla extract
  6. 1 teaspoon salt
  7. 1 teaspoons baking soda
  8. 1 tablespoon hot water
  9. 2 and 1/4 cups all-purpose flour
  10. 1/4 cup dark cocoa powder
  11. 3.9 oz instant chocolate pudding mix
  12. 1 cup Andes peppermint baking chips
  13. 1 cup semi-sweet chocolate chips
Instructions
  1. Preheat oven to 350 degrees. Line baking sheets with parchment paper or silicon baking mats.
  2. In a large bowl, combine the flour, salt, cocoa powder, and pudding mix. Gently mix with a spatula and set aside.
  3. Using an electric mixer, beat the butter on medium high speed until smooth. Add in the sugars and beat until light and fluffy. Add in the eggs, one at a time, mixing well in between additions.
  4. In a small bowl, dissolve the baking soda in the hot water. Add the baking soda mixture to the butter mixture. Then add in the vanilla. Mix well.
  5. Slowly add in the dry ingredients into the mixer bowl. Mix under medium speed until combined. Add in the baking chips and chocolate chips and mix some more.
  6. In heaping tablespoons, scoop the cookie dough on the baking sheets. Bake for 10 minutes, slightly press the tops with a spoon or a fork, and bake for another 1-2 minutes. Remove cookie sheets from oven and let cool for at least 5 minutes before transferring cookies to a wire cooling rack to cool completely. Store in an airtight container for up to 7 days.
  7. Makes about 40 cookies
Adapted from Something Swanky
Simple Everyday Food https://www.simpleeverydayfood.com/
IMG_2651 copy

I actually decided to freeze half the batch of cookie dough balls for later – not only would they be readily available when I’m craving cookies at a later date, I was hoping it will limit how many cookies I eat a day… note to self for next time: if Amy wants to eat 10 cookies a day, Amy will eat 10 cookies a day, regardless if there are 10 or 20 cookies laying around the house.

Well, at least I have enough peppermint baking chips for a few more batches!

Recipe adapted from Something Swanky

© Simple Everyday Food. All images & content are copyright protected. Please do not use any of my images without prior permission. If you want to republish this recipe, please re-write the recipe in your own words, or kindly link back to this post for the recipe.

Sharing is caring! Email this to someonePrint this pagePin on PinterestShare on YummlyShare on FacebookShare on Google+Tweet about this on Twitter

Warning: if you’re not a big dog person, this post might not be for you…..

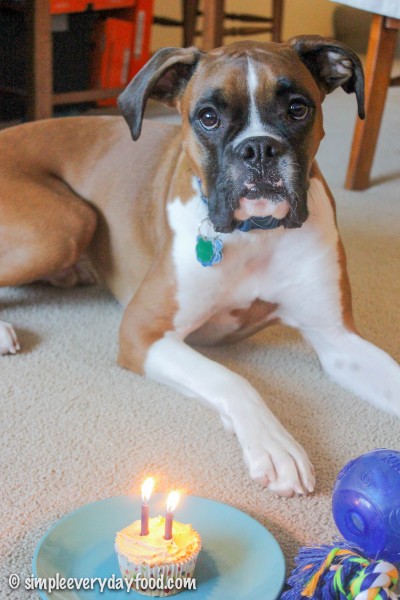
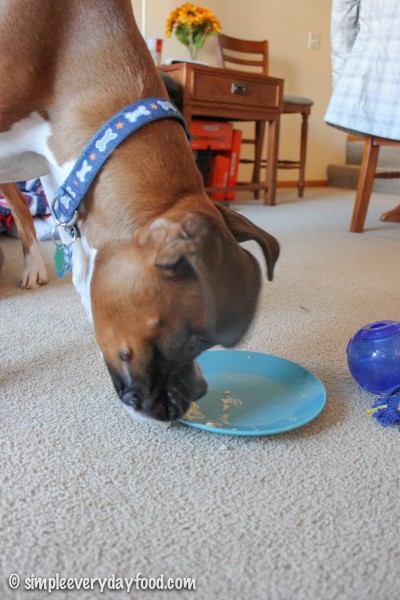
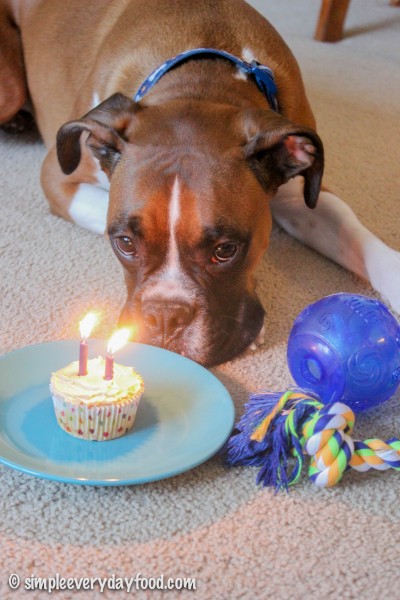
My baby boy turned TWO today! And I made him cupcakes to celebrate.

IMG_2904 copy

IMG_2929 copy

IMG_2941 copy

….please tell me I’m not the only one who makes cupcakes for their dog’s birthday…..

It really seemed like not that long ago we were making the trip to Hutchinson to bring our first ever puppy home… he was so tiny! Brian and I never owned a puppy before, so we weren’t really sure what we were getting ourselves into. Despite a few rough patches along the road, we are extremely pleased at how great of a dog we have raised together.

Bentley was only 7 weeks when we brought him home, and a few of his favorite things included sleeping…

sleeping 2

…sleeping, sleeping, and more sleeping.

sleeping

sleeping 3

And during the rare hours he would be awake, he’d be busy playing with his toys.

george

ring

Fast forward two years later, the little sleepy boxer puppy we once had has grown into a petite 55-lb dog with endless energy with a cheerful happy attitude, a protective instinct, endless curiosity, and the desire to play for hours.

rope

tire

pretzel

floppy ears

He does his best to be my little helper in the kitchen when I’m cooking and baking, so today I wanted to make something special for my little guy to celebrate another year of being part of our family.

IMG_2902 copy   IMG_2898 copy

IMG_2926 copy

IMG_2934 copy

IMG_2950 copy  IMG_2973 copy

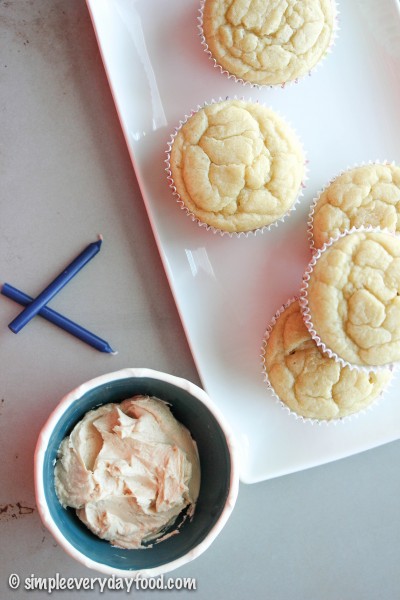
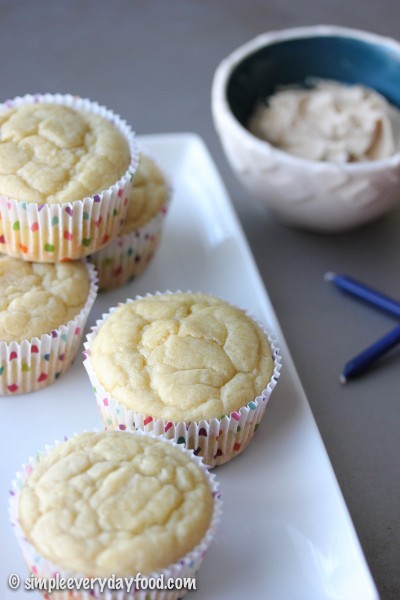
These cupcakes are super easy to make – it only requires one bowl and a whisk. Add everything in the bowl in no particular order, whisk until combined, spoon into cupcake liners, bake in the oven, and you’re done. It’s that easy. This recipe only makes 5 decent sized cupcakes, which is great because 1. no dog in the world needs to eat that many cupcakes at once, and 2. it’ll be easier to store them later on. I usually just share the treats I make with Bentley’s puppy friends so there will be less of it sitting around the house.

Oh, and please please please don’t feed your dog all 5 cupcakes in one sitting – it can cause tummy upsets and can potentially make your dog very sick (just think of the last time you inhaled 5 cupcakes in a row… I bet you didn’t feel too good afterwards). And if your dog has certain dietary restrictions, please consult your veterinarian before making these :)

Bake these in the oven for about 15-17 minutes, and make the frosting while you’re waiting. It is important that the cupcakes and the frosting get stored separately. The frosting contains Greek yogurt, which cannot be left out in room temperature for long, so store it in the fridge, while the cupcakes can be stored at room temperature. Simply frost the cupcakes right before serving – your dog will love you forever…. I promise.

IMG_2943 copy

doggie cupcakes with peanut butter frosting
Print
For the cupcakes
  1. 1/2 cup all-purpose flour
  2. 1 teaspoon baking powder
  3. 1/3 cup no sugar added applesauce
  4. 1/3 cup canola oil
  5. 1 egg, at room temperature
  6. 1 tablespoon honey
  7. A pinch of cinnamon
For the frosting
  1. 3 tablespoons low-fat plain Greek yogurt
  2. 1 and 1/2 tablespoons peanut butter
Instructions
  1. Preheat the oven to 350 degrees. Line 5 cupcake wells with cupcake liners and set aside.
  2. In a medium bowl, combine all the ingredients and whisk until thoroughly mixed. Spoon cupcake batter into the cupcake liners, filling each well about 3/4 full.
  3. Bake for 15-17 minutes, or until an inserted toothpick comes out clean. Let cupcakes cool for at least 10 minutes, then remove onto wired cooling rack to cool completely.
  4. While the cupcakes are cooling, make the frosting by mixing the yogurt and the peanut butter together until smooth.
  5. Store cupcakes and frosting separately*, and frost cupcakes right before serving.
  6. Makes 5 cupcakes
  7. *store cupcakes in an airtight container in a dry cool place for up to 5 days. Store frosting in a separate airtight container in the refrigerator.
Adapted from The Scrumptious Pumpkin
Simple Everyday Food https://www.simpleeverydayfood.com/
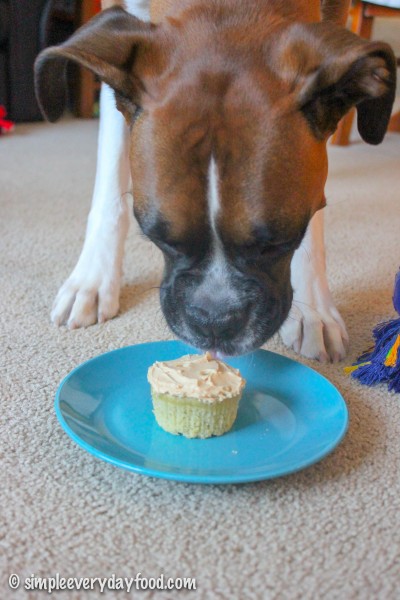
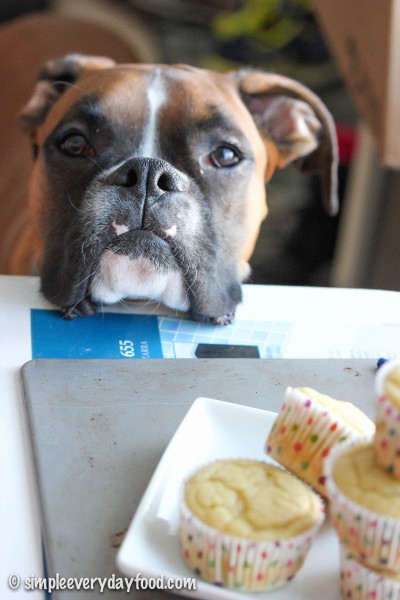
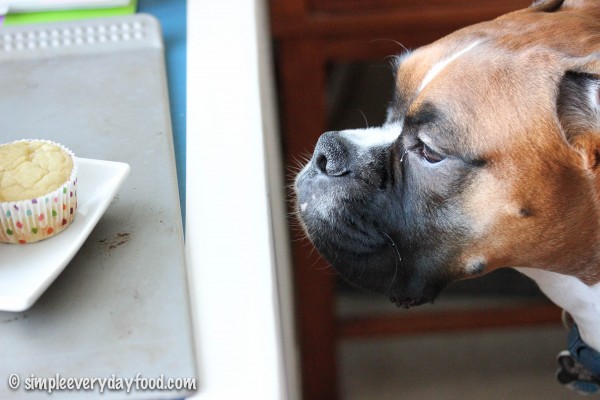
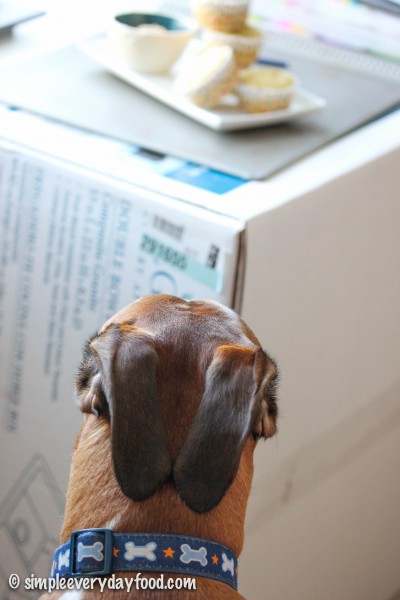
The hardest part of this recipe is listening to your dog whine as these cupcakes cool. It’s seriously like they know these cupcakes were made specifically for him.

IMG_2916 copy

IMG_2918 copy

IMG_2920 copy

Happy birthday Bentley! Thank you for being such a great puppy the past two years – we sure are lucky to have you in our lives!

IMG_2947 copy

photo(1)

Recipe adapted from The Scrumptious Pumpkin

© Simple Everyday Food. All images & content are copyright protected. Please do not use any of my images without prior permission. If you want to republish this recipe, please re-write the recipe in your own words, or kindly link back to this post for the recipe.

Sharing is caring! Email this to someonePrint this pagePin on PinterestShare on YummlyShare on FacebookShare on Google+Tweet about this on Twitter

This past season marks the last season the Minnesota Vikings will be playing in the Metrodome. In the next few months, they’re tearing it down and will be building a brand spankin’ new stadium in downtown Minneapolis. I sure hope the new stadium has better food than the Metrodome! So for the next few seasons, die-hard Vikings fans will have to brave the elements and the freezing temperatures if they want to watch their beloved Vikings play. No thank you – I’ll only watch football outdoors if it’s above 50 degrees. If it’s below 50, then I’d rather sit in the comfort of my own home in my PJs watching the game where the commentators tell me what’s going on, there are lines drawn on the screen to tell me where the yard lines are at, and I don’t have to wait in line just to use the bathroom.

This chili recipe is a perfect game day food! It’s perfect for that football party you’re hosting this playoff season or for tailgating outside (you know, if you’re into standing outside in the sub-freezing temperatures thawing out your beer by holding it over a fire).
IMG_2619 copy

This is the only chili recipe I have ever used. I don’t know if I would ever consider trying out a new recipe, simply because this one is already perfect (in my opinion)… so why fix something if it ain’t broke? If you’re like me and already have a tried and true chili recipe, I won’t blame you if you’re not up to changing things up. Kudos to you if you’re all for trying new things, though. However, if you’re still out there searching for a good chili recipe, you should totally give this a try!

IMG_2611 copy

simple (and super delicious) turkey chili
Print
Ingredients
  1. 2 tablespoons EVOO
  2. 1.25 pounds ground turkey
  3. 1 medium onion, diced
  4. 1 green bell pepper, diced
  5. 2 cloves garlic, minced
  6. 1/4 cup chili powder
  7. 2 teaspoons dried oregano
  8. 1 and 1/2 teaspoons cumin
  9. Two 15-oz reduced sodium red kidney beans, drained and rinsed
  10. One 28-oz can petite diced tomatoes
  11. One 15-oz can reduced sodium tomato sauce
  12. One 10-oz bag frozen corn
  13. Salt and pepper
  14. Toppings such as sour cream, shredded cheese, if desired
Instructions
  1. Heat the EVOO in a large Dutch oven over medium-high heat. Brown the turkey, breaking it up into small pieces with a wooden spatula until cooked through. Then add the onions, bell peppers, and garlic into the pot. Cook until onions turn translucent, about 5 minutes. Add in the chili powder, oregano, 1/2 teaspoon each of salt and pepper. Stir and cook for another minute.
  2. Stir in the diced tomatoes, tomato sauce, beans, corn, 1.5 cups of water, and 2 more teaspoons of salt. Simmer over low heat for 30-45 minutes, or until beans are cooked through. Add more chili powder if needed.
  3. Ladle the chili into serving bowls. Top with toppings, if desired
  4. Serves 6
Adapted from Food Network Magazine
Simple Everyday Food https://www.simpleeverydayfood.com/
IMG_2617 copy

I used ground turkey instead of ground beef to make it a little healthier. I like to use products that claim “reduced sodium” or “no salt added” on the package to keep things on the healthier side. If you can’t find reduced sodium products, no worries either – the final product will taste just as good! I also added a few cans of red kidney beans because 1. chili just has to have beans in it, and 2. it’s cheap and filling and is a good source of protein and fiber. If you have a bean-hater in the house, simply omit it… or you can divide the chili into two pots prior to simmering everything and add just one can of beans (instead of two) in one of the pots. That way you’ll get two pots of chili – one with beans and one without beans :)

IMG_2613 copy

If you’re making this for hosting a football party, you can keep it warm by throwing it in a Crockpot and setting it on “warm”. Toppings are completely optional too – oyster crackers, shredded cheese, green onions, sour cream…. you can have a little “make your own chili” station for your guests to completely customize their bowl of chili.

Recipe adapted from Food Network Magazine

© Simple Everyday Food. All images & content are copyright protected. Please do not use any of my images without prior permission. If you want to republish this recipe, please re-write the recipe in your own words, or kindly link back to this post for the recipe.

Sharing is caring! Email this to someonePrint this pagePin on PinterestShare on YummlyShare on FacebookShare on Google+Tweet about this on Twitter