everyday food made simple

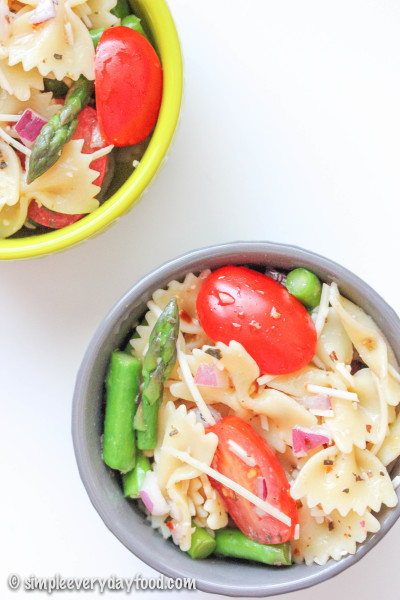
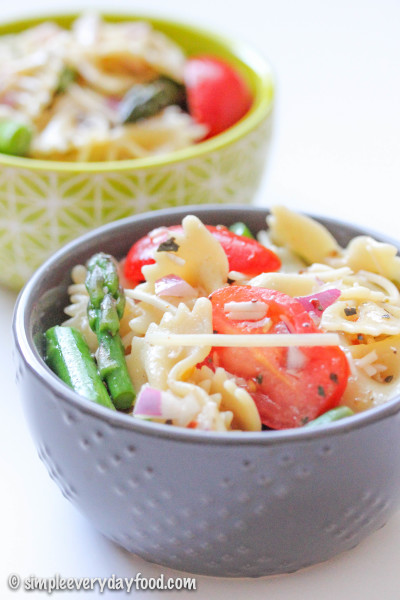
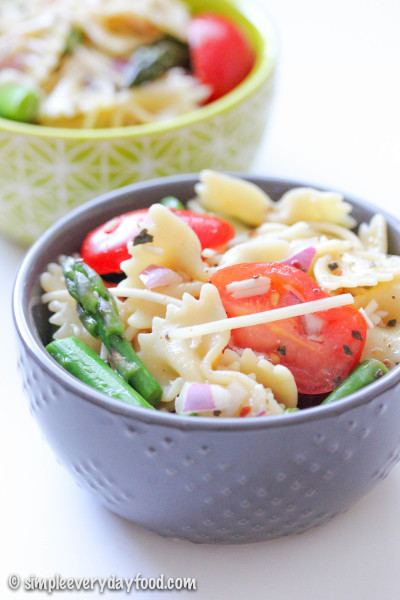
asparagus pasta salad

Just less than 24 hours ago, we came back home from a two-week long vacation in Taiwan to visit my family. We had so much fun doing touristy things, taking little vacations during our vacation, eating everything in sight, visiting extended family, and spending time with my parents and my sister that I haven’t seen in years.

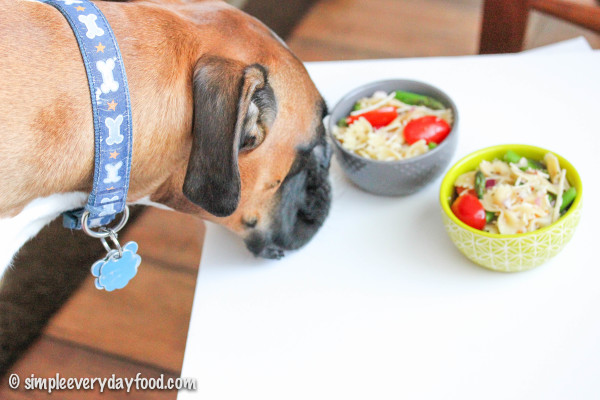
We were sad to leave, but we were also excited to hurry home and see my favorite boy. We sure missed him! But thank goodness for good friends who were willing to watch him and give him the love and attention he needed while we were gone.

asparagus pasta salad

asparagus pasta salad

We avoided the super hot and humid tropical weather this time around, but everyday was still a warm 80+ degrees with occasional rain storms and more than enough humidity.

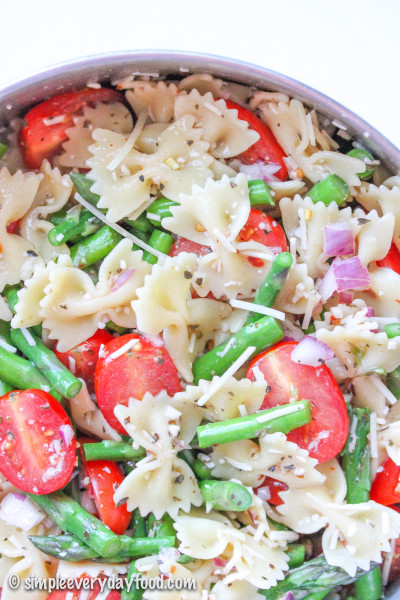
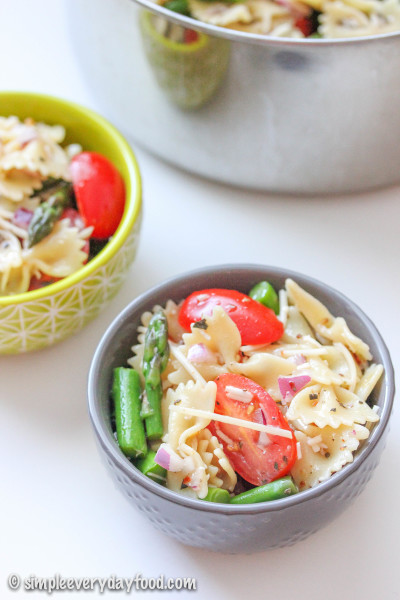
Some days when it was sunny and hot, all I craved for was some summery light pasta salad. Like this one, which happens to use lots of bright summer vegetables and dressed with a light Italian vinaigrette. It can be eaten as a light meal, a snack, or as a side dish; it can be eaten cold or at room temperature – it’s so perfect for summer!

asparagus pasta salad

asparagus pasta salad

Are you ready for a confession? I can’t remember if I’ve ever made pasta salad before.

Yep, you heard me right. I’ve made potato salad and creamy broccoli/cauliflower salad before, but never have I made pasta salad from scratch, let alone one with a homemade dressing.

As far as I remember, the only kind of pasta salad I’ve ever made were from boxes that come with a packet of seasoning mix… I should totally be ashamed of myself.

So to redeem myself from being judged, today’s simple pasta salad only requires a few ingredients; you probably already have most of the ingredients for the dressing sitting in your cupboard right now!

asparagus pasta salad

asparagus pasta salad

asparagus pasta salad     

pasta salad with italian dressing
Print
For the dressing
  1. 1/3 cup red wine vinegar
  2. 2 teaspoons lemon juice
  3. 2-3 cloves garlic, minced
  4. 1 teaspoon granulated sugar
  5. 2 teaspoons dried oregano
  6. 1/2 teaspoon crushed red pepper flakes, or more to taste (optional)
  7. 1/2 cup extra virgin olive oil
For the salad
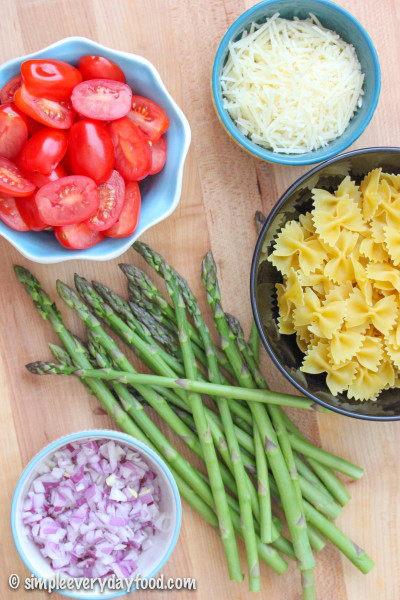
  1. 2-3 cups uncooked pasta (I used small bowtie pasta)
  2. 1 pound asparagus, cut into 1" pieces
  3. 2/3 cup diced red onions
  4. 2 cups grape tomatoes, halved
  5. 2/3 cup shredded Parmesan cheese
Instructions
  1. In a medium bowl, combine all the dressing ingredients and whisk. Set aside.
  2. Bring a pot of salted water to a boil over medium high heat. Add in the pasta for the amount of time as directed on the box, minus one minute. Stir occasionally. Add in the asparagus in with the pasta and cook for an additional minute. Drain and rinse pasta and asparagus under cold water to stop the cooking process.
  3. In a large bowl, combine the red onions, tomatoes, and Parmesan cheese, then add in the pasta and asparagus. Drizzle the dressing over the pasta salad and toss to combine. Pasta salad can be served cold or at room temperature.
  4. Serves 6-8
Adapted from Just A Taste
Simple Everyday Food https://www.simpleeverydayfood.com/
Recipe adapted from Just A Taste

© Simple Everyday Food. All images & content are copyright protected. Please do not use any of my images without prior permission. If you want to republish this recipe, please re-write the recipe in your own words, or kindly link back to this post for the recipe.

Sharing is caring! Email this to someonePrint this pagePin on PinterestShare on YummlyShare on FacebookShare on Google+Tweet about this on Twitter

FullSizeRender 8

1. Brian and I always joke that when we retire, we’re going to plan a road trip and travel across America. Apparently someone was reading our minds and came up with a perfect road trip for us.

2. This list kind of made me chuckle. I haven’t personally experienced a whole lot this, but I do catch myself talking a whole lot about the weather here on SEF. And for the record, the Minnesota State Fair is NOT stupid.

3. Looking for a summer book list? Here’s 16 books that apparently you should read and will love. I’ve read a few on here and have a few on my to-read list, but I don’t know if I would consider Gone Girl a personal favorite…

4. Healthy freezer-friendly breakfast sandwiches that can be made ahead of time? I foresee a lot of these in my future. I’m pretty sure I can eat breakfast sandwiches and breakfast burritos every morning for the rest of my life.

5. Pretzels are on my baking bucket list and I actually have a few pretzel recipes saved in my recipe box, but when I saw these sweet almond ones, I knew these would have to be the first ones I ever make.

6. I’m really really sad that our Kitchen Aid ice cream maker broke last year. Because this. I want to make this. Or can someone make this for me?

7. Scallops and shrimp and pasta? Holy yum. I need to make this sometime. Except I haven’t cooked with artichoke hearts before. I like spinach artichoke dip, so I think I’ll like it from a jar?

8. Here’s a pretty comprehensive list of some of the best food trucks in the U.S. – did your favorite make the list? Last summer we went to a food truck festival in Minneapolis that was loads of fun that I’m sure we’ll be doing again this year.

Have a good rest of the week, friends!

FullSizeRender 6

Sharing is caring! Email this to someonePrint this pagePin on PinterestShare on YummlyShare on FacebookShare on Google+Tweet about this on Twitter

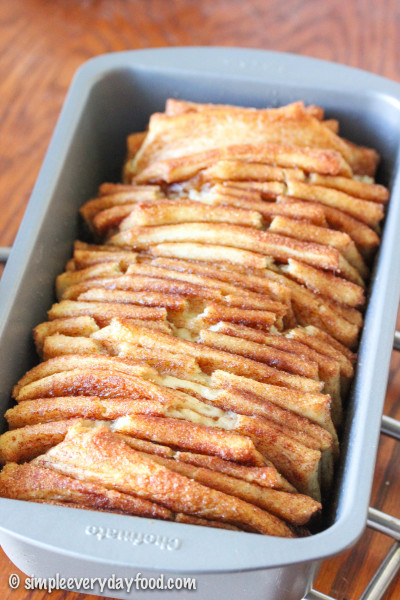
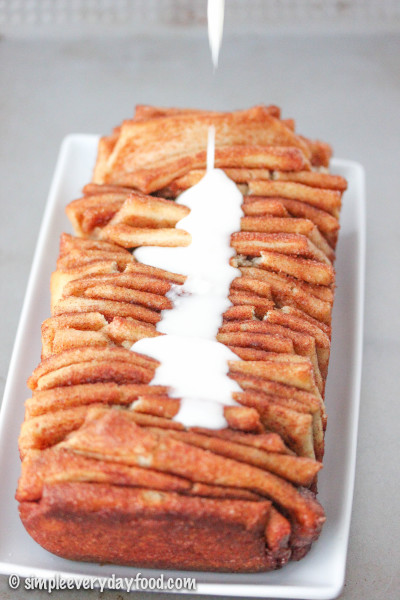
Let’s all pause for a moment and discuss how important it is for you to make these for breakfast this weekend. I’ve made a few variations of breakfast rolls that I’ve shared with you in the past (you can find them here, here, here, and here), but today we’re ditching the rolls and making something I’ve never made before… pull-apart bread.
IMG_4424 copy

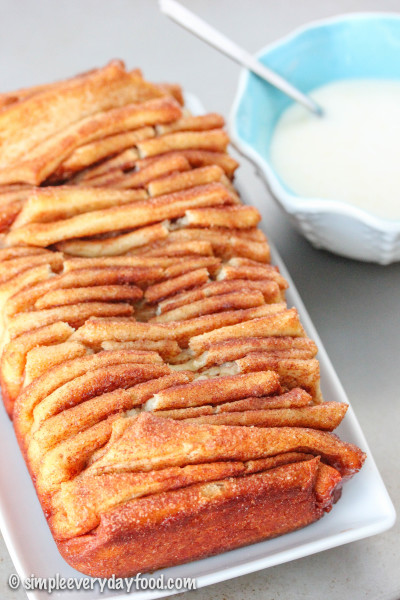
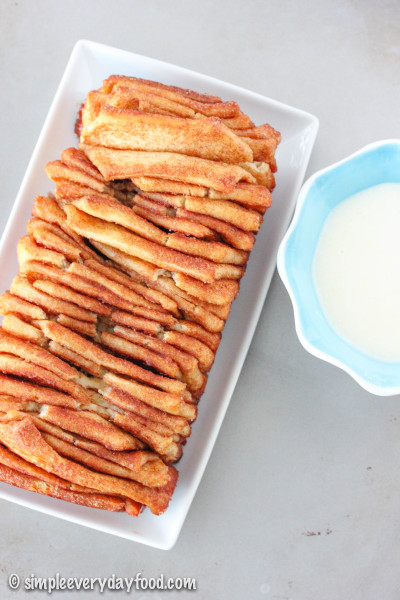
And before we get too crazy with the variations, let’s start with a simple and classic flavor: cinnamon + sugar with a vanilla glaze/dipping sauce.

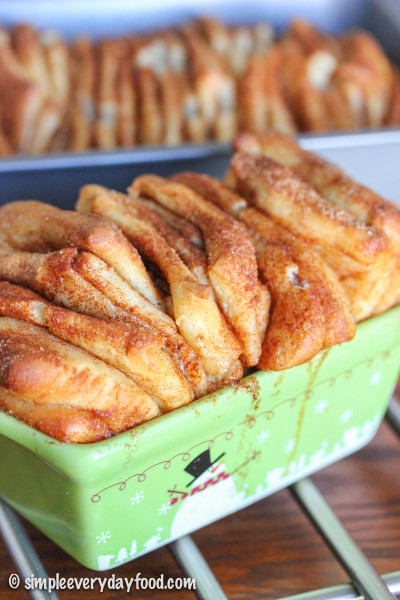
The beauty of the pull-apart bread is its non-uniformity. No matter how exact you cut all your dough squares, not every piece of those squares is going to rise in the same exact way. The result is this beautiful vertically layered bread with pieces sticking out in every which way, making it that much more fun to peel away a piece, dunking it in the sticky sweet glaze, and shoving it in your mouth.
IMG_4444 copy

IMG_4458 copy

I’ll forewarn you that this post is a little bit lengthy, but please don’t let the number of steps intimidate you or hold you back from making this! I took step-by-step photos for you to go along with each step (located at the end of this post) to make the instructions easier to understand. I also added a few comments of my own (which I italicized) based on my own preference for you to use as a reference. There’s a lot of “making and waiting” involved, but once you get things started it goes by fast. Please trust me when I tell you that you need to make this bread because it’s actually pretty easy to make and it’s so fun to eat!
IMG_4400 copy

IMG_4437 copy

On a semi-related note: this was my very first time taking step-by-step photos for a recipe that  required a few more steps than the usual posts that appear here on SEF, and it really made me appreciate all the talented food bloggers out there that include photos for each step in very post (my favorite is probably Simply Scratch – Laurie’s blog is beautiful and inspiring) – it really is a lot harder than it seems! It doesn’t help that my kitchen has zero natural lighting, so I had to run back and forth between the living room, dining room, and kitchen the entire time, trying to beat the sun and finding the best angle to shoot these photos.

Hats off to all the bloggers out there that take such wonderful step-by-step photos for people like me to admire and learn from.

cinnamon pull-apart bread
Print
For the dough
  1. 2 cups skim milk
  2. 1/2 cup vegetable oil
  3. 1/2 cup granulated sugar
  4. 1 teaspoon vanilla extract
  5. 2 and1/4 teaspoons (1 packet) active dry yeast
  6. 4 and 1/2 cups all-purpose flour, divided
  7. 1/2 teaspoon baking powder
  8. 1/2 teaspoon baking soda
  9. 2 teaspoons salt
  10. 1/2 cup (1 stick) unsalted butter, melted and cooled
For the cinnamon sugar mixture
  1. 1 and 1/2 cups granulated sugar
  2. 3 tablespoons ground cinnamon
  3. 1/2 teaspoon ground nutmeg
For the icing
  1. 1 and 1/2 cups powdered sugar
  2. 1/4 cup heavy whipping cream
  3. Pinch of salt
Instructions
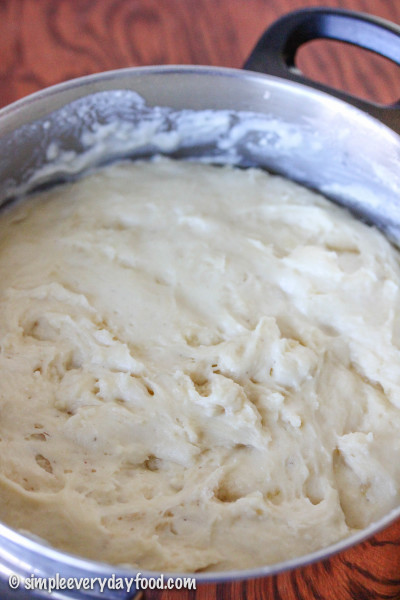
  1. To make the dough, combine milk, oil, vanilla extract, and 1/2 cup sugar in a large saucepan. Heat it until very hot but not boiling. Turn off heat and allow to cool slightly until it's just warm to the touch. Sprinkle in the yeast and add 4 cups of flour. Stir to combine, then put lid on the pot and allow to rise for 1 hour in a warm, draft-free area until doubled in size.
  2. During this time, generously coat a 9 x 5 x 3-inch loaf pan with the melted butter and set aside. In a medium bowl, combine the ingredients for the cinnamon sugar mixture and set that aside as well.
  3. After 1 hour, stir in additional 1/2 cup flour, along with the baking powder, baking soda, and salt. If dough is overly sticky, stir in up to an additional 1/2 cup of flour - I added in 1/4 cup increments. the dough should be slightly sticky but should not stick to your hands as you handle it.
  4. Roll out dough onto a floured surface into a roughly 12 x 20" rectangle. Brush on melted butter so that it covers all the dough (I totally didn't skimp on this step - the butter is what makes the cinnamon sugar mixture stick to the dough!).
  5. Sprinkle a generous coating of the cinnamon sugar mixture onto the buttered dough... it may seem like a lot, but let's face it - there's no such thing as too much cinnamon sugar! Reserve about 2-3 tablespoons of the mixture.
  6. Cut the dough vertically into approximately 2" wide strips (you'll get about 6-8 of 'em), then stack all the strips into one stack. Cut the stack of strips into 2" wide squares. Tilt your loaf pan vertically and start stacking your dough squares into your buttered loaf pan. Don't cram too many squares in your pan since you'll need to allow room for them to rise some more... you may have some squares leftover.
  7. Sprinkle the tops with more cinnamon sugar... because there's never enough of that stuff! Cover with a dish towel and allow to rise in a warm place for 30-45 minutes, or until dough have risen to double the size.
  8. In the meantime, preheat oven to 350 degrees. Place the pan in the oven and bake for 30-35 minutes or until the center is cooked through. Check dough at 20 minutes to make sure the top isn't browning too fast.. if it is, cover with aluminum foil for the remainder of the baking time.
  9. Remove the pan from the oven when it's done and let cool for 20 minutes. Run a knife along the edges and take the bread out of the pan and transfer to a serving plate. Mix together the icing ingredients and drizzle over the top*. Serve warm and enjoy!
Notes
  1. * If desired, you can reserve about half of the glaze and use it as a dipping sauce.
Adapted from The Pioneer Woman
Simple Everyday Food https://www.simpleeverydayfood.com/
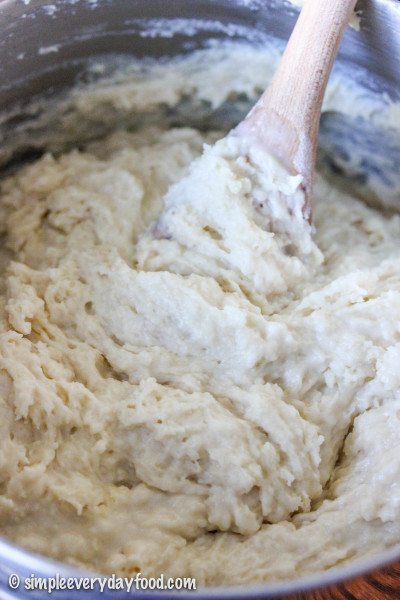
1. To make the dough, combine milk, oil, vanilla extract, and 1/2 cup sugar in a large saucepan. Heat it until very hot but not boiling. Turn off heat and allow to cool slightly (I made this before I purchased a candy thermometer and used the old-school touch-and-feel method. It’s “cool” enough when you can stick your hand in it without getting burned – think warm bath water). Sprinkle in the yeast and add 4 cups of flour. Stir to combine, then put lid on the pot and allow to rise for 1 hour in a warm, draft-free area until doubled in size (below are the Before and After shots).
IMG_4304 copy   IMG_4309 copy

2. During this time, generously coat a 9x5x3-inch loaf pan with the melted butter and set aside. In a medium bowl, combine the sugar, cinnamon, and nutmeg. mix, and set aside.

3. After 1 hour, stir in additional 1/2 cup flour, along with the baking powder, baking soda, and salt. If dough is overly sticky, stir in up to an additional 1/2 cup of flour – I added in 1/4 cup increments. the dough should be slightly sticky but should not stick to your hands as you handle it.

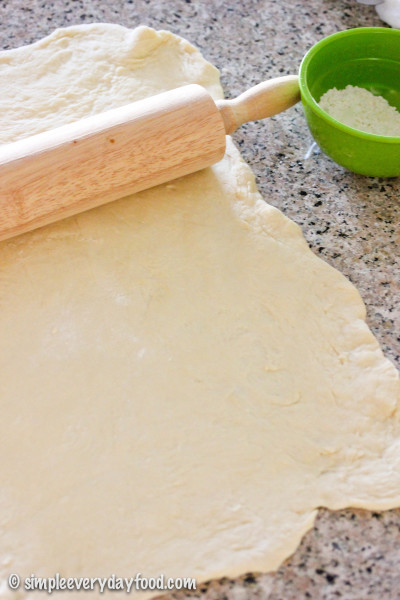
4. Roll out dough onto a floured surface into a roughly 12×20″ rectangle. Brush on melted butter so that it covers all the dough (I totally didn’t skimp on this step – the butter is what makes the cinnamon sugar mixture stick to the dough!).
IMG_4320 copy

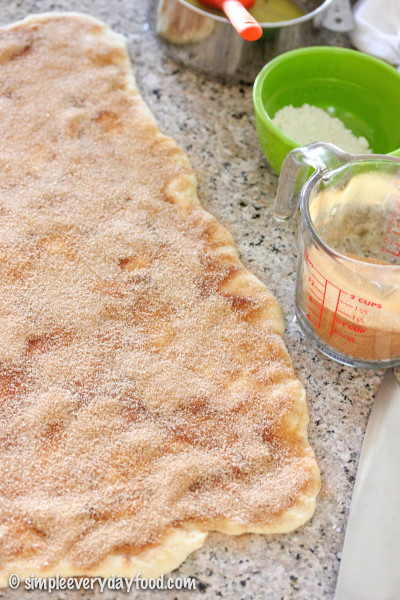
5. Sprinkle a generous coating of the cinnamon sugar mixture onto the buttered dough… it may seem like a lot, but let’s face it – there’s no such thing as too much cinnamon sugar! Reserve about 2-3 tablespoons of the mixture.
IMG_4331 copy

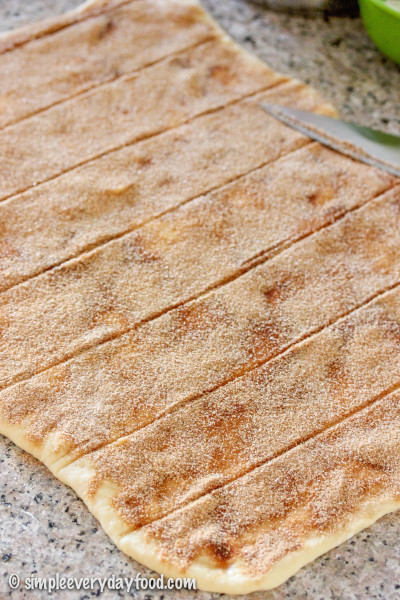
6. Cut the dough vertically into approximately 2″ wide strips (you’ll get about 6-8 of ’em)…
IMG_4339 copy

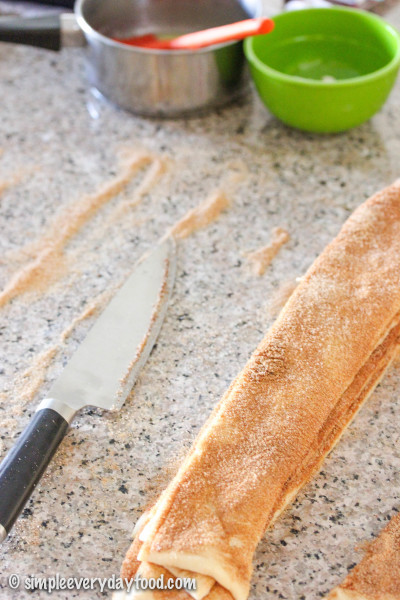
7. …Then stack all the strips into one stack.
IMG_4347 copy

8. Cut the stack of strips into 2″ wide squares (if you’re OCD like me, you’d take a ruler and measure and score marks on your dough prior to cutting. I also trimmed off the edges so I’m left with nicely uniformed squares… because uniformity is what makes my world go round).
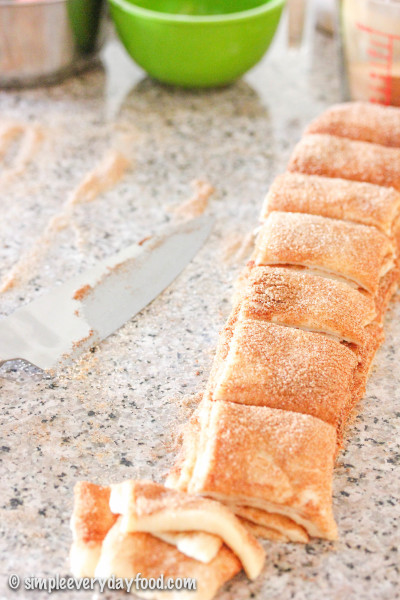
IMG_4354 copy

9. Tilt your loaf pan vertically and start stacking your dough squares into your buttered loaf pan. Don’t cram too many squares in your pan since you’ll need to allow room for them to rise some more… you may have some squares leftover (I used my leftover squares and some of the trimmed edge pieces to make a mini pull-apart loaf!).
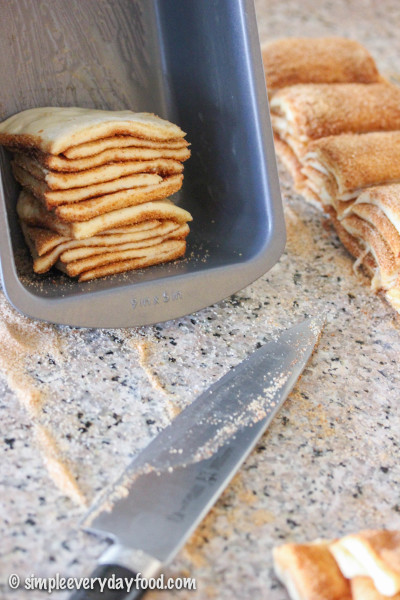
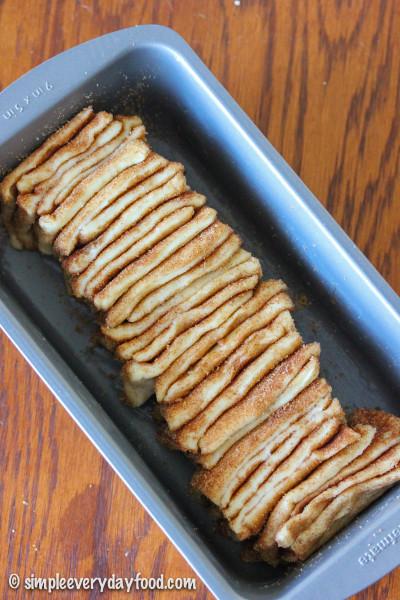
IMG_4358 copy   IMG_4378 copy

10. Sprinkle the tops with more cinnamon sugar… because there’s never enough of that stuff! Cover with a dish towel and allow to rise in a warm place for 30-45 minutes, or until dough have risen to double the size.
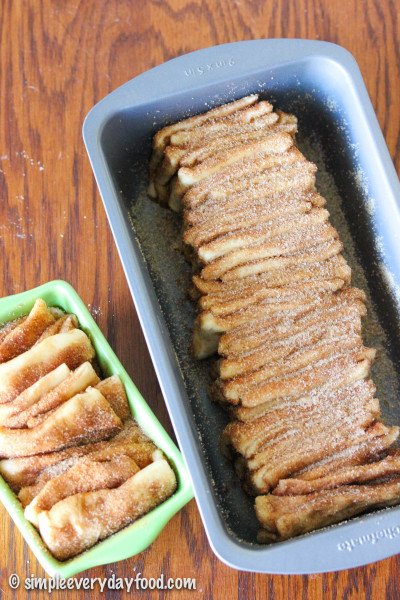
IMG_4388 copy

11. In the meantime, preheat oven to 350 degrees. Place the pan in the oven and bake for 30-35 minutes or until the center is cooked through. Check dough at 20 minutes to make sure the top isn’t browning too fast.. if it is, cover with aluminum foil for the remainder of the baking time.

12. Remove the pan from the oven when it’s done and let cool for 20 minutes. Run a knife along the edges and take the bread out of the pan and transfer to a serving plate. Mix together the icing ingredients and drizzle over the top. Serve warm and enjoy!

Recipe adapted from The Pioneer Woman

© Simple Everyday Food. All images & content are copyright protected. Please do not use any of my images without prior permission. If you want to republish this recipe, please re-write the recipe in your own words, or kindly link back to this post for the recipe.
Sharing is caring! Email this to someonePrint this pagePin on PinterestShare on YummlyShare on FacebookShare on Google+Tweet about this on Twitter

FullSizeRender 7

1. Throughout the entire past winter, everyone – I mean everrrryone – around me was sick. Brian was sick. My mom was sick. Everyone at work was sick. No joke, people that I worked with were dropping like flies; people were calling in sick every other day with fevers, coughs, aches and pains, headaches, stuffy noses, you name it. It was like people were passing around their germy Kleenexes and drinking out of each other’s water bottles or something. It spread like wildfire, from one department to the next. I always took pride in my “superior” immune system – giving credit to years of building my immune system from touching germy things and getting coughed on everyday after years of working in an emergency room.

But earlier this month, despite the hard fought battle, I finally succumbed to my first cold in a long time. I even called into work sick; something that I’ve only done twice the whole year I’ve been there. I laid on the couch with my bag of cough drops, my box of tissues, my bottle of Aleve, my pets keeping me company, along with the TV remote and my Kindle… it was lame.

IMG_2427

2. I also had the most out-of-this-world amazing oxtail pho ever. The meat was buttery, tender, and melt-in-your-mouth ridiculous. I mean just look at it. Seriously delish.

IMG_2569

3. Earlier this month, Brian got himself a new job that he’ll be starting in a few weeks! After working so hard to get a degree and slowly climbing the ladder, he’ll finally be doing something that he’s wanted for so long, and I couldn’t be any prouder! Even though that means we can no longer carpool together, that I will no longer have my chauffeur to drive me to and from work, and that I will have to pay for a parking contract again, I’m still happy that he’ll be doing something that he loves.

4. Brian and I are probably the least artistic people you’ll ever meet, but somehow I managed to convince him to do one of those “wine + paint” nights with me to paint the iconic Stone Arch Bridge at our local Cheers Pablo. It was actually fun even without the booze!

FullSizeRender 10

5. I watched the documentary film Blackfish a few weekends ago and wooooah. LIFE. CHANGING. Have you seen it before? My parents brought me to Sea World when I was young while we lived in Florida and I’ve always loved marine animals, but after watching it, I don’t know if I could ever bring myself to go to Sea World ever again. The film was so powerful and it touched me so much that I was actually bummed out the rest of the afternoon. I felt sad for those giant majestic creatures that should not have to live their lives cooped up in a tank. I felt angry that us humans think that we are entitled to capture such beautiful animals, even separating babies from their mamas, using them for our own profit and entertainment. I could probably write an entire essay about that film, but I’m not going to here. I am, however, going to recommend you to watch the film, because it seriously will leave you with lots to think about.

The funny thing is, the very next day after I watched Blackfish, a Sea World commercial came on while I was watching TV by myself. It had footages of veterinarians and trainers who claim along the lines of “I love working here… the animals here are treated well and they live just as long in captivity as they do in the wild due to the superb veterinary care they receive… we have the highest standard of care in the world and our whales are thriving; I wouldn’t be working here if they weren’t…” Uh huh. Sure.

It was as if the moment I clicked to watch Blackfish on Netflix, it pinned my location and Sea World sent me a commercial to watch on TV the very next day as an attempt to refute everything I just learned. Coincidence? I guess I’ll never know.

(And in case you’re wondering, whales in captivity do NOT live anywhere near as long as they would in the wild)

6. A brand new grocery store opened in our neighborhood last week, which we just had to check out to see what they had compared to the other 8 grocery stores in our city. They had an awesome butcher shop, a bakery, and lots and lots of healthy organic food/snack choices. But what pleased me the most was that every single item on their shelves were neatly organized. Every single box and packet was stacked with great precision with every single label facing the exact same way.

As stupid and sad as it sounds, it made my heart sing with joy, and apparently my life came down to finding happiness in neatly stocked grocery. #findhappinessinthelittlethings

7. We also finally visited the new fro-yo place right across the street. They had tiramisu fro-yo, yo! I’m already a fan.

FullSizeRender 9

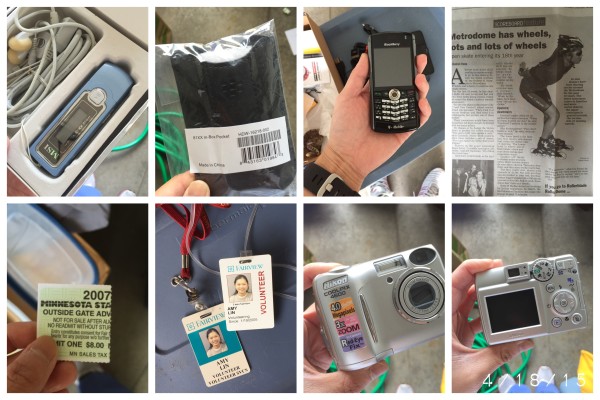
8. Spring cleaning: Garage Edition finally happened, and in case you didn’t know, apparently I’m a Hoarder with a capital “H”. I found all kinds of crap in bins that I’ve had since high school… things ranging from high school notebooks, shoes that I’ve had but never worn, newspaper clippings of random things, old skate wheels, old cell phones, lots and lots of MCAT prep books, mp3 players, and every single plane ticket stub I’ve ever owned for 4 whole years since 2004. Once again, can you say HOARDER?! Yikes. I was slightly embarrassed.

IMG_2971

But remember those Blackberry Pearls? I still remember how cool I felt the day I brought mine home. They were the bomb back then (along with the Motorola Razrs)!

Sharing is caring! Email this to someonePrint this pagePin on PinterestShare on YummlyShare on FacebookShare on Google+Tweet about this on Twitter

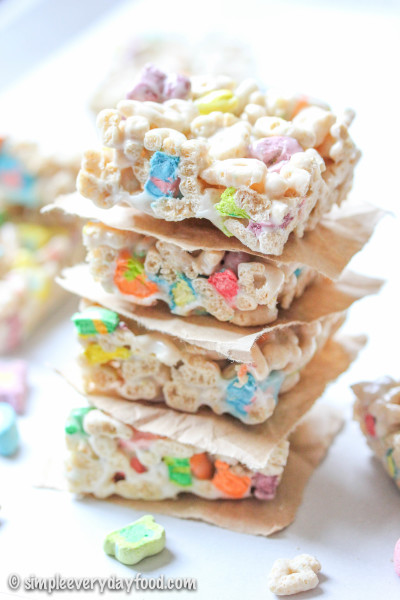
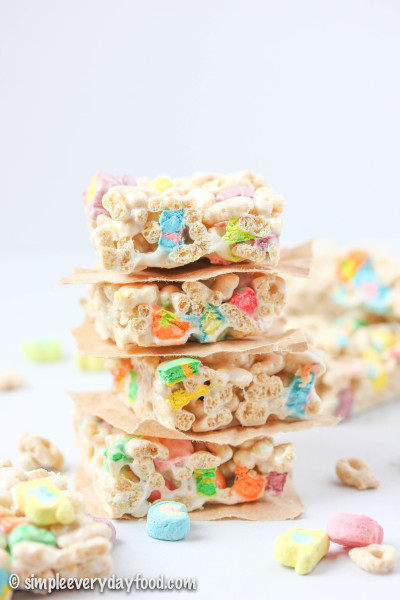
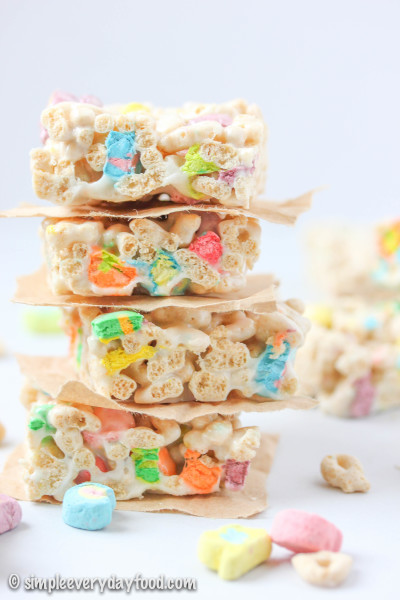
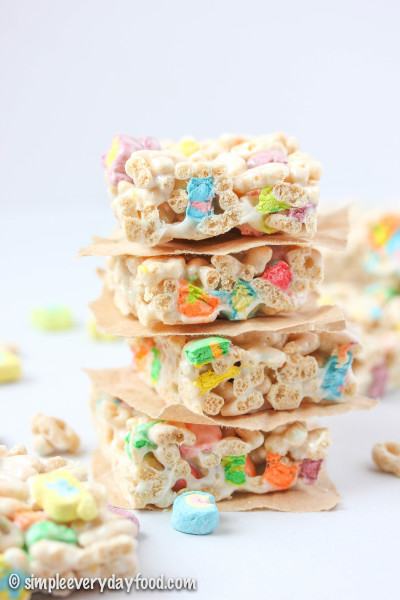
lucky charms bars

I know I’m a little late in the game, but I finally watched Big Hero 6 and I loved it! Have you seen it yet? I’ve heard so much about it when it first came out, but never really put too much thought into it until a coworker of mine brought it for me one day and told me it was her daughter’s new favorite movie.

There were definitely parts of the movie that I totally wasn’t expecting to happen, but there were also a lot of other parts of it that were cute and made me smile.

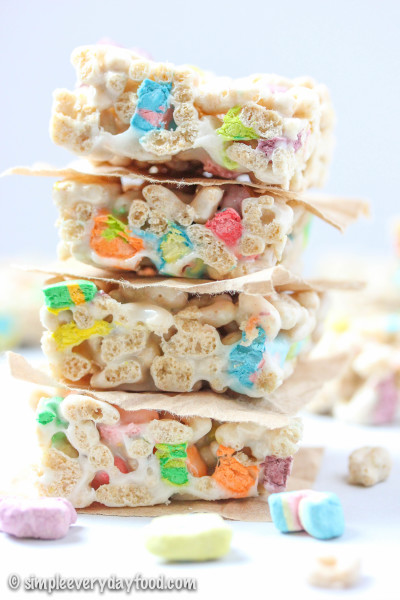
Baymax totally reminded me of a giant walking talking marshmallow, which in turn reminded me that I needed to share these ridiculous bars I made a while ago that involved sticky gooey marshmallows….

lucky charms bars   lucky charms bars

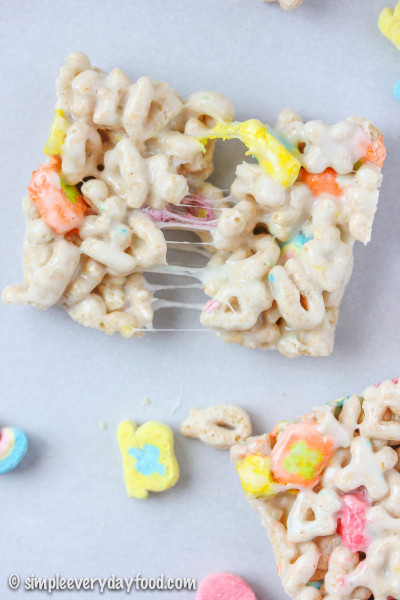
Marshmallow treat bars are probably one of the easiest things to make – they only require a few ingredients, they don’t require any special equipment or powering on the oven, and a batch of these things is usually enough to feed a crowd. Cheap, quick, and easy is the kind of desserts I like to bring to a potluck.

lucky charms bars

lucky charms bars

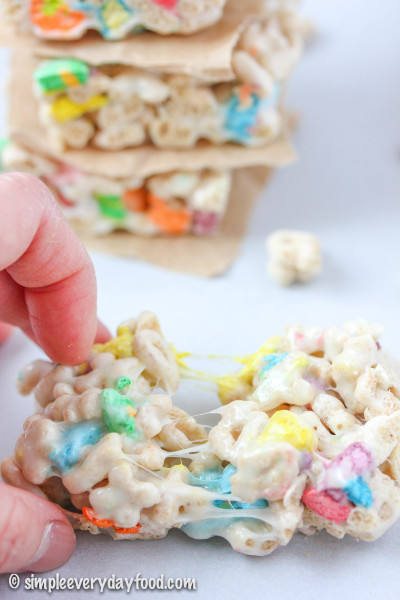
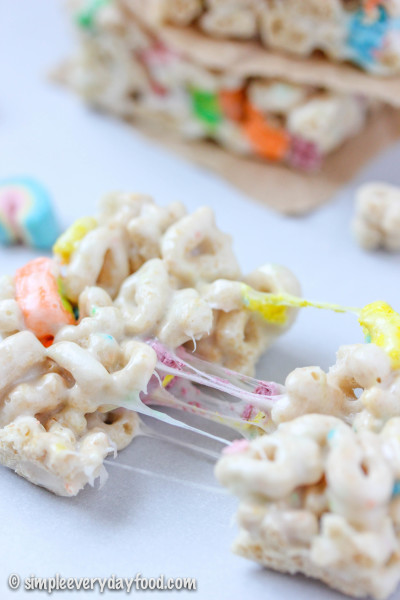
I’m sure we’ve all had terrible marshmallow treats before. You know, the kind that may have sat out for a few days too long? The kind that’s not at all soft and gooey when you bite into it? The kind that scrapes a layer of epithelial tissue off the roof of your mouth that leaves the top of your mouth raw and sore for days? Yeah… if you’re looking for that kind of a marshmallow treat (WHYYYYYY would you ever want a rock hard marshmallow treat would be beyond me), this recipe is not it.

lucky charms bars

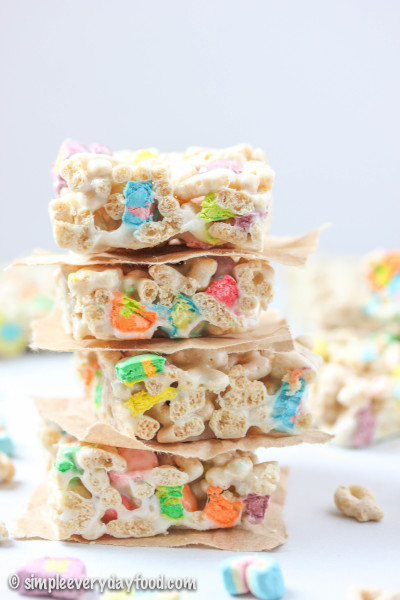
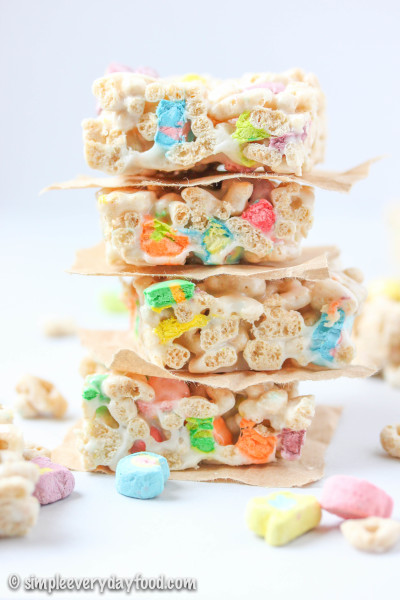
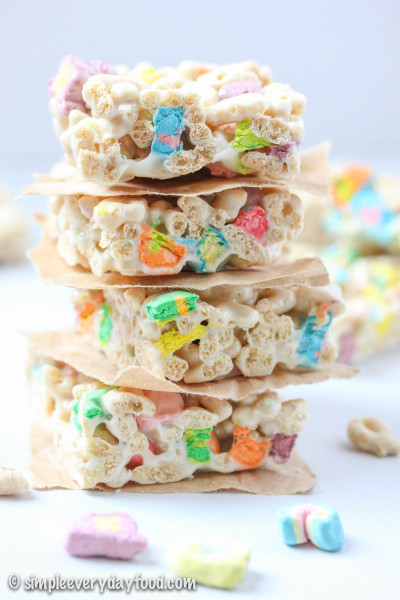
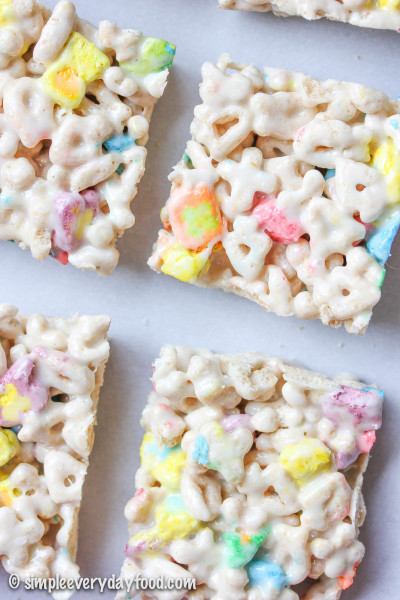
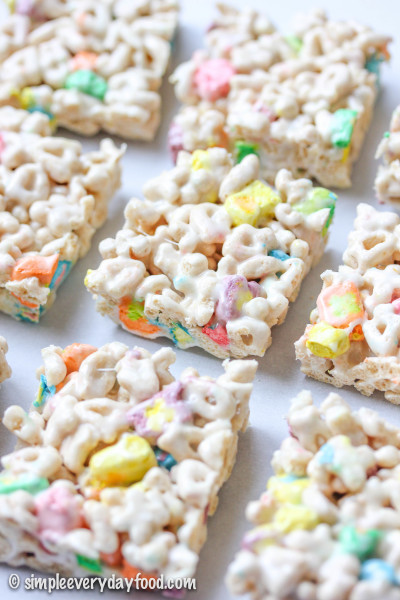
They’re oh so soft, so chewy, so gooey, so sweet, and so so so delicious. Not to mention on top of the 5 cups of marshmallows that goes into it, there’s more than plenty colorful Lucky Charms marshmallows in them, which makes them yummy to eat, and even prettier to look at.

lucky charms bars

lucky charms bars   lucky charms bars

This was only the second time I’ve ever made marshmallow treats. The last time I made them a few years ago, I’m pretty sure I got sticky marshmallow goo all over my hands and hair, my bars were hard, and Brian landed himself a trip to the ER that ended with 7-8 stitches on his toes… but that’s a whole ‘nother story for a different day.

Although my marshmallow bars weren’t a huge success that day, I did learn a few things that day about making these treats that I’m going to share with you, so listen up!

lucky charms bars   lucky charms bars

The single most helpful tip I learned was to grease EVERYTHING that will be coming in contact with the cereal/marshmallow mixture – that includes every single inch of the pan, the spatula you’ll be stirring with, and your hands if you’re using them to press the cereal treats into the pan rather than wax paper.

lucky charms bars

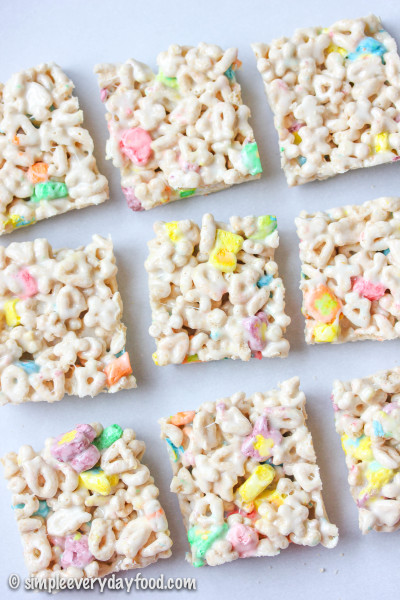
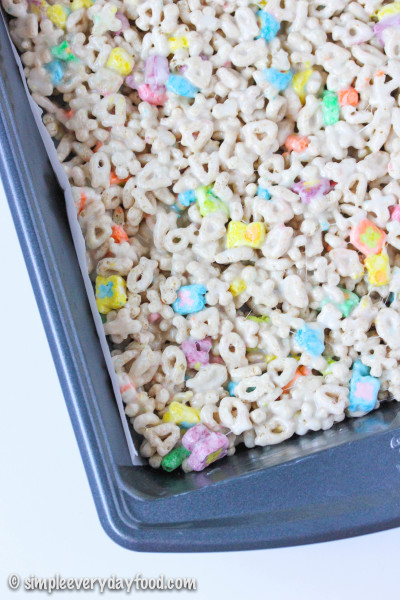
I actually lined my baking pan with parchment paper for easy removal of the bars once they cool. That way you can lift the entire pan of marshmallows onto a cutting board to cut them into squares rather than trying to cut them up while they’re in the pan.

lucky charms bars

When you’re pouring your cereal/marshmallow treats into the pan, don’t press them too hard into the pan. The more you try to cram them together, the denser they’ll get, and the harder they will become once they cool. If you’re not into greasy hands, you can also gently press them in with a sheet of wax paper.

lucky charms bars

lucky charms bars

These really do taste best if you eat them the same day they’re made, but they will still taste great the day after. I wouldn’t recommend storing them for more than two days, unless you’re purposely trying to end up with dry, hard marshmallow bars.

lucky charms bars   lucky charms bars

Sorry for the photo overload, my friends. I was having an indecisive day!

lucky charms bars
Print
Ingredients
  1. 4 tablespoons unsalted butter, plus more for greasing the pan
  2. 5 cups mini marshmallows
  3. 6 cups Lucky Charms cereal
Instructions
  1. Lightly coat a 9x13" baking pan with butter, line with parchment paper (the butter will help the parchment paper stick to the pan), then grease the parchment paper with another thin coat of butter. Set aside.
  2. Melt butter in a large pot over low heat. Add the marshmallows and stir until the marshmallows are completely melted. Remove from heat and stir in the Lucky Charms with the buttered spatula until combined.
  3. Pour cereal mixture into the prepared greased baking pan, pressing the tops gently with waxed paper* and let cool. Remove the bars from the pan using the parchment paper and transfer onto a cutting board. Cut into squares and serve. Bars can be stored at room temperature in an airtight container for up to 2 days.
  4. Makes one 9x13" pan
Adapted from A Pumpkin & A Princess
Simple Everyday Food https://www.simpleeverydayfood.com/
 Recipe adapted from A Pumpkin And A Princess

© Simple Everyday Food. All images & content are copyright protected. Please do not use any of my images without prior permission. If you want to republish this recipe, please re-write the recipe in your own words, or kindly link back to this post for the recipe.
Sharing is caring! Email this to someonePrint this pagePin on PinterestShare on YummlyShare on FacebookShare on Google+Tweet about this on Twitter