everyday food made simple

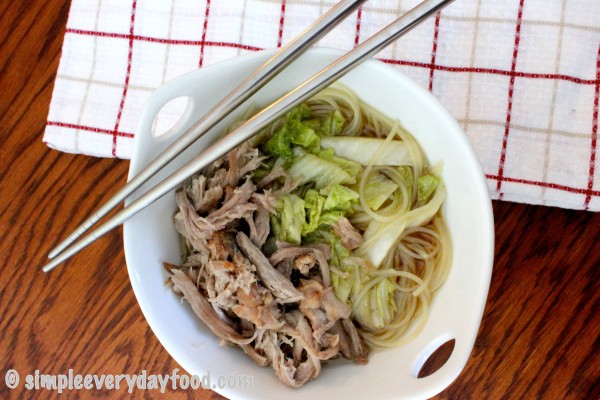
This is perhaps the best thing I have ever made in the Crockpot. Ever. Now granted I haven’t made a whole lot of different things in the Crockpot, but this one is amazing (if I may say so myself) and it will definitely be a repeat for my next busy homework-filled day.

IMG_1530

I’ve been finding the perfect recipe for a traditional Chinese/Taiwanese noodle soup broth, and I think this might be it. It literally brought me back home and I think I almost shed a tear when I tasted it for the first time today. I almost felt like I was transported back in time: finding some tiny little hole-in-the-wall noodle shop on the streets of Taiwan, sitting with my family at a small table on metal stools, waiting for our food to be cooked. Most of these restaurants only have big industrial fans during the hot summer months, so we usually sit somewhere near a fan. As if we weren’t hot enough, we usually all order noodle soup (I think I order noodle soup half the time not because of the noodles, but simply because I love the “soup” part of it).

Noodle soup has a special place in my heart. It’s usually something that can made within 15, 20 minutes with a variety of ingredients, so we ate a lot of it growing up, especially when my parents didn’t have much time to cook after coming home from work. Now when I say “noodle soup”, I don’t mean the American “chicken noodle soup”. The Asian version is very different and in my (biased) opinion, tastes way better :)

Anyway, back to soup… I used a pork butt roast for this rather than a pork shoulder – you can definitely use a pork shoulder if you’d like. The pork butt is slightly fattier, but it also gives the broth an amazing flavor as well.

IMG_1528

The combination of soy sauce, ginger, garlic, and star anise play an important part in making this a true authentic Taiwanese/Chinese dish. I added about 1.5 cups of water after taking the roast out to dilute the broth a little bit more; however, if you prefer your broth on the more concentrated and salty side, feel free to omit the additional water. I used Napa cabbage as my vegetable simply because that was all my grocery store had at the time, but if you prefer bok choy, that’ll work as well.

IMG_1538

slow cooker asian pork and noodle soup
Print
Ingredients
  1. 3 cups low-sodium chicken broth
  2. 1/4 cup soy sauce
  3. 3 tablespoons light brown sugar
  4. 3 cloves garlic, smashed
  5. 1-2" piece ginger, peeled and sliced
  6. 2 pieces star anise
  7. 1/4 teaspoon salt
  8. 3 pounds pork butt roast
  9. 1.5 cups water
  10. 2 cups Napa cabbage, chopped
  11. 3-4 oz dried Mai-Fun noodles
Instructions
  1. In a 5-6 quart slow cooker, combine the chicken broth, soy sauce, brown sugar, garlic, ginger, star anise and salt. Add the pork, then cover and cook on low 8 hours, or until pork is fork tender.
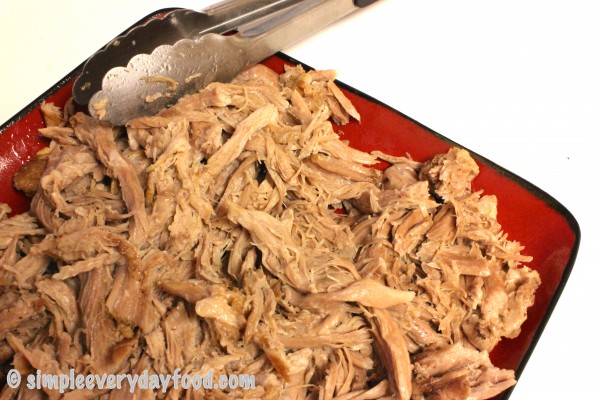
  2. Remove pork and place on a large plate. Shred with a fork and set aside.
  3. Add the water, Napa cabbage, and noodles to the slow cooker, making sure they are submerged. Cover and cook for 30 more minutes, or until noodles are done.
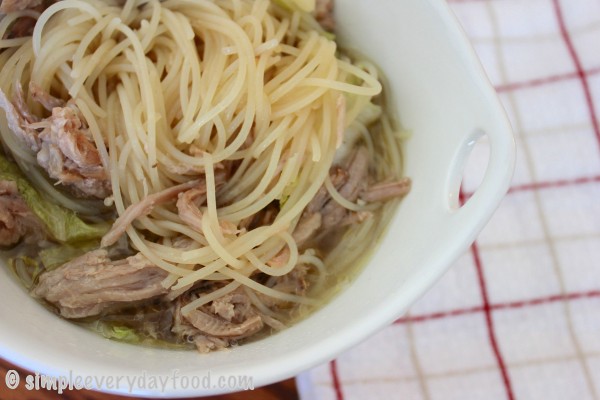
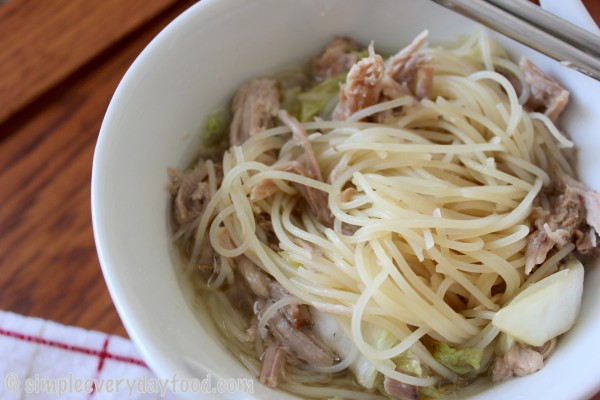
  4. Divide the noodles, Napa cabbage, and pork among bowls, then ladle in the broth.
  5. Serves 3
Adapted from Food Network
Simple Everyday Food https://www.simpleeverydayfood.com/
Not only is the flavor of this soup very nostalgic to me, it also makes the house smell like a little hole-in-the-wall Taiwanese noodle place. I placed the roast in the slow cooker this morning before leaving for class, and when I came back 8 hours later, I could smell the deliciousness before I even opened the front door. Not to mention finding a recipe this delicious that only requires a Crockpot is always a win in my book!

IMG_1540

Enjoy!

Recipe slightly adapted from Food Network

© Simple Everyday Food. All images & content are copyright protected. Please do not use any of my images without prior permission. If you want to republish this recipe, please re-write the recipe in your own words, or kindly link back to this post for the recipe.

Sharing is caring! Email this to someonePrint this pagePin on PinterestShare on YummlyShare on FacebookShare on Google+Tweet about this on Twitter

Can you believe it’s August already?! Where did my summer go???? Next thing we know, the leaves are going to be turning red, falling off of trees, it’s going to be cold, and there’s going to be snow on the ground.

Ugh, I don’t even want to think about snow right now. It’s August, folks! August is the last month of summer in my opinion, and therefore all of the remaining hot sunny days need to be treasured. I’m already looking forward to the Minnesota State Fair that starts August 22nd! We’ve already bought our tickets and Blue Ribbon Book, and I’ve already read about all the new vendors/foods-on-a-stick that are going to be at the fair! And for those of you that are big State Fair fans nerds like me, there are going to be 40 new fair foods this year!

Jalapeno corn dogs. Comet corn. Breakfast sausage corn dogs. Cajun pork rinds. Funnel cake sundaes. Idaho nachos. Mini donut batter crunch ice cream (!!).. and much more that I want to try!

And then there’s always the all-time favorites: root beer floats, cheese curds, pronto pups, deep-fried chocolate chip cookie dough on a stick, chocolate dipped keylime pie on a stick, sweet corn ice cream, mac & cheese on a stick, the corn roast, Sweet Martha’s cookies, Tom Thumb’s mini donuts, cream puffs, potato skins, Dole Whip floats (!!), french fried mushrooms, porcupine meatballs on a stick, walleye fries, Minneapple pies….. whew. Should I go on?

And once again, I’m going off track here… at the beginning of this summer, I wanted to buy some popsicle molds and make some homemade popsicles. I also wanted to buy an ice cream maker attachment for the KitchenAid mixer, but figured we should wait until we sell the house and move before adding more things to my kitchen collection. Since I didn’t get to make any popsicles or ice cream this summer, I figured I can make Bentley some doggie popsicles instead.

This recipe really is super simple. It only requires 4 ingredients and a blender. It only takes a total of 5 minutes to make (excluding freezing time). And there’s only a total of 5 simple steps. FIVE! It’s that easy – no reason not to make these for your four-legged canine kids.

Step 1: Blend ingredients.

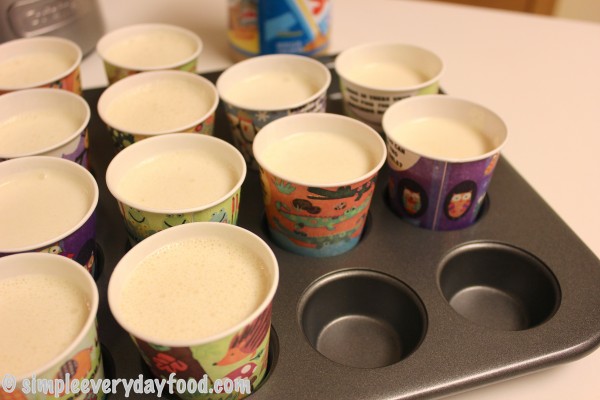
Step 2: Pour into Dixie cups.

IMG_1544

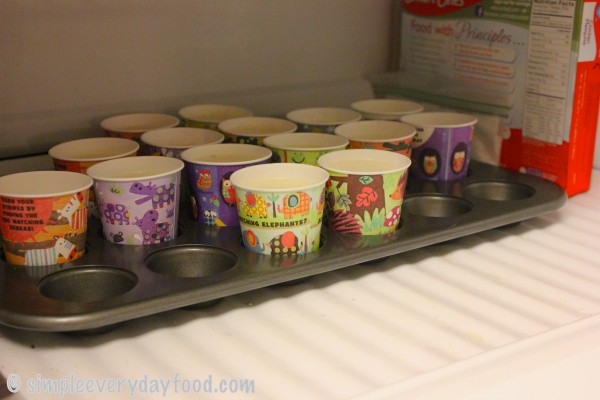
Step 3: Freeze overnight.

IMG_1546

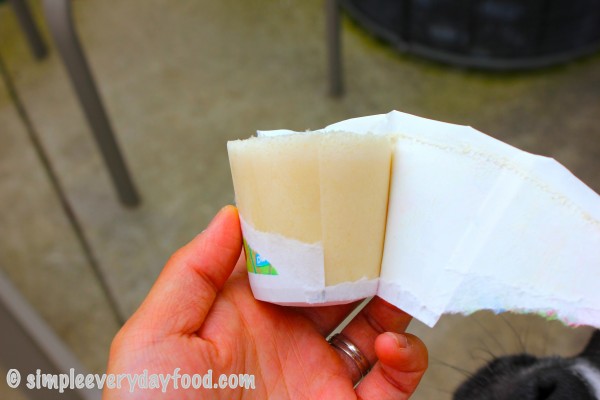
Step 4: Peel away Dixie cup from popsicle.

IMG_1547

Step 5: Give to dog, and wait to receive a cute “thank you you’re the best, mom!” look with a muzzle full of melted popsicle drippings <3

IMG_1561

IMG_1577

This is more like his “awww my treat is gone! Can I have another one?” look. Hard to say no to that, but I stood my ground (for 6 hours).

doggie peanut butter yogurt popsicles
Print
Ingredients
  1. 32 oz plain yogurt
  2. 3 tablespoons creamy peanut butter
  3. 1 tablespoon honey
  4. 1 banana
  5. 15-17 mini Dixie cups
Instructions
  1. In a blender, combine the yogurt, peanut butter, honey, and banana. Blend until smooth.
  2. Fill mini Dixie cups about 3/4 full with mixture. Place in freezer and freeze overnight.
  3. When ready to serve, peel off the Dixie cup from the popsicle. The bottom part of the cup may stick to the popsicle, but should be easily peeled off with a little help of your fingernails.
  4. Give to your four-legged canine friend outside or on a easily cleanable surface (hardwood floors, tiles).
  5. Makes about 15 mini Dixie cup popsicles
Notes
  1. If you have a mini muffin pan, I found out that the mini Dixie cups fit pretty well in those and make it easier to transport all of them into the freezer. Otherwise you can place the Dixie cups in a cake pan or rimmed cookie sheet as well.
Simple Everyday Food https://www.simpleeverydayfood.com/
We used mini Dixie cups, but if you have any extra ice cube trays laying around the house, those would work too! I chose to use Dixie cups because 1. they hold a little bit more than an ice cube well would, 2. it’s easier to pick one and give it to Bentley (as opposed to trying to pop them out from a tray), and 3. they’re disposable (read: less things to wash).

Now this can be a little messy to eat, so I would strongly encourage you to give these to your furry babies outside… unless you’re willing to clean up trails of sticky melted peanut butter yogurt ice cream :-)

Bentley was able to enjoy his in the yard today! It was a beautiful day out, perfect for something popsicles! It was his first time having any sort of a popsicle so he wasn’t quite sure what to do with it in the beginning… he spent 99% of the time licking his frozen treat and pushing it around the yard with his nose, it was comical.

IMG_1550

IMG_1560

I didn’t personally try it, so I can’t tell you guys how it tastes, but it’s Bentley approved!

© Simple Everyday Food. All images & content are copyright protected. Please do not use any of my images without prior permission. If you want to republish this recipe, please re-write the recipe in your own words, or kindly link back to this post for the recipe.

Sharing is caring! Email this to someonePrint this pagePin on PinterestShare on YummlyShare on FacebookShare on Google+Tweet about this on Twitter

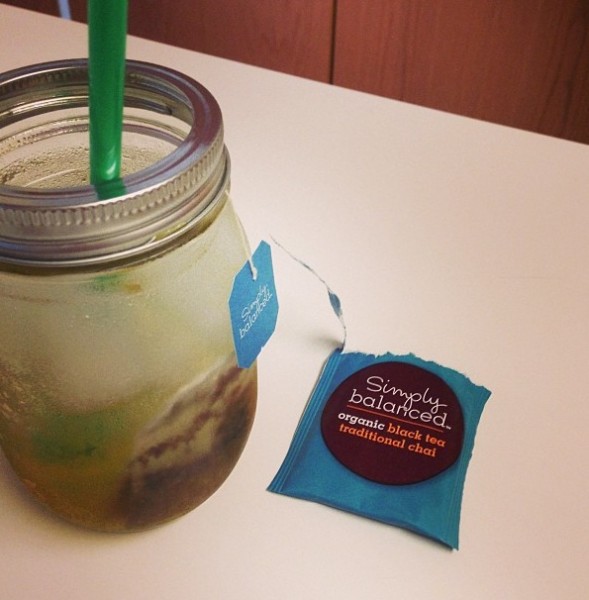
1. I’m the perfect example that when it comes to food, it’s all about the packaging. I’ve never been a big fan of store brands (other than Archer Farms). I know what you’re thinking: they taste the same as name brands. Sometimes they even taste better. And they’re cheaper. Yeah yeah yeah. But to me, the packaging of food is just as important as the presentation of food on a dish. If the packaging isn’t pretty, I have no desire to even try it, even if it’s 20 cents cheaper.

Now, Target just recently launched their own healthy grocery brand, Simply Balanced. According to the Target website:

“…more than 40 percent of the assortment is organic. There are no products with hydrogenated or partially hydrogenated oils, high-fructose corn syrup, synthetic colors, artificial preservatives, artificial flavors or artificial sweeteners…. the majority of Simply Balanced items are made without genetically modified organisms (GMOs), and Target will eliminate all GMO ingredients from the line by the end of 2014.”

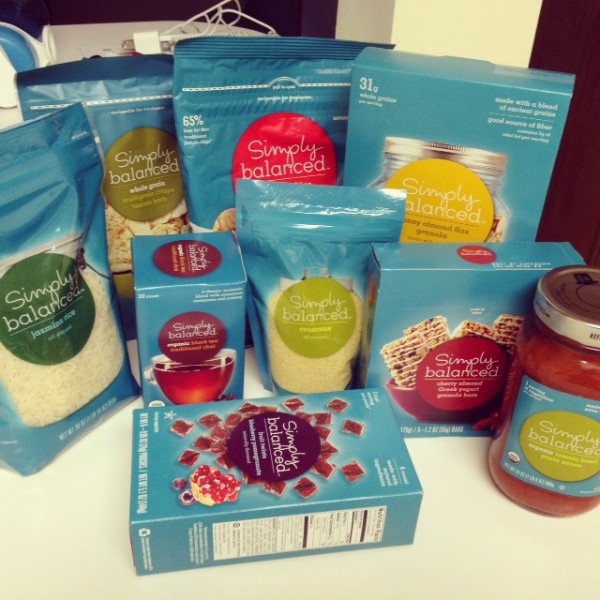
Sounds pretty good, huh? Not only are these products super delicious, the packaging is very appealing and eye-catching. A few weeks ago I bought a few boxes of their granola bars to try it out, and then the next time we went grocery shopping, this happened:

photo 1

photo 2

Haha… oops. I jokingly told Brian that they should sponsor my blog since we spent 1/3 of our total bill on their products :)

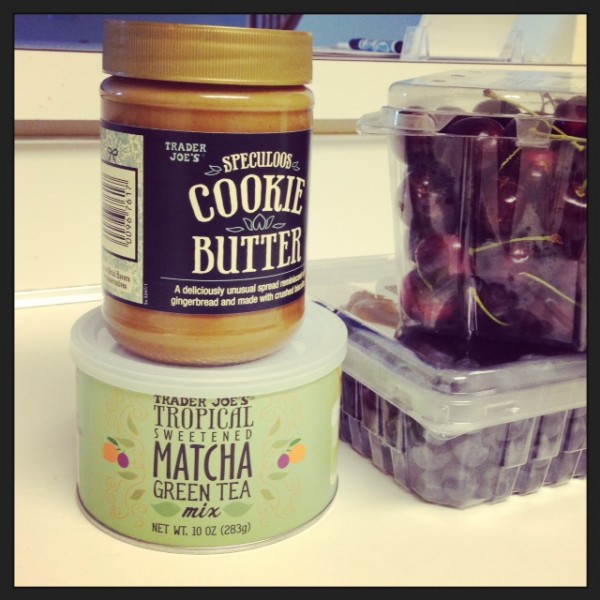
2. My partner-in-crime at school Samantha (hi Samantha!) told me a few days ago that Trader Joe’s has this Cookie Butter thing that’s supposedly really good. As I recall, her exact words were “oh don’t even start”. I’ve been hearing (and seeing) a lot about it lately and figured I should probably see what all the hype is about. Well, while I was waiting for my dinner to cook, I couldn’t resist and had a little spoonful of it. I think my exact words were “oh this is going to be bad“. There might be times this weekend that consist of me sitting on the couch with Cookie Butter and a spoon…..

photo 4

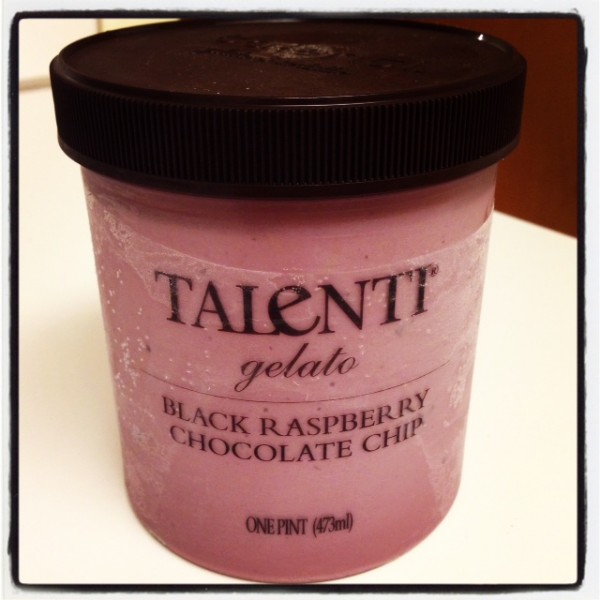
I’m also currently obsessed with these too. I just finished a pint of the Mediterranean Mint and moved along to my next flavor (it’s amazing).

photo 3

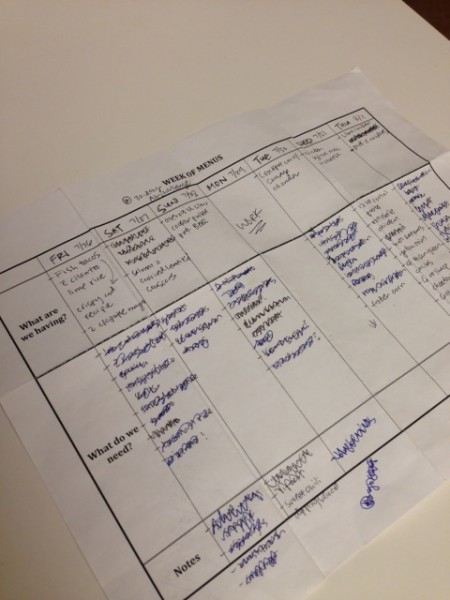
3. Ever since the last time we ended up picking dinner options out of a hat that were written on pieces of paper due to the lack of meal planning, I’ve decided that’s never going to happen again. I made a fancy table from Word and this week was our first week putting it into use. It worked out great!

photo

4. Today Brian and I had a little lunch date at downtown Minneapolis – we decided to have our first ever food truck experience! I had the lobster tacos and Brian got the pulled chicken sandwich (he loved the barbeque sauce that went with it!).

photo 5

5. Did you know Campbell’s is now coming out with CheeseburgerOs?!

20130723-cheeseburgeros-can.jpg

(photo source)

I guess they’re coming out nationwide in August (that’s tomorrow!)… can I say “ew”? Are people just getting that lazy that they can’t even use two hands to eat a cheeseburger? Or maybe it’s a time-saving thing? I have never ever opened (or touched) a can of the original SpaghettiOs, and don’t think I’d be trying their newest product anytime soon either. Do you think you’d be trying it?

© Simple Everyday Food. All images & content are copyright protected. Please do not use any of my images without prior permission.

Sharing is caring! Email this to someonePrint this pagePin on PinterestShare on YummlyShare on FacebookShare on Google+Tweet about this on Twitter

Couscous has been making frequent appearances in our weekly dinners lately, as seen here, here, and here.

I think I introduced Brian to couscous a few months ago when we were looking for different kinds of carbs to add into our weekly rotation (eating brown rice with everything can get old after a while)… thankfully, he was willing to give it a try. Ever since then, our cupboards are always stocked with a container full of this tiny little coarsely ground pasta.

Here are three reasons why it has been so popular in our household, and why you need to try it too:

  1. it’s super simple and quick to make – it only takes about 5 minutes
  2. it’s bland if you make it plain, meaning that it can serve as a blank canvas. It has the capability to developed into a variety of beautiful flavors based on the different spices and ingredients you add to it
  3. it’s healthy and low in calories

Okay, reason #4 we like it so much: it’s fun to say. Couscous. Couscous couscous couscous.

Now that you think I’m a total weirdo, let’s move along…

We’ve always made couscous with just chicken stock to let our main dish shine. However, today I decided to spice up our couscous and added a little bit of curry powder to it.

IMG_1511

curried couscous
Print
Ingredients
  1. 2 tablespoons EVOO
  2. 2 cloves garlic, minced
  3. 1 medium shallot, finely diced
  4. 3/4 teaspoon curry powder (make it 1 teaspoon for stronger curry flavor)
  5. 1/2 teaspoon paprika
  6. 1/2 teaspoon salt
  7. 1 cup couscous
  8. 1 cup water
Instructions
  1. In a medium saucepan, heat the EVOO over medium high heat. Add in the garlic and shallots. Cook for 2-3 minutes, stirring often, until shallots are softened.
  2. Add the curry powder, paprika, and salt to the shallots. Stir until combined.
  3. Add in the water, and immediately add the couscous. Stir to combine, cover with lid, and remove from heat.
  4. Let stand for 5 minutes. Fluff with fork before serving.
  5. Serves 2-3
Notes
  1. Every brand of couscous may require different amounts of water to cook. Make sure you read the directions for the couscous carefully before cooking. If it requires 1.5 cups of water instead, then make the couscous using 1.5 cups of water instead of 1 cup as stated in the directions (I put 1 cup in the directions because that's how much water our brand of couscous calls for).
Simple Everyday Food https://www.simpleeverydayfood.com/
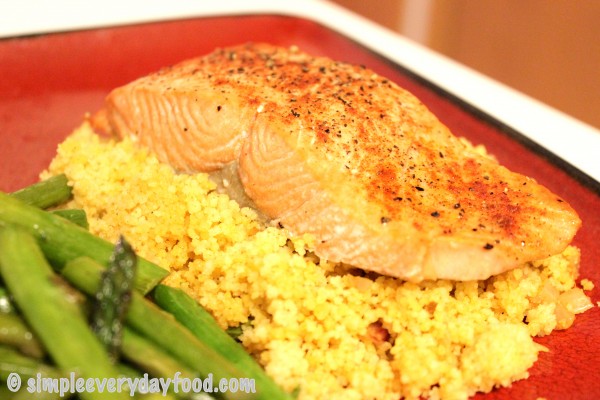
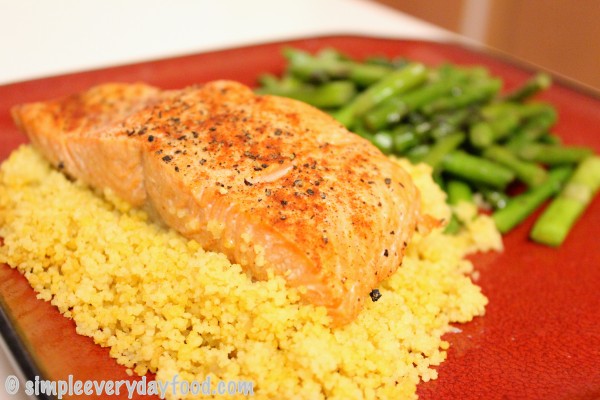
The slight hint of curry along with the shallots make this couscous super delicious. It paired wonderfully with our lightly seasoned salmon. I knew the flavor wasn’t overpowering when Brian (who never had the desire to try curry) gave it a try and actually thought it was pretty good.

IMG_1508

“Pretty good” doesn’t really do it justice. I thought it was quite delicious! We’ll probably be making this again in the very near future.

The salmon was made simply by sprinkling it with some salt, pepper, paprika, and cooking it for 6-8 minutes under the broiler.

Enjoy!

© Simple Everyday Food. All images & content are copyright protected. Please do not use any of my images without prior permission. If you want to republish this recipe, please re-write the recipe in your own words, or kindly link back to this post for the recipe.

Sharing is caring! Email this to someonePrint this pagePin on PinterestShare on YummlyShare on FacebookShare on Google+Tweet about this on Twitter

Apple pie. It’s as American as baseball, NASCAR, and country music.

(Yes, I love all of the above)

Plus, now you can make it just in time for the 4th of July holiday!

A few weeks ago when I made my key lime pie bars, I mentioned that during my break from work and school, I was going to muster up the courage and attempt to make my first ever pie.

Well, since my “days left of vacation” are dwindling down to single digits, I figured what better time than this weekend. The pie isn’t going to make itself, right?

As I was assembling my pie together, I remembered why I never made pies in the first place – they are just way too much work and take so much time! It’s definitely not something to make on a regular basis when you work and go to school full time, that’s for sure. Even though it was pretty dang worth it in the end.

IMG_1187

First you have to make the filling. Peeling and slicing 4 pounds of apples was not fun.

IMG_1167

IMG_1170

Then you have to make the dough. This step wouldn’t have been so difficult if our food processor could hold more than 1 cup of flour at a time. I figured, “oh I’m sure it can fit 2.5 cups of flour and 4 tablespoons of shortening and 1.5 sticks of butter so let me just try to fit everything in there and pulse it together.

IMG_1174

Of course it wasn’t that easy: flour went everywhere and nothing was getting pulsed and mixed the way they were supposed to. Instead of a simple 10-minute process, I think it took me about 40 minutes fighting with the food processor to make the pie dough.

Needless to say, my dough-making process involved a lot of swearing, “ugh”‘s from annoyance, and thoughts about giving up and buying pre-made pie crust instead.

In the end, I persevered and showed the pie gods a tiny food processor wasn’t going to hinder my making-pie-for-the-first-time spirit.

IMG_1175

After the dough was made, it needed to chill in the refrigerator for at least an hour. Then they needed to be rolled out into two 12″ discs. Well, this step proved to be quite a challenge for me too. First my pie dough kept sticking to my work surface (I think I wasn’t generous enough with the flour), then parts of the dough stuck to my rolling pin, leaving little holes in my crust. After a small battle (and a little bit more cursing), I assembled my pie together, only to find out I forgot to dot the chilled filling with the two additional tablespoons of melted butter before covering the pie up with the other disc of dough.

UGGGHHHHHHH.

IMG_1185

Well, I guess I just inadvertently made this pie a little bit healthier, because I sure wasn’t about to take that thing apart and do it all over again. Now I won’t feel as guilty later when I go back for seconds (or put an extra scoop of ice cream on it).

classic apple pie
Print
For the pie dough
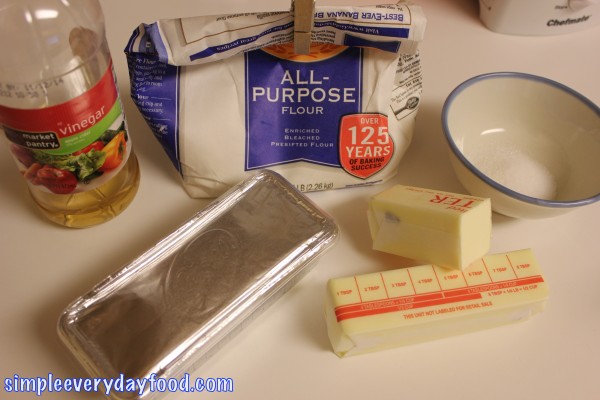
  1. 2.5 cups all-purpose flour
  2. 4 tablespoons cold vegetable shortening
  3. 2 teaspoons sugar
  4. 1/2 teaspoon salt
  5. 1 teaspoon apple cider vinegar
  6. 1.5 sticks cold unsalted butter, cut into small cubes
For the filling
  1. 4 pounds of mixed apples (I used Granny Smiths and Gala apples), peeled and cored
  2. 2/3 cup granulated sugar
  3. 2 tablespoons lemon juice
  4. 4 tablespoons unsalted butter
  5. 2 tablespoons flour, plus more for dusting
  6. 1 teaspoon ground cinnamon
  7. 1/4 teaspoon salt
  8. 1 large egg, beaten
To make the pie dough
  1. Pulse the flour, shortening, sugar, vinegar, and salt in a food processor until it turns into a fine meal. Add the small cubes of butter and pulse. Add 1/4 cups of ice water and pulse until the dough begins to come together. Add in an addition 1-4 tablespoons of ice water (one tablespoon at a time), if the dough doesn't seem like it's holding together.
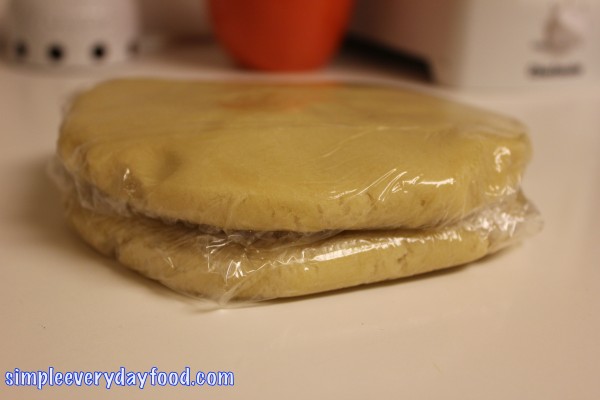
  2. Divide the dough between two sheets of plastic wrap and pat into discs.
  3. Wrap tightly and chill in fridge for an hour, preferably overnight.
To make the filling
  1. Slice the apples into 1/4" thick slices. Transfer into a large bowl and toss with lemon juice and sugar.
  2. Melt the butter in a large skillet over medium heat. Add the apples and cook until softened, about 15 minutes, stirring occasionally. Add in the flour, cinnamon, and salt. Stir until sauce starts to thicken. Remove from heat. Set aside and let cool completely.
To assemble the pie
  1. Roll out one disc of dough onto a well-floured work surface into a 12" round. Carefully transfer to a 9" pie plate. Add in the cooled filling.
  2. Roll out the other disc of dough into a 12" round. Lay the dough over the filling and press the two crusts together. Trim the edges if needed and crimp with your fingers.
  3. Brush the top of the crust with the beaten egg and sprinkle with coarse sugar, if desired. Cut a few slits on the top crust to allow steam to escape. Chill in the refrigerator for an hour.
  4. Meanwhile, place a baking sheet on the lower rack of the oven and preheat the oven to 425 degrees for at least 30 minutes. Put the pie directly on the hot baking sheet and reduce temperature to 375 degrees.
  5. Bake until the pie is golden and filling is bubbly, about 60-70 minutes, rotating the pie several times throughout.
  6. Transfer to a cooling rack and cool until the filling is set (about 2-3 hours).
Adapted from Food Network Magazine
Simple Everyday Food https://www.simpleeverydayfood.com/
IMG_1196

Despite all the technical difficulties experienced, the pie turned out to be a success! Not only does it taste great, it’s actually a pretty good looking pie for my very first ever attempt! (If I may say so myself…)

I’ll be honest, the thing that bothered me the most throughout this whole process were the 5 slits on the top crust not being evenly spaced.

IMG_1192

…It’s just part of my OCDness. At least once I cut out the first slice, it didn’t bother me as much anymore.
IMG_1197


Now that I know I can make a pie, I think I’ll stick with cookies, cupcakes, truffles, and other individual-sized desserts for now.

Enjoy!

Recipe adapted from Food Network Magazine

Sharing is caring! Email this to someonePrint this pagePin on PinterestShare on YummlyShare on FacebookShare on Google+Tweet about this on Twitter