everyday food made simple

First off, can I just say that I would love to meet whoever invented the Crockpot and give them a hug? It’s probably one of the best inventions of the 20th century, and it’s days like today that I’m thankful for its existence.

IMG_1525

Coming into this weekend, I was super behind on all the homework and projects and reading that I had to do by Monday. Owning and operating a food blog and having to write a certain number of posts per week can be quite challenging when you’re taking five classes that have a ton of homework and don’t have enough hours in the day to cook and take pictures and blog (whew)… But fear not, my dear readers, I came up with a brilliant idea of being able to make home-cooked meals and getting homework done at the same time!

Enter our lovely Crockpot.

It’s the perfect way of eating at home and getting stuff done! I probably spent about 15-20 minutes prepping for this meal, and left the Crockpot to do the rest of the cooking. No need to spend hours prepping or slaving away over the stove. There’s really not even a whole lot of dishes to clean up afterward either (which means more time to study). I felt bad wasting this lovely day away by not grilling something outside, but sometimes getting stuff done is just a little bit more important than blogging (I can’t believe I just said that).

slow cooker pulled pork sandwiches
Print
Ingredients
  1. One 3-3.5 lb pork roast
  2. 1 medium onion, sliced
  3. 2 teaspoons light brown sugar
  4. 1 teaspoon paprika
  5. 2 teaspoons salt
  6. 1 teaspoon garlic powder
  7. A dash of cayenne pepper
  8. A pinch black pepper
  9. 3/4 cup apple cider vinegar
  10. 1/4 cup water
  11. 8 oz tomato sauce
  12. Dash hot sauce, such as Tabasco
  13. 1 teaspoon sugar
  14. 2 tablespoons Worcestershire sauce
  15. 12 whole wheat slider buns
  16. Your favorite kind of barbeque sauce
Instructions
  1. Place the sliced onions in the bottom of a 5- to 6-quart slow cooker. Mix the brown sugar, paprika, garlic powder, cayenne pepper, salt and pepper and rub it over the pork roast. Place roast in Crockpot over the onions.
  2. In a medium bowl, combine the vinegar, water, tomato sauce, 1/2 teaspoon black pepper, hot sauce, sugar, and Worcestershire sauce. Pour over the roast. Cover and cook on low for 8 hours, or until meat is tender and is easily shredded with a fork.
  3. Remove roast from Crockpot and shred finely with a fork.
  4. Assemble sandwiches by placing desired amount of pork in between the buns. Add your favorite barbeque sauce on top of the meat or simple drizzle extra juices for extra juiciness.
  5. Serves 3-4
Adapted from Food Network
Simple Everyday Food https://www.simpleeverydayfood.com/
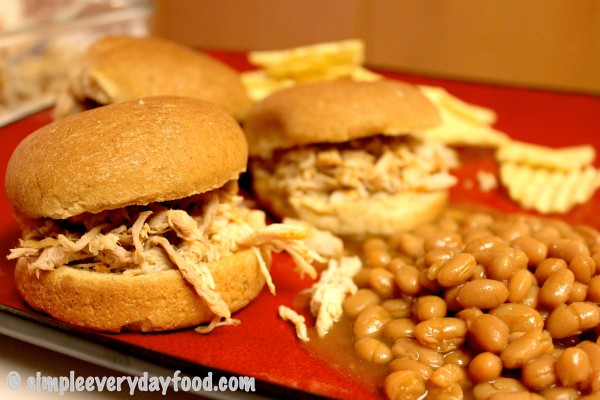
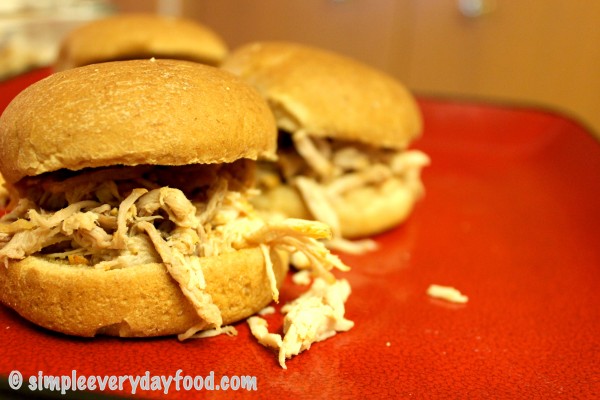
We bought little slider buns instead of regular hamburger buns, since mini foods are always way cuter (and more fun to eat) than regular-sized foods, but feel free to use regular hamburger buns if that’s what you have around the house. If you prefer not to add the barbeque sauce on your sandwich, you can spoon a little bit of the leftover juice/sauce over the meat instead.

IMG_1523

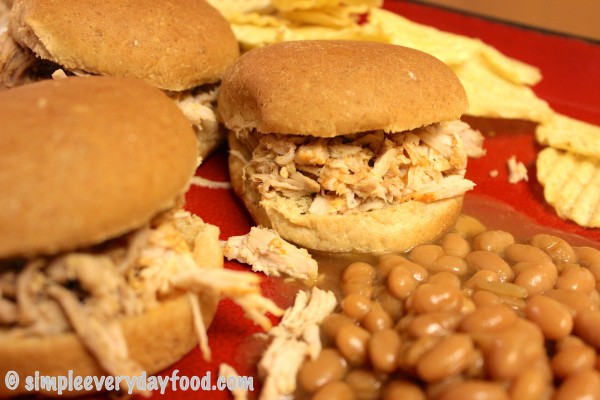
The pork itself is very light in flavor, but the addition of the barbeque sauce gives it an extra tang and makes it more like a “barbeque pulled pork sandwich”, if that’s what you’re going for.

Baked beans, pulled pork sandwiches, and potato chips. Sounds like a summer meal to me.

IMG_1526

Enjoy!

Recipe adapted from Food Network

© Simple Everyday Food. All images & content are copyright protected. Please do not use any of my images without prior permission. If you want to republish this recipe, please re-write the recipe in your own words, or kindly link back to this post for the recipe.

Sharing is caring! Email this to someonePrint this pagePin on PinterestShare on YummlyShare on FacebookShare on Google+Tweet about this on Twitter

Summer. It usually means hot (and humid) days, being outside, and eating light.

When I say “eating light“, I don’t mean “light” as in “not eating a whole lot” – I mean “light” as in “eating meals that are light in flavor“.

IMG_1504

There is a reason why winter = comfort food season. People want to sit at home wrapped up in a blanket eating a plate of hot cheesy pasta casserole or a bowl of hot creamy soup. No one wants to do all that when it’s 95 degrees out.

Well, I don’t mind it that much, but I know most people would prefer not eat a steaming hot bowl of soup when they’re hot and sweaty already.

I think tacos are the perfect summer food. It’s light, easy to make, customizable, healthy, and its flavor can be easily tweaked based on what meats you make and what toppings you add to it.

Chicken fajitas.

Carnitas.

Barbacoas.

Seafood (fish, shrimp, etc).

Then pile on the toppings that you like: Beans. Cheese. Lettuce. Tomatoes. Avocados. Sour cream.

No matter what your preference is, there’s usually a perfect taco for you. You can have a family of picky (and non-picky) eaters, but when it comes to tacos, everyone can easily add their favorite toppings and be a happy camper at the dinner table.

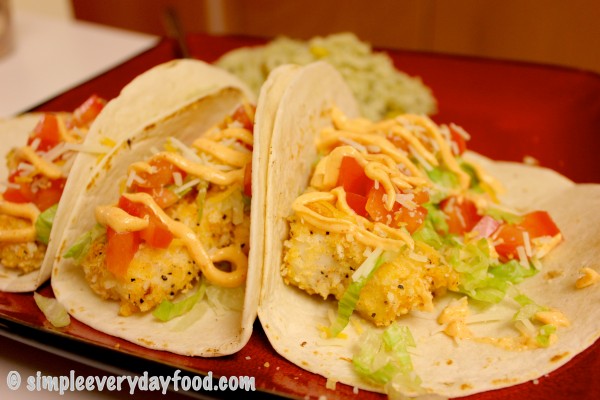
Now that I’ve done enough rambling, let me talk about these tacos. They’re simple. They’re healthy. They don’t take a whole lot of prep time in the kitchen, and they’re delicious. Deeeee-licious.

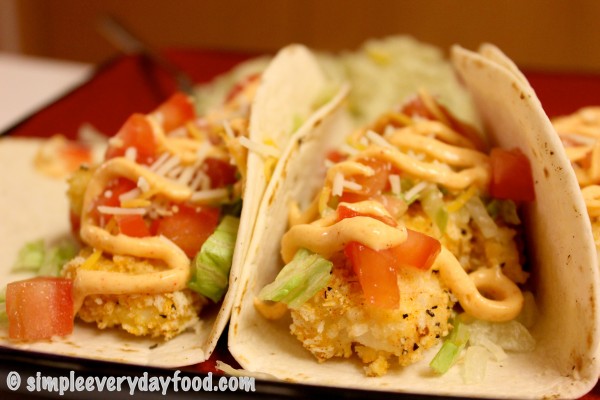
I basically took my crispy cod sandwich with spicy mayo, eliminated the bun, cut the fish fillets into fish sticks, and put them in a soft flour tortilla. Drizzle on the spicy mayo, and viola! Fish tacos.

IMG_1502

Yep, it’s that easy. Easy peasy.

easy peasy fish tacos
Print
Ingredients
  1. 1 lb cod filets
  2. 1 egg
  3. 1 cup plain panko bread crumbs
  4. 1 package of 6" flour tortillas
  5. An assortment of toppings
for the panko bread crumb seasoning
  1. 1/2 teaspoon salt
  2. 1/2 teaspoon black pepper
  3. 1/2 teaspoon paprika
  4. 1/2 teaspoon garlic powder
  5. 1/2 teaspoon onion powder
for the spicy mayo
  1. 1/3 cup mayo
  2. 1/4 teaspoon paprika
  3. 1/4 teaspoon garlic powder
  4. 1/4 teaspoon onion powder
  5. 1/4-1/2 teaspoon hot sauce, depending on taste
Instructions
  1. Preheat oven at 350 degrees. Line a baking sheet with aluminum foil and set aside.
  2. Place cod fillets on a plate and pat dry with paper towels. Slice/cut the fillets into sizes of fish sticks, about 2" pieces. Season with salt and pepper.
  3. In a large bowl, whisk the egg. In another large shallow bowl, combine all the ingredients for the panko bread crumbs (and its seasonings).
  4. Dip the fish sticks into the egg wash. Transfer them to the shallow bowl containing the bread crumbs. Flip them around a couple times, making sure that every inch of it is covered with the bread crumbs, transfer to baking sheet (you may have to do this in several rounds to prevent overcrowding of the bowls). Bake for 20 minutes until the bread crumbs look golden and crispy.
  5. In the meantime, make the spicy mayo: combine all the ingredients in a small bowl, whisk to combine. If desired, transfer the mayo into a small Ziploc bag and cut a small hole in the corner for easy drizzling.
  6. Once the fish is done cooking, assemble your tacos: place a few fish sticks in the middle of your tortilla, top with toppings, and drizzle with the spicy mayo.
  7. Serves 2-3
Notes
  1. We warmed the tortillas up in a small pan over medium-high heat, about 15 seconds on each side.
Simple Everyday Food https://www.simpleeverydayfood.com/
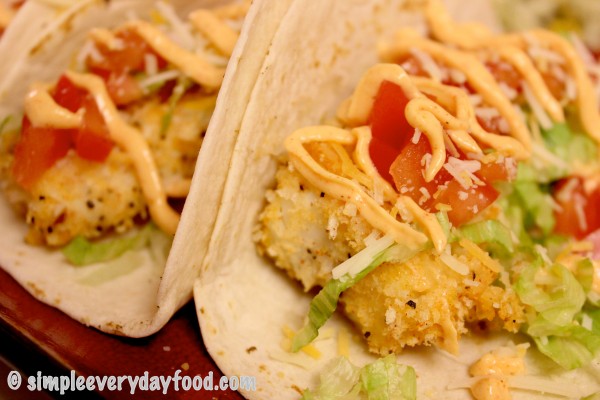
Making tacos really can’t get a whole lot simpler than this. Not only do these tacos deliver in flavor, it also has a variety of textures as well – the crispiness of the fish, the softness of the tortilla, the crunchiness of the shredded lettuce, and the creaminess of the mayo… it has every texture one bite of food will ever need.

IMG_1505

So what are you waiting for? Put this on your meal planner for the week!

Enjoy!

© Simple Everyday Food. All images & content are copyright protected. Please do not use any of my images without prior permission. If you want to republish this recipe, please re-write the recipe in your own words, or kindly link back to this post for the recipe.

Sharing is caring! Email this to someonePrint this pagePin on PinterestShare on YummlyShare on FacebookShare on Google+Tweet about this on Twitter

Yikes. I went a whole week without making anything worth posting.

Now that I think about it, I don’t even think I made anything substantial in the kitchen since last week. It’s been a bad eating week for me, and I only have a hectic work and school schedule to blame. The first week of school was busy – getting back into the school mentality has been a challenge after a whole 4 weeks of summer off. Five classes, 7-8 big projects due in about 2 months, and a ton of reading to do. It’s only the second week and I’m sooooo behind already!

I promise I’ll be more active in the kitchen this weekend. I already have several things in mind to make, so stay tuned!

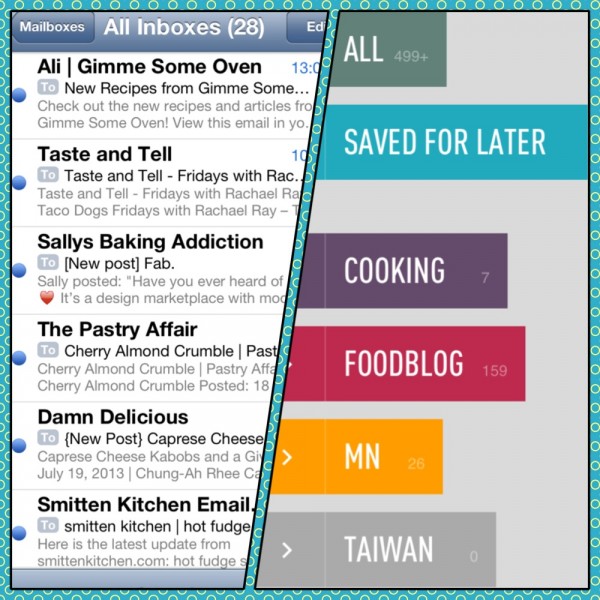
1. Because life has been so busy, I’ve been falling behind in my blog reading… my life has literally been revolving around school, work, studying, and trying to get enough sleep in between. I haven’t even really had time to spend time with Bentley or the hubs! I took this snapshot a few days ago. Since then, I did finally get most of my emails read, but my Feedly feed now has more than 360 unread food blog articles! Yikes.

photo 1

2. I found this link called “21 Reasons Why A Dog Is The Best Investment You Will Ever Make“. A lot of them made me smile. Some made me sad. But it really made me realize how much joy Bentley has brought to our lives in the past 1.5 years :)

923109_10103071202058390_21838851_n

3. Have you ever wondered why “scratch paper” is called “scratch” paper? It’s not like we use it to scratch anything. We use it for taking notes, making paper airplanes, and do math calculations… why couldn’t it be called “recycled one-sided paper“? The name seems like it makes a lot more sense to me.

4. We went to a local goat farm yesterday as part of our Large Productions Animal class. Baby goats! They were so cute! We learned how to restrain, do jugular blood draws, and trim hoofs. I’m not a farm girl, but I definitely loved those little buggers.

photo 5

photo 2

photo 3

5. I think I want to make these sometime. They seem simple on paper. And they include my favorite berries… so therefore I consider it a healthy dessert.

© Simple Everyday Food. All images & content are copyright protected. Please do not use any of my images without prior permission.

Sharing is caring! Email this to someonePrint this pagePin on PinterestShare on YummlyShare on FacebookShare on Google+Tweet about this on Twitter

I decided to start this little section called “This Week In Review” that will document life’s random things as well as random thoughts that cross my mind during the week. I figured this can be a way for me to take a break from all the cooking, baking, studying, and working, and still be able to write something lighthearted on here on a regular basis…. so here we go!

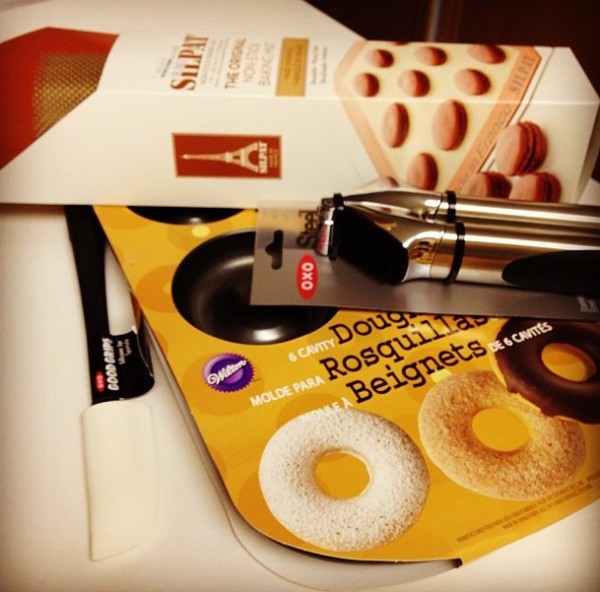
1. I’m sure our bank account hates it when I shop at Bed Bath and Beyond. It doesn’t help that we get coupons in the mail all the time – they just have so many fun things in there! I finally broke down and bought a Silpat and a garlic press this past weekend! Woo hoo for new toys!

photo 1

2. Yes, that was a donut pan you saw in the picture. Who’s excited to make healthier donuts? This girl sure is! My first experiment was making key lime donuts – they turned out to be a success!

3. My second to last quarter started on Monday. Back to wearing scrubs 4-6 days a week. Five classes – I hope I survive!

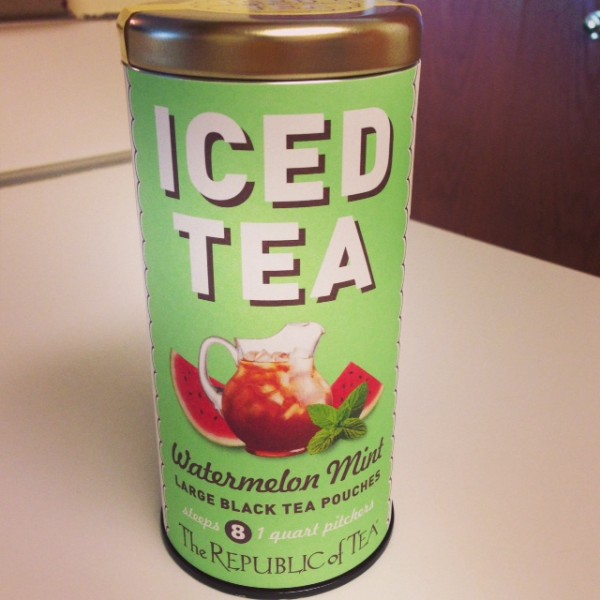
4. I’m very into iced tea lately. I found these at Kowalski’s a few weeks back and decided to make a quart of it a few nights ago. Although I’m all about being healthy, next time I’m going to be adding a little simple syrup to it. I’m sure that defeats the purpose of tea being good for you, but oh well.

photo 2

5. Every year we have to do a Hazardous Material (HazMat) training for work – we review how to triage, set up decon tents, and don HazMat suits. I got to do mine today! Today’s main topic was about blast explosions, mass casualties, and radiation exposure. In addition to the 95-degree heat, we got to wear lovely suits that are anything but breathable and play with Geiger counters (did you know Secret deodorant can set it off?!)

photo 3

© Simple Everyday Food. All images & content are copyright protected. Please do not use any of my images without prior permission.

Sharing is caring! Email this to someonePrint this pagePin on PinterestShare on YummlyShare on FacebookShare on Google+Tweet about this on Twitter

I’m not sure why I’m so into key limes this summer. Before this June, I’ve never had anything involving key limes in my life. And all of a sudden, I’m making key lime pie bars, and now key lime donuts…

IMG_1499

A few days ago, I went to Bed Bath & Beyond and bought myself a donut pan. Does anyone else besides me love that store?? I can probably shop there for hours and come out with hundreds and hundreds of dollars worth of kitchen stuff. That store is seriously bad for our bank account.

Okay, back to donuts…

If I can have something sweet for breakfast for the rest of my life, it would probably be donuts.

Or blueberry muffins.

Probably donuts. I looove donuts to a fault, and I’m glad I don’t eat them for breakfast all that often (my favorite is the ones with chocolate glaze and sprinkles on top!) There are a few donut shops around the metro that I’ve been wanting to try for a while. When we were in Seattle last month, we were so busy checking things off of my to-do list that we didn’t have a chance to try out their famous Top Pot Donut Shop. Also, a few years ago, there was a huge donut craze back in Taiwan when Mister Donut opened. There would always be a line of people out their doors and around the corner, just to buy half a dozen of their donuts.

I guess what I’m sayin’ is that people love donuts regardless of where they’re from and how old they are.

Now that I have a donut pan, I can make homemade donuts in the oven that is healthier compared to their fried counterparts. And I can eat half a dozen of them for breakfast without feeling guilty….

baked key lime donuts
Print
For the donuts
  1. 1-1/2 cups all-purpose flour
  2. 1/2 cup sugar
  3. 1 teaspoon baking powder
  4. 1/2 teaspoon baking soda
  5. 1/4 teaspoon salt
  6. 1 egg
  7. 6 ounces plain Greek yogurt
  8. 1/3 cup vegetable oil
  9. 1/4 cup milk
  10. 1 tablespoon key lime juice
  11. 1 tablespoon lime zest
For the glaze
  1. 1 cup powdered sugar
  2. 1/4 cup key lime juice
  3. 1 cup crushed graham crackers
Instructions
  1. Preheat the oven to 325°F. Grease a donut pan and set aside.
  2. In a medium-sized bowl, whisk together the flour, sugar, baking powder, baking soda and salt. In another bowl, beat the egg, then add in the yogurt, oil, milk, key lime juice and lime zest. Whisk until thoroughly combined. Stir the dry ingredients into the wet ingredients and mix.
  3. Transfer the batter to a large Ziploc bag. Cut off the corner and pipe the batter into the donut pan, filling each well about 1/2-2/3 full.
  4. Bake for 10, or until a toothpick comes out clean. Remove from the pan and allow to cool completely on a wired cooling rack.
  5. Meanwhile, make the glaze: mix together the powdered sugar and key lime juice. After the donuts have completely cooled, dip the tops of the donuts into the glaze, then dip the donut into the graham cracker crumbs.
  6. Makes 14 donuts
Adapted from Taste and Tell Blog
Simple Everyday Food https://www.simpleeverydayfood.com/
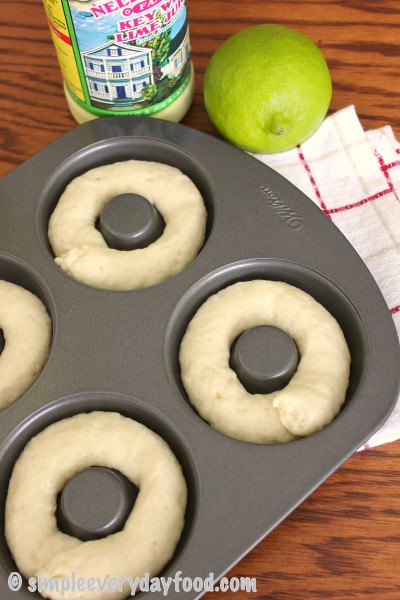
Watch these…

IMG_1469

Go from this…

IMG_1474

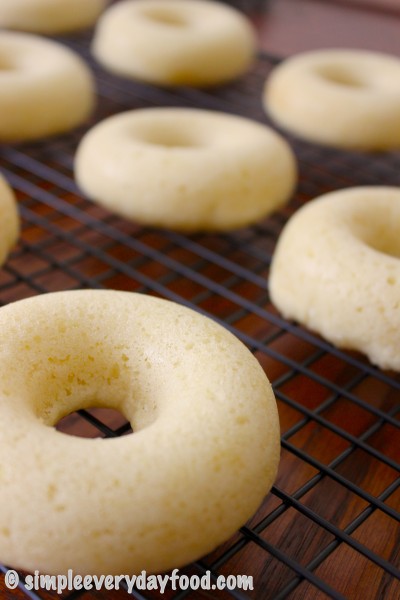
…to this!

IMG_1483

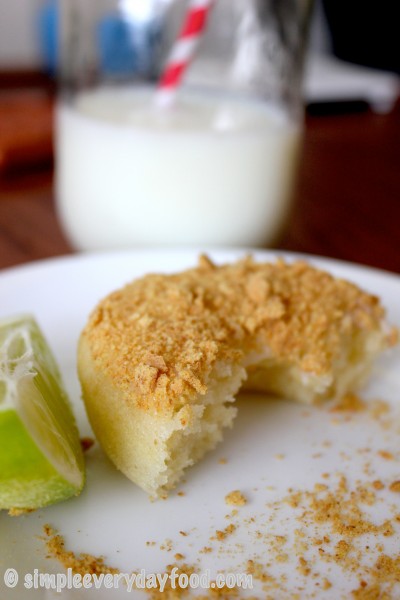
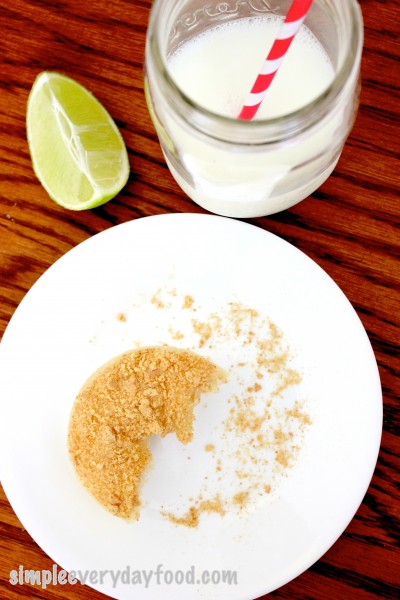
These donuts use vegetable oil instead of butter, only has 1/2 cup of sugar, uses Greek yogurt, and has key lime juice in it. All in all, I consider it as a healthy donut. It’s soft and airy, and the Greek yogurt gives it a slightly chewy texture. The crushed graham crackers on top almost reminds you of the graham cracker crust of a key lime pie – it’s like an up-side-down key lime pie in donut form! It’s also super easy to make – I didn’t even use my KitchenAid stand mixer for this – everything is mixable by hand!

IMG_1494

Now, what kind of donuts should I make next……

Enjoy!

© Simple Everyday Food. All images & content are copyright protected. Please do not use any of my images without prior permission. If you want to republish this recipe, please re-write the recipe in your own words, or kindly link back to this post for the recipe.

Sharing is caring! Email this to someonePrint this pagePin on PinterestShare on YummlyShare on FacebookShare on Google+Tweet about this on Twitter