everyday food made simple

Do you like peanuts? Do you like limes? Do you like Thai peanut sauce?

If you answered “yes” to all of the above, well, you’re in luck. Tonight’s marinade is inspired by the peanut sauce that often accompanies a lot of Thai food. It’s almost similar to the peanut sauce I used in my pad thai.

Actually, now that I think about it, about 80% of the ingredients found in this recipe can also be found in that peanut sauce as well….

So, if you’re a fan of shrimp pad thai, think of this is a dish as a “skinny” version of it since you’ll be saving yourself a lot of carbs but I promise you what this recipe lacks in carbs, it sure makes it up in flavor!

Another plus to this dish is that since your food processor is going to do all the hard labor for you, there’s really not a whole lot of work that goes into this either.

IMG_1204

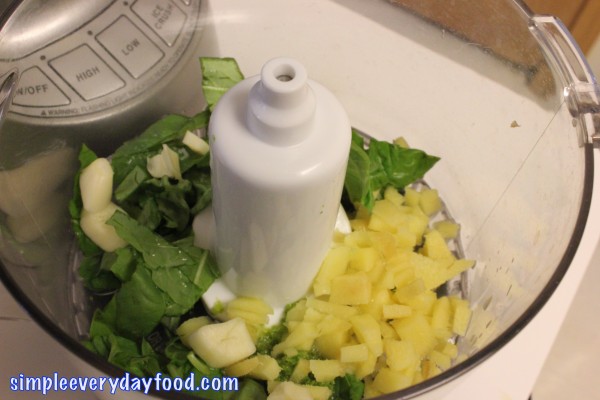
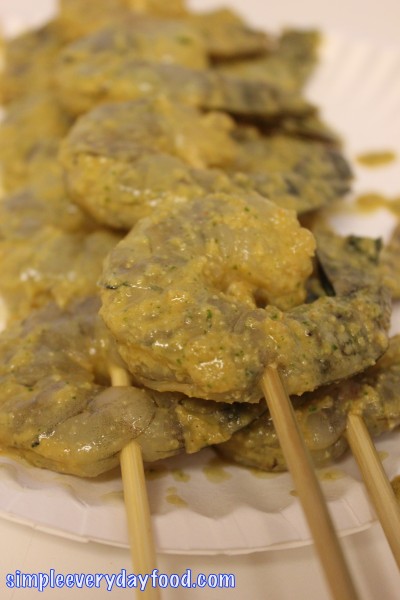
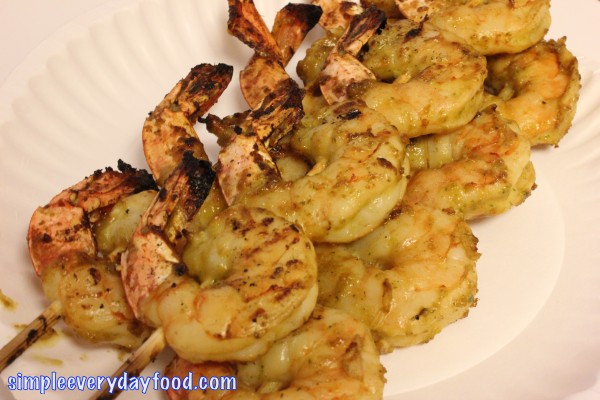
Throw ingredients into food processor. Pulse. Marinate shrimp. Throw on grill. Enjoy.

IMG_1217

IMG_1220

It’s as easy as “1, 2, 3!”

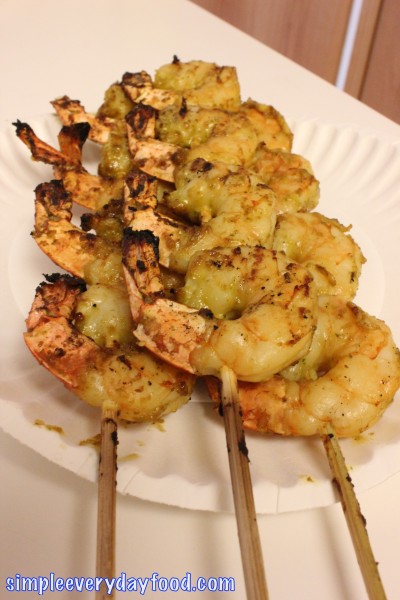
And if you’re making this as an appetizer for a party, your hungry guests wouldn’t have to wait long either since it only takes 4-5 minutes on the grill, and BAM! These bad boys are done and ready to be served.

peanut-lime marinated shrimp
Print
For the marinade
  1. 1/4 cup vegetable oil
  2. 1/4 cup low-sodium soy sauce
  3. 3 tablespoons unsalted peanuts
  4. 1/2 teaspoon lime zest
  5. 2 tablespoons lime juice
  6. 2 tablespoons sesame oil
  7. 1/3 cup fresh basil, roughly chopped
  8. 2.5 tablespoons ginger, roughly chopped
  9. 1 large clove of garlic
  10. 1 teaspoon hot chili sauce
  11. 12-15 jumbo grilling shrimp
Instructions
  1. In the food processor, combine all the marinade ingredients and pulse until smooth and there aren't any big chunks of ingredients visible. Combine shrimp and marinade in a medium-sized bowl, toss to evenly coat the shrimp, cover and set aside at room temperature for 20-30 minutes.
  2. Using a charcoal grill, place shrimp over direct high heat. Cover and grill until shrimp are firm to the touch, lightly charred, and slightly opaque in the center, turning once (about 2-3 minutes per side).
  3. Remove from grill and serve with a fresh squeeze of lime juice, if desired.
Adapted from Weber Grills
Simple Everyday Food https://www.simpleeverydayfood.com/
 IMG_1222

Enjoy!

Sharing is caring! Email this to someonePrint this pagePin on PinterestShare on YummlyShare on FacebookShare on Google+Tweet about this on Twitter

As I promised, here’s the second recipe of last night’s dishes – a very simply seasoned tenderloin with a garlicky sauce.

IMG_1152

I partially wanted to make something that involved garlic because I found this cute little thing at the store yesterday! It’s a way better (and more eye appealing) than our old “Philadelphia cream cheese garlic storage container“! And we can actually proudly display it on our counter now!

IMG_1127

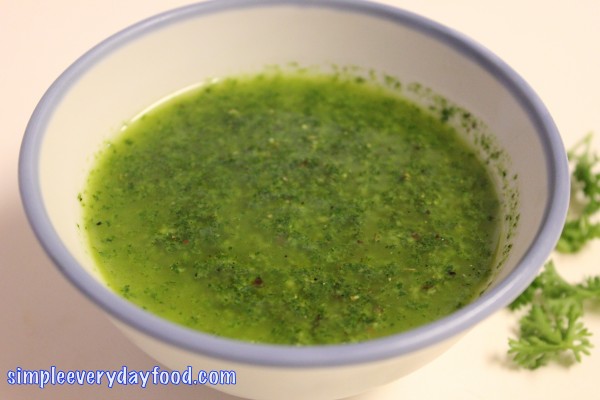
Although this tenderloin is juicy and tender by itself, the sauce kicks the whole dish up a few notches. Green sauces, unlike other colored sauces, are usually associated with words like “fresh” and “healthy“. And why wouldn’t they? They’re usually made with some sort of an herb, garlic, light seasoning (salt and pepper), with little sugar and other processed condiments.

IMG_1125

IMG_1148

pork tenderloin with garlic herb sauce
Print
Ingredients
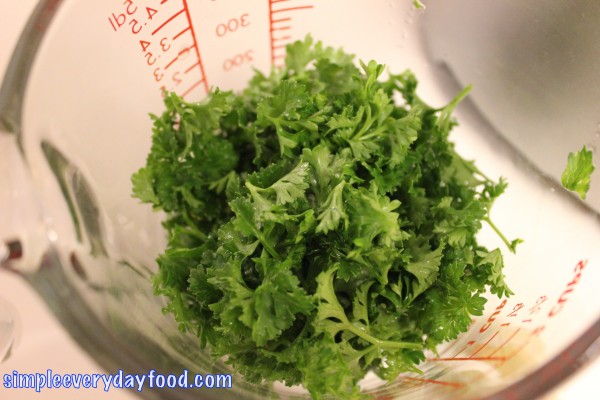
  1. 1 cup packed flat leaf parsley
  2. 2 cloves garlic
  3. 1/2 cups EVOO, plus more for brushing
  4. 3 1/2 teaspoon dried oregano
  5. 1 tablespoon red wine vinegar
  6. A dash of crushed red pepper (omit if you're not a fan of spiciness)
  7. 1 1.5-pound pork tenderloin
  8. 1/2 teaspoons garlic powder
  9. Salt and pepper
Instructions
  1. Using a food processor, pulse the parsley and garlic. Then add in the EVOO, 1/2 teaspoon dried oregano, vinegar, red pepper, 1/2 teaspoon salt, and a pinch of black pepper. Transfer to a bowl and set aside.
  2. Prepare a charcoal grill so it's nice and hot.
  3. Brush the pork with some EVOO and rub with 1 teaspoon salt, 3 teaspoons dried oregano, and the garlic powder.
  4. Place tenderloin on the grill, turning often, and cook until the meat thermometer registers 145 degrees, about 25-30 minutes.
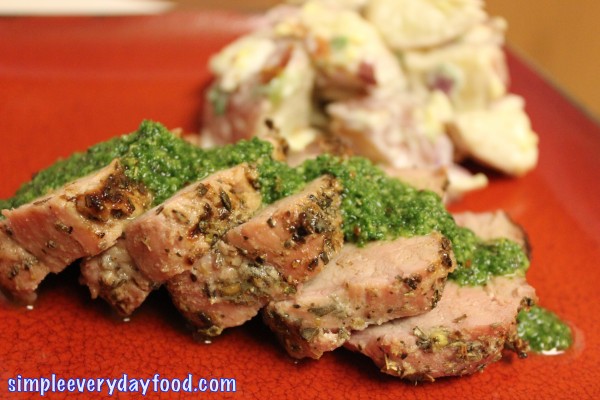
  5. Remove from grill and let rest for 20 minutes. Thinly slice and drizzle with the herb sauce.
Adapted from Rachel Ray Magazine
Simple Everyday Food https://www.simpleeverydayfood.com/
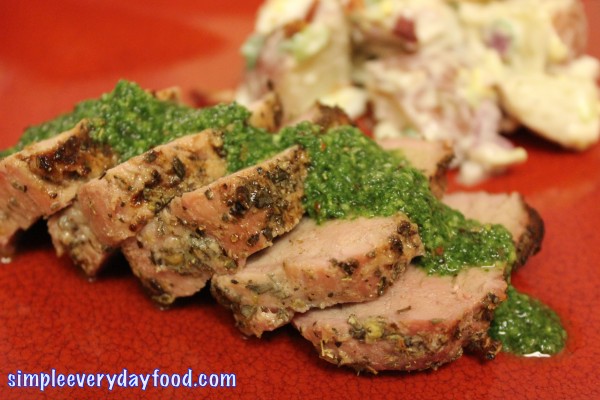
Not only does this green garlic sauce taste good, it also makes the whole dish look like something you can order at a restaurant.

IMG_1155   

After we both had our share last night, there were a few pieces left, and I wasted no time on calling dibs on them for lunch today!

And yes, I’m still working on that gigantic bowl of potato salad… I had to try my hardest to pull myself away from that bowl so I can have some room for coffee later.

….”just one more bite!

[five bites later….]

“Okay, just one last bite! This is going to be my last bite!”

Enjoy!

Sharing is caring! Email this to someonePrint this pagePin on PinterestShare on YummlyShare on FacebookShare on Google+Tweet about this on Twitter

This is going to be the first part of a two-part blog series – to be perfectly honest with you, I decided to split tonight’s recipes into two posts simply because I’m feeling a little lazy and don’t feel like posting two posts tonight. Check back tomorrow for a grilled tenderloin with garlic herb sauce!

IMG_1158

There are several things on my list that every summer must consist of:

  1. shorts, tanks, and flip flops.
  2. sunshine and warm temperatures – and by warm, I mean 80 or above.
  3. fun, summery drinks – slushies, smoothies, punch, and convenience store Slurpies. (what’s everyone’s favorite flavor?)
  4. grilling.
  5. grilling.
  6. ….and more grilling.
  7. driving with the windows rolled down.
  8. iced coffee.
  9. potato salad.

To me, nothing screams summer more than potato salad. It seems like someone almost always brings them to every potluck/cookout there is during the summer.

IMG_1144

There are a few ingredients (or lack thereof) that are essential in my kind of a potato salad: it has to have eggs, it can’t have mustard, and it can’t be runny and soupy.

This recipe has everything that a perfect potato salad should (and shouldn’t) have…but wait! There’s one very important addition to this dish:

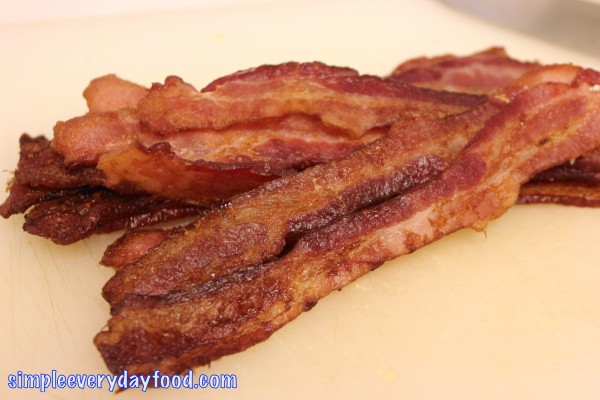
Bacon.

Mmmmm… bacon. Everything tastes better with bacon.

IMG_1133

bacon & egg potato salad
Print
Ingredients
  1. 1.5 pounds small red-skinned potatoes, quartered
  2. 1 pound bacon, cooked and chopped
  3. 2 large hardboiled eggs, chopped
  4. 2 tablespoons red wine vinegar
  5. 3/4 cup mayonnaise
  6. 2 scallions, finely chopped
  7. 1/4 medium red onion, diced
  8. 1 tablespoon sugar
  9. 1/2 teaspoon salt
Instructions
  1. Put the potatoes in a medium pot, cover with water and bring to boil. Reduce heat to medium and cook until fork-tender. Drain and let cool.
  2. In the meantime, combine the vinegar, mayonnaise, scallions, red onion, sugar, salt, and a pinch of black pepper in a small bowl.
  3. Once the potatoes are cooled, transfer them into a large bowl. Add the bacon bits and the mayonnaise mixture. Toss to combine. Then add in the chopped eggs and toss until everything is evenly coated with the dressing.
  4. Serve at room temperature and refrigerate leftovers.
Adapted from Food Network Magazine
Simple Everyday Food https://www.simpleeverydayfood.com/

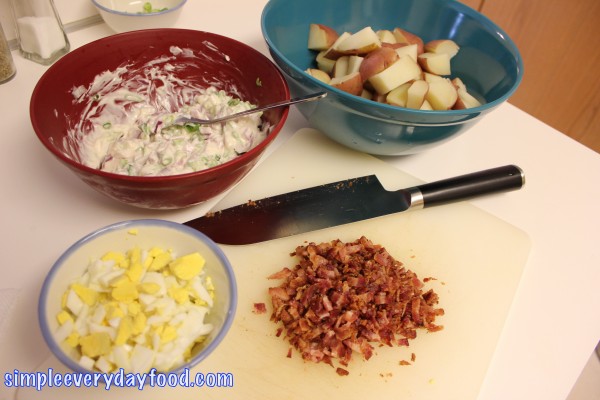
Once everything is prepped and ready, it’s time to mix everything together!

IMG_1134

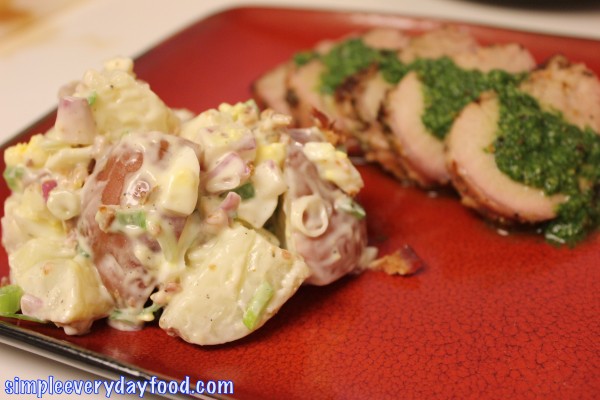
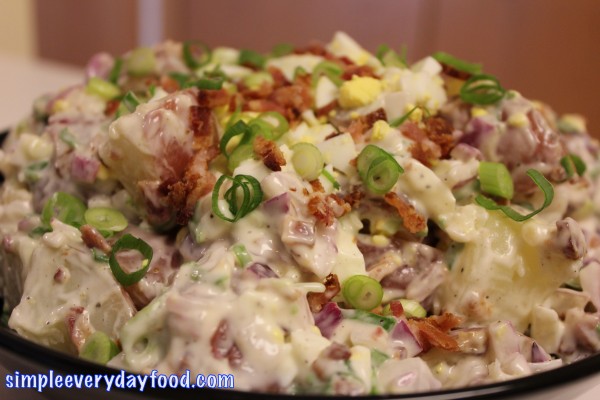
I’m pretty sure this is the best potato salad I’ve ever made, and I’m pretty sure these crispy bacon bits can win an Oscar for Best Supporting Actor for it’s superb performance in making this entire dish taste so much better. The dressing is enough to where it slightly coats everything, but not too much to where the flavor is overwhelming and you’re left with a puddle of dressing on the bottom of your dish.

IMG_1139

All in all, this is the perfect potato salad to bring to your next barbeque cookout! I probably could’ve sat on the couch and ate the entire bowl tonight…. instead I settled for a small portion to go with my pork tenderloin.

IMG_1156

Enjoy!

Recipe slightly adapted from Food Network Magazine

Sharing is caring! Email this to someonePrint this pagePin on PinterestShare on YummlyShare on FacebookShare on Google+Tweet about this on Twitter

When it comes to desserts, I don’t do boring.

By “boring“, I mean traditional – like chocolate cake, vanilla cake, red velvet cupcakes, oatmeal raisin cookies, chocolate chip cookies…. you get the idea. I like making desserts that aren’t your everyday “boring” flavors….My reasoning is, if I want old fashioned dessert flavors, I’m sure I can find them at just about every bakery/grocery store in the neighborhood. If I’m spending the time to make something from scratch, it’d better be something I can’t find easily.

Wait, but isn’t this post about “plain”, “regular”, “boring” chocolate chip cookies?

IMG_1053

Yeah yeah… today I actually felt like making some traditional chocolate chip cookies. Actually, one of the reasons why I chose chocolate chip was simply because I didn’t feel like going to the store and buying a bunch of ingredients for cupcakes. I also didn’t feel like standing in the kitchen for hours making cupcakes either. Talk about laziness – I just wanted something sweet, something homemade, and something easy to make.

That’s when I decided to go back to the basics and make something simple.

I like my cookies chewy, and the high proportion of brown sugar kept these cookies soft and moist (sorry!) in the middle. Slightly golden crunchy edges with gooey soft chocolatey centers.

IMG_1056

IMG_1059

chewy chocolate chip cookies
Print
Ingredients
  1. 2 3/4 cups all-purpose flour
  2. 1 teaspoon salt
  3. 1 teaspoon baking powder
  4. 1 teaspoon baking soda
  5. 2 1/2 sticks butter, softened to room temperature
  6. 1 3/4 cups packed brown sugar
  7. 1/4 cup granulated sugar
  8. 2 large eggs, at room temperature
  9. 2 teaspoons vanilla extract
  10. 2 cups semi-sweet chocolate chips
Instructions
  1. In a large bowl, sift together flour, salt, baking powder, and baking soda. Set aside.
  2. Using an electric mixer, beat the butter, brown sugar, and granulated sugar on medium-high until pale and fluffy, about 3-4 minutes.
  3. Beat in the eggs, one at a time, then beat in the vanilla. Reduce the speed to low, then slowly incorporate the flour mixture into the egg mixture. Stir in the chocolate chips by hand.
  4. Cover with plastic wrap and chill in refrigerator for at least an hour, preferably overnight.
  5. Preheat the oven to 375 degrees. Line 2 baking sheets with parchment paper. Roll cookie dough into ~1" balls and place onto prepared cookie sheets. Bake for 10-12 minutes, or until edges begin to brown.
  6. Remove cookies from oven, cool on the baking sheet for 10 minutes, then remove and cool completely on a wired cooling rack.
  7. Makes about 48 cookies
Adapted from Food Network Magazine
Simple Everyday Food https://www.simpleeverydayfood.com/
So this recipe makes about 48 cookies. Of course we’re not going to eat all of them (although Brian would’ve polished off the whole bowl of raw cookie dough last night if I wasn’t guarding the bowl with my life), so it’s a good thing I’ll be swinging by work today to drop some off for my lucky coworkers!

IMG_1068

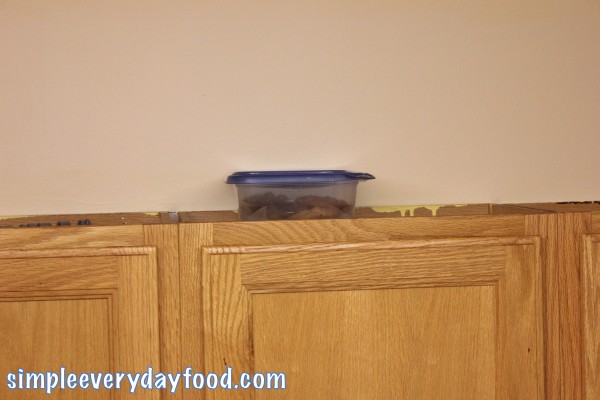
After putting some cookies in a Tupperware for work, there were about 20 left. We divided the rest amongst the two of us – I got five, and the hubs took the rest of the 15.

Somehow he thinks I won’t be touching his cookies if he placed them all the way up on the cupboards……

IMG_1077

Little does he know, there’s not a whole lot that can stand between a girl and her sweets…. I might be short, but I have my ways. MWAHAHAHAHAHAHA!!

Yep, that’s my evil laugh.

Enjoy!

Sharing is caring! Email this to someonePrint this pagePin on PinterestShare on YummlyShare on FacebookShare on Google+Tweet about this on Twitter

It’s been a while, but forgive me – I’ve been busy enjoying my 24 days off of work and school with a little vacation with the hubs in Seattle.

This trip to Seattle is actually both a vacation and a scouting trip. You see, we’re hoping that we can move here early next year for both a change of scenery and for a better food scene. Call me a nerd, but I’m moving for the food. Yes, I will move for food.

Seafood. I love seafood. Fresh crab, salmon, shrimp… And don’t get me started on all the authentic Taiwanese restaurants and bakeries in this area. I was practically drooling when I was scouting out all the Taiwanese restaurants three months prior to our departure date.

And just 6 hours after we arrived a few days ago, I was sold and am determined to live here someday.

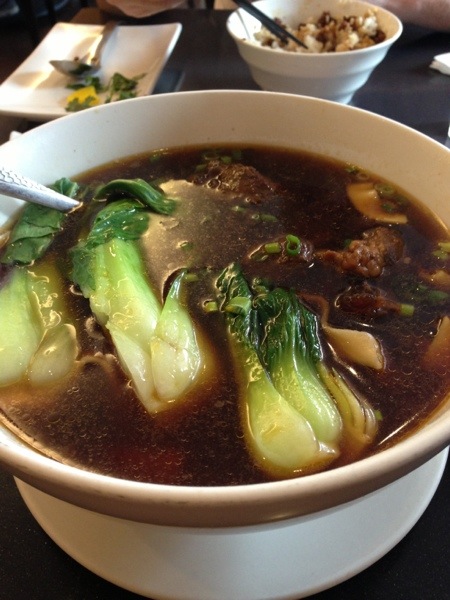
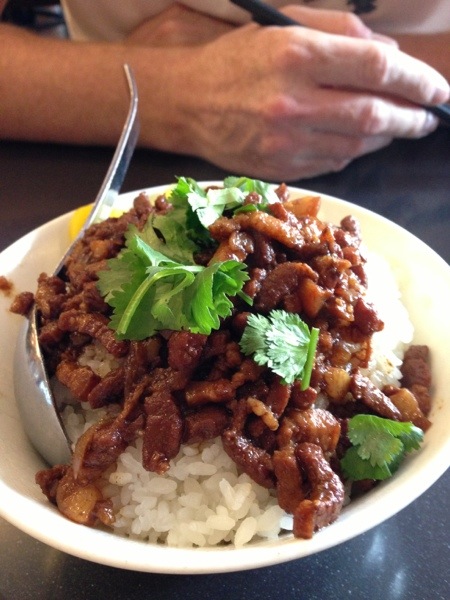
It all started with a trip to Facing East, an authentic Taiwanese restaurant nestled in a strip mall in Bellevue. When I saw their menu, I wondered if I died and went to heaven.

I had the beef noodle soup and the hubs had the minced pork with rice (both very traditional dishes and both are must try’s!)

20130621-074837.jpg

20130621-074848.jpg

And of course, since we’re staying in downtown Seattle, a visit to the ever so famous Pike Place Market was a must.

20130621-075040.jpg

…and the first ever Starbucks.

20130621-075513.jpg

I’m taking full advantage of being in this city and trying to get some sort of fresh seafood everyday!

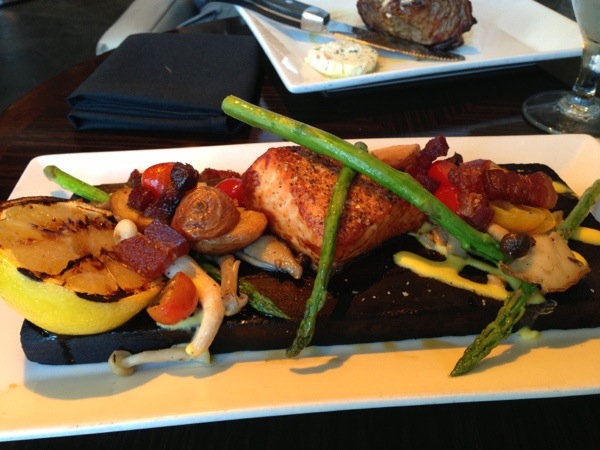
Cedar plank salmon with rainbow potatoes, assorted mushrooms, and asparagus.

20130621-075630.jpg

Big gigantic calamari steaks and rosemary garlic fries.

20130621-075811.jpg

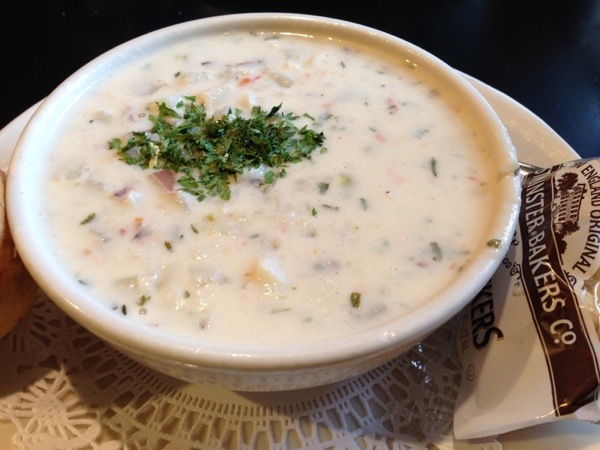
Dungeness crab chowder (this was amazing!)

20130621-075847.jpg

And of course, we had to make a trip to a Taiwanese bakery. I think this time the hubs was in heaven…

20130621-080042.jpg

Right next door to the bakery was a bubble tea place, so of course we has to stop there as well.

20130621-080226.jpg

Our biggest dilemma everyday is perhaps deciding on what’s for breakfast. There’s a French bakery downtown that has amazing eclairs and macaroons!
20130621-080416.jpg

Stay tuned for more pictures!

Sharing is caring! Email this to someonePrint this pagePin on PinterestShare on YummlyShare on FacebookShare on Google+Tweet about this on Twitter