everyday food made simple

Hey guys! Guess what?

Today we’re celebrating a special day that’s coming up tomorrow and I’m quite excited about it.
IMG_5398 copy

I’ll give you a few hints:

  1. It’s going to be a two-year celebration
  2. It involves something that started out as an idea, which turned out to be a hobby
  3. It involves food (lots and lots of food), lots of time in the kitchen, hours of time spent on learning photography and techie things, and a little space I own here on the internet

That’s right, you guessed it! Tomorrow will be Simple Everyday Food’s 2nd blogiversary! Can I get a whoop whoop?!
IMG_5402 copy

IMG_5409 copy

This little site of mine started out as an idea, and after a few encouragements from the mister, I bit the bullet two years ago, signed up for my own domain name, and BOOM! SEF was born. Fast forward throughout the years, this little corner of mine here on the world wide web has slowly became my happy place where I get to temporarily run away from everyday stresses, let loose, and be creative. I still have so much to learn in regards to the food blogging business, but SEF wouldn’t be able to continue to grow without all my supporters and those that I constantly learn from every single day.

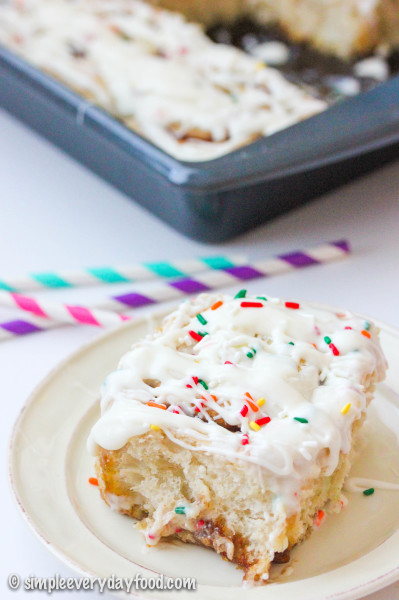
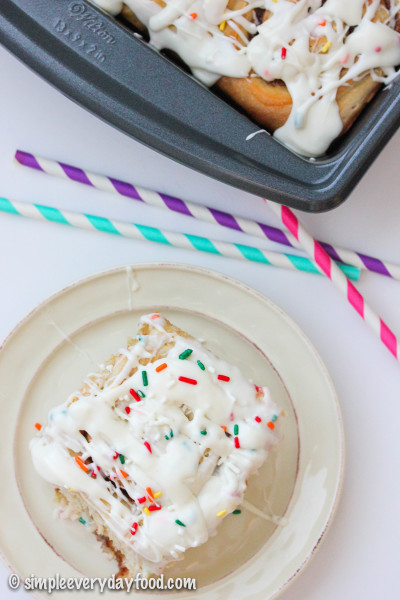
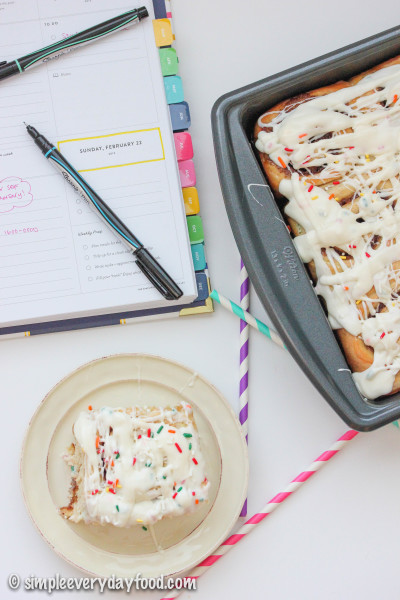
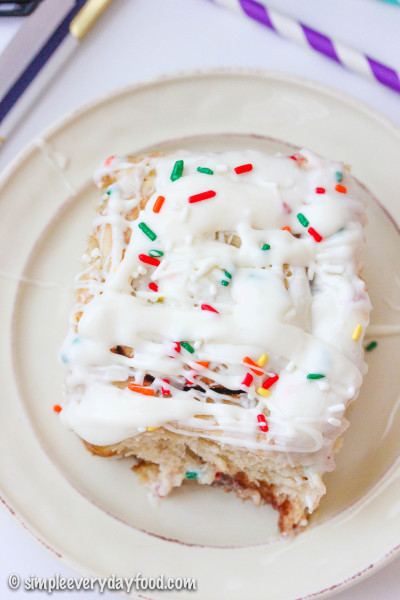
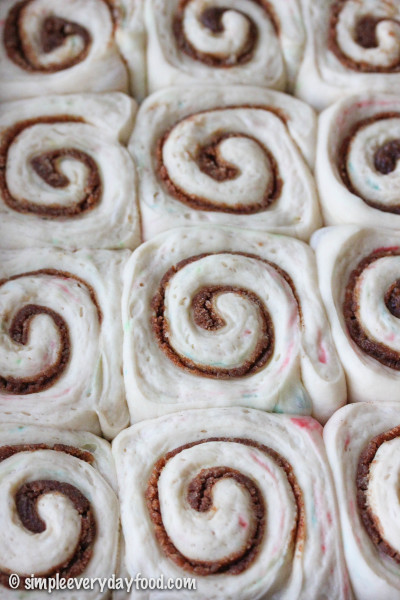
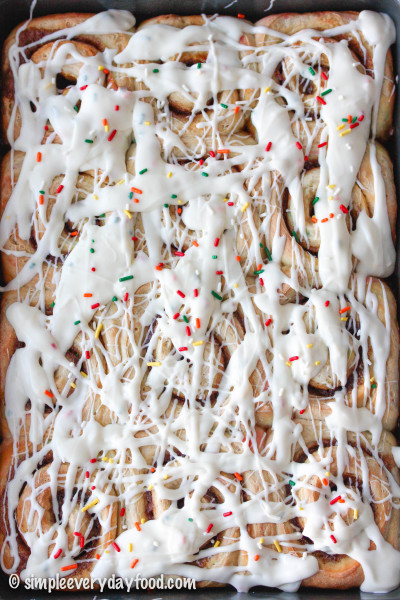
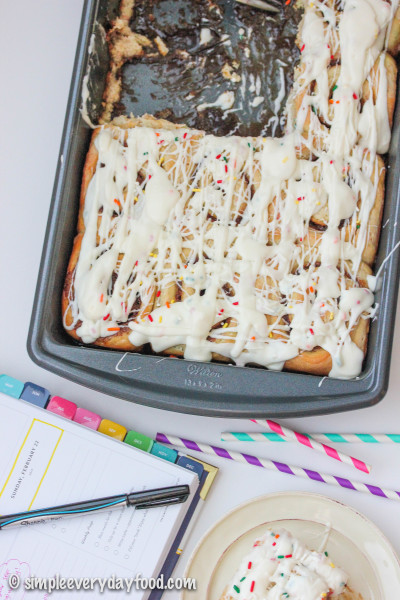
So it’s only appropriate that we celebrate this special occasion with sprinkles. Lots and lots and looooots of sprinkles. And instead of a cake, we’re celebrating with some soft and fluffy cinnamon rolls. Homemade cinnamon rolls dotted with plenty of sprinkles baked to melt-in-your-mouth perfection, generously drizzled with a sweet and creamy cream cheese frosting with sprinkles, to be exact.
IMG_5374 copy

IMG_5388 copy

IMG_5396 copy

A big thank you to all of you who have been part of this journey – I wouldn’t be here without you guys! xoxo
IMG_5415 copy

overnight funfetti cake batter cinnamon rolls
Print
For the rolls
  1. 2 and 1/2 cups water
  2. 1 tablespoon active dry yeast
  3. 1 teaspoon salt
  4. 1 box funfetti cake mix (I used Pillsbury)
  5. 5-6 cups all-purpose flour, plus more for dusting
  6. 1 teaspoon vanilla extract
For the filling
  1. 1 stick (8 tablespoons) unsalted butter, melted and cooled
  2. 2 and 1/2 cups dark brown sugar
  3. 2 tablespoons ground cinnamon
For the glaze
  1. 2 and 1/2 oz light cream cheese, softened to room temperature
  2. 3 tablespoons milk
  3. A splash of vanilla extract
  4. 1 and 1/2 cups powdered sugar
  5. rainbow sprinkles for garnish, if desired
Instructions
  1. Heat water in a microwave safe bowl until it reaches ~120-125 degrees F. Sprinkle in the yeast and salt and give it a good stir. Let sit for 5 minutes until foamy.
  2. In the bowl of an electric mixer, combine the cake mix and the 5 cups of flour, stir to combine. Using a dough hook attachment, slowly add in the yeast mixture and vanilla extract. Turn on the mixer and mix on low, gradually increasing the speed to medium-low. Knead the dough for about 5 minutes or until the dough is elastic and pulls away from the sides of the bowl. If the dough is still too sticky, add in additional flour, 1/4 cup at a time, until it no longer sticks to you hand (I only used about 1/2 cup of extra flour). Remove dough and place in a lightly greased bowl, cover and let rise until it doubles in size, about 1-2 hours.
  3. In the meantime, combine the brown sugar and cinnamon in a medium bowl and set aside. Grease two 9x13" baking pans and set those aside as well.*
  4. Once the dough has risen, divide the dough into two portions so it's easier to work with. Turn half of the dough onto a lightly floured surface and roll into a rectangle, approximately 11x15" (or in my case, my dough always turns out to be a large blob instead). Brush half of the melted butter onto the dough, covering every single inch if possible. Then generously sprinkle half of the brown sugar/cinnamon mixture evenly on top.
  5. Starting on the long end, tightly roll up the dough and cut dough into 10-11 slices, about 1.5-2" thick each. Place into prepared baking pan. Repeat with the other half of the dough.
  6. Cover baking pans and let rise overnight on your kitchen counter.
  7. The next morning, bake rolls in a 400 degree oven for 15-20 minutes or until golden brown (mine took exactly 15 minutes). Remove from oven and let cool.
  8. While the rolls are cooling, make the glaze: beat the cream cheese in an electric mixer until smooth and creamy. Add in the milk and vanilla extract and beat until incorporated. Slowly add in the powdered sugar and beat until smooth. Drizzle over rolls and sprinkle with additional rainbow sprinkles, if desired. Rolls taste best the same day, but can be stored in an airtight container at room temperature for up to 5 days**.
  9. Makes 20-22 rolls
Notes
  1. * If you only have one 9x13" baking pan like me, you can always use a 9" pie plate along with the baking pan.
  2. ** You can always freeze one pan of the rolls after they've cooled from the oven, then wrap well and freeze. Thaw out in the refrigerator or at room temperature, make the glaze, and heat rolls in microwave until warm.
Adapted from Something Swanky
Simple Everyday Food https://www.simpleeverydayfood.com/
Recipe adapted from Something Swanky; glaze recipe adapted from Well Plated

© Simple Everyday Food. All images & content are copyright protected. Please do not use any of my images without prior permission. If you want to republish this recipe, please re-write the recipe in your own words, or kindly link back to this post for the recipe.

Sharing is caring! Email this to someonePrint this pagePin on PinterestShare on YummlyShare on FacebookShare on Google+Tweet about this on Twitter

Just a few weeks ago, we finally decided to re-join a gym. I figured with all the cupcakes, cookies, and bars that come out of my kitchen, it would be a matter of time until my pants start to get tighter and the number of the scale to go upwards… okay okay, I lied. All that was actually starting to happen and I was horrified one day when I put on my jeans and realized they were getting slightly snug around the hip and waist and thigh area.

So with the new year and multiple gyms offering “New Year Resolution” rates, the mister and I joined a local gym for only $1 each and made a pack that we would go at least 3 times a week, Monday-Friday, alternating between cardio and lifting. I’m happy to say that a few weeks into it, we’ve been staying strong and going almost everyday after work and I definitely feel better about myself afterwards.

Since Valentine’s Day is just around the corner (errr, I mean, tomorrow) and with us trying to live a healthier lifestyle, today I bring to you an easy, quick, cheap, relatively-healthier Valentine’s Day recipe that will satisfy your sweet n’ salty tooth but not break the bank at the same time.

IMG_5504 copy

IMG_5448 copy

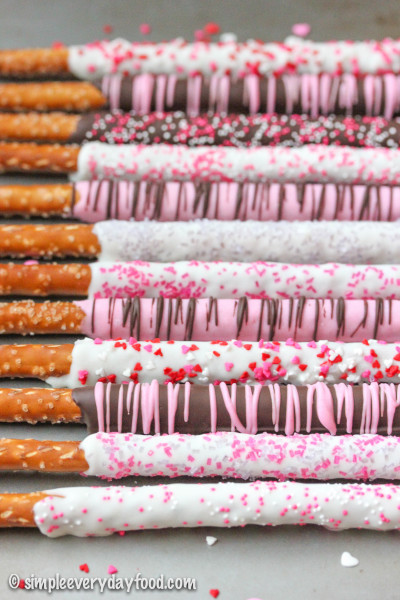
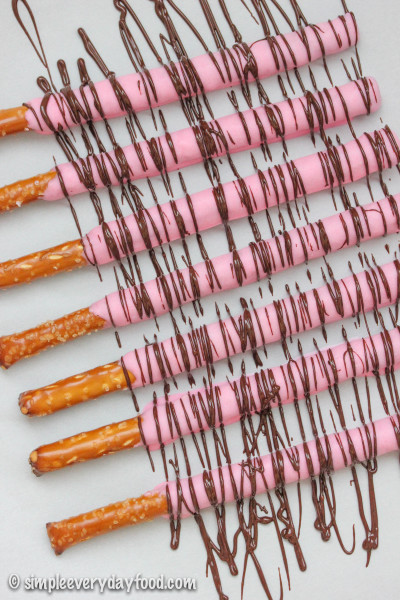
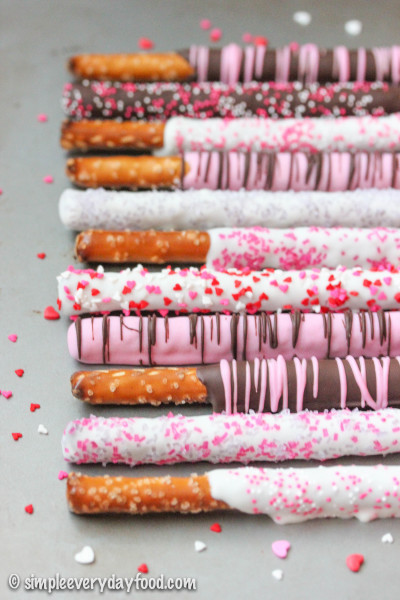
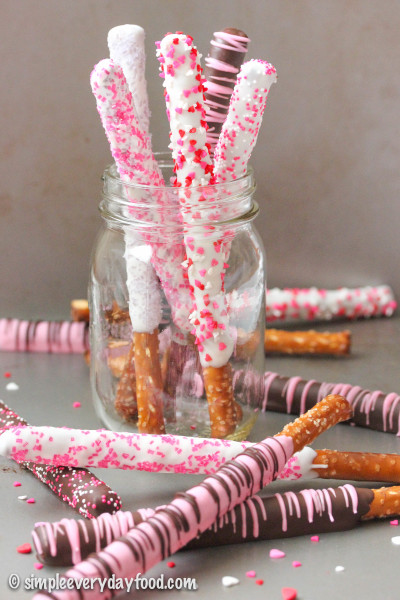
If you just realized that tomorrow is Valentine’s Day and have started to panic about what to get your significant other, you should totally make these pretzel rods because even though they’re easy and cheap to make, they look beautiful and your honey will think you spent a good fortune on them at the store.

IMG_5426 copy

IMG_5509 copy

IMG_5493 copy

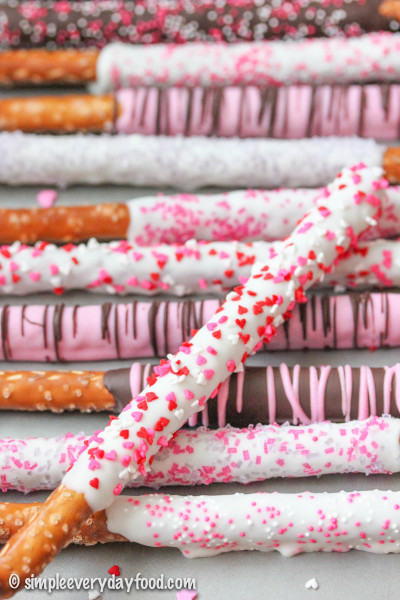
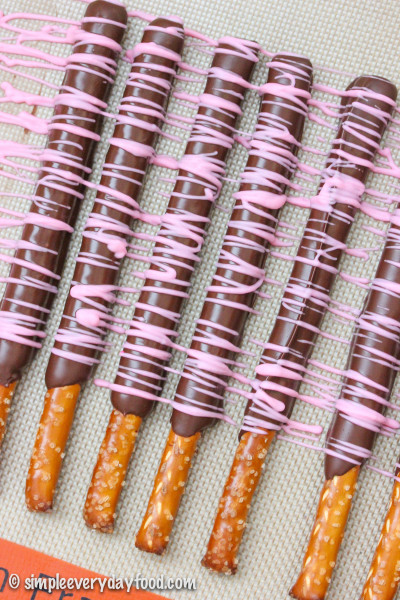
Plus, you can always customize them to however you want them – dark chocolate, milk chocolate, white chocolate… chocolate drizzle, sprinkles (always say yes to sprinkles), crushed candy/nuts, or just plain (but that’s soooo boring!). Add a few drops of gel-based food coloring into the melted white chocolate for special occasions. The combinations really are endless and it can always be a fun little project for you and the little ones (if you have little ones) on a snowy day.

IMG_5423 copy   IMG_5418 copy

IMG_5478 copy

IMG_5440 copy

The trick to dipping these is to pour the melted candy melt/almond bark into a tall skinny glass for easy dipping. Swirl the pretzel rods in it, leaving a few inches on the end to hold on to, then let the excess drip back into the glass and place the pretzel rod on a parchment paper-lined baking sheet. If your candy melt starts to harden again, scrape it back into the saucepan and reheat until melted. See? Suuuuuuper simple. Sprinkle your garnishes on right away before the chocolate coating hardens, otherwise you’re left with plain old boring chocolate-covered pretzels. And why have plain pretzel rods when you can have ones with sprinkles?!

IMG_5495 copy

chocolate covered pretzel rods
Print
Ingredients
  1. 20 pretzel rods
  2. 16 oz vanilla-flavored candy coating
  3. Assorted sprinkles for decorating
  4. Gel food coloring, optional
Instructions
  1. Line two baking sheets with silicone baking mats or parchment paper. Set aside.
  2. In a medium saucepan, melt the candy coating over low heat, stirring occasionally until melted (you can also use a double boiler if you have one).* Transfer the melted candy coating into a tall, narrow glass or container for easy dipping. Carefully dip pretzel rods into the candy coating, leaving a few inches at the end uncoated. Gently tap off the excess and sprinkle the sprinkles over the coated pretzel rods, if desired. Place on baking sheets and let the candy coating harden completely. Pretzel rods can be stored in an airtight container at room temperature for up to one week.
Notes
  1. * Squeeze a few drops of gel food coloring into the completely melted candy coating until you reach the desired color.
Simple Everyday Food https://www.simpleeverydayfood.com/
© Simple Everyday Food. All images & content are copyright protected. Please do not use any of my images without prior permission. If you want to republish this recipe, please re-write the recipe in your own words, or kindly link back to this post for the recipe.

Sharing is caring! Email this to someonePrint this pagePin on PinterestShare on YummlyShare on FacebookShare on Google+Tweet about this on Twitter

 The Big Game is tomorrow – are you ready?!

For all your last-minute party planners that are in need of a last-minute appetizer ideas, I’ve got you covered today! Here are some of the most popular game day recipes here on SEF:

>> Buffalo ranch chicken cups

 IMG_5158 copy    

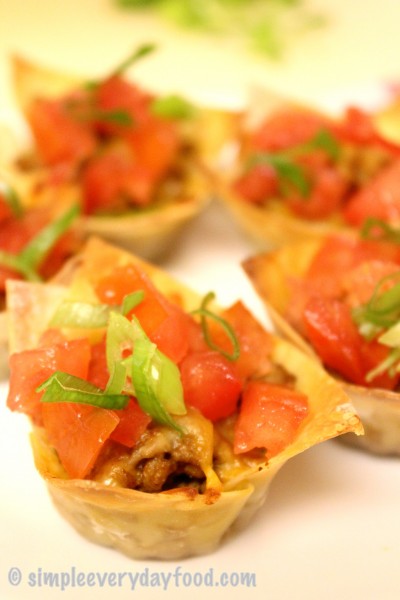
>> Mini taco cups

IMG_1703

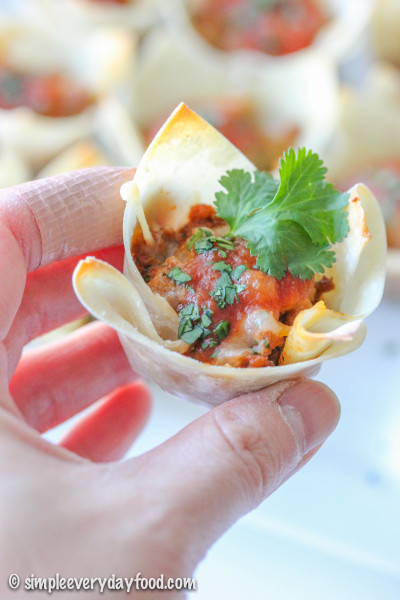
>> Mini taco cups, 2.0

IMG_5563 copy

>> Wonton wrapper wrapped mozzarella sticks

IMG_2017 copy

>> Chipotle hot corn dip

IMG_1714

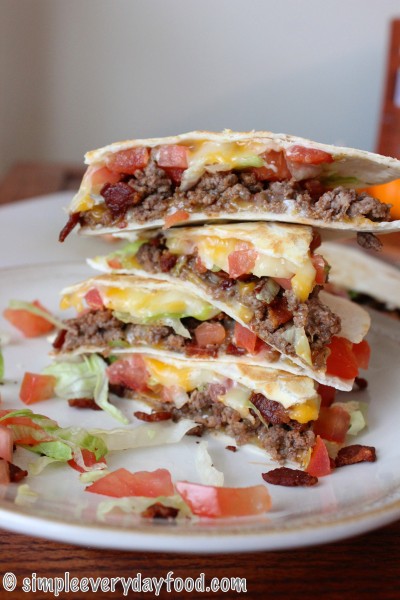
>> Bacon cheeseburger quesadillas

IMG_2265 copy

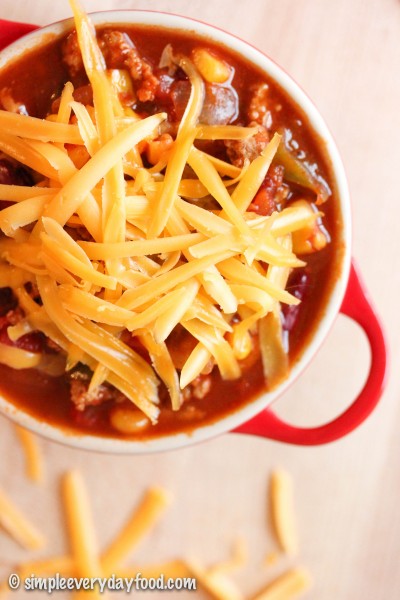
>> Tailgate turkey chili

IMG_2611 copy

(can you tell which of these pictures were from a few years ago when I knew nothing about food photography?)

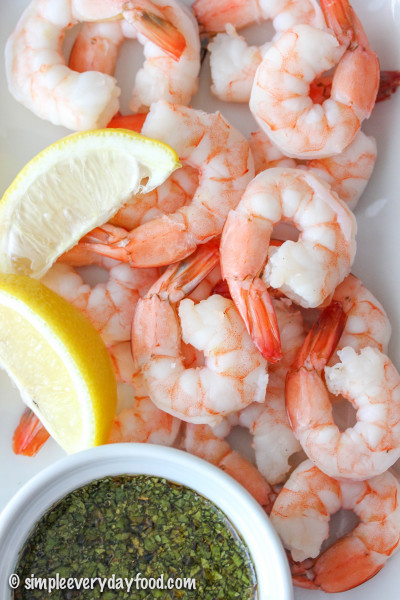
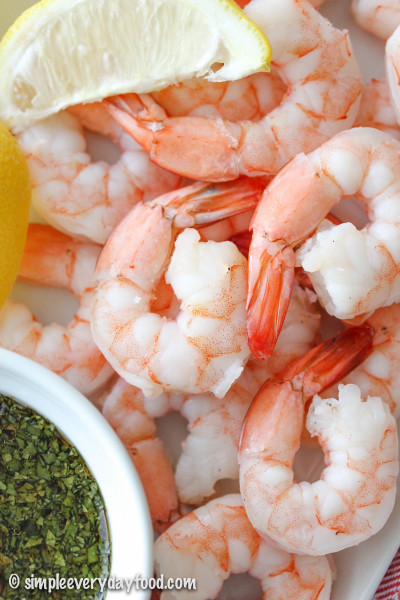
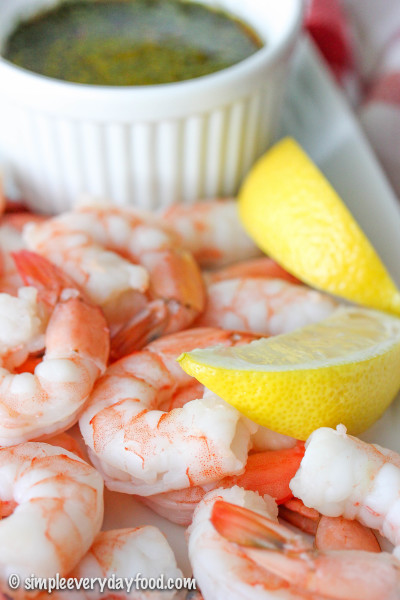
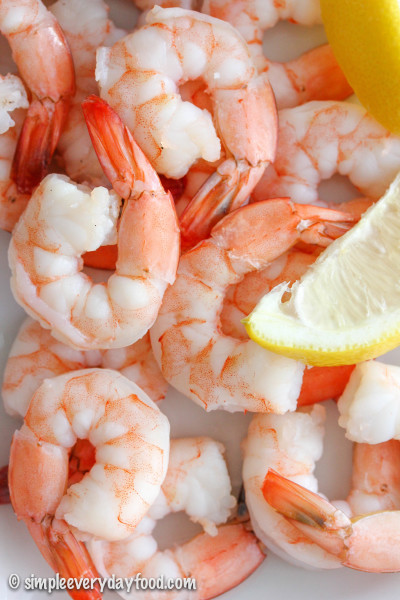
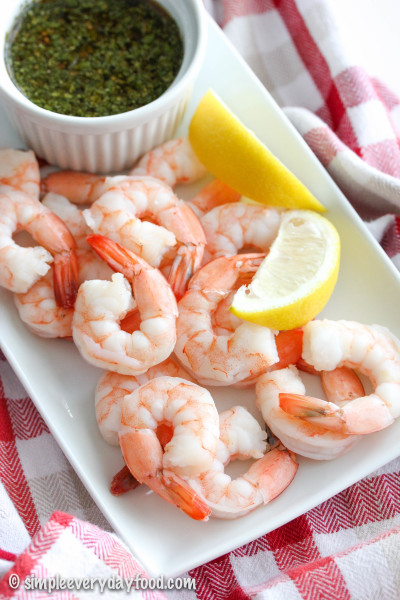
Plus I even have a new super quick and simple shrimp cocktail recipe for you to satisfy all your seafood-loving party guests.

IMG_5203 copy

IMG_5192 copy

Instead of the traditional cocktail sauce, I made a soy-ginger sauce to go with them instead. Because you know, I can never seem to make anything “traditional”. That’s just how I roll, yo.

IMG_5196 copy

This dish comes together easily within an hour and there’s really not a whole lot of prep work that goes into it – the most work you’ll have to do is mince some herbs and grate some garlic and ginger. Otherwise it’s just a lot of “throwing the ingredients in a bowl”, boiling, chilling, mixing, and more chilling. Not a lot of labor involved so you can spend more time watching the game and spending time with friends.

IMG_5194 copy

IMG_5190 copy

Whether you’ll be rooting for the Seahawks or the Patriots tomorrow, or if you’re just going to parties just for the food – I hope everyone has a fabulous time spending the day with family and friends!

shrimp cocktail with soy-ginger dipping sauce
Print
For the shrimp
  1. 2 bay leaves
  2. 1 lemon, quartered, plus more for serving
  3. 1 tablespoon whole black peppercorns
  4. 1 tablespoon coriander seeds
  5. 2 tablespoons salt
  6. 1 pound large uncooked shrimp, peeled and deveined, tails intact
For the sauce
  1. 1/3 cup low-sodium soy sauce
  2. 3 tablespoons cilantro, finely chopped
  3. 1 green onion, green parts only, minced
  4. Juice of 1 lemon
  5. Juice of 1 lime
  6. 1 tablespoon finely grated ginger
  7. 1 teaspoon sesame oil
  8. 1/4 teaspoon granulated sugar
  9. 1/4 teaspoon grated garlic
Make the shrimp
  1. In a large pot, combine 8 cups water, bay leaves, quartered lemon wedges, peppercorns, coriander seeds, and salt. Bring to a boil, then reduce the heat to medium-low. Add the shrimp and simmer until the tails curl slightly and the shrimp is just cooked through, about 3-4 minutes. Using a slotted spoon, remove the shrimp onto a plate and chill in refrigerator for at least 1 hour.
  2. While the shrimp is chilling, make the sauce by combining all the sauce ingredients with 3 tablespoons of water in a small bowl. Mix to combine and refrigerate for at least 1 hour prior to serving.
  3. Shrimp can be stored in an airtight container in the refrigerator for up to 2 days.
Adapted from Food Network Kitchens
Simple Everyday Food https://www.simpleeverydayfood.com/
Recipe adapted from Food Network Kitchens

© Simple Everyday Food. All images & content are copyright protected. Please do not use any of my images without prior permission. If you want to republish this recipe, please re-write the recipe in your own words, or kindly link back to this post for the recipe.

Sharing is caring! Email this to someonePrint this pagePin on PinterestShare on YummlyShare on FacebookShare on Google+Tweet about this on Twitter

Does everyone have their Super Bowl party plans planned out already?

Will you/are you:

  1. Be heading over to someone’s house to watch the big game?
  2. Going to be the one who hosts the party and has to plan out the big game day menu?
  3. Be going to bed at the lame hour of 8:30 because you have to get up the next day at 4 a.m. to go to work (and getting less than 7 hours of sleep is completely unfathomable)?

…I think we all have an idea of which of the three options I will be doing.

IMG_5563 copy

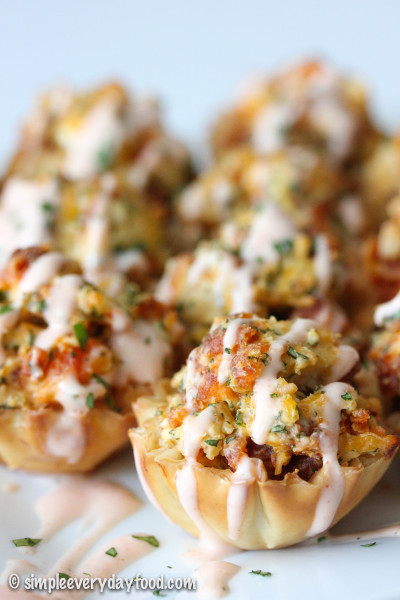
No matter which of the above categories you fall in, I’ve got a party appetizer for you today that’s guaranteed to be a big hit! The mini taco cups I posted two summers ago has turned out to be super popular, and has also been the most visited recipe here on SEF since then.

IMG_5533 copy

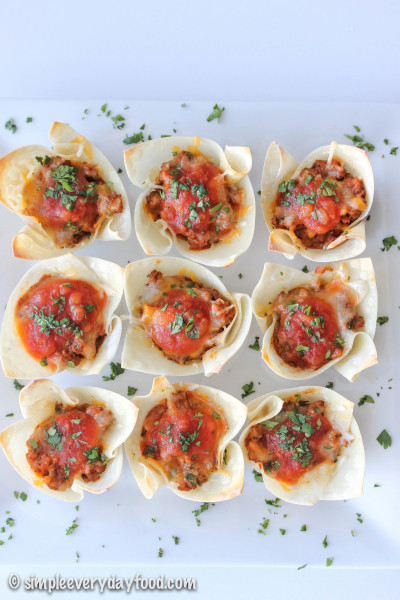
Today I gave them a little makeover and they taste even better than the ones before. Consider them to be the second generation, new-and-improved version of the original taco cups. What makes these better? I minced up some cilantro and mixed a bit of that into the filling. Then I dolloped the tops of the baked cups with a small amount of salsa and sprinkled more cilantro on top.

AND! New photos! Way prettier photos than the first generation mini taco cups 1.0. It’s funny how much my food photography skills have evolved throughout the past two years. I look back at my old food pictures and I’m not going to lie – most (if not all) of them make me cringe. But I still have so much to learn!

IMG_5520 copy

IMG_5523 copy

IMG_5531 copy

IMG_5552 copy

You really should make these for your party. Or bring them to a party. Or if you’re like me, make them for just you and your husband during pregame because once the game starts you’ll be going to bed shortly thereafter. And if none of the above applies to you, you should still make a pan of these and eat them yourself anyway, because you’ll be missing out if you don’t.

IMG_5539 copy

mini taco cups 2.0
Print
Ingredients
  1. One 12-oz package of wonton wrappers
  2. 1 pound lean ground turkey
  3. 1 package 40% less sodium taco seasoning
  4. 1 cup shredded Mexican blend cheese (you probably won't use all of it)
  5. A few handfuls of cilantro, finely chopped
  6. 1/4 cup of your favorite salsa
Instructions
  1. Preheat oven to 350 degrees.
  2. Brown the ground turkey in a large skillet. Drain the fat, and then season the meat with the taco seasoning according to package directions. Sprinkle in a few tablespoons worth of the cilantro, more or less depending on taste.
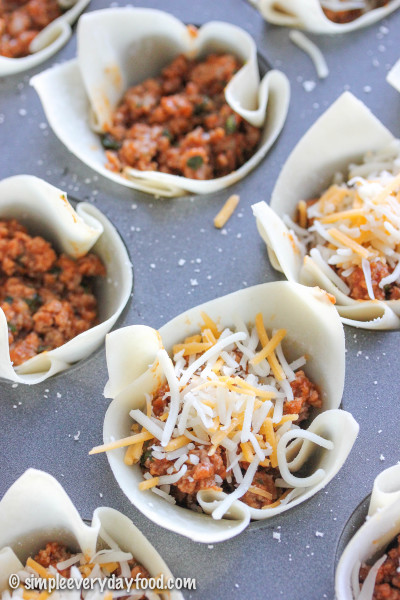
  3. Using a mini muffin tin, line the wells with wonton wrappers, so the wrappers are shaped into little cups inside the wells. Spoon the taco meat into each cup, about 1/2-2/3 full. Sprinkle the tops with cheese. Bake for 8 minutes, or until wrappers are slightly turning brown. Remove from oven, dollop the tops with salsa, and add more chopped cilantro as garnish, if desired. Serve immediately.
  4. Makes about 30 cups
Simple Everyday Food https://www.simpleeverydayfood.com/
© Simple Everyday Food. All images & content are copyright protected. Please do not use any of my images without prior permission. If you want to republish this recipe, please re-write the recipe in your own words, or kindly link back to this post for the recipe.

Sharing is caring! Email this to someonePrint this pagePin on PinterestShare on YummlyShare on FacebookShare on Google+Tweet about this on Twitter

IMG_4520 copy

In case any of you read up on my dilemma of Apple Watch vs. Fitbit from the previous post, I have eliminated one contender – I’ve decided that I’m going to wait on the Apple Watch until it’s market-tested and I have read up on a few reviews and recommendations on people’s opinions on them. Plus I’m sure as technology advances, its future generations will probably be more evolved and have more advanced features that I would want my ideal smart watch to have.

But in the meantime, I’m debating between the Fitbit Charge HR or the Fitbit Surge. I’m also thinking about getting a gym membership at my local 24/7 gym. Advice or suggestions are welcome as always!

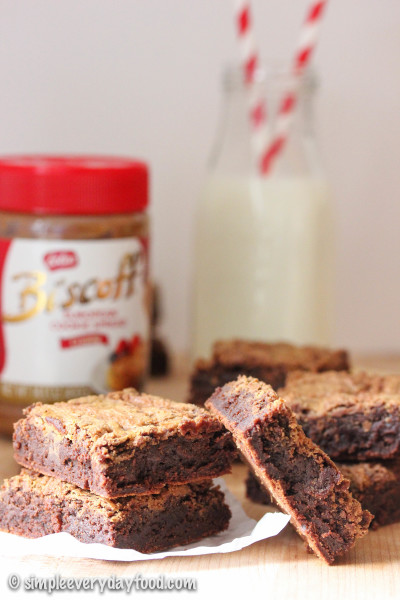
So about these brownies… They’re made with dark chocolate, which contain healthy antioxidants. And since antioxidants are known to lower risks of health problems, these brownies are therefore good for you. That correlation totally made sense, right? So you’re welcome – go ahead and have another brownie!

IMG_4501 copy

IMG_4497 copy


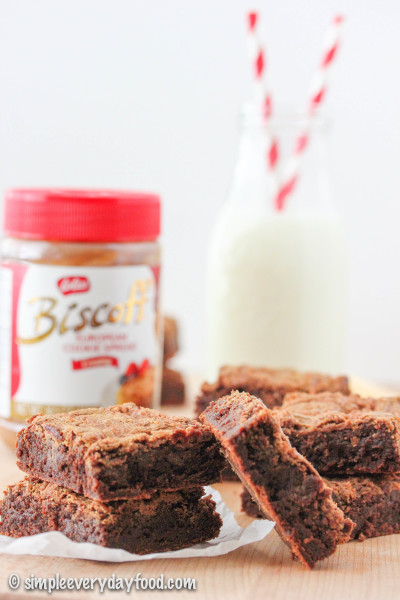
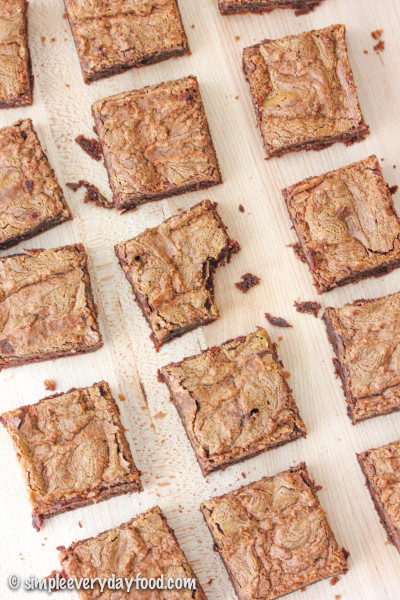
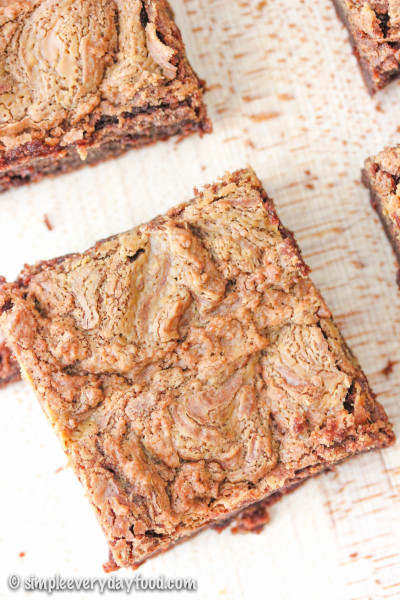
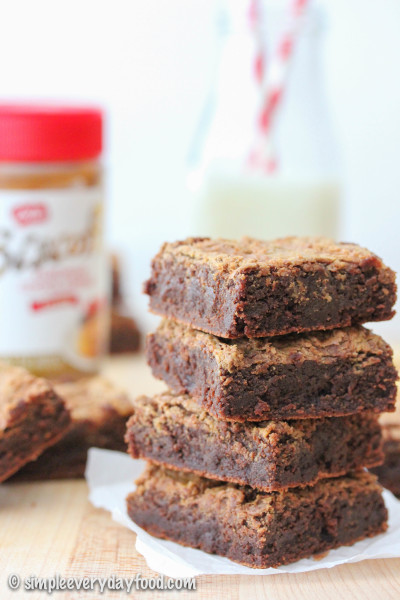
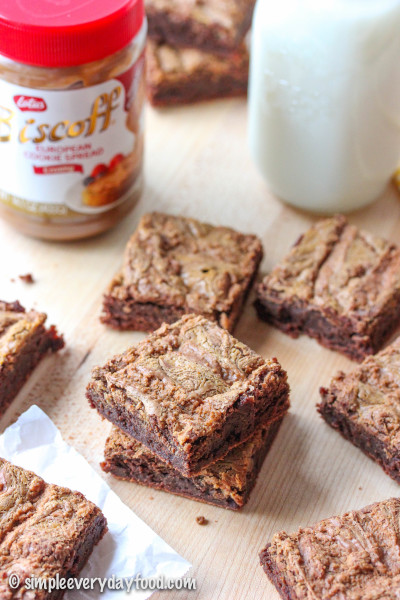
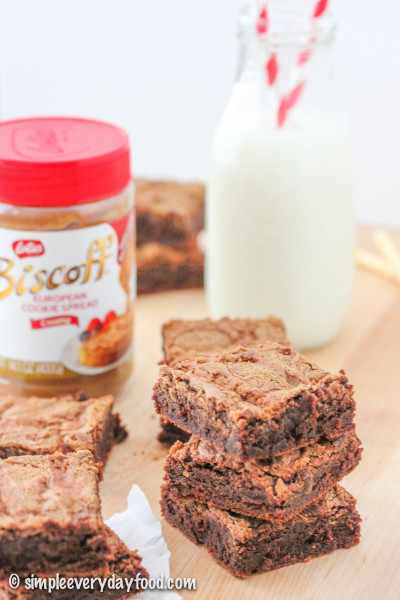
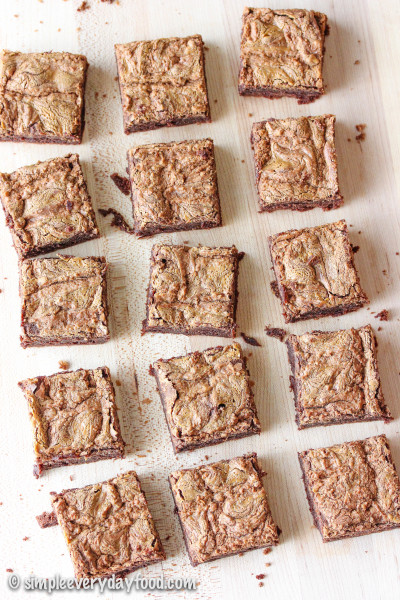
These brownies are so fudgy and delicious! They’re not dense in a it’s-stuck-to-the-roof-of-my-mouth-now-I-need-a-glass-of-milk kind of way, and they’re not light and airy like any ordinary brownie either. The tops are baked to crispy perfection. They still have just the right amount of denseness and chew to them, retaining the texture of a good ol’ fashioned brownie… with a nice thick layer of Biscoff swirls on top, of course. Because Biscoff makes everything taste better.

IMG_4545 copy

IMG_4532 copy

I only used 60% bittersweet dark chocolate for this recipe to offset the sweetness of the sugars and the spread, giving these brownies just the right amount of sweetness while not being overly sweet (read: you can eat more than one!). Don’t worry, although it’s “bittersweet” chocolate, you won’t taste a single hint of bitterness in these at all. I promise.

IMG_4529 copy

IMG_4508 copy

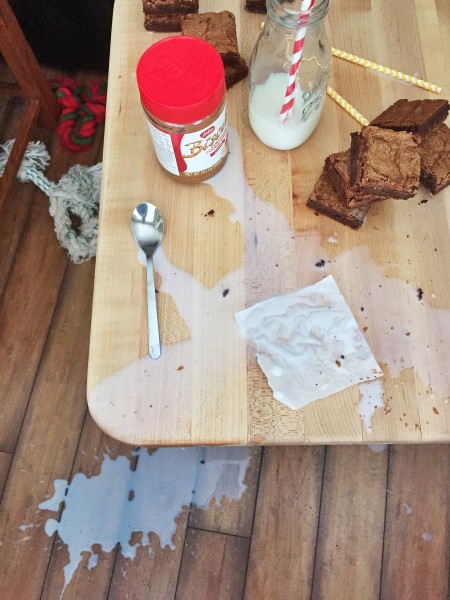
I was having a wonderful photography day, until tragedy struck. I had more plans for these brownies but I was flustered and upset and wanted to cry over spilled milk, so I decided it was time to clean up and put the camera away.

IMG_0369

Fret not, my friends! No brownies were harmed during this tragedy.

[sigh] the foodblogger life can be rough sometimes.

IMG_4482 copy

fudgy biscoff-swirled brownies
Print
Ingredients
  1. 1 cup dark brown sugar, packed
  2. 1/2 cup granulated sugar
  3. 2 cups dark chocolate chips (I used Ghirardelli's 60% bittersweet chocolate baking chips)
  4. 1/2 cup (1 stick) unsalted butter
  5. 4 eggs, at room temperature
  6. 2 teaspoons vanilla extract
  7. 1/2 teaspoon salt
  8. 1 cup all-purpose flour
  9. 1/2-1 cup creamy Biscoff spread
Instructions
  1. Preheat oven to 325 degrees and line a 9x13" baking pan with aluminum foil or parchment paper. Spray generously with cooking spray and set aside.
  2. Place sugars in your electric mixer's mixing bowl. Stir and set aside.
  3. In a small saucepan, melt butter and chocolate chips over low heat, stirring constantly. Remove from heat and pour into your mixing bowl with the sugars. Mix on low speed until combined. Add in the eggs, one at a time, and add in the vanilla and salt. Then add in the flour, 1/2 cup at a time, increasing the speed to low-medium until everything is thoroughly incorporated. Pour batter into the prepared pan and set aside.
  4. In another small saucepan, melt the Biscoff spread over low heat (or melt in a microwave in 15-30 second increments). Pour over the pan and create swirls by running a butter knife through the batter.
  5. Bake for 35-40 minutes, or until a toothpick inserted into the center comes out clean. Remove from oven and let cool completely.
  6. Brownies can be stored in an airtight container at room temperature for up to a week.
  7. Makes one 9x13" pan
Adapted from Biscoff
Simple Everyday Food https://www.simpleeverydayfood.com/
Recipe adapted from Biscoff

© Simple Everyday Food. All images & content are copyright protected. Please do not use any of my images without prior permission. If you want to republish this recipe, please re-write the recipe in your own words, or kindly link back to this post for the recipe.

Sharing is caring! Email this to someonePrint this pagePin on PinterestShare on YummlyShare on FacebookShare on Google+Tweet about this on Twitter