everyday food made simple

Lately I’ve been thinking about getting a Fitbit Charge HR. I already own a FitBit Flex, but I’m really digging the additional functions the Charge HR provides (heart rate monitoring, time display, automatic sleep detection, etc). But as I added it into my shopping cart and typed in my credit card information one day, I suddenly remembered that the iWatch is scheduled to come out sometime this year, and that’s when the internal debate began…

I’m sort of an Apple geek – all my electronic toys have the little half-bitten apple logo on it. When I initially heard of this iWatch, I laughed and vowed I would never need a wrist gadget that did a lot of the things my phone could do. “Why do I need a watch like that when I can just use my Fitbit?” Buuuut… after reading all about its features, I’m kind of ashamed to admit that I have since changed my mind and I now want a iWatch, especially since it also contains a pretty cool health & fitness app within.

Question: Do any of you guys have the new Fitbit Charge HR? Do you recommend it? Are you planning on getting the iWatch when it comes out? Why or why not? I’d like to hear your opinions!

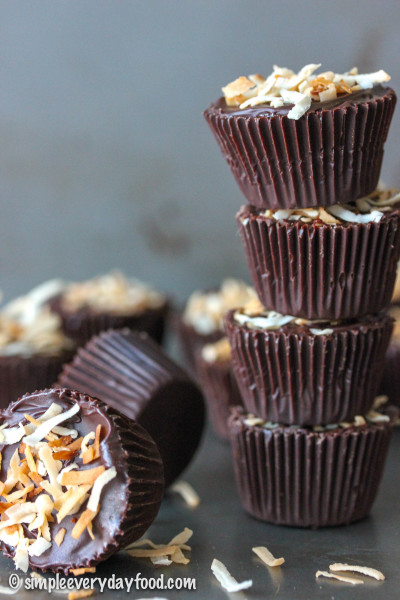
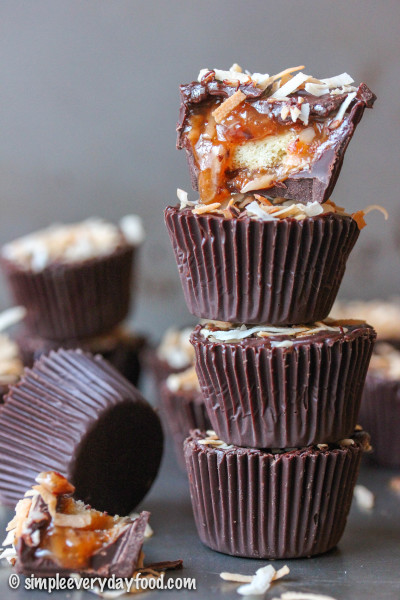
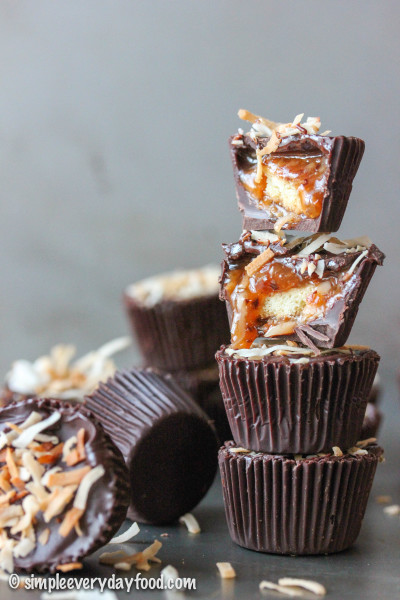
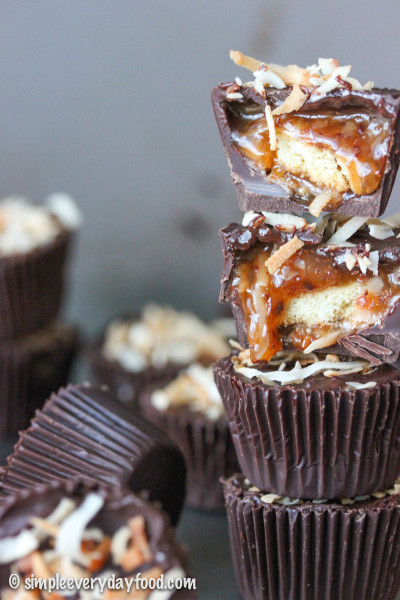
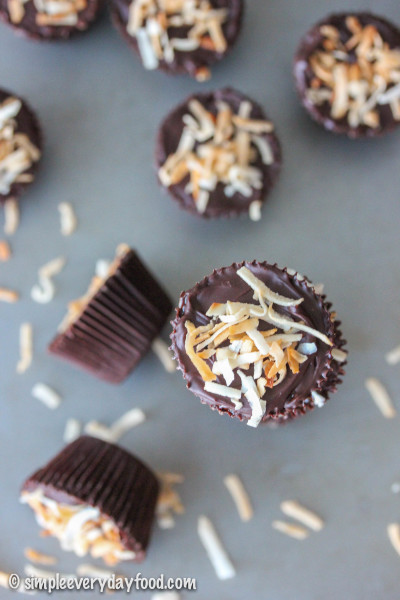
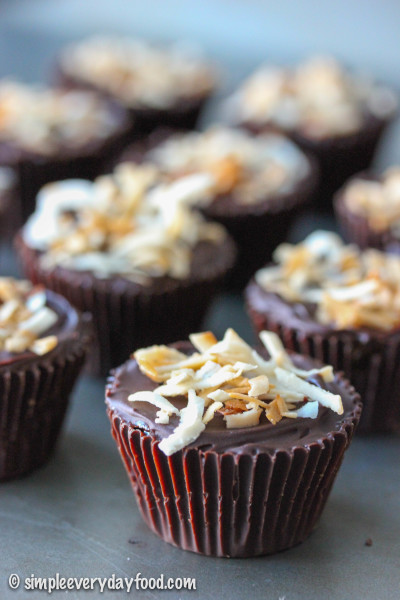
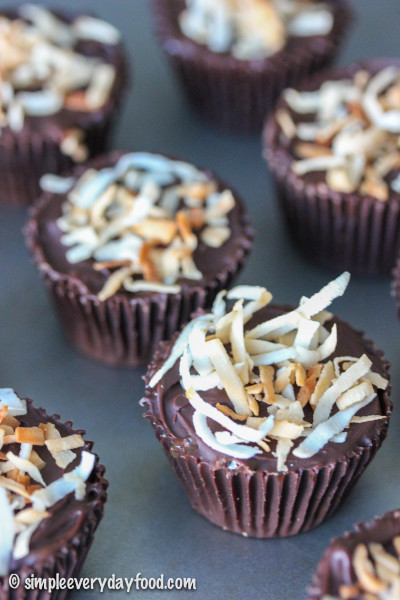
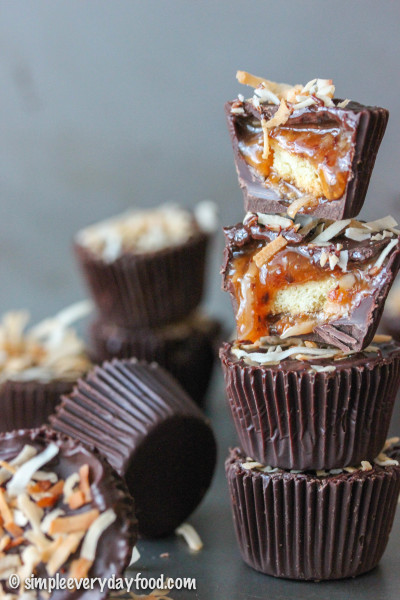
Maybe the reason why I’m thinking so much about activity trackers is because I may have accidentally ate a few too many of these Samoa cookie chocolate cups.. they’re little chocolate cups filled with gooey sweet and salty caramel coconut mixture and a bite-sized piece of shortbread cookie, all in this little chocolate cup… and oh boy are they dangerous!
IMG_5134 copy

IMG_5126 copy

IMG_5110 copy     

They don’t require any sort of mixer, and they don’t require any baking. It may seem like a long process to make them, but there’s a lot of waiting around in between steps, which is perfect for getting miscellaneous things done around the house… or spending some time on Pinterest…. or finding things to buy online… or taking a few of those silly BuzzFeed quizzes…
IMG_5079 copy

IMG_5115 copy

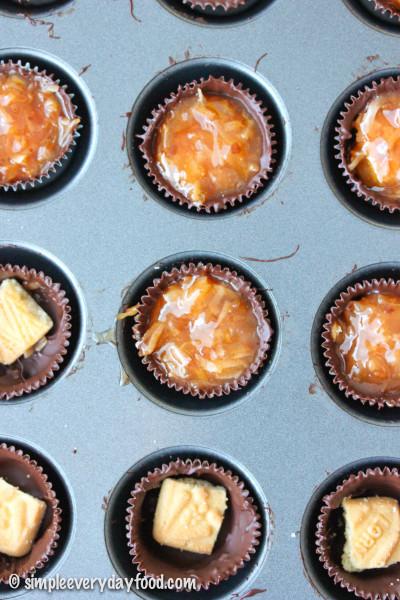
First you melt the chocolate and spread the chocolate around in the liners so it covers everysingleinch of it. Freeze those babies for half an hour (this would be the time to do those things we previously talked about). Then add a little bit of the caramel coconut mixture on the bottom of each cup and top with a little bite of the shortbread cookie.

Are you still following me?
IMG_5060 copy

Top the cookies with more caramel coconut and sprinkle the tops with some sea salt, if the salty-sweet combo is your kind of thing. Freeze some more (patience, grasshopper!).

IMG_5063 copy

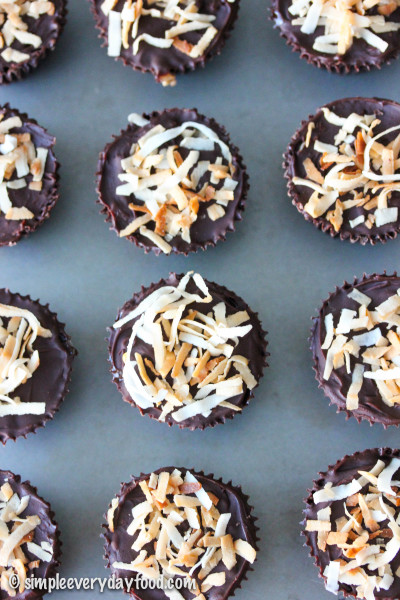
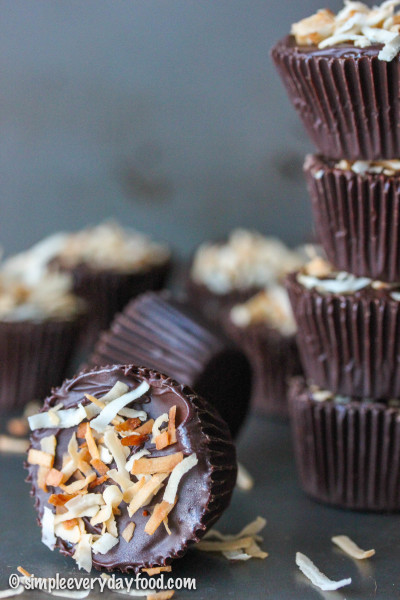
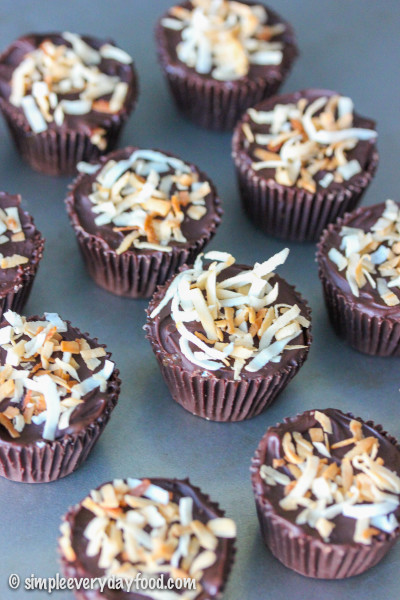
Then top it up with more melted chocolate and garnish with toasted coconut flakes. Freeze a little bit longer (almost there!), then EAT and DEVOUR!
IMG_5109 copy

IMG_5088 copy

I will not be responsible for the amount of chocolate cups you eat in one single sitting. Nor will I be responsible if you end up with a stomach ache after eating half the pan… just sayin’.
IMG_5085 copy

IMG_5090 copy

But just look at that ooey gooey caramel-y deliciousness! I mean, how can you resist?!

I apologize for the over abundance of pictures…
IMG_5124 copy

IMG_5146 copy

samoa cookie chocolate cups
Print
Ingredients
  1. 2 and 1/2 cups semi sweet chocolate chips
  2. 1 and 1/4 cups sweetened coconut flakes
  3. 1 cup caramel syrup
  4. 6 shortbread cookie squares, cut into quarters
  5. Sea salt, for sprinkling, if desired
Instructions
  1. Line a 24 mini muffin pan with liners and set aside.
  2. Using a double boiler, melt 2 cups of the chocolate chips, stirring occasionally until smooth. Drop 1-2 teaspoons of melted chocolate into each liner, spreading the chocolate up the sides of the liner using a pastry brush or a spoon. Make sure the sides are nicely coated. Freeze for 30 minutes.
  3. In the meantime, toast the coconut flakes in a nonstick pan over medium heat. Once you notice the flakes are starting to brown, stir constantly until most of the coconut flakes turn golden brown in color. Be careful not to burn them! Remove from heat and reserve 1/4 cup for garnish.
  4. Combine the caramel sauce and the remaining cup of coconut flakes in a medium bowl and mix well. Remove the frozen chocolate cups from the freezer and spoon ~1/2 teaspoon of the caramel/coconut mixture on the bottom of each cup, top with a quarter piece of the shortbread cookie, then top with ~1 teaspoon of the caramel mixture. Sprinkle tops with a little bit of sea salt (if desired). Freeze for another 30 minutes.
  5. Melt remaining 1/2 cup of chocolate chips over a double boiler (or in the microwave) until completely melted and smooth. Remove chocolate cups from freezer, and cover each cup with a thin layer of the melted chocolate, smoothing the tops with a spoon if needed. Garnish with the reserved toasted coconut flakes. Freeze for an additional 15 minutes. Chocolate cups can be stored either at room temperature, in the fridge, or in the freezer in an airtight container, depending on your preference!
  6. Makes 24 chocolate cups
Adapted from The Housewife In Training
Simple Everyday Food https://www.simpleeverydayfood.com/
Recipe adapted from The Housewife In Training

© Simple Everyday Food. All images & content are copyright protected. Please do not use any of my images without prior permission. If you want to republish this recipe, please re-write the recipe in your own words, or kindly link back to this post for the recipe.

Sharing is caring! Email this to someonePrint this pagePin on PinterestShare on YummlyShare on FacebookShare on Google+Tweet about this on Twitter

Warning: lots and lots of cute puppy pictures ahead! :)

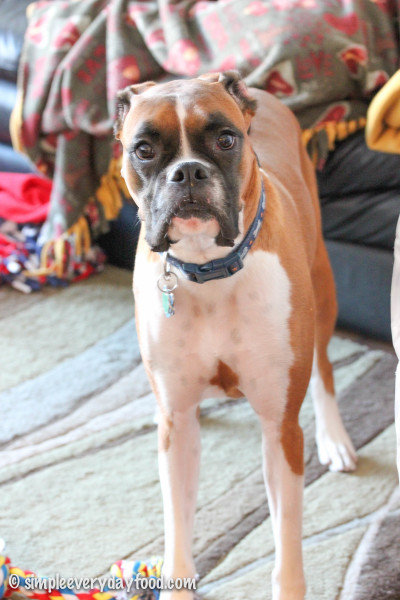
 My baby boy turned THREE (!!!) a few days ago! Oh man, where did the time go?!

IMG_1324

IMG_5313 copy

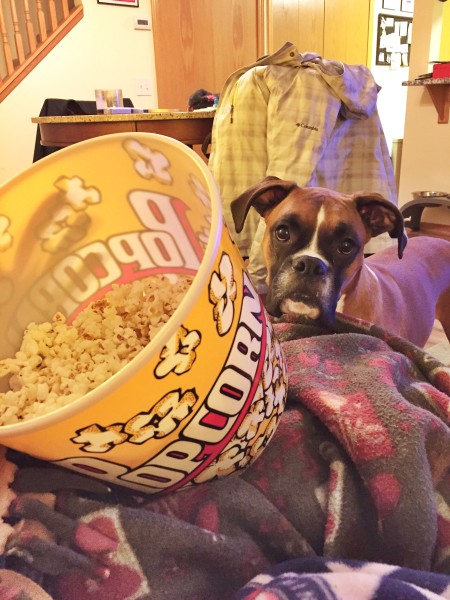
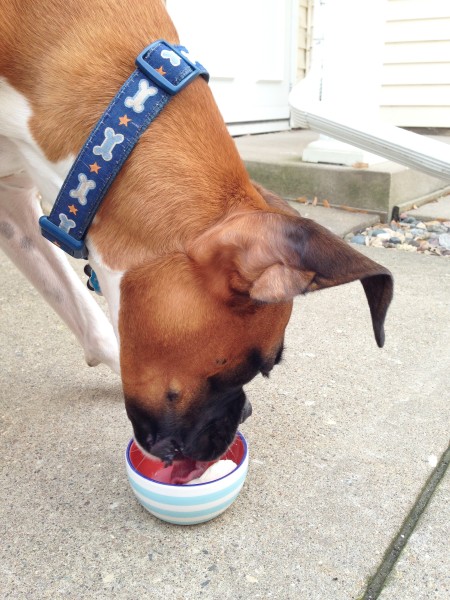
It’s been a fun-filled year for Mr. Bentley. He discovered the tastiness of blueberries, popcorn, cheese, and ice cream.

IMG_0853

IMG_8327

He still loves to be outside in the summer – I think if it were up to him, he’d be outside every single minute when it’s at least 60 degrees. But he did realize how wonderful it is to just lay outside and soak up the sun, and that not every single minute needs to be about running around.

IMG_9578

IMG_8215

IMG_8421

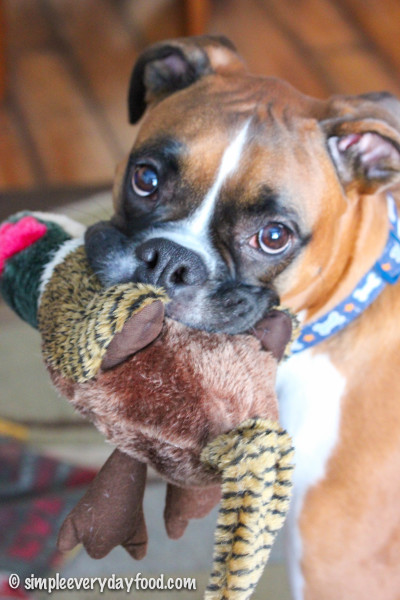
He’s mellowed out a bit since last year, but there are still days where all he wants to do is be goofy and crazy.

IMG_9951

IMG_8629

IMG_9777

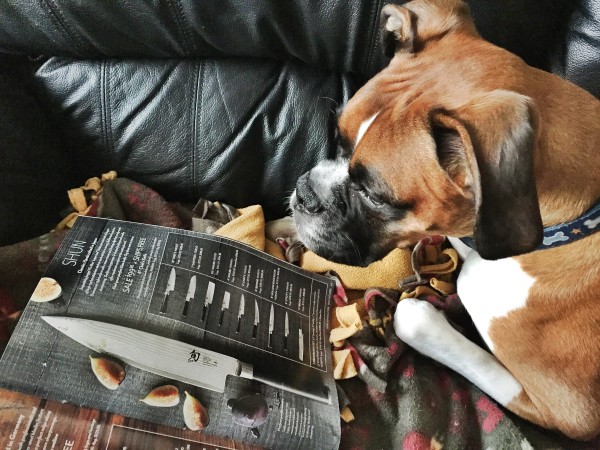
He loves looking through Sur la Table catalogs that we receive in the mail…

IMG_0203

He loves staring at us while we eat at the dinner table…

IMG_0625

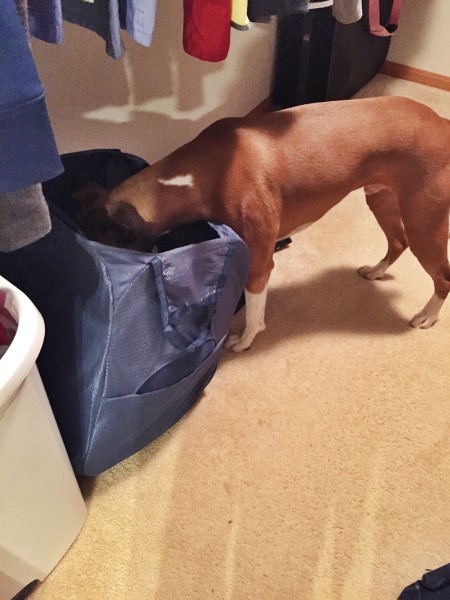
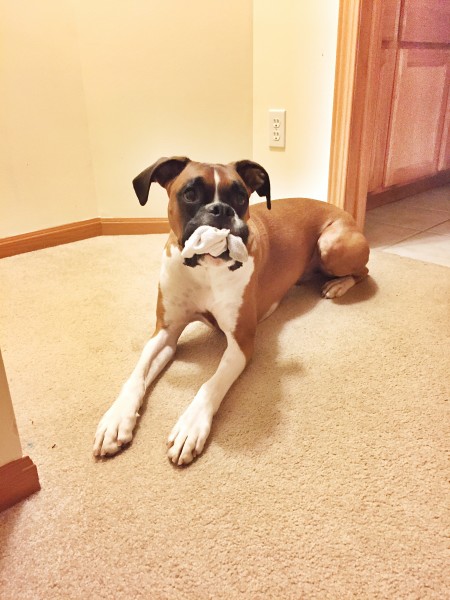
And his new (annoying) naughty habit involves trying to rip socks off of our feet. For some reason it has to be dirty socks. You can throw a pile of clean, fresh-out-of-the-dryer socks at him and it wouldn’t phase him. But a pair of socks on your feet? He’ll rip those off and run around the house with them like it’s some sort of game. I’ve even caught him multiple times with his head in my hamper, digging for socks.

IMG_0809

IMG_1120

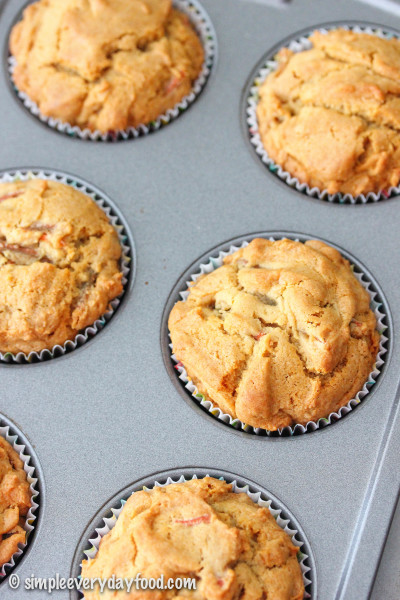
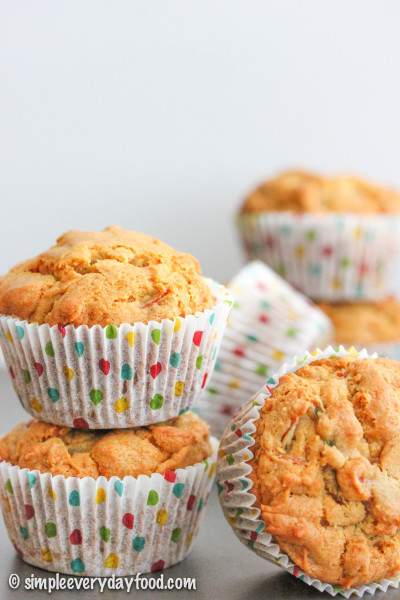
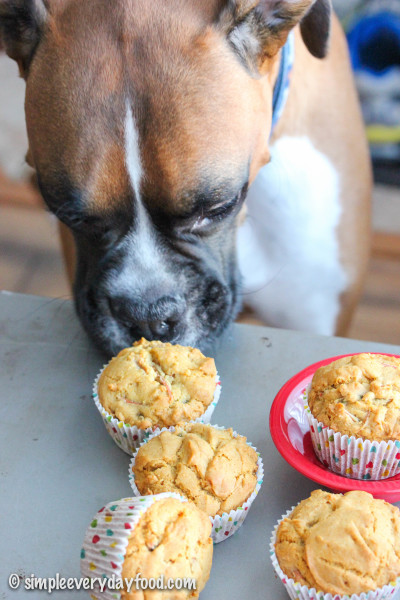
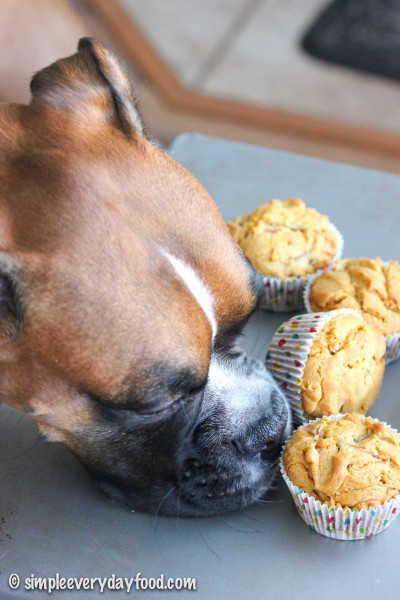
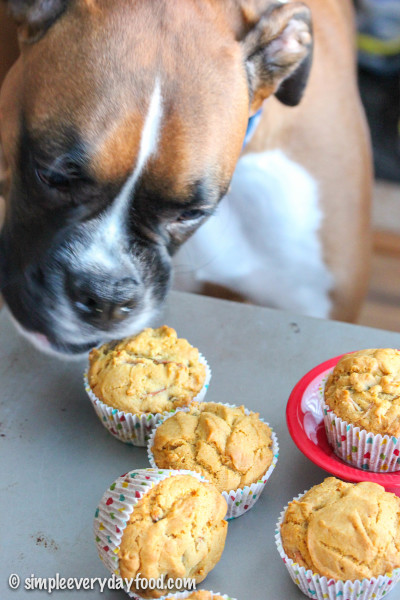
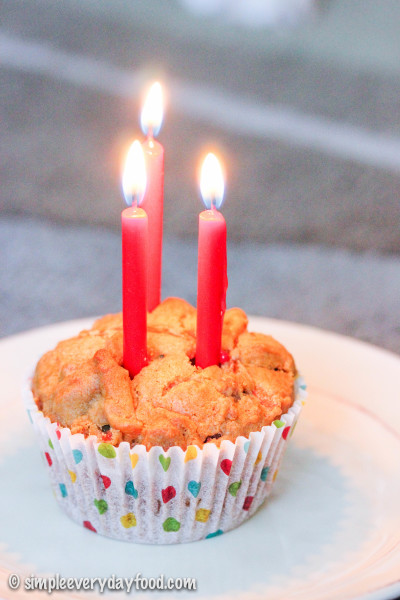
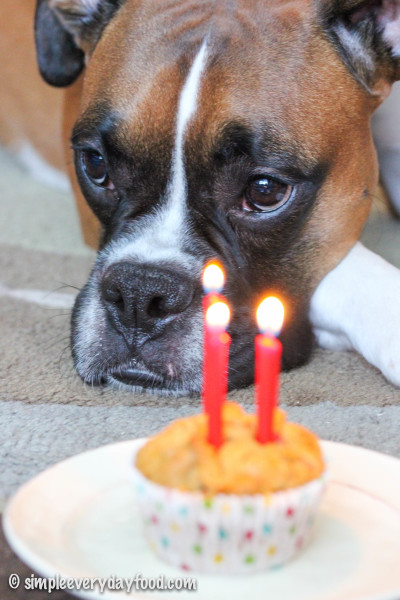
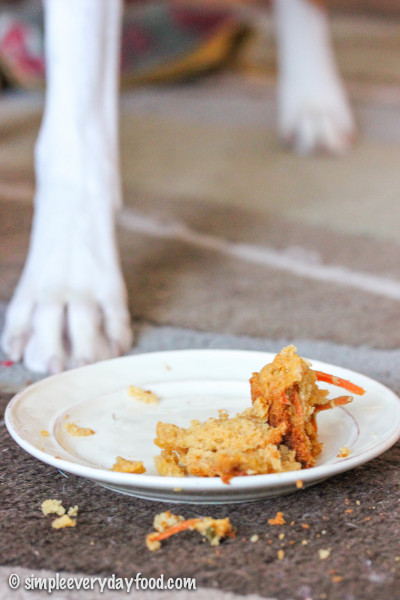
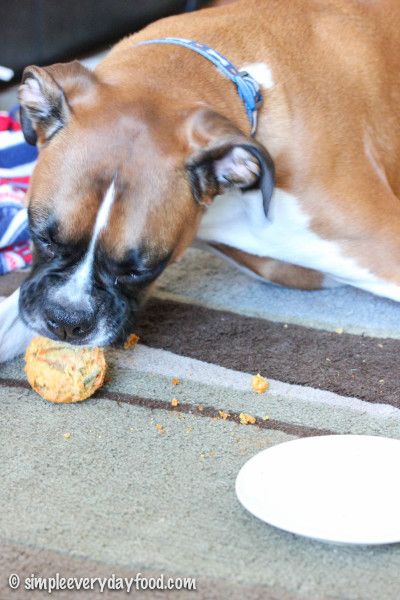
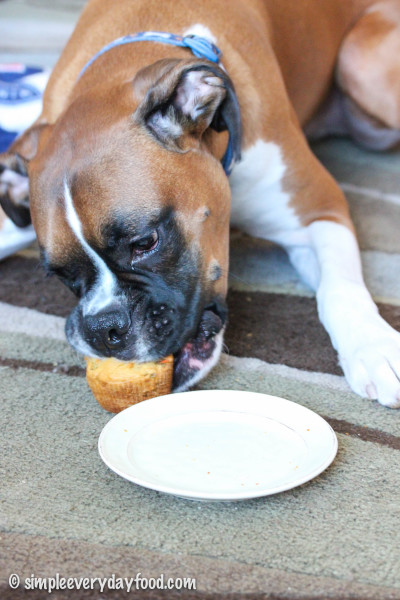
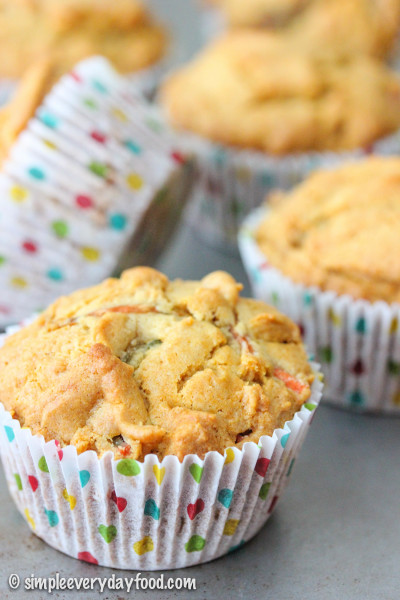
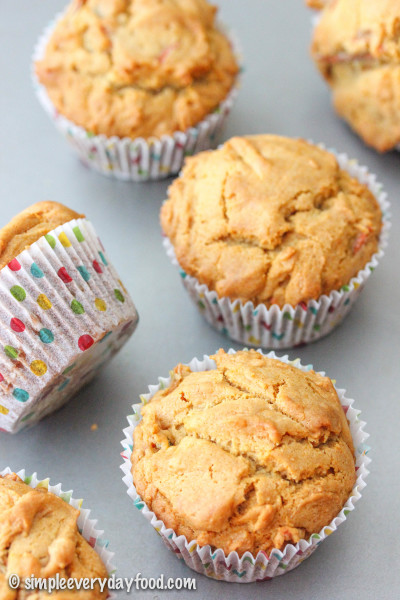
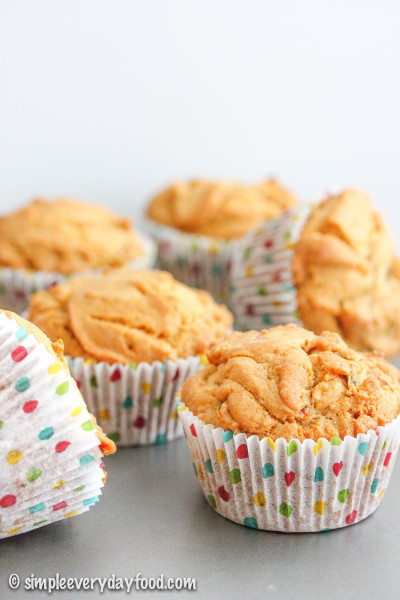
Considering how much I love this boy of mine, it only made sense that I made him something (with love!) for his birthday. These turned out more like muffins instead of the cupcakes I initially envisioned, so I scratched the frosting idea. I don’t think Bentley minded, because he snatched one off the baking sheet right in front of me as I was taking pictures of them!

IMG_5276 copy

IMG_5305 copy

IMG_5315 copy     IMG_5318 copy

IMG_5316 copy     IMG_5319 copy

IMG_5321 copy     IMG_5326 copy

IMG_5338 copy     IMG_5333 copy

This recipe is super simple to make and only requires a few ingredients that you probably already have sitting around in your house. It also only requires a few mixing bowls, a whisk, and a spatula… Add ingredients in bowl, mix, spoon into muffin tins, and bake – no rocket science here!

 IMG_5285 copy

IMG_5289 copy

IMG_5306 copy

IMG_5355 copy

The batter only yields 6 muffins, which is a perfect amount! Bentley’s sharing a few with his friends, because he certainly doesn’t need all 6 muffins to himself, and it’s always more fun to share food with friends. And like I said last year, if your dog has certain dietary restrictions, please consult your veterinarian before making these.

IMG_5369 copy

IMG_5297 copy

And if you want a little frosting on top of these for your furry friend, you can definitely use the easy frosting recipe I used last year.

It’s been a great three years and I can’t imagine life without him. Thank you for being such a great puppy, Bentley! We love you!

IMG_5307 copy

peanut butter & carrot doggie muffins
Print
Ingredients
  1. 1 cup all-purpose flour
  2. 1 teaspoon baking soda
  3. 1 large egg, at room temperature
  4. 1/4 cup creamy peanut butter
  5. 1/4 cup vegetable oil
  6. 1/4 cup honey
  7. 1 cup shredded carrots
Instructions
  1. Preheat oven to 350 degrees. Line 6 muffin tins with cupcake liners and set aside.
  2. In a small bowl, combine the flour and baking soda. Set aside. In a medium bowl, combine the egg, peanut butter, vegetable oil, and honey. Whisk until thoroughly combined, then stir in the shredded carrots. Add the dry ingredients to the wet ingredients and mix until fully incorporated.
  3. Divide batter evenly between the prepared muffin tins and bake for 25-27 minutes, or until an inserted toothpick comes out clean. Remove from oven and let cool prior to serving. Muffins can be stored in an airtight container for up to 5 days.
  4. Makes 6 muffins
Notes
  1. * If your dog has certain dietary restrictions, please consult your veterinarian before making these.
  2. ** And please do not feed your dog all 6 of these muffins in one setting! :)
Adapted from Romp Rescue
Simple Everyday Food https://www.simpleeverydayfood.com/
Recipe adapted from Romp Rescue

© Simple Everyday Food. All images & content are copyright protected. Please do not use any of my images without prior permission. If you want to republish this recipe, please re-write the recipe in your own words, or kindly link back to this post for the recipe.

Sharing is caring! Email this to someonePrint this pagePin on PinterestShare on YummlyShare on FacebookShare on Google+Tweet about this on Twitter

IMG_5160 copy

First things first – I’ve become a publisher on Yummly! You can now find my official Publisher Page here (or simply click on the Certified Yummly button on my sidebar). And as you scroll past the recipe below, you’ll also notice that my social media sharing buttons have changed! I added a new Plug-in to SEF so now you can “Yum” my recipes and add it your Recipe Box on Yummly along with all your other “Yum’d” recipes… you know, for convenience and all. I started using Yummly a few months ago and it’s now one of my go-to places when I’m looking for dinner inspirations. They even send you weekly recommendations based on what you’ve “Yum’d” in the past! I’m super excited to be part of this new social media sharing platform, so bare with me as I get my Yummly page updated… in the meantime, keep Yum-ing!

The past few months, I’ve been hooked on the Lizzy Gardner series, written by T.R. Ragan. In case you’re not familiar, it’s a series of four books (so far) that centers around a private investigator Lizzy Gardner and the cases that she somehow always gets herself, as well as the people around her, involved in. The books aren’t particularly deep and complex, and the plots are always somewhat predictable (there are murders, Lizzy gets involved, she ends up figuring out who did it, yada yada yada). However, the author does do a good job at keeping the reader’s attention and the novels are pretty easy to read.

It started with spending 99 cents on the first book, then realizing I was able to borrow the 2nd, 3rd, and 4th book for free through my Amazon Prime membership. So for the past few months, I’ve been borrowing the next book in the series the first day of the month, finishing the book within 10 days, and impatiently waiting for the next 20 days until I can borrow the next book. It doesn’t help that the author seems to looooove ending her books on cliffhangers, because when I realized the 4th book was over (less than a week of starting it), I may have slammed my Kindle on my pillow a few times and yelled “NOOOOOO!!!!!!” (ask Brian about it – I’m pretty sure he jumped and thought I was crazy).

Initially I was going to wait it out and borrow the next book next month, but I just couldn’t wait it out any longer, so I broke down and went on Amazon with the intent of spending a few dollars and buying the next book….. only to realize that it won’t be released until February 3rd. Ahhhhhh! So much for that plan. Guess I’ll have to wait in the end anyway. Have I mentioned I hate waiting?

Okay, back to food. Because I’m sure you didn’t come on here to read about book reviews.

  IMG_5169 copy     

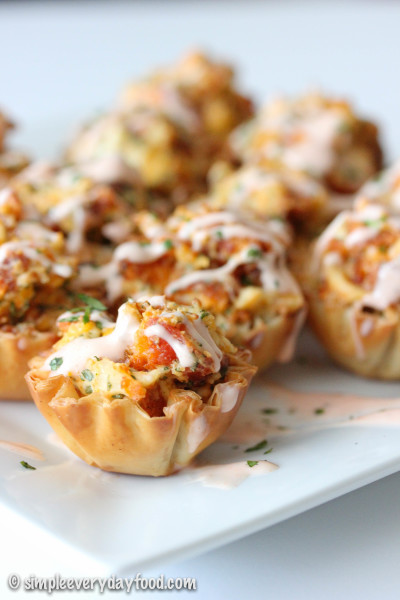
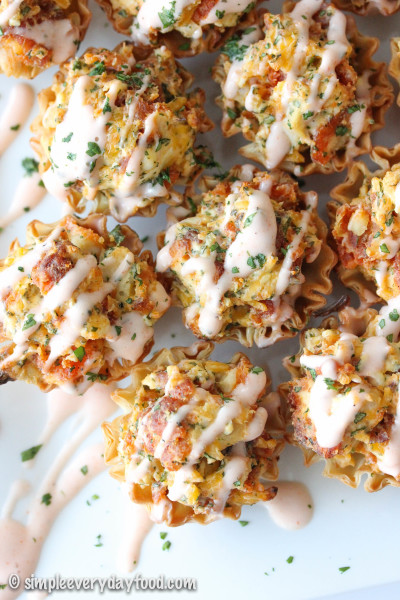
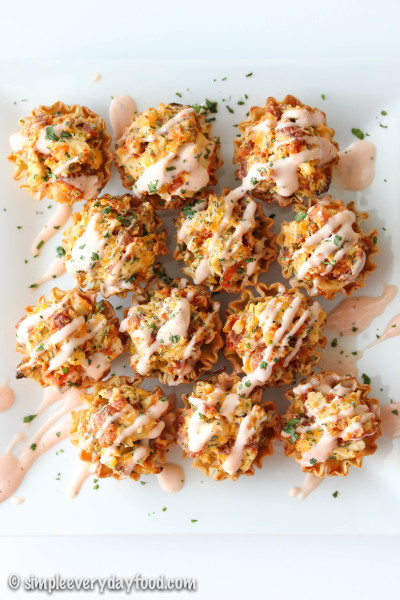
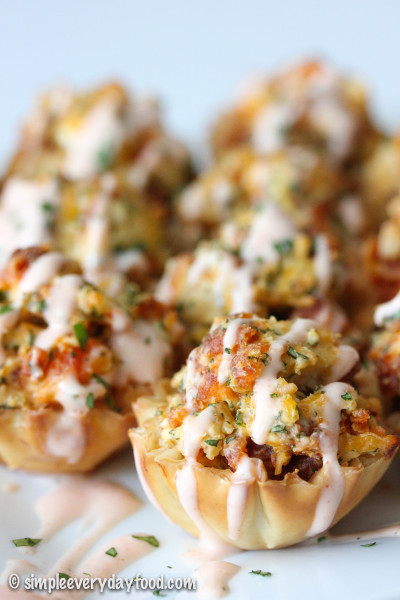
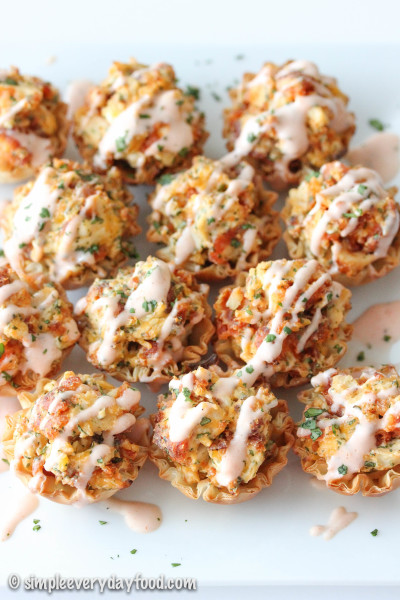
Can I just say these buffalo ranch chicken cups are so ridiculously deliciously easy to make? I even like them more than my mini taco cups, which happen to be the #1 most popular recipe on my site. That’s right, they’re that good.

IMG_5153 copy

IMG_5159 copy

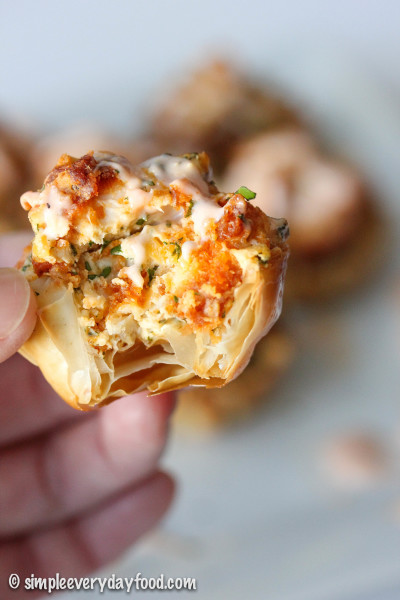
These bite-sized appetizers are so easy to assemble and they pack so much flavor in just one bite, you won’t be able to eat just one! The light, crispy, flaky phyllo (or “fillo”) shells are filled with a creamy chicken filling with large chunks of chicken and a slight hint of heat, baked to crispy perfection.

IMG_5163 copy

 IMG_5158 copy

IMG_5176 copy

IMG_5179 copy

So in case you’re already looking for Super Bowl party finger foods for next month, you should most definitely add these to your list… your guests will thank you! And even if you decide to eat the whole pan yourself, that’s okay too. We don’t judge here in the food blogging world.

 IMG_5166 copy

buffalo ranch chicken cups
Print
Ingredients
  1. 1/4 cup light ranch dressing
  2. 1 tablespoon Frank's Red Hot sauce (more or less depending on taste)
  3. 3 oz low fat cream cheese, softened to room temperature
  4. One generous 1/4 cup of shredded cheddar cheese
  5. 2 tablespoons finely chopped cilantro (plus more for garnish, if desired)
  6. About 10 pieces of Tyson's Any'tizers Buffalo Chicken Wyngz, roughly chopped
  7. One package pre-baked fillo (phyllo) shells
Instructions
  1. Preheat oven to 400 degrees.
  2. In a small bowl, combine the ranch dressing and hot sauce. Set aside.
  3. In a medium bowl, combine the cream cheese, cheddar cheese, cilantro, and 2 tablespoons of the ranch mixture. With a spoon, mix ingredients together until thoroughly combined. Gently stir in the chicken bits and mix some more.
  4. Place the fillo shells into an ungreased mini muffin tin, and generously spoon the chicken mixture into the shells. Bake for 10 minutes, or until the fillo shells are golden brown.
  5. Drizzle the remaining ranch mixture over the chicken bites and sprinkle with additional cilantro, if desired. Serve immediately.
  6. Makes 15 mini cups
Adapted from Lauren's Latest
Simple Everyday Food https://www.simpleeverydayfood.com/
Recipe adapted from Lauren’s Latest

© Simple Everyday Food. All images & content are copyright protected. Please do not use any of my images without prior permission. If you want to republish this recipe, please re-write the recipe in your own words, or kindly link back to this post for the recipe.

Sharing is caring! Email this to someonePrint this pagePin on PinterestShare on YummlyShare on FacebookShare on Google+Tweet about this on Twitter

Happy 2015 everyone! Did everyone have a good holiday season? I felt like everything after Thanksgiving of last year was all a blur. We had our turkey, we had our leftovers, and the next thing I knew, Christmas somehow crept up on us, then BAM! it was over. Just like that.

Life really got the best of us this year because we didn’t even have time to put up our Christmas tree. Tragic, right? At least we did hang our stockings and buy ourselves a wreath to hang on our door. I did make some Christmas cookies, listened to some Christmas jingles on the radio, Christmas shopped for Brian and Bentley, and ate my fair share in all things peppermint chocolate. So all in all, I guess it was a pretty good holiday season – simple and low-key.

As we waved 2014 good-bye and welcomed in 2015, here’s just a few of my accomplishments that occurred in the past year:

  • One of my new year resolutions for last year was to be better at keeping photo memories of our lives. I’m glad to say that I stuck to this all year and have an over-stuffed Project Life binder to prove it! It’s been fun capturing little everyday things, developing them into tangible photographs, and jotting down little notes and memories into my Project Life binder! I’ll definitely be continuing this for years and years to come.
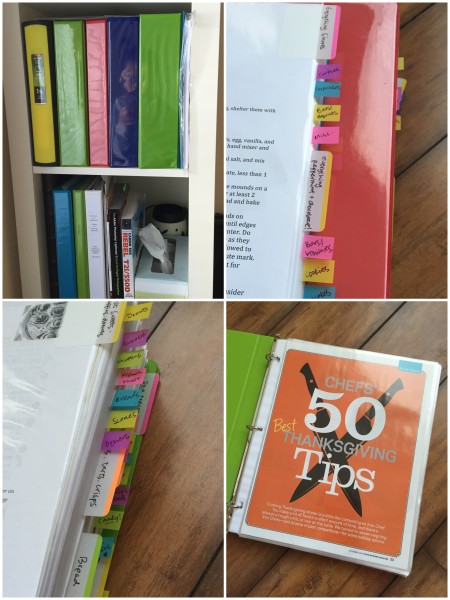
  • I also managed to organize all my recipes into binders and categorized them according to the type of dishes they fall into. For This project actually started a few years ago and the number of recipes I started to collect grew so much that I actually had to buy separate binders for individual categories of food! I now have a separate binder for cakes and cupcakes, then another one for bars/brownies/blondies and cookies, one for all things s’mores and peppermint+chocolate, and a separate one for Thanksgiving alone!

IMG_1281 

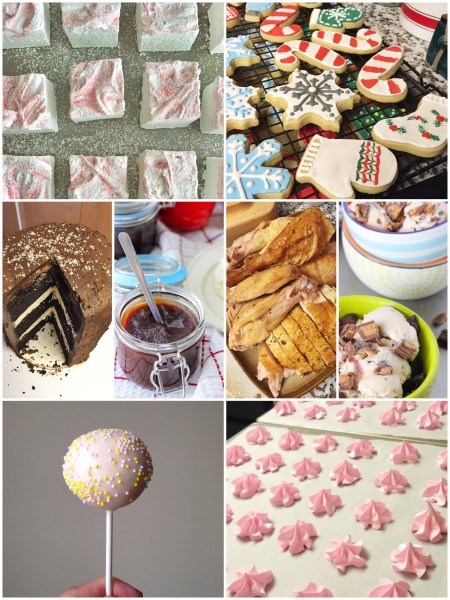
  • This year was also the year of culinary firsts for me – I learned how to make cake pops, a three-layered cake, homemade salted caramel, Swiss meringue buttercream, homemade marshmallows, royal icing-decorated Christmas cookies, meringue cookies, homemade ice cream, and homemade apple butter. And I successfully carved a beautiful turkey with a surgeon’s precision on Thanksgiving.

IMG_1290

  • I got LASIK! You can read about my experience here.
  • I officially became a certified veterinary technician and landed myself a full-time job at one of the best hospitals, less than two months after graduation. I now work with some amazingly talented individuals who teach me something new every day.

So there you have it, my friends! Here’s to an equally amazing 2015! xo

Sharing is caring! Email this to someonePrint this pagePin on PinterestShare on YummlyShare on FacebookShare on Google+Tweet about this on Twitter

I don’t know about you, but in our household, Thanksgiving planning started at the end of October (it’s a big deal!). We planned out our menu and everything we may need, and a few days ago I finished up a make-ahead timeline to make things go as smoothly as possible on the big day.

I don’t know about your timeline – if you’re nerdy enough like me to make one – but mine is filled with 2-3 things to prep and make every night leading up to Thanksgiving. And since this week I’ll already be doing lots of chopping, baking, cooking, and prepping after a long day of work, the last thing I need is to worry about the age old question of “what’s for dinner??“.

Enter today’s easy recipe…… *drum roll please*…..

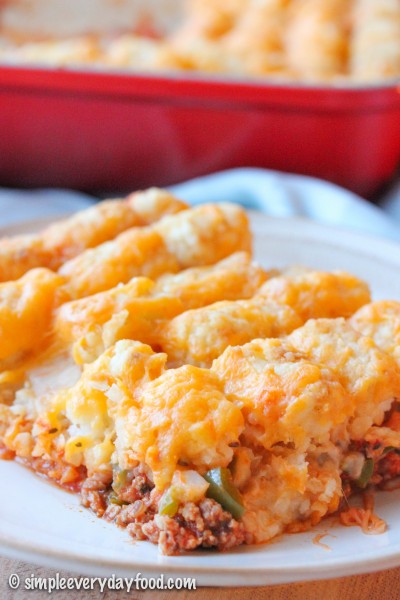
I present to you: Pizza tator tot casserole!

IMG_3254 copy

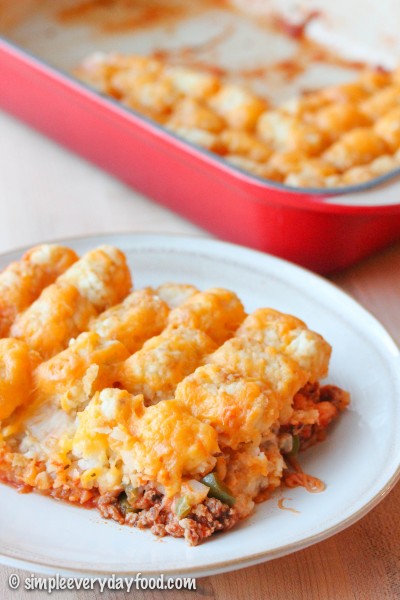
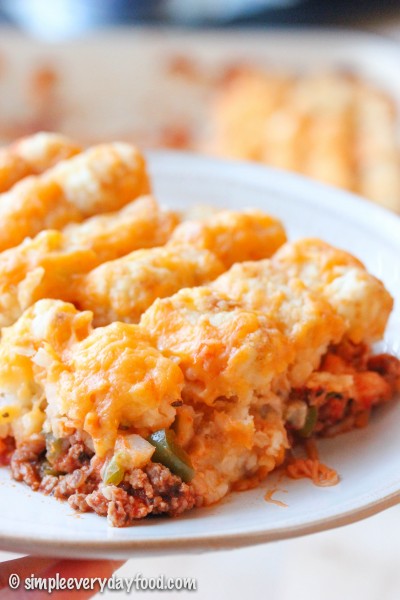
My taco tator tot casserole is perhaps one of the most popular recipes in our house – we make it at least once very few weeks – it’s just that good. I remember the first few weeks when I started my new job back in February, we actually made a double batch of it in anticipation of being busy and giving me enough time to get settled into my new routine. Now we gave a new spin to our favorite comfort food – combining our favorite casserole dish with tons of pizza flavors! It’s hearty, meaty, and cheesy all at the same time. It’s got pizza sauce, basil, plenty of cheesy goodness, lean ground beef, onions and green peppers, and not to mention to crispy baked tator tots carefully arranged in OCD fashion on top. All the food groups balanced into one delicious meal, it’s guaranteed to be a hit at your dinner table!

Have I mentioned that it’s also super easy and painless to make?

IMG_3260 copy

Just like ordering pizza on a lazy Friday night, you can totally customize what goes into this casserole based on personal preference. We kept it simple by using plain ground beef and pizza sauce, but this dish totally has the potential to be dressed up based on what you like on your pizza..

IMG_3258 copy

Add in bacon bits, crumbled Italian sausage, and pepperoni slices for the meat lovers in your house.

Simply add in more cheese for extra cheesy goodness.

Or if you happen to like your pizza piled high with veggies, just throw in some sliced mushrooms, olives, extra peppers, spinach, or whatever happens to tickle your fancy at the moment.

See? I told you the possibilities are endless.

pizza tator tot casserole
Print
Ingredients
  1. 1 pound lean ground beef
  2. 1 medium green bell pepper, diced
  3. 1 medium onion, diced
  4. 15-oz pizza sauce
  5. 1 teaspoon dried basil
  6. 3 cups shredded mozzarella cheese
  7. 1 package frozen tator tots
  8. 1 cup shredded cheddar cheese
Instructions
  1. Preheat the oven to 400 degrees.
  2. In a large skillet, brown the beef over medium heat with the green peppers and onions until the beef is no longer pink. Add the pizza sauce and basil.
  3. Transfer the beef mixture into a 8x11" casserole dish. Top with mozzarella cheese and tator tots
  4. Bake uncovered for 30-40 minutes, or until the potatoes are crisp and brown. Sprinkle the shredded cheddar cheese, bake for an additional 5 minutes or until cheese is melted.
  5. Let cool for 5-10 minutes and serve.
  6. Serves 6
Adapted from Taste of Home - Ground Beef edition
Simple Everyday Food https://www.simpleeverydayfood.com/
Recipe adapted from Taste of Home – Ground Beef edition

© Simple Everyday Food. All images & content are copyright protected. Please do not use any of my images without prior permission. If you want to republish this recipe, please re-write the recipe in your own words, or kindly link back to this post for the recipe.

Sharing is caring! Email this to someonePrint this pagePin on PinterestShare on YummlyShare on FacebookShare on Google+Tweet about this on Twitter