everyday food made simple

1. I can’t believe it’s already November. In less than two months, we’ll be waving 2014 good-bye and welcoming in 2015. It seemed like it wasn’t all that long ago that I was just making new year resolutions! I honestly think the days and years go by faster as you get older.

2. The weather in Minnesota was gorgeous this fall. It was sunny and warm almost every day… until this week. I’m pretty sure as Daylight Savings Time ended, so did our streak of beautiful warm weather. This past week, it snowed. SNOWED!!!!! And the highs are only supposed to be in the upper teens~lower 20s this weekend and next week. 

Can everyone else just pause what they’re doing for a minute and panic with me?

The streets in our neighborhood are completely iced over but thank goodness the highways are clear (for now). I’m already bundled in layers and whining about how cold it is and winter hasn’t even really started yet. I just might decide to hibernate underneath the warmth of my covers for the next 6 months. Wake me up when it’s 50 and above.

 IMG_0292

***They said these temperatures are about 20 degrees below average for this time of year!***

IMG_0306

3. Even though Thanksgiving is the next holiday in line, it seems like all the store shelves are already full of Christmas merchandises and everything peppermint chocolate. I was unable to resist the temptation of all things Christmas and already gave in to all the fun Christmas-y things, just one mere day after Halloween was over (sorry, Thanksgiving!).

IMG_0248

4. Call us lame, but Brian and I usually go all out and plan a full Thanksgiving menu for just the two of us. It’s not that we’re loners (or losers)… it’s just that our families and friends either live far far away or have families of their own. Plus with my job, there’s usually a good chance that I’ll be working one (or all) of the major holidays. So for the past few years, we’ve been celebrating by ourselves. This year we’ll be having our Thanksgiving feast on Black Friday (I’ll be working all day Thanksgiving) – we already planned out our entire Thanksgiving menu last weekend, and this weekend I will be constructing a Thanksgiving timeline… because that’s totally what normal non-type-A-OCD-people do, right?

5. I also decided to be ahead of the game this year and ordered our Christmas cards a few weeks ago. They just came in the mail today, and I will be addressing them this weekend so they will be ready to be mailed out right after Thanksgiving. Getting things done way ahead of time makes me feel like I have my life together.

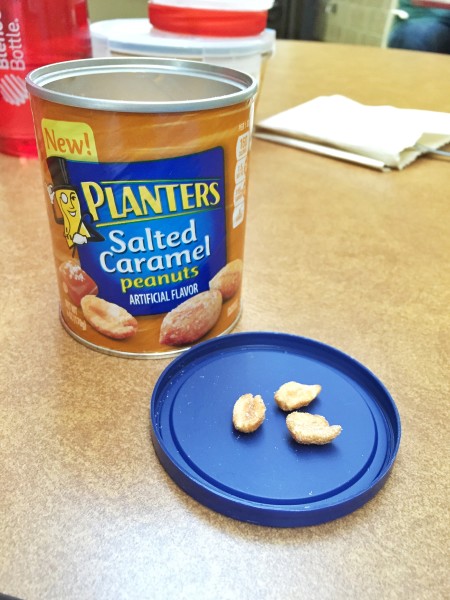
6. Has anyone had these? They’re ridiculously addicting and delicious! I’ve been having a hard time finding them at my local Target – the only place I have seen them is in the checkout aisle.

IMG_0340

7. I hope everyone has a wonderful weekend! Just don’t torture your dog with peppermint cookie ice cream like I did…

IMG_0282

Sharing is caring! Email this to someonePrint this pagePin on PinterestShare on YummlyShare on FacebookShare on Google+Tweet about this on Twitter

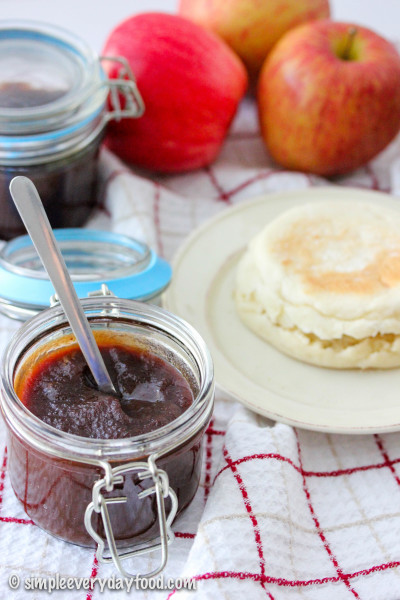
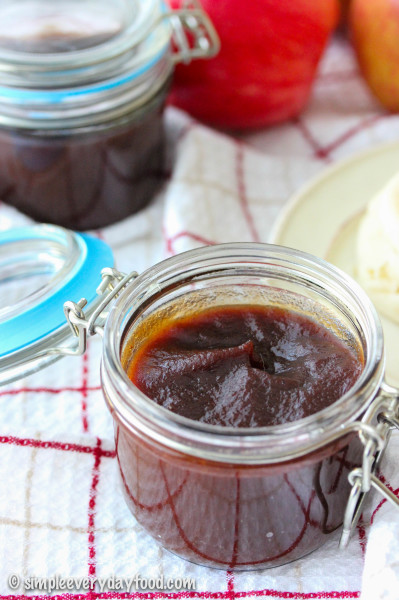
For the longest time ever, I didn’t know apple butter didn’t actually involve “butter”. Why couldn’t they call it something like “apple jam” or “apple spread”?

IMG_4250 copy

IMG_4267 copy

But then again, peanut butter doesn’t involve “butter” either, and I don’t hear people calling it “peanut spread”…

BUT! They do call the popular Nutella a “hazelnut spread”, not a “hazelnut butter”, even though its consistency is just like peanut butter..

So what qualifies a condiment as a “butter”? Is it its consistency? Like it’s so smooth it spreads just like butter? Or is it just the way people are used to calling it? Maybe I’ll start a new trend and call my apple butter an apple “spread” instead.

IMG_4236 copy

Ugh. Technicalities.

So anyway. I’ve been wanting to make Crockpot apple butter for years now, and I’m so glad I finally did! It’s soooooo easy and so ridiculously delicious that I can’t believe it took me so long to try it! I used a mixture of Fuji, Honeycrisp, and Granny Smith apples for my apple butter. The Fuji and Honeycrisp apples are sweet, and the Granny Smiths give it a hint of tangy tartness that wonderfully balances out the sweetness of the sugar and apples.

The best part about all this is that you throw all your ingredients in a Crockpot and let it slowly cook overnight, and you’ll wake up to the delicious mouth-watering smell of cinnamon apples. Add a splash of vanilla extract, break up any large pieces with a wooden spoon, and let it cook another 1-2 hours the next morning as you slowly sip on your coffee and read the morning newspaper.

If you own an immersion blender, this would be a good time to use that nifty gadget. If you’re like me and don’t own one of those cool gadgets, then simply puree the apple mixture in a blender in batches (I filled my blender about half full and only had to puree two batches of it).

IMG_4247 copy

IMG_4255 copy

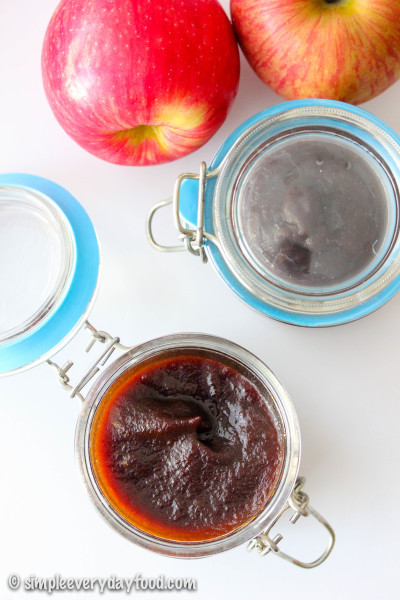
If you’re satisfied with the consistency of your apple butter, then simply let it cool completely prior to transferring them into jars. I personally prefer a thicker apple butter, so if you’re like me, then place the pureed apple butter back into the Crockpot with the lid ajar and cook on low for another hour or two, or until it has reached your desired consistency.

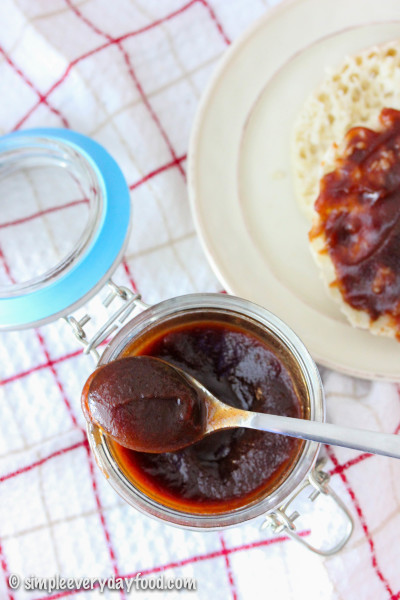
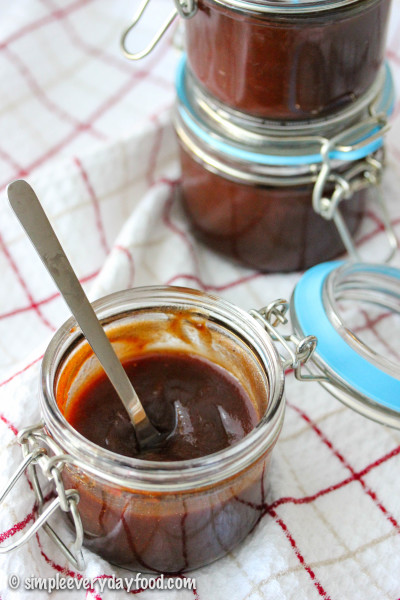
If you know how to can things, can this baby up and save it for the dead of winter when you’re craving a taste of fall. Otherwise place it in the fridge and spread it on toast, on an English muffin, on crackers, or just eat it with a spoon.

Or if you’re feeling generous, give away a few jars to friends and family – they’ll love you forever.

IMG_4289 copy

IMG_4277 copy

overnight crockpot apple butter
Print
Ingredients
  1. 3-3.5 pounds apples, peeled, cored, and sliced (about 7-8 apples; I used a combination of Fuji, Honeycrisp, and Granny Smith)
  2. 1/2 cup granulated sugar
  3. 1/2 cup dark brown sugar, packed
  4. 2 teaspoons ground cinnamon
  5. 1/4 teaspoon ground nutmeg
  6. 1/8 teaspoon ground cloves
  7. 1/8 teaspoon ground allspice
  8. A pinch of salt
  9. 1 and 1/2 teaspoons vanilla extract
Instructions
  1. Place apples in a slow cooker. In a medium bowl, combine the sugars, cinnamon, nutmeg, cloves, allspice, and salt. Sprinkle over the apples and stir it around until the apples are generously coated with the sugar mixture. Cover and cook on low for 10-12 hours overnight.
  2. The next morning, add in the vanilla extract. Stir the mixture around, breaking up any large pieces with a wooden spoon. Cover and cook for another 2 hours.
  3. In batches, pour the mixture into a blender and puree until smooth (this would be a time where an immersion blender would come in handy). For a thicker consistency, continue to cook the pureed apple butter on low with the slow cooker cover ajar for another hour, or until it's to the consistency of your liking.
  4. Let cool completely and transfer into jars. Refrigerate apple butter for up to 2 weeks.
  5. Makes about 1.5 pints
Adapted from Brown Eyed Baker
Simple Everyday Food https://www.simpleeverydayfood.com/
Recipe adapted from Brown Eyed Baker

© Simple Everyday Food. All images & content are copyright protected. Please do not use any of my images without prior permission. If you want to republish this recipe, please re-write the recipe in your own words, or kindly link back to this post for the recipe.

Sharing is caring! Email this to someonePrint this pagePin on PinterestShare on YummlyShare on FacebookShare on Google+Tweet about this on Twitter

I had originally planned on posting this recipe next week, but these cookies turned out so pretty (and delicious) that I couldn’t help but share it with you guys a week early!

IMG_4157 copy

IMG_4132 copy

Brian is a fan of the holiday Oreos. He swears that they taste better than the regular ones, and has tried convincing me that the Halloween ones are the best, despite the fact that I personally think they are the same thing and taste exactly the same (except for the different designs and different colored filling)… but I don’t think he believes me.

I think it’s all mental. I think somewhere in Oreo’s headquarters dwells researchers that have conducted market research that show people are more likely to buy “new” products if they change the look of the product and make them “limited edition”, even if they keep the recipe the same.

Do you think the Halloween Oreos taste better than the regular ones?

Since Halloween is just around the corner and my local grocery store has strategically placed all these tempting Oreos right by the checkout aisles, I caved and bought myself a pack of them. I knew they would make the perfect cookie with some of the Halloween sprinkles I bought at the craft store a few weeks back.

You know I’m a sucker for all things sprinkles!

IMG_4212 copy

IMG_4126 copy

I purposely made a big batch of these cookies earlier this week, knowing that I had my one-month post-LASIK checkup on Friday, and wanted to bring a couple dozen of these for the staff at the Whiting Clinic to show my appreciation of how wonderful they have been. I hope they liked them!

If you don’t want to make so many cookies at once, you can halve the recipe… although these cookies do freeze well and it never hurts to have frozen cookie dough in case of any late night cookie emergencies. Also, you can definitely use regular Oreos for this recipe (or any flavor for that matter). And it’s definitely not limited to just Halloween sprinkles either – use your favorite kind, none at all, or mix all your favorite sprinkles together to make it one colorful cookie – the possibilities are endless.

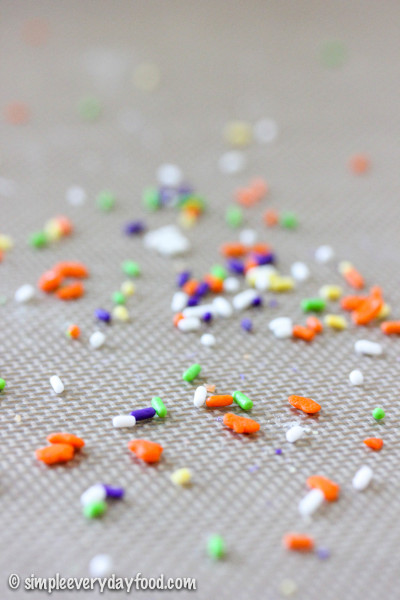
I decided to divide the batter in half since I had two different Halloween sprinkles I wanted to use – a spooky green/purple/orange one, and a candy corn colored one… the perfect pairing with some orange cream-filled Oreos! But dividing the batter into two also resulted in a lot of “transferring of the doughs”, which would’ve been a lot easier if I had two electric mixers…

IMG_4121 copy   IMG_4124 copy

IMG_4118 copy   IMG_4114 copy

Basically you’ll be making one basic cookie dough and mixing in the add-ins separately. And trust me when I tell you that your arms will thank you if you use an electric mixer – it saves time and muscle and mixes everything better since the batter will be pretty sticky. The chopped Oreos may come apart while you mix them in and that’s totally okay! You’ll get swirls of the orange filling throughout the dough which will give the cookies a beautiful festive look.

IMG_4196 copy

IMG_4150 copy

About 1.5 hours after you chill the dough, make sure to take it out and roll them into dough balls. If you chill them for too long, the dough gets hard, making it difficult to roll. Once they’re rolled into balls, you can refrigerate them up to 3 days if you don’t plan on making them right away.

I normally prefer a thick puffy cookie rather than a thin one, but these turned out so good! They’ll look slightly puffy when you take them out of the oven, but they’ll flatten out a bit as they cool. The outer edges are slightly crunchy, but the insides are oh so soft and chewy with tons of chopped Oreo cookies laced in between each bite.

IMG_4180 copy

IMG_4136 copy

So. Frickin’. Good.

halloween cake batter oreo cookies
Print
Ingredients
  1. 2 and 1/2 cups all-purpose flour
  2. 2 and 1/2 cups vanilla cake mix (I used Betty Crocker)
  3. 1 teaspoon baking soda
  4. A pinch of salt
  5. 1 and 1/2 cups unsalted butter, at room temperature
  6. 1 cup granulated sugar
  7. 1 cup dark brown sugar, packed
  8. 2 eggs, at room temperature
  9. 3 teaspoons vanilla extract
  10. 1 cup Halloween sprinkles*
  11. 20 Halloween Oreos, roughly chopped**
Instructions
  1. 1. In a large bowl, sift together flour, cake mix, baking soda, and salt. Set aside.
  2. 2. Using an electric stand mixer with the paddle attachment, cream the softened butter and sugars together on medium speed until creamy and smooth. Add in the eggs, one at a time, beating well in between each addition. Then add in the vanilla extract and mix until combined, scraping down the sides in between if needed.
  3. 3. Slowly stir in the dry ingredients to the wet ingredients and gradually increase the speed to low-medium until everything is combined.
  4. *** If you plan on using only one kind of sprinkles, go on to Step 4 ***
  5. *** If you plan on using two different kinds of sprinkles, skip to Step 5. ***
  6. 4. Add in the sprinkles and mix on low. Then add in the chopped Oreos and mix on low until everything is evenly distributed.
  7. 5. Divide the batter in half (approximately is fine), and place one half of the dough in a separate bowl (we'll call this Dough #2). Add in Sprinkle #1 to the dough that is still in the mixer bowl, mix on low and then add in the chopped Oreos until combined. Remove Dough #1 into a bowl and set aside. Put Dough #2 into mixer bowl, mix in Sprinkle #2 and chopped Oreos until combined.
  8. 6. Cover bowl(s) with plastic wrap and refrigerate dough for at least 1.5 hours. Roll dough into balls (I used a 1.5 tablespoon cookie scoop) and place in a tupperware, cover tightly, and refrigerate until ready to bake. Cookie dough can be refrigerated up to 3 days.
  9. 7. Preheat oven to 350 degrees and line baking sheets with silicone baking mats or parchment paper. Bake for 10-12 minutes and let cookies cool on the baking sheet for 5 minutes before removing them onto a wired cooling rack to cool completely. Store cookies at room temperature in an airtight container for up to 7 days.
  10. Makes 60 cookies
Notes
  1. *If you plan on using two different kinds of sprinkles like I did, you'll need 1/2 cup of each
  2. **If you plan on making two different batches, divide the roughly chopped Oreos into two separate bowls
Adapted from Sally's Baking Addiction
Simple Everyday Food https://www.simpleeverydayfood.com/
Recipe adapted from Sally’s Baking Addiction

© Simple Everyday Food. All images & content are copyright protected. Please do not use any of my images without prior permission. If you want to republish this recipe, please re-write the recipe in your own words, or kindly link back to this post for the recipe.

Sharing is caring! Email this to someonePrint this pagePin on PinterestShare on YummlyShare on FacebookShare on Google+Tweet about this on Twitter

IMG_4033 copy   

So while I’m sitting here at my local coffee shop writing today’s post, I contemplated about telling you guys the horrifying experience I had at this very same coffee shop just a few days ago, which involved two small birds flying into the glass window with a loud “thud!” right next to where I was sitting and landing on the sidewalk. And a phone call to a local emergency veterinary clinic regarding said collision that left me angry and frustrated. I started writing and then proceeded to deleted the two paragraphs I have written, because I figured this story is probably pretty dang unappetizing for a food blog, and the last thing I want to do is to turn you guys off.

So let’s start over…. despite the numerous pumpkin recipes I have posted here on SEF, would you believe me if I told you there once was a time where I hated pumpkin-flavored anything? I still don’t care for pumpkin pie to this day, but I do like some things that are pumpkin-spice-flavored. I have been seeing a lot of seasonal pumpkin flavor-related items on my Instagram feed lately and a lot of people stocking up on all things pumpkin (apparently Trader Joe’s have transformed itself into America’s pumpkin headquarters), but other than these pumpkin spice Oreo cookies, I have yet to stock up my pantry with any of these seasonal items.

I have to admit, these Oreos are pretty dang amazing. I had to hoard a stack of these babies and tuck them away in my cupboard for this recipe, just in case I didn’t have the self control to stop eating them.

IMG_3990 copy

IMG_3994 copy

These cookies are soft, puffy, and filled with pumpkin deliciousness! You may remember these ooey gooey pumpkin chocolate chip cookies I made last year. This time, I switched out the milk chocolate chips for white chocolate chips instead, and I think I actually like these better!

IMG_4034 copy

IMG_4022 copy

The white chocolate chips are a perfect complement to the golden Oreo cookies. All the flavors shine through and the ingredients don’t overpower one another. They are slightly crunchy on the outside, but so soft and chewy on the inside. And when you get a bite with the chopped Oreo cookies, it’s like a little bite of heaven.. so good!

IMG_4037 copy

IMG_4018 copy

IMG_4008 copy

soft and chewy pumpkin spice oreo cookies
Print
Ingredients
  1. 1/2 cup (1 stick) unsalted butter, melted and cooled
  2. 3/4 cup granulated sugar
  3. 1/4 cup dark brown sugar
  4. 2 teaspoons vanilla extract
  5. 1/4 pumpkin puree
  6. 2 cups all-purpose flour
  7. 1 teaspoon baking soda
  8. 2 teaspoons cornstarch
  9. 1/4 teaspoon salt
  10. 1 teaspoon ground cinnamon
  11. 1/8 teaspoon ground nutmeg
  12. 1/4 teaspoon ground cloves
  13. 1/4 teaspoon ground ginger
  14. 1/3 cup white chocolate chips
  15. 1/2 cup pumpkin spice oreos, coarsely chopped
Instructions
  1. In a medium sized bowl, combine the flour, baking soda, cornstarch, salt, cinnamon, nutmeg, cloves, and ginger. Set aside.
  2. Using an electric mixer with the paddle attachment, beat together the melted butter and both sugars. Add in the vanilla extract and pumpkin puree. Mix over medium speed until combined. Gently stir in the white chocolate chips and chopped Oreos.
  3. Cover and refrigerate for at least 30 minutes. Meanwhile, preheat the oven to 350 degrees and line two baking sheets with parchment paper and set aside.
  4. Using a medium cookie scoop (about 1.5 tablespoons), drop dough balls approximately 1" apart on the baking sheets. Bake for 8-10 minutes, rotating the pans halfway to ensure even baking. Remove from oven and gently press the tops with the back of a spoon if the cookies are too puffy for your liking (I did, because I love my cookies with slight cracks but yet still slightly puffy). Let cool on the baking sheet for 5-10 minutes before transferring them to a wired cooling rack to cool completely. Cookies can be stored in an airtight container for up to 5 days.
  5. Makes 2 dozen cookies
Adapted from The Domestic Rebel
Simple Everyday Food https://www.simpleeverydayfood.com/
Recipe adapted from The Domestic Rebel

© Simple Everyday Food. All images & content are copyright protected. Please do not use any of my images without prior permission. If you want to republish this recipe, please re-write the recipe in your own words, or kindly link back to this post for the recipe.

Sharing is caring! Email this to someonePrint this pagePin on PinterestShare on YummlyShare on FacebookShare on Google+Tweet about this on Twitter

Disclaimer: this post is super lengthy and it has nothing to do with food. The Whiting Clinic LASIK + Eye Care did not endorse me to write this review. This entry was written solely based on the purpose that I wanted to document my LASIK journey and serve as a review of my experience with the Whiting Clinic. All opinions are 100% my own.

◊ ◊ ◊ ◊ ◊ ◊ ◊ ◊ ◊ ◊

As long as I can remember, my eyesight has been bad. I like to blame it on genetics – both my parents are nearsighted, and everyone in our family has worse vision in their right eye than their left. My sister, that lucky duck, is the only one who still has perfect vision up to this day.

My first memory of having to wear corrective lenses goes way back to fourth grade. My dad took me to an optometrist, where I picked out a plastic, thick framed, ombre pink/transparent pair of glasses which I absolutely hated. Throughout the years, I’ve had multiple pairs of glasses varying in prescription, and they slowly became a part of me in which I’ve relied dependently to make the world a clearer place to see.

Over the years, I ended up with astigmatism along with my nearsightedness. I decided to get contacts when I was in high school after I joined the lacrosse team, and ever since then, putting in contacts became part of my daily routine.

Those at work all know I’m an extreme eye-wuss. Or as we call it, I’m one of those that “don’t do eyeballs”. Any sort of patient who comes in with any sort of eye problem automatically grosses me out. Whether it’s a bulging eyeball, a busted eyeball, a bloody eyeball, cherry eyes – you name it, I hate it. If there’s something wrong with the eye, you’ll see me running out the door. There has been times where I had to give eyedrops to patients with eye issues, and I had to ask other people to come do treatments for me because I just can’t do it. Nooooo thank you.

Some people ask me how I can put in and take out contacts if I have such a phobia to eyes – I tell them that I was lucky enough to have gotten contacts at a younger age, before I developed this weird eye phobia. Because there’s one thing I know for sure – If I had this eye phobia back then, I sure wouldn’t be able to bear the idea of my finger coming at my eyeball to put in contacts every morning, or the thought of picking at my eyeball to take my contacts out at the end of the day.

I’ve actually thought about getting LASIK for years but simply didn’t have to guts to bring myself to it. My reasoning? I only have one pair of eyes. What if something goes wrong during the procedure and I go blind forever?

I have since learned that going blind during a LASIK procedure is basically impossible, and that you’re more likely to get an infection from your contacts than LASIK. However, prior to gaining all this knowledge, reading all about how the procedure is done and the possible side effects and complications sure didn’t ease any of my skepticism. Plus, there are so many LASIK providers out there – who do I trust with my eyes????

A former coworker of mine, who also can’t stand all-things-eyeball-related, went to Dr. Whiting for her LASIK procedure a few years back… and she survived. A few other coworkers, including herself, kept telling me, “if Erika can do it, you can do it too.” She raved on how great of an experience she had – from the entire staff to the actual procedure itself, she had no complaints whatsoever. A few other friends also went to Dr. Whiting for their procedure and every single one of them recommended the place to me.

Upon further research that I conducted myself, I discovered that Dr. Whiting has done 100,000+ LASIK procedures and is considered one of the nation’s top LASIK surgeons. He’s the official LASIK provider for the Minnesota Wild hockey team, has done LASIK for many sports radio personalities (which is what sold Brian in the end), and other local “celebrities” as well. I figured if so many professionals trust him with their eyes, I should to able to, too.

So, I scheduled my free LASIK consultation, and by the end of the 90-minute appointment, I was sold.

2014-09-05 at 19.40.09

Well, my heart was sold. But my analytical brain insisted that having a blade come towards your eyeball and cut a flap on your cornea was not a good idea at all. It was just a consultation, but I was nervous. They say the appointment on procedure day would last about 90 minutes, but only takes about 30 seconds per eye. I remember asking, “so what happens during the rest of the 89 minutes of the appointment?!” I think Dr. Loomis sensed my anxiety because at one point he asked me why I was so nervous considering that it was only a consult exam… I remember I kept asking him if it was an actual blade that was going to cut my cornea open. Instead of trying to explain to me (apparently my brain was refusing to comprehend what he was saying), he went into the procedure room and took a blade off the machine that was just used on another patient.

You guys, it was an actual blade. Like a scalpel blade with an extremely sharp edge to it. I’m pretty sure I felt a slight wave of nausea. Apparently he’s never had to show the actual blade to anyone, but he decided he would for me just because I was so “curious”. I then was very tempted to ask him if there was any way I could keep the blade used on my eyes for my scrapbook, but decided that probably would’ve been a little too weird..

The days leading up to the procedure was nerve wracking. I’m not going to lie – I freaked out and had major anxiety the entire two weeks leading up to my procedure date. Every time I thought about it, I wanted to puke. The morning of the procedure definitely wasn’t any better either. They offered me either Benadryl or Valium to ease my anxiety… I would’ve taken the entire bottle of Valium if they would’ve let me. It relaxed me a little, but didn’t quite give me the sedative effect I was hoping for. I was not groggy and it definitely did not mess with my memory at all – it relaxed my muscles, but I was well aware of what was going on the entire time.
2014-09-18 at 19.19.47

2014-09-19 at 09.46.08 (1)

Pre-op.. not sure if that’s a nervous smile or if it’s the Valium talking…

Like I expected, the actual procedure only took less than a minute per eye – it was over before I knew it. I can go into detail of everything I remember, but I think I’ll spare you guys the play-by-plays. During my consult exam, they did mention that I would only feel “pressure” during the procedure. I’ll admit that I was a little skeptical when they used that word. Coming from the medical field (I used to work in a human ER), I knew doctors would sometimes substitute the word “pain” with “pressure”. Patients are generally more receptive to something if they’re told “you’ll feel a little pressure” as opposed to “oh yeah this will probably be a little painful”.

I was glad that I indeed only felt pressure on my eye during the procedure. They numbed both my eyes up very well so the entire procedure was not painful at all. The whole time I felt like I was in a hypnotic-like state. I followed the technicians and Dr. Whiting’s instructions like my body just moved on command without my brain actually processing the information and telling my body what to do. From walking into the procedure room and laying underneath the cool, space-ship like laser machine, to seeing Dr. Whiting put on his sterile gloves (along with the “smack!” that goes with putting sterile gloves on) and throughout the entire procedure, I was under the magic spell of Valium and I felt like things were just happening around me before my brain even had a chance to process everything.

I got to go home that day with some fashionable shades that I wore around the house that weekend as well as to bed for the next week.

2014-09-19 at 17.20.23

Having a snuggle buddy always helps.

Lubricating eye drops will be my best friend for the next three months and the hardest part for me so far is remembering that I shouldn’t be rubbing my eyes. But it sure is nice not having to wear glasses or contacts! Some days I still have to remind myself that the reason things are crystal clear is because I got LASIK, not because I have contacts in.

2014-09-19 at 16.06.08 

Since I have worked in the medical field for the past 6 years, I had high expectations of my entire LASIK experience (especially since so many of my friends recommended their facility to me). I’m pleased the say that my overall experience at the Whiting Clinic has exceeded all my expectations and then some.

Their entire staff are well-trained, polite, caring, and professional. We probably encountered close to 10 different people during our consult exam, on procedure day, and during my 1-day post-op check-up appointment, and every single one of them were fantastic. Everyone there is so friendly and does their best to put you at ease. Dr. Whiting has exceptional bedside manners and also has a very calming demeanor (which helped immensely to ease my anxiety). The facility is modern, clean, spacious, well-lit, with plenty of refreshments provided for both patients and family members (coffee and chocolate never hurts). They truly make it a customized experience for each and every patient – you get to choose the music you want in the background during your procedure and the mood lighting in the procedure room to help you relax. You also get to choose whether or not you want the curtain open for others to view your procedure from the huge glass window. From start to finish, every single little detail is tailored to each patient – I was impressed and extremely happy with both how I was treated and my results of my LASIK thus far.

2014-09-18 at 18.15.06

After my experience at the Whiting Clinic and knowing how a LASIK procedure actually is done, my current self would absolutely tell the Amy from two years ago that it’s definitely not as bad as I thought it was. And if (for some unfortunate reason) I had to do it again, I totally would in a heartbeat. It’s only been a little under a month since my procedure, but I have no regrets about my decision and I would absolutely put my trust in the fantastic staff at the Whiting Clinic to take care of my eyes from here on forward.

 ↓  I can guarantee you that this will never be me. Bye-bye glasses, forever and ever. I will never miss you.

Sharing is caring! Email this to someonePrint this pagePin on PinterestShare on YummlyShare on FacebookShare on Google+Tweet about this on Twitter