everyday food made simple

IMG_3708 copy

I’m not sure when my addiction to coffee began. Just a few years ago, coffee was a treat to myself every month. Now the smell of coffee invigorates my soul and awakens my foggy brain every morning at 4:30. And somewhere along the way, it became a necessity to start my day.

I became one of those “don’t talk to me until I’ve had my coffee” kind of people.

I used to laugh at Brian when he would complain about getting caffeine headaches, but it wasn’t until I got my first caffeine headache did I realize it was “a real thing”, and oh man I will never think of “having a caffeine headache” as a joke anymore. It’s serious business, folks.

Prior to my coffee addiction, chai tea lattes used to be my drink of choice when I would visit coffee shops. The combination of the tea, the spices and the creaminess of it was enough to keep me awake and going for the rest of the day. Now that my caffeine tolerance has gone up significantly ever since I entered the “real world”, a chai tea latte is only enough for an afternoon pick-me-up.
IMG_3702 copy

IMG_3705 copy

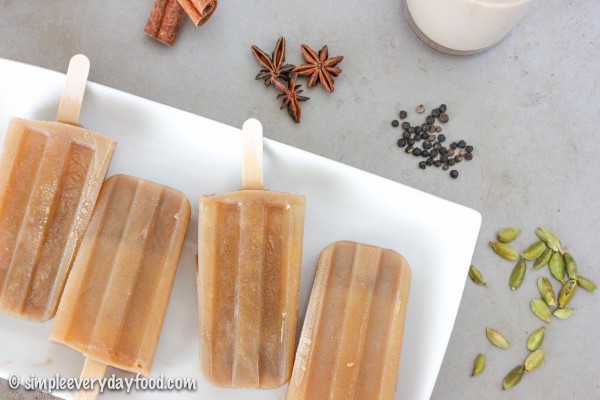
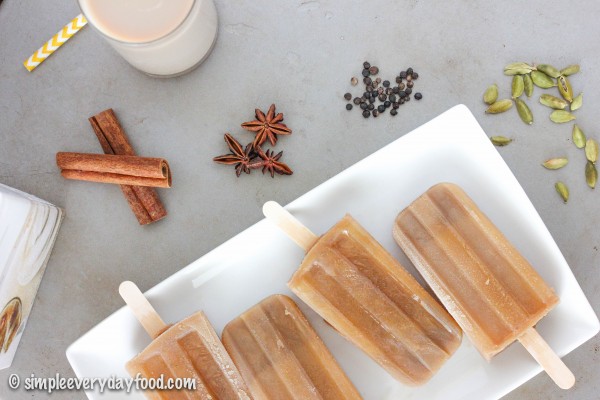
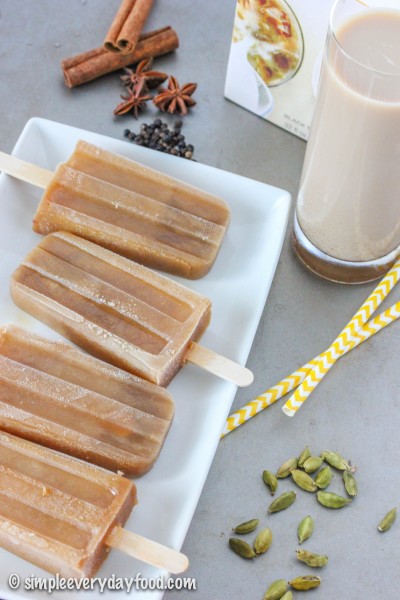
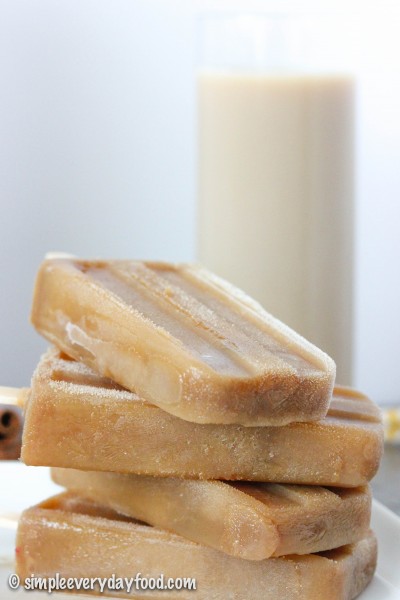
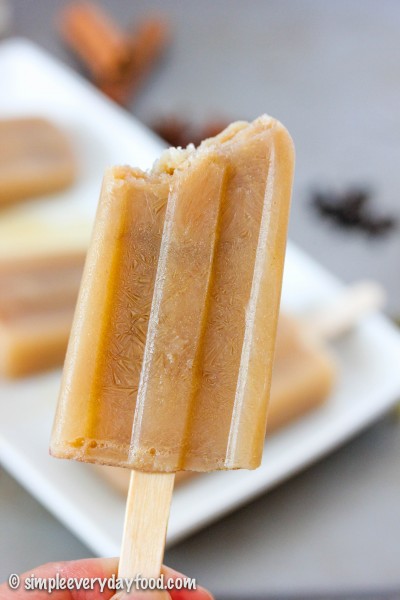
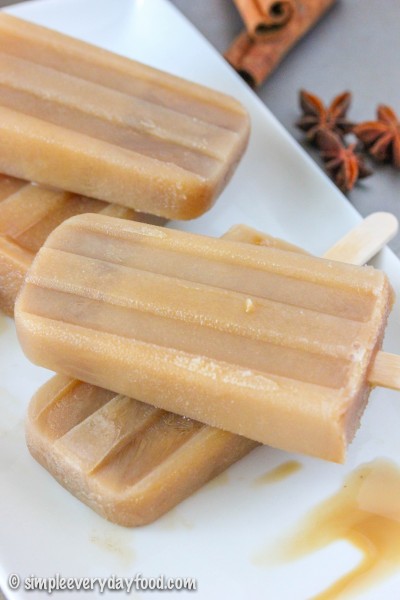
So today I’ve made you the perfect afternoon pick-me-up for a hot day – chai tea latte popsicles! Only two ingredients needed and there’s really not a whole lot of science involved to make these… and they’re so fun to eat on a hot summer afternoon! I’ve been going to the freezer and having one of these every day after work. Whether or not the small amount of caffeine in it actually does anything to me, I don’t know; but at least my mind thinks I’m feeding it caffeine to last me a few more hours before bedtime.
IMG_3726 copy

IMG_3718 copy

IMG_3713 copy

chai latte popsicles
Print
Ingredients
  1. 1 cup chai tea concentrate (I used the Tazo brand)
  2. 1 cup skim milk
Instructions
  1. In a medium-sized bowl (preferably with a pour spout), combine the chai tea concentrate and the milk.
  2. Pour mixture into popsicle molds, leaving about a 1/4-1/2" space from the top to give the popsicles room to expand when frozen.
  3. Freeze for an hour, then insert popsicle sticks. Freeze until frozen.
  4. Makes 10 popsicles
Notes
  1. To remove the popsicles from the molds, run warm water over the outside of the molds for ~30 seconds. Pull the popsicles straight up out of the molds - don't try to wiggle them out. Store in a separate container in the freezer.
Simple Everyday Food https://www.simpleeverydayfood.com/
© Simple Everyday Food. All images & content are copyright protected. Please do not use any of my images without prior permission. If you want to republish this recipe, please re-write the recipe in your own words, or kindly link back to this post for the recipe.

Sharing is caring! Email this to someonePrint this pagePin on PinterestShare on YummlyShare on FacebookShare on Google+Tweet about this on Twitter

Is anyone else sad that it’s already mid-August and summer is coming to an end? Where did my summer go? I made a whole list of summer to-dos at the beginning of the summer, and there are so many things I haven’t got to cross off the list yet!

But let’s try to be positive here – even though summer is ending, it doesn’t mean that it’s going to be 20 degrees and snowing the next day (but you just never know in Minnesota). There’s always the Minnesota State Fair, all things pumpkin and apples and cinnamon, the beautiful fall foliage, and plenty of crisp fall days ahead of us!

But as long as it’s 80 and sunny, I will be clinging on to every last day of summer. This includes the making of all things that scream summer that are bursting in summer flavors! Like this lemon gooey bar.

IMG_3451 copy

IMG_3462 copy    

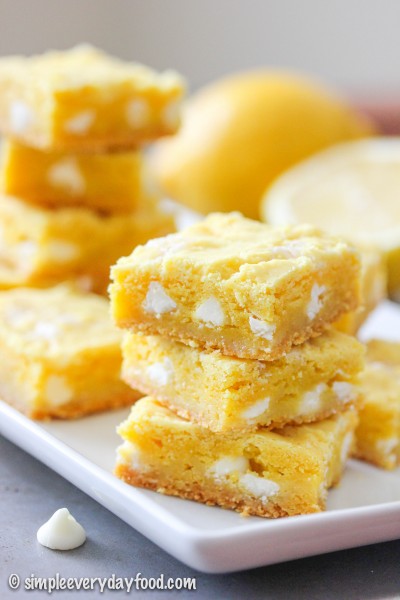
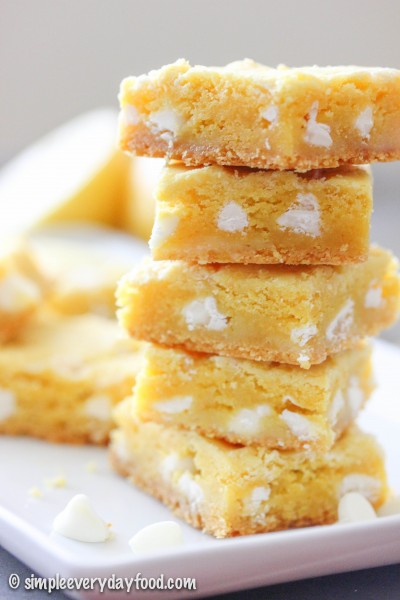
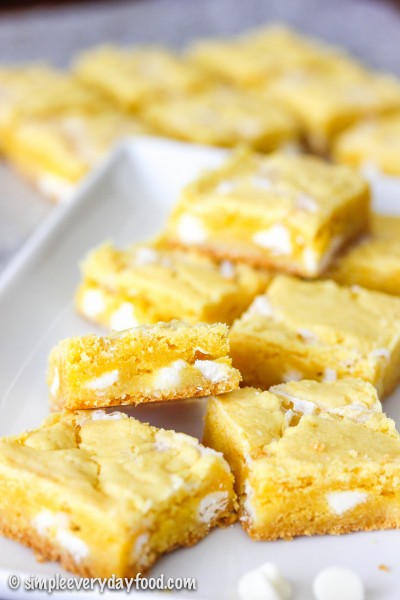
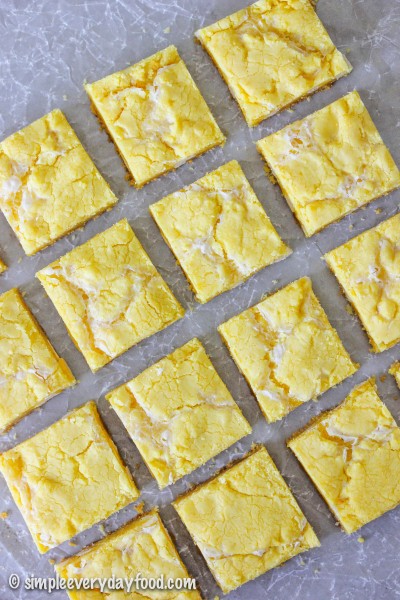
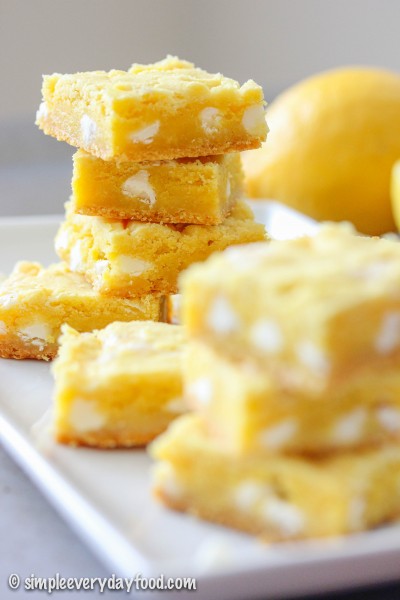
This lemon gooey bar tastes exactly what it sounds like – lemony and gooey. If I could’ve called it “The Amazingly Delicious Soft and Gooey Melt-In-Your-Mouth Lemon Bars”, I totally would’ve. Soft lemon bars sprinkled with plenty of white chocolate chips… every bite is melt-in-your-mouth amazing! I brought some to work to share with some lemon-loving coworkers and I’m pretty sure the pan was gone within the hour. Word sure travels fast around the hospital when there are sweets involved!

IMG_3465 copy

IMG_3438 copy

These bars are made in a similar manner to the peppermint gooey bars I made last winter. If you haven’t tried those yet, I do highly recommend you do so sometime!

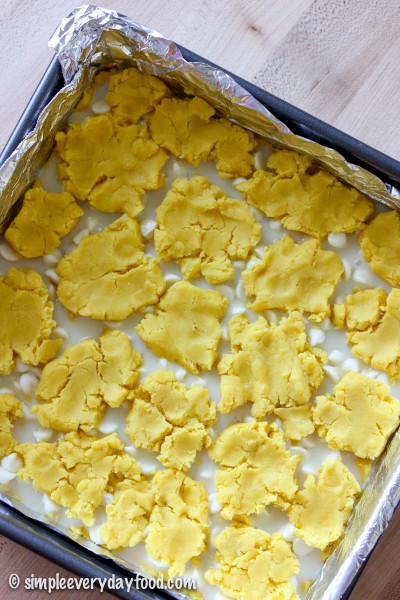
So you’re going to make the dough first, pressing half of it into the bottom of the pan. Then do a little bit of drizzling of some sweetened condensed milk and a bit of sprinkling of some white chocolate chips. Tear the rest of the dough into little pieces, pressing them on top. Don’t worry if the pieces don’t cover the whole pan completely – they will expand and stretch out once you put them in the oven.

IMG_3426 copy

IMG_3433 copy

The entire process is super straightforward and simple, but you know what the most difficult thing about making these bars is? The waiting. I hate waiting, but believe me when I tell you these taste way better when you actually wait patiently for them to cool completely. I highly recommend running a few errands and getting out of the house while they cool so you’re not tempted to check on these bars every 3 minutes (not that I’m speaking from personal experience or anything… ahem).

IMG_3458 copy

lemon gooey bars
Print
Ingredients
  1. 1/2 cup (1 stick) unsalted butter, softened to room temperature
  2. 1 box (16.25 oz) lemon cake mix (I used Duncan Hines)
  3. 1 egg, at room temperature
  4. 1/2 cup sweetened condensed milk
  5. 1/2 cup white chocolate chips
Instructions
  1. Preheat oven to 350 degrees. Line a 9x9" baking pan with aluminum foil and spray generously with nonstick cooking spray.
  2. Using an electric mixer, stir butter over medium speed until fluffy. Mix in the cake mix and egg. Beat until texture resembles cookie dough.
  3. Place about half of the dough in the bottom of the pan, press to form the crust, making sure all corners and sides are covered with dough. Sprinkle the white chocolate chips evenly over the dough and drizzle with the sweetened condensed milk. Drop balls of remaining dough evenly over the top. Press lightly. Don't worry if the entire surface isn't covered by the dough balls - the dough will expand once cooked in the oven.
  4. Bake for 28-32 minutes, or until the tops are slightly browned. Cool completely before cutting into squares. Once completely cooled, bars can be stored in an airtight container for up to 5 days.
Adapted from Crazy for Crust
Simple Everyday Food https://www.simpleeverydayfood.com/
Recipe adapted from Crazy for Crust

© Simple Everyday Food. All images & content are copyright protected. Please do not use any of my images without prior permission. If you want to republish this recipe, please re-write the recipe in your own words, or kindly link back to this post for the recipe.

Sharing is caring! Email this to someonePrint this pagePin on PinterestShare on YummlyShare on FacebookShare on Google+Tweet about this on Twitter

Whenever I tell people I’m a vet tech, it’s always inevitable that someone will say, “I’m so jealous! I wish I could play with puppies and kittens all day!”

I always smile at their response because:

  1. Contrary to public belief, vet techs do not play with puppies and kittens all day.
  2. As a matter of fact, I actually do not see puppies and kittens all that often.
  3. It’s really not all rainbows and unicorns – there’s actually quite a bit a lot (I mean A LOT) of poop, pee, vomit, and blood involved on a daily basis (that’s if you’re lucky).
  4. There’s also a lot of sadness and death that we see on a regular basis. However, at the end of the day, we love what we do and we wouldn’t trade it for anything in the world.

Screenshot 2014-07-08 18.26.30

The past few months, my coworkers and I have been taking care of a particular patient whom we have all grown attached to and fallen in love with. He stayed with us to get his medical condition under control while his loving parents dealt with some family issues themselves. They trusted us to take care of their baby boy, and we gave him all the love and attention he deserved: extra long walks, lots of ear and butt scratches, and lots of treats and cookies. He was such a happy dog that it was just too easy for us to fall in love with him. However, just earlier this week when I was about to go to bed, my coworker texted me and told me his family had ultimately decided to let him go, just a few hours after I said good-bye to him at the end of my shift.

I was devastated. I think we all were. I can’t speak for anyone else, but I realized I was attached to that boy more than I knew.

So how do we cope during times like this?

Well, some people curl up on the couch and cry into a pillow. [check]

Some people like to talk about it. [uh yeah no thank you]

Some people lay in bed and watch TV for hours on end.

Some people go for a run to temporarily forget the pain.

Some people reflect through writing. [check]

And some people sit down with a pint of ice cream and eat until they feel better. [check]

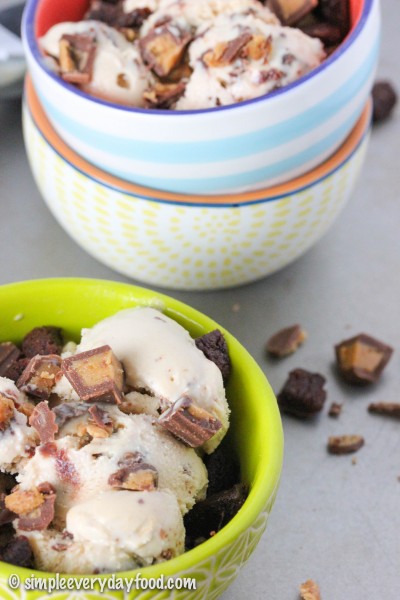
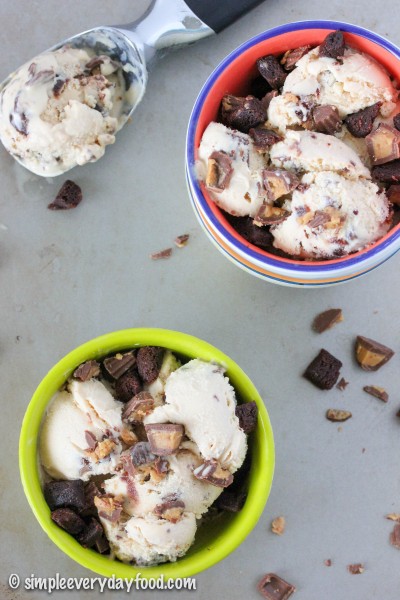
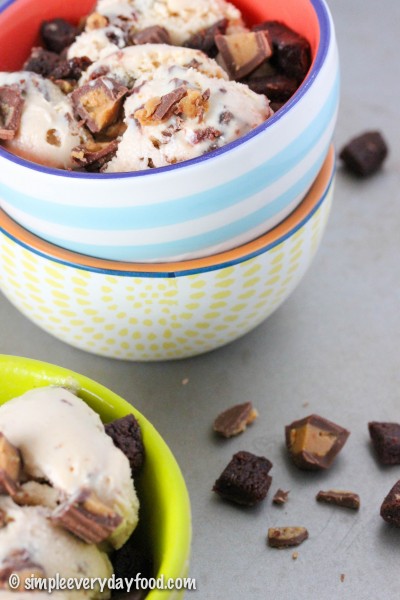
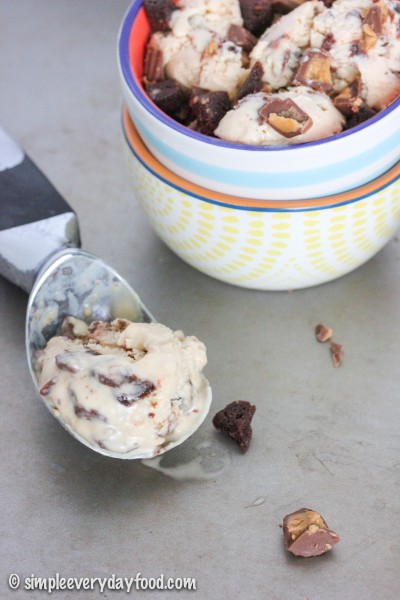
This peanut butter cup ice cream with brownie bits, to be exact.

IMG_3688 copy

IMG_3676 copy    

If we took a poll of America’s favorite flavor combo, peanut butter + chocolate has got to be in the top 3. That’s why this ice cream is the epitome of comfort food. Chucks of chopped peanut butter cups and brownie bits generously sprinkled throughout the ice cream – every bite is sweet, chocolatey, decadent, chewy, and crunchy. Oooooh yeah. It’s pure heaven, I tell ya.

IMG_3686 copy

IMG_3677 copy

What’s even better is that this doesn’t require tempering of eggs, which means no risk of getting scrambled eggs! Just blend, chill, churn, freeze (and wait for what seems like eternity), and enjoy! And let me tell you right now – waiting for the ice cream to freeze overnight is pure torture!

The peanut butter ice cream base is so good that I could’ve slurped it all with a straw! I had to refrain myself from pouring it into a glass, topping it off with the mix-ins, and drinking it like a milkshake…

So go do yourselves a favor guys, and go make this right now. I promise you won’t be disappointed!

IMG_3683 copy

peanut butter cup ice cream (with brownie bits)
Print
Ingredients
  1. 3/4 cup creamy peanut butter
  2. 1 cup plus 2 tablespoons sugar
  3. 2 and 2/3 cups half-and-half
  4. A pinch of salt
  5. A dash of pure vanilla extract
  6. 1 heaping cup (unwrapped) mini Reese’s cups, frozen and chopped
  7. 1 cup roughly chopped brownie bites (optional)
Instructions
  1. In a blender, combine the peanut butter, sugar, half-and-half, salt, and vanilla extract. Blend until smooth. Place in refrigerator and chill completely.
  2. Add mixture to ice cream maker and churn according to manufacture's instructions.
  3. Once churned, gently fold in the chopped peanut butter cups and chopped brownie bites with a spatula. Transfer to storage container and freeze overnight.
  4. Makes 1 quart
Adapted from Annie's Eats
Simple Everyday Food https://www.simpleeverydayfood.com/
Recipe adapted from Annie’s Eats

© Simple Everyday Food. All images & content are copyright protected. Please do not use any of my images without prior permission. If you want to republish this recipe, please re-write the recipe in your own words, or kindly link back to this post for the recipe.

Sharing is caring! Email this to someonePrint this pagePin on PinterestShare on YummlyShare on FacebookShare on Google+Tweet about this on Twitter

I hope everyone had a wonderful 4th that was celebrated by spending time with family, nice weather, and plenty of good food! It’s funny that in our family, we (and by “we”, I mean “I”) usually plan an excessively long list of things I want to make for the holidays despite the fact that it’s usually the two of us. It’s not one of those “oh these are the things I want to make, but I probably won’t make everything”.  Noooooo siree! I’m the one who plans and executes. If I want to make it, I will make it.

You should’ve seen the list I made for Thanksgiving last year – it was ridiculous. I think I had 8-9 things on the menu just to feed the two of us, from appetizers to side dishes to dessert – we were covered in the event of a zombie apocalypse and we couldn’t leave the house for 3 weeks. There was so much food that we barely had enough counter space to put everything!

The big holiday itself usually gets a lot of attention and planning ahead, but not everyone plans for breakfast the morning after when everyone wakes up from the food coma. In case you’re still looking for a easy breakfast option for tomorrow, I’ve got you covered!

IMG_3098 copy

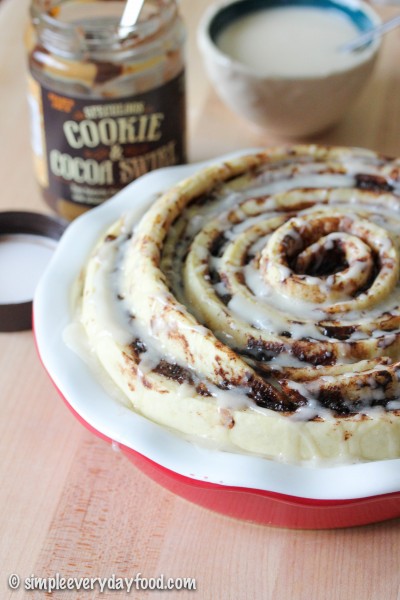
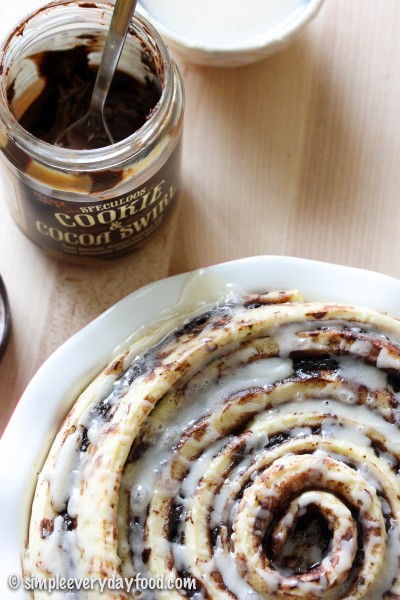
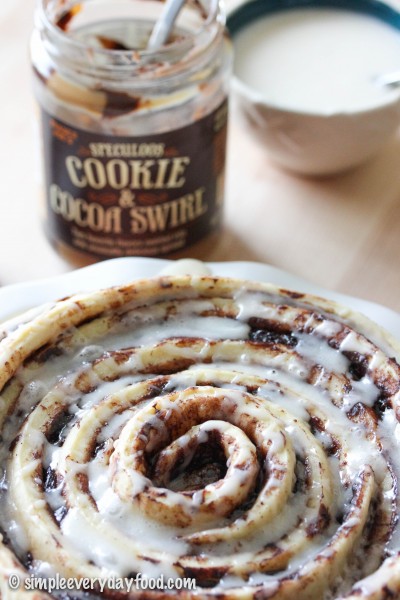
These cinnamon rolls can be easily made the night before, so when you wake up and want breakfast, you only have to wait less than 30 minutes for a piping hot, fresh out-of-the-oven, mouth-watering, gooey, sweet cinnamon roll! And let me tell you, it’s totally worth the wait, because these are deeeelish!

Chocolate + cookie butter + maple glaze + fluffy rolls = it’s practically heaven! I could eat this every weekend.

IMG_3103 copy

I’m personally a big fan of overnight cinnamon roll recipes, simply because I my stomach doesn’t have the patience to wait long for food in the morning. All the hard work is put in the night before, so all you have to do is throw it in the oven, make the glaze, wait, and enjoy the next morning – pretty easy, eh?

IMG_3095 copy

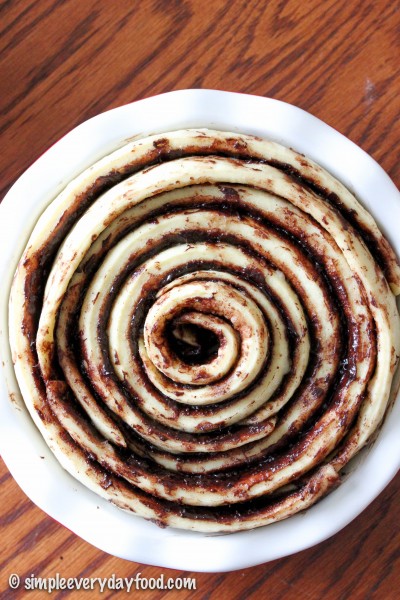
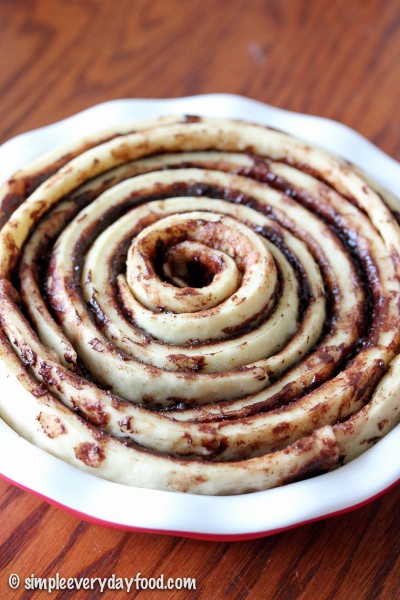
[loosely coil the strips to allow room for the dough to rise overnight]

IMG_3092 copy

This giant spiral cinnamon roll is so pretty to look at, and even more fun to eat. You can either cut it into wedges and serve it like you would cake, or you can do what we did, and peel off the strips as you go. I highly recommend the latter, simply because it’s always fun when you get to eat with you hands, and eating it this way kind of reminds me of tearing off little pieces of bubble tape gum from when I was little (remember those? The gum whose flavor only lasts 5 seconds?).

IMG_3105 copy

giant spiral cinnamon roll with vanilla maple glaze
Print
For the roll
  1. 2 and 3/4 cup all-purpose flour
  2. 3 tablespoons granulated sugar
  3. 1 teaspoon salt
  4. 1 package instant yeast
  5. 1/2 cup water
  6. 1/4 cup skim milk
  7. 3 tablespoons unsalted butter
  8. 1 egg, at room temperature
For the filling
  1. 2/3 cup chocolate cookie butter (I used Speculoos chocolate cookie butter from Trader Joe's), softened slightly by microwaving it for 10-15 seconds
  2. 2 tablespoons ground cinnamon
For the glaze
  1. 1 cup powdered sugar
  2. 1 tablespoon heavy cream
  3. 1 tablespoon pure maple syrup
  4. 1 teaspoon pure vanilla extract
Instructions
  1. To make the dough, set aside 1/2 cup flour. In a large electric mixer bowl, combine the remainder of the flour, sugar, salt, and yeast together. Set aside.
  2. In a microwavable bowl, heat the water, milk, and butter together until the butter is melted and the mixture is hot to touch. Stir the butter mixture into the flour mixture over medium-low speed. Increase the speed to medium, add in the egg and just enough of the reserved flour until the dough is soft, pulls away from the sides of the bowl, and is no longer sticky (I used the entire 1/2 cup, but you may not have to use it all).
  3. Knead the dough for 3-4 minutes on a lightly floured surface. Form the dough into a ball and place in a lightly greased bowl. Cover and let sit for 30 minutes. In the meantime, spray a 9" pie pan with nonstick cooking spray and set aside.
  4. After 30 minutes, roll the dough out on a lightly floured surface into a 15x12" rectangle. Spread the slightly softened cookie butter over the top, then sprinkle the ground cinnamon.
  5. Using a pizza cutter, cut the dough into six 2" wide strips (cut the the long way). Loosely roll up one strip (kind of like a fruit roll-up) and place in the center of the pan. Wrap the remaining 5 strips loosely around the center one, starting each strip at the end of the previous one so the end product looks like a giant spiraled cake.
  6. Loosely cover the roll with aluminum foil and let rise in a warm, draft-free area overnight.
  7. The next morning, bake cinnamon roll at 350 degrees for 30-35 minutes or until lightly browned. I covered the top with aluminum foil 15 minutes into baking to prevent excessive browning on top.
  8. Remove the cake and let cool for 10 minutes. In the meantime, make the glaze by whisking all the glaze ingredients together until smooth. Drizzle over the rolls prior to serving.
  9. Serve immediately, or cover it tightly with foil and store up at room temperature for up to 3 days.
Adapted from Sally's Baking Addiction
Simple Everyday Food https://www.simpleeverydayfood.com/
Recipe adapted from Sally’s Baking Addiction

© Simple Everyday Food. All images & content are copyright protected. Please do not use any of my images without prior permission. If you want to republish this recipe, please re-write the recipe in your own words, or kindly link back to this post for the recipe.

Sharing is caring! Email this to someonePrint this pagePin on PinterestShare on YummlyShare on FacebookShare on Google+Tweet about this on Twitter

IMG_3514 copy

Has anyone else been sucked into the World Cup frenzy? Just like any other major international sporting event, the World Cup is one that I always look forward to, and this year was no exception.

My sister and I got into soccer way back in 2002. Unlike the U.S., every time the World Cup rolls around, it’s a big deal in Taiwan – all sorts of World Cup-related merchandise can be seen around every street corner. My sister and I’s favorite team (even til today) is Germany. I remember we’d set our alarms and wake up at 3 a.m. to watch them play. Because we lived in a small apartment, we’d tip toe around the house in the middle of the night, trying to rub the sleepiness away from our eyes, and muting the TV because we were afraid to risk waking up our parents and getting sent back to bed. We’d watch in silence, whispering to each other during the game, and silently cheer on our team. After the game was over, we’d put the remote right where we found it and sneak back into bed, waking up the next morning tired and exhausted (yeah, we had it down to a science).

Sounds crazy, but at that time, it was all so worth it.

For the past two World Cup games, I had to watch them by myself here in the U.S. while my sister caught the games back in Taiwan. We still watch the games, text each other about the results, and cheer on our team together. Some things just never change.

Now, onto this recipe..

IMG_3493 copy

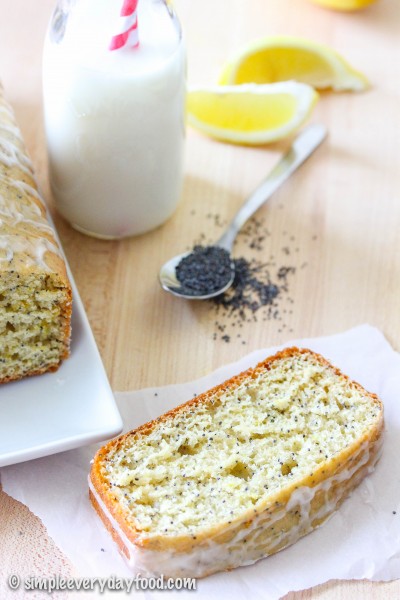
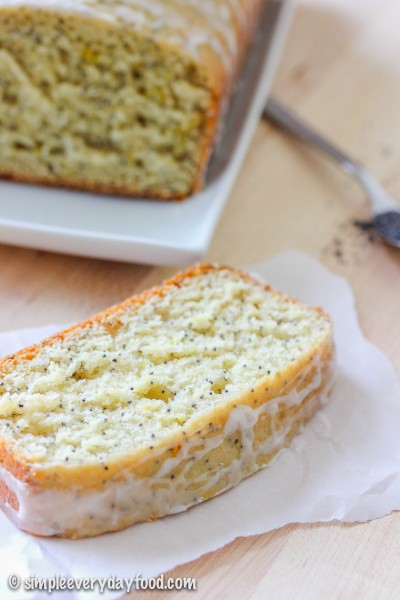
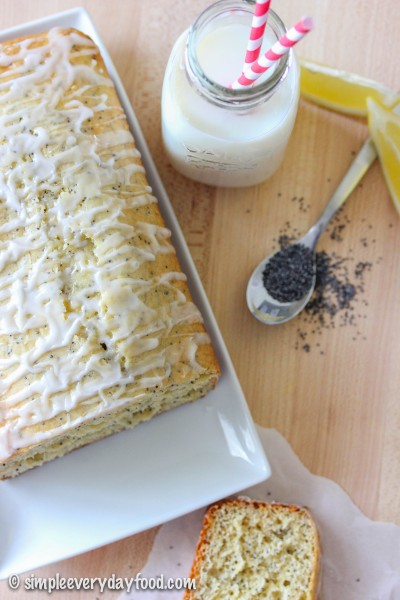
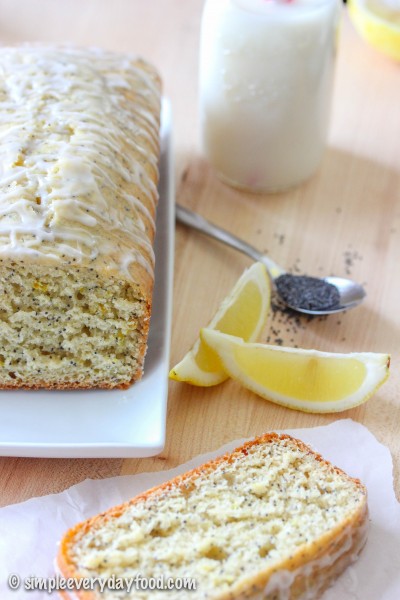
Can I just say how good this loaf cake is? The cake itself is soft and moist, the lemons give it a sweet yet tangy flavor, and the poppy seeds inside almost pops in your mouth. None of the flavors are heavy and overpowering – every component does its part to make this a light, summery recipe. The glaze on top is really optional, although I do highly recommend it as it adds an extra punch of lemon flavor to it, and the fact that no on ever turns down a layer on yummy sugary glaze on top of any kind of dessert.

IMG_3506 copy

The best part? You can eat it for breakfast, as a afternoon (or mid-morning) snack, or even as a light dessert after dinner. I placed it under the “breakfast” category simply because I ate it more for breakfast as opposed to dessert, even though no one ever said you can’t eat cake for breakfast…..

IMG_3497 copy

lemon poppy seed loaf cake
Print
For the cake
  1. 2 cups all-purpose flour
  2. 2 tablespoons poppy seeds
  3. 1 and 1/2 tablespoons lemon zest
  4. 3/4 teaspoon baking powder
  5. 3/4 teaspoon baking soda
  6. 1/4 teaspoon salt
  7. 1 tablespoon vegetable oil
  8. 1 egg, at room temperature
  9. 1 tablespoon vanilla extract
  10. 2/3 cup granulated sugar
  11. 1/3 cup plain Greek yogurt
  12. 2 tablespoons fresh lemon juice
  13. 6 tablespoons milk
For the glaze
  1. 4 tablespoons powdered sugar
  2. 1/4 teaspoon almond extract
  3. 1 teaspoon milk
  4. 1/2 teaspoon lemon zest
Instructions
  1. Preheat oven to 350 degrees. Coat a 9x5" loaf pan with nonstick cooking spray and set aside.
  2. In a medium bowl, whisk together the flour, poppy seeds, lemon zest, baking powder, baking soda, and salt.
  3. In a large bowl, combine the oil, egg, and vanilla extract. Mix to combine. Then whisk in the sugar, yogurt, and lemon juice until thoroughly incorporated. Alternate between adding the flour mixture and the milk (I added 1/3 of the flour, 1/2 of the milk, 1/3 of the flour, 1/2 of the milk, then the remaining 1/3 of the flour).
  4. Pour the batter in the loaf pan and bake for 45-50 minutes, or until an inserted toothpick comes out clean. If you notice the top is browning too fast, cover the pan with a tented tin foil after the first 30-40 minutes.
  5. Cool the pan for at least 15 minutes, then turn onto a wired cooling rack to cool completely.
  6. While the cake is cooling, prepare the glaze by whisking all the glaze ingredients in a small bowl. Drizzle over the top of the cooled caked. Cake may be sliced and stored in an airtight container for up to 5 days.
Adapted from Amy's Healthy Baking
Simple Everyday Food https://www.simpleeverydayfood.com/
Recipe adapted from Amy’s Healthy Baking

© Simple Everyday Food. All images & content are copyright protected. Please do not use any of my images without prior permission. If you want to republish this recipe, please re-write the recipe in your own words, or kindly link back to this post for the recipe.

Sharing is caring! Email this to someonePrint this pagePin on PinterestShare on YummlyShare on FacebookShare on Google+Tweet about this on Twitter