everyday food made simple

samoa cupcakes

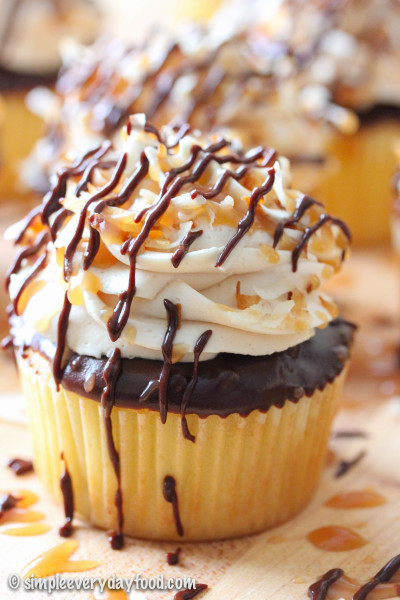
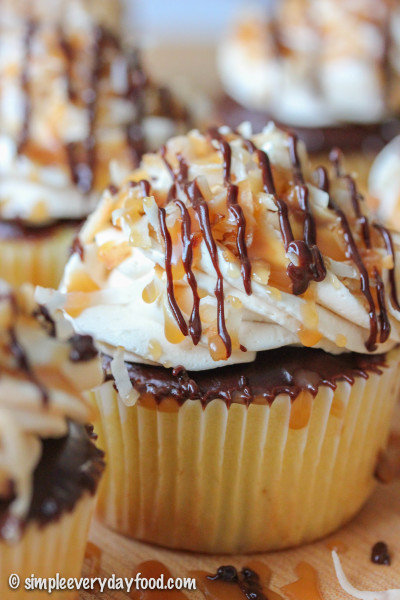
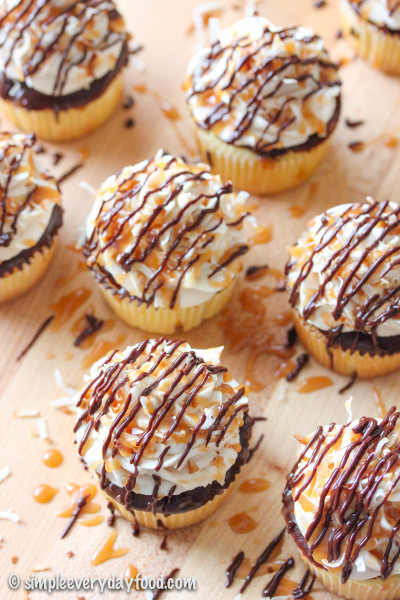
Before we go any further, don’t you just want to lick that caramel drizzle off your screen????

Those who know me know that I’m a sucker for sweets, especially when it’s anything that involves mint and chocolate. So when you see me choose anything over mint chocolate, you know it’s gotta be good. I don’t do it often, but when I do, you know Girl Scout cookie season is upon us

…(I would’ve made you a Dos Equis meme of myself, but I didn’t want to make a fool of myself).

As big of a Thin Mint lover as I am, the Samoas have traditionally been my favorite – the shortbread cookie, toasted coconut, and the sweet chocolate and caramel drizzles over the top are flavor combinations made in heaven.

And believe it or not, I actually still have an entire box of Samoas stashed in the back of my cookie cupboard from last month – it’s a miracle in itself that that box has survived this long!
samoa cupcakes

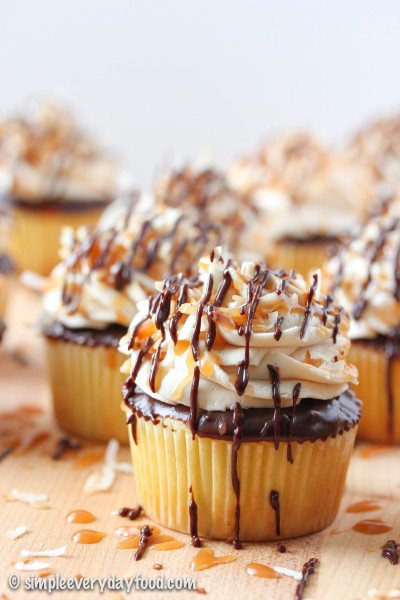
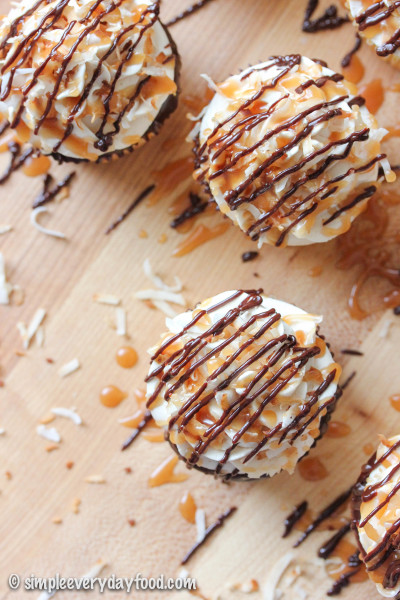
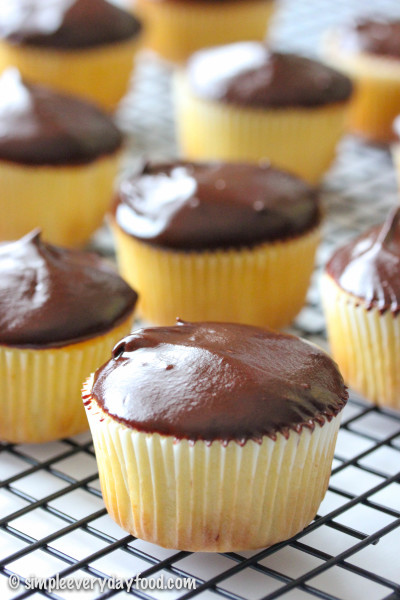
And then there are these ridiculous cupcakes. The cupcakes with layers and layers of textures and flavors that makes it a sweet, decadent, indulgent treat – yellow cake dunked in rich dark chocolate, topped with a sweet fluffy caramel buttercream (made from scratch!), garnished with crunchy toasted coconut flakes and drizzled with more melted dark chocolate and caramel sauce.

Pardon me as I wipe the drool off of my keyboard.
samoa cupcakes

samoa cupcakes

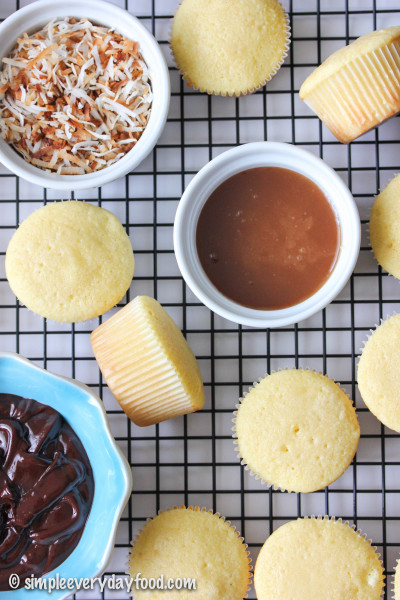
Pretty much everything in this recipe is made from scratch, except for the coconut flakes, because, well, I can’t seem to find coconuts anywhere around where I live, and shredding them myself seems a little time consuming…
samoa cupcakes

samoa cupcakes

But can we first talk about this homemade cake?! It’s OMGIcanjusteatallthecakesbyitself good. It’s so soft, fluffy, moist, and super duper delicious!
samoa cupcakes

Next up: the caramel sauce. It may seem easier to use store bought caramel sauce for this recipe, but please believe me when I tell you that you definitely need – NEED!!! – to make this homemade caramel sauce. It seriously only took me maaaybe 5 minutes to make and you can definitely taste the difference between the homemade version vs. the store-bought ones. The flavors are more pronounced – stronger, richer, and way more intense in flavor… I promise you totally won’t regret it!

So promise me you’ll make the caramel sauce? Pinky promise? I’ll even give you some tips!

  • Make sure you read all the instructions (preferably several times) prior to making the sauce… you want to know what you’re doing before you start the process rather than reading the instructions as you go. Get all the ingredients you need before starting: you want to have everything you need in arm’s reach, because once things start happening, it goes fast.
  • Although it only takes a few mere minutes out of your day to make this, it’s kind of a recipe that requires you to babysit it as you make it. That means if you’re a multi-tasker like I am, try to refrain from having five things going on all at once that all require your attention (ahem Pinterest, Instagram, changing the TV channel, trying to get the dog to stop harassing the cat…).
  • At the same time, be patient! It may take a few minutes for your boiling sugar-water mixture to start turning colors, but don’t forget to swirl your pan occasionally and have your whisk handy for when the mixture turns amber brown.
  • Once things start happening, whisk whisk and whisk some more! Make the whisk your best friend for these few minutes. Be one with the whisk.
  • Don’t be scared of making caramel! Seriously, it may seem like a daunting task but it’s really a lot easier than it seems. Plus as cliche as it sounds, it really does taste so much better (I just typed “butter” instead of “better”… hahaha!) than store-bought ones. Not to mention that it will also make your house smell like a caramel candy-making factory.
  • You’ll most likely end up with extra caramel sauce, but I’m sure you’ll be able to find things to do with it. I’m pretty sure I’ve ever heard of anyone complaining about extra caramel… have you?!

Add this homemade caramel sauce into some plain ol’ buttercream frosting, and you’ll end up with the a frosting that may just be the highlight of the entire cupcake.
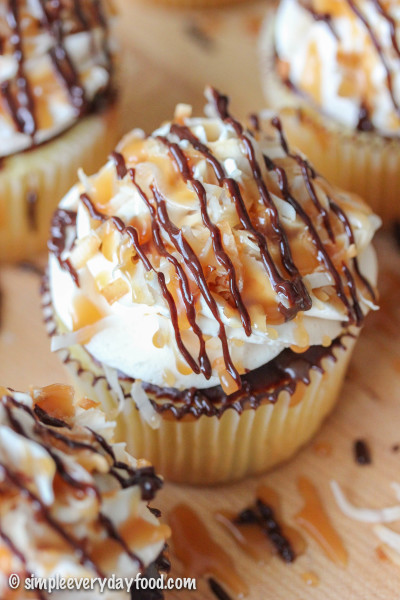
samoa cupcakes

samoa cupcakes with caramel buttercream frosting
Print
For the cakes
  1. 1 and 1/3 cups all-purpose flour
  2. 2 and 1/2 tablespoons cornstarch
  3. 1 teaspoon baking powder
  4. 1/8 teaspoon baking soda
  5. 1/4 teaspoon salt
  6. 1/3 cup unsalted butter, at room temperature
  7. 3/4 cup granulated sugar
  8. 3 tablespoon vegetable oil
  9. 2 large eggs, at room temperature
  10. 1 teaspoon vanilla extract
  11. 1/4 cup skim milk
  12. 1/4 cup buttermilk
For the caramel sauce
  1. 3/4 cup granulated sugar
  2. 3 tablespoons water
  3. 3 tablespoons butter (I used unsalted butter because that's what I had on hand - you can use salted butter or a combination of both unsalted + salted, if desired)
  4. 1/4 cup + 2 tablespoons heavy cream, combined in a small bowl
Caramel buttercream frosting
  1. 1/2 cup unsalted butter, at room temperature
  2. 2 cups powdered sugar
  3. 1/3 cup caramel sauce
  4. 1/2 teaspoon vanilla extract
  5. 1-2 tablespoons heavy whipping cream, if necessary
Optional toppings
  1. Chocolate sauce* (see Notes)
  2. 1/2 cup toasted coconut
For the cakes
  1. Preheat the oven to 350 degrees. Line 12 muffin tins with liners and set aside.
  2. In a medium mixing bowl, combine the flour, cornstarch, baking powder, baking soda, and salt. Stir to combine and set aside. In a separate small bowl, combine the milk and buttermilk, whisk together and set aside.
  3. In the bowl of an electric mixer, combine the butter and sugar and whip using the paddle attachment on medium-high until pale and fluffy, about 3-4 minutes, scraping the sides and bottom of the bowl if needed. Add in the vegetable oil and mix some more. Add in the eggs, one at a time, mixing on medium-low speed after each addition just until mixed. Add in the vanilla extract and mix some more.
  4. Add in the flour mixture and the milk mixture into the butter, alternating between the flour and the milk, starting and ending with the flour mixture, mixing until just combined after each addition (flour - milk - flour - milk - flour).
  5. Spoon cake batter into the lined muffin tins, filling each about 3/4 full. Bake for 16-18 minutes or until an inserted toothpick comes out clean (mine took exactly 17 minutes). Remove from oven and let cool for 5 minutes before transferring to a wired cooling rack to cool completely.
While the cupcakes are cooling, make the caramel sauce
  1. {Before starting this, read the instructions first - I have tips on how to make the caramel sauce in the post, and gather all your ingredients so you have them nearby}
  2. Using a heavy-bottomed saucepan, combine the sugar and water over medium-high heat, whisking constantly to make sure the sugar completely dissolves. Once the mixture starts to boil, stop whisking. Carefully swirl the pan every once in a while the mixture continues to boil. Once the mixture reaches a dark amber color, add in the butter and whisk vigorously until butter has melted and is incorporated. Remove from heat immediately, wait 3 seconds, then very carefully pour in the heavy cream while you're constantly whisking the mixture. Be very careful, as it may splatter as you add in the heavy cream. Whisk until smooth and let cool before transferring to a bowl/container to cool completely.
For the caramel buttercream
  1. Using an electric mixer fitted with the paddle attachment, whip the butter on medium-high speed for 4-5 minutes until pale and fluffy. Add in the powdered sugar and beat on medium speed until combined. Add in the caramel sauce and the vanilla extract and continue to beat on medium-high until frosting looks light and fluffy in texture. If the frosting looks too thick, whip in 1 tablespoon of heavy cream at a time until you reach desired consistency.
To assemble the cupcakes
  1. Dip the tops of the cooled cupcakes into the chocolate sauce, letting the excess run off and return cupcakes back to their upright positions. Let the chocolate have some time to harden prior to piping the frosting, about 10-15 minutes. Pipe the caramel buttercream frosting over the tops of the cupcakes with your favorite piping tip, top with toasted coconut flakes, and drizzle with extra chocolate and caramel sauce. Cupcakes can be stored in an airtight container at room temperature for up to 5 days.
  2. Makes 12 cupcakes
Notes
  1. * To make chocolate sauce: add 1 cup chocolate chips and 1/4 cup heavy whipping cream in a microwave-safe bowl. Heat in microwave in 30 second increments, stirring after each interval until chocolate is completely melted and mixture is smooth.
Adapted from Cooking Classy
Simple Everyday Food https://www.simpleeverydayfood.com/
Recipe adapted from Cooking Classy

© Simple Everyday Food. All images & content are copyright protected. Please do not use any of my images without prior permission. If you want to republish this recipe, please re-write the recipe in your own words, or kindly link back to this post for the recipe.

Sharing is caring! Email this to someonePrint this pagePin on PinterestShare on YummlyShare on FacebookShare on Google+Tweet about this on Twitter

I wanted to title today’s post as “Because there are already 184,750,172,902 mint chocolate cupcakes out there on the Internet, so why not add another recipe to the mix”, but that title seemed a little too lengthy, plus I figured people would have a hard time remembering the name of it when I tell them about this wonderfully delicious and moist chocolate cupcake topped with some mint Oreo buttercream frosting.

IMG_3276 copy

So I settled with a concise, to-the-point title of “Mint Oreo Cupcakes”. Short and sweet, just like these cupcakes.

IMG_3275 copy

IMG_3303 copy

I’m typically not a fan of St. Patrick’s Day, because I’m not a fan of beer drinking, I’m not particularly fond of corned beef and cabbage, and I really don’t look good in green attire.

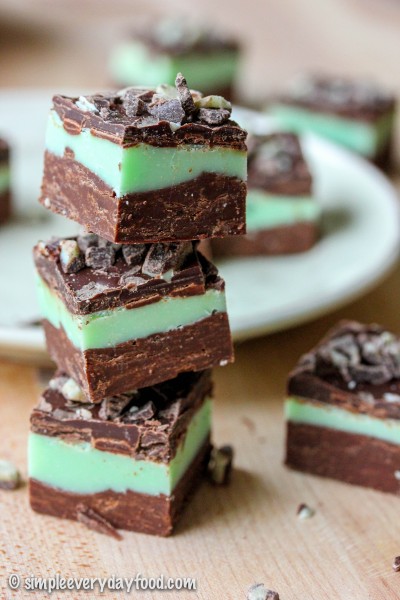
However, green = mint, which gives me an excuse to make all things mint chocolate. Like this mint chocolate fudge.

IMG_3012 copy

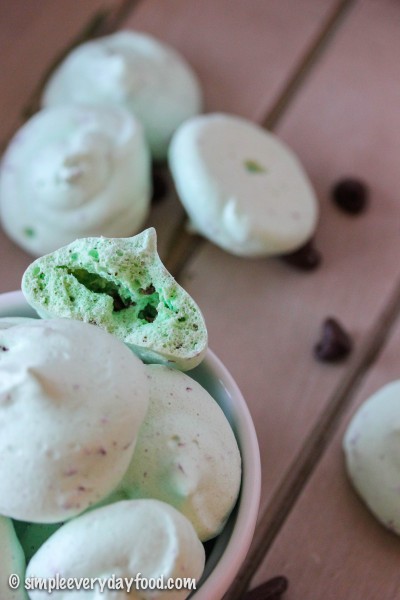
And these mint chocolate chip meringue cookies.

IMG_3411 copy

Oh, and have I mentioned my addiction to McDonald’s Shamrock Shakes? I don’t care what people say about them and how many calories and how many grams of sugar those things have, it’s the only thing I look forward to when St. Patrick’s Day starts rolling around the corner.

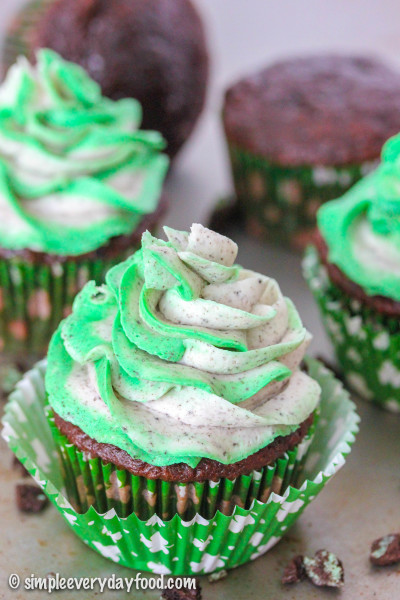
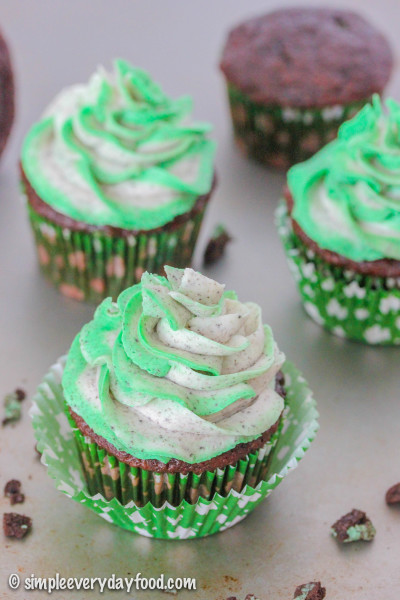
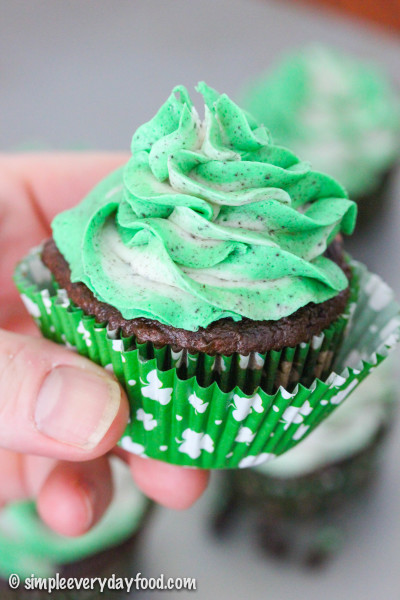
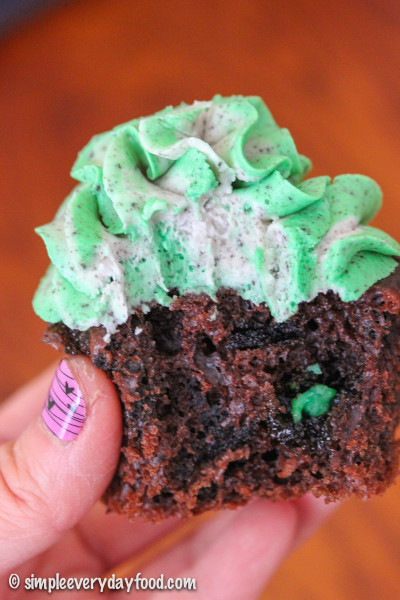
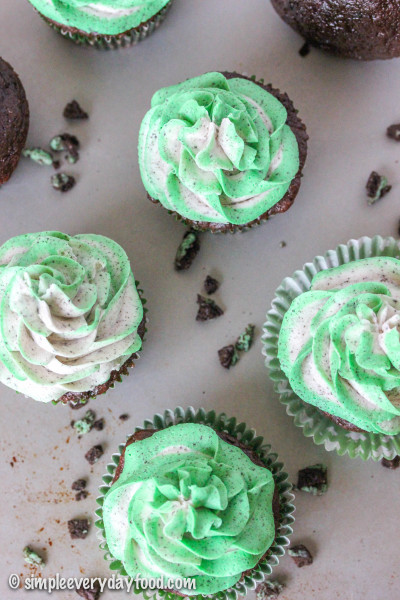
In celebration of the upcoming holiday, today I made you mint Oreo cupcakes – a light and fluffy chocolate cake studded with mint Oreo bits in every bite, topped with a mint Oreo buttercream with swirls of green for a festive look. It really is a mint-chocolate-lover’s perfect cupcake!

IMG_3321 copy

IMG_3292 copy

IMG_3288 copy

Now if you could excuse me, I’m going to go get myself a Shamrock Shake…

Shake in one hand, cupcake in the other, because that’s how everyone should celebrate St. Patty’s Day.

mint oreo cupcakes
Print
For the cupcakes
  1. 1 box Devil's Food cake mix
  2. 3 large eggs, at room temperature
  3. 1/2 cup vegetable oil
  4. 1 cup buttermilk
  5. 1/2 cup sour cream
  6. 2 teaspoon vanilla extract
  7. 20-24 mint Oreos, coarsely chopped
For the frosting
  1. 1/2 cup (1 stick) unsalted butter, at room temperature
  2. 8 oz cream cheese
  3. 1 and 1/2 teaspoon peppermint extract
  4. 1 tablespoon heavy whipping cream
  5. 3-4 cup powdered sugar
  6. Green food coloring
  7. 6-7 mint Oreo cookies, finely crushed and sifted to get rid of any large chunks
Instructions
  1. Preheat the oven to 350 degrees. Line cupcake tins with liners and set aside.
  2. Sift the cake mix over a medium bowl and set aside.
  3. In a large mixing bowl, combine the eggs, oil, buttermilk, sour cream, and vanilla extract. Whisk until smooth. Stir in the cake mix and mix until just combined. Gently fold in the chopped Oreos.
  4. Fill the cupcake liners ~3/4 fill and bake for 15-20 minutes, or until an inserted toothpick comes out clean. Remove from oven and let cool for 5 minutes before transferring them onto a wired cooling rack to cool completely.
  5. While the cupcakes are cooling, make the frosting: beat the butter and cream cheese over medium speed until smooth and fluffy. Add in the peppermint extract and heavy whipping cream. Slowly add in 3 cups of powdered sugar and beat until smooth. If the frosting is still too loose, add in 1/2 cup of powdered sugar until you reach your desired consistency. Add in the green food coloring, one drop at a time, until the color is to your liking. Gently fold in your crushed Oreos* and pipe over cooled cupcakes with your favorite piping tip.
Notes
  1. *Make sure not to overmix the crushed Oreos, otherwise your frosting will turn into a sickly, unappetizing (yet still delicious) shade of gray.
Adapted from Your Cup of Cake
Simple Everyday Food https://www.simpleeverydayfood.com/
Recipe adapted from Your Cup of Cake

© Simple Everyday Food. All images & content are copyright protected. Please do not use any of my images without prior permission. If you want to republish this recipe, please re-write the recipe in your own words, or kindly link back to this post for the recipe.

Sharing is caring! Email this to someonePrint this pagePin on PinterestShare on YummlyShare on FacebookShare on Google+Tweet about this on Twitter

 IMG_3864 copy  

It’s been about a week since the new iPhone 6 launch – did you upgrade to the new phone? Did you decide on a 6 or 6 Plus? Or are you one of those silly Android lovers that are super anti-Apple?

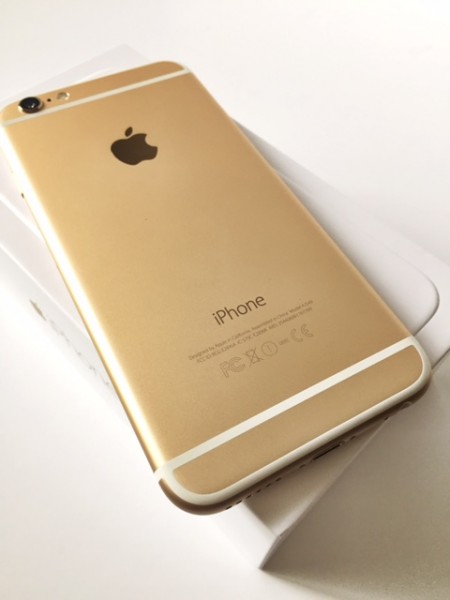
I myself, being a huge Apple fanatic, just had to get the new iPhone. And of course I had to have it on launch day. I just couldn’t bear the idea of seeing everyone else posting pictures of their new phone and reading all about how awesome the new phone is without having one in my hand.

IMG_9434

So first thing in the morning on September 12th, we waited for almost an hour and pre-ordered our iPhone 6s at the AT&T store. Needless to say, I was beyond ecstatic when I heard the FedEx truck pull up to our door last Friday, delivering a little brown box with our brand new phones carefully tucked in it. Other than the fact that my phone now doesn’t fit in my scrub pants pocket or my wallet, I’m in love with everything else about it – the screen is larger, but not too large to where it doesn’t fit in my hand. It’s slim, sleek, and lightweight all at the same time. The camera is amazing and the retina display is incredible.

IMG_9435

Don’t worry, even if you are an Android user, we can still be friends… I promise.

However, if you’re not into snickerdoodles, I’m not sure if we can be friends anymore.

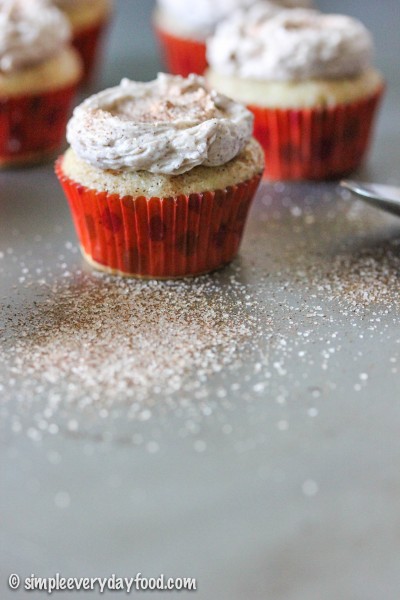
Okay, I’m totally kidding. We can still be friends, and I will totally force these snickerdoodle cupcakes on you, which I’m sure you’ll totally change your mind about snickerdoodles in general.

IMG_3870 copy

IMG_3872 copy

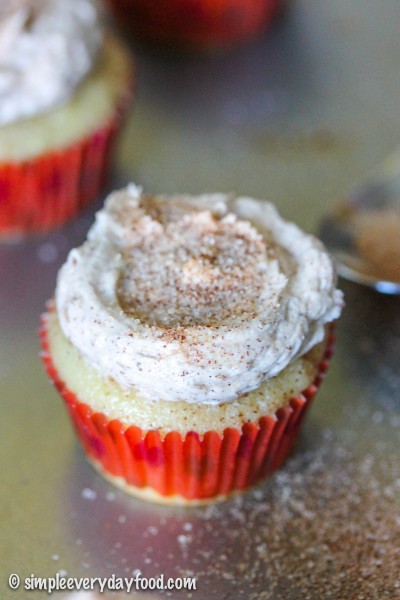
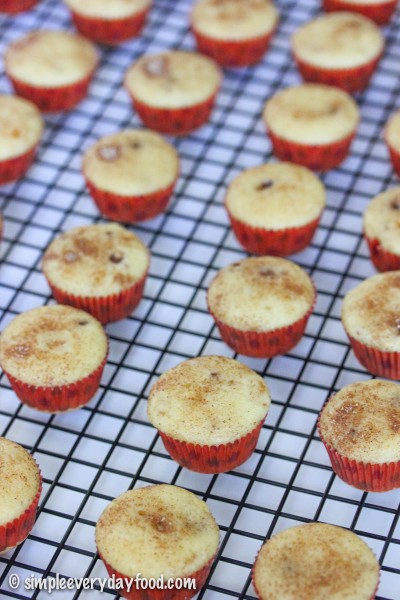
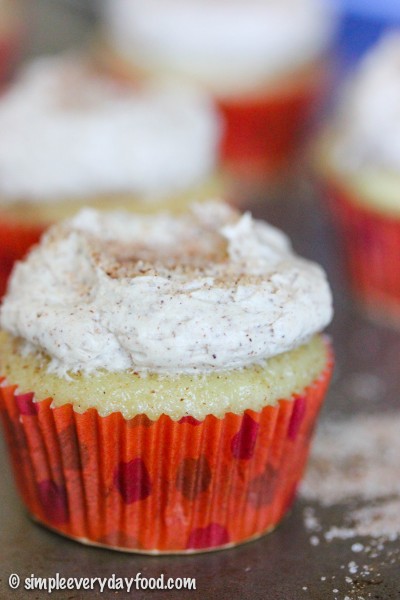
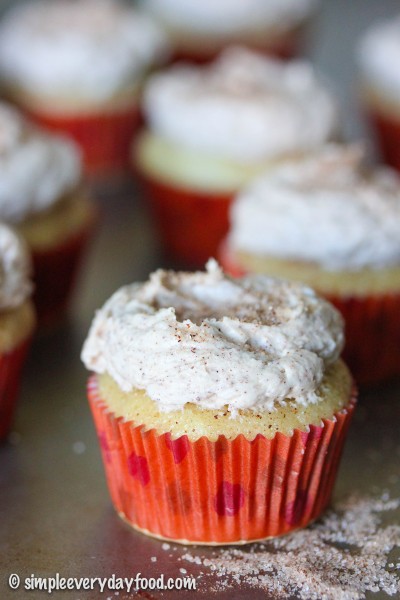
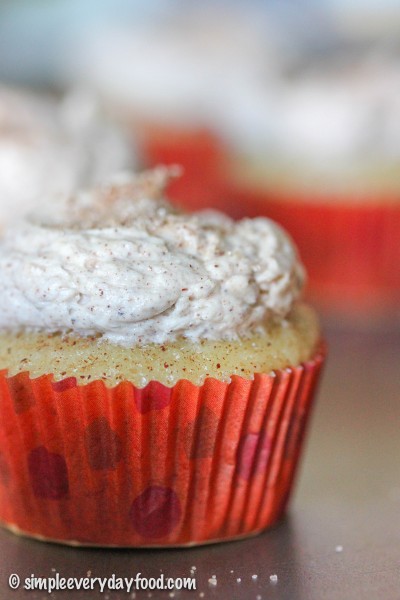
These cupcakes are a cinnamon lover’s dream – there’s so much cinnamon put into it! There’s cinnamon added into the batter, then a generous layer of cinnamon sugar sprinkled in between the batter, and two whole tablespoons of it in the frosting! Yep, you read that right: two tablespoons of cinnamon. Or if you’re like me, my two tablespoons sort of turned into two heaping tablespoons of it…

Because: “it’s too cinnamon-y”, said no one ever.

IMG_3834 copy

IMG_3841 copy

IMG_3875 copy

And to make these cupcakes even more adorable, I made them into “minis” – because everything is cuter when they’re minis, right?

IMG_3860 copy

Disclaimer: this food blog will not be responsible for how many cupcakes you end up eating in one sitting.

And because the batter yielded 40+ mini cupcakes, I brought some to work to share, and EVERYONE loooooooved it. Loved it, as in “these may be the best cupcakes you’ve brought so far”.

Must be rough being a food blogger’s coworker..

IMG_3880 copy

mini snickerdoodle cupcakes with cinnamon frosting
Print
For the cupcakes
  1. 1 and 2/3 cups all-purpose flour
  2. 1/2 teaspoon baking powder
  3. 1/4 teaspoon baking soda
  4. 1/2 teaspoon salt
  5. 1/2 cup (1 stick) unsalted butter, melted and cooled
  6. 1 and 1/3 cups granulated sugar, divided
  7. 1 large egg, at room temperature
  8. 1/4 cup low-fat vanilla yogurt
  9. 3/4 cup skim milk
  10. 1 tablespoon vanilla extract
  11. 2 rounded teaspoons ground cinnamon
For the frosting
  1. 1 cup (2 sticks) unsalted butter, at room temperature
  2. 3 cups powdered sugar
  3. 1/4 cup heavy whipping cream
  4. 2 teaspoons vanilla extract
  5. A pinch of salt
  6. 1.5-2 tablespoons ground cinnamon
Instructions
  1. Preheat oven to 350 degrees. Line mini muffin tins with cupcake liners and set aside.
  2. In a medium bowl, combine flour, baking powder, baking soda, and salt. Set aside.
  3. Whisk in 1 cup of granulated sugar into the melted butter, then stir in the egg, yogurt, milk, and vanilla extract until thoroughly combined. Add in the dry ingredients to the wet, and stir until there are no more lumps in the batter.
  4. In a small bowl, combine the ground cinnamon and the remaining 1/3 cup granulated sugar. Set aside.
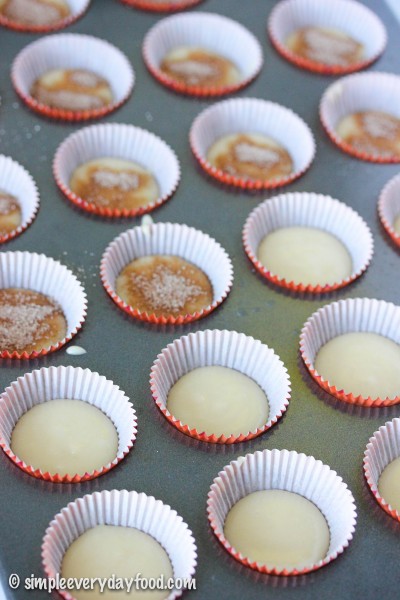
  5. Spoon about 1 teaspoon of the batter into the bottom of each of the cupcake liner, just enough to cover the bottom. Top with about 1/4-1/2 teaspoon of the cinnamon sugar mixture. Top with more batter, filling each well about 3/4 full, then top each mini cupcake with a generous sprinkle of the cinnamon sugar mixture.
  6. Bake the cupcakes for about 13 minutes, or until an inserted toothpick comes out clean. Let cool for 5 minutes before removing the cupcakes onto a wired cooling rack to cool completely.
  7. While the cupcakes are cooling, make the frosting: using an electric stand mixer, beat the butter on medium speed until light and fluffy. Slowly add in the powdered sugar, heavy whipping cream, and vanilla extract. Gradually increase the speed to "high" and beat for 3-4 minutes. Add more powdered sugar/cream until you reach the desired consistency. Add in the ground cinnamon and beat until combined. Pipe frosting onto cupcakes with your favorite piping tip. Dust the tops with the the remaining cinnamon sugar mixture if desired. Cupcakes can be stored in an airtight container for up to 3 days.
  8. Makes 40-42 mini cupcakes
Adapted from Sally's Baking Addiction
Simple Everyday Food https://www.simpleeverydayfood.com/
Recipe adapted from Sally’s Baking Addiction

© Simple Everyday Food. All images & content are copyright protected. Please do not use any of my images without prior permission. If you want to republish this recipe, please re-write the recipe in your own words, or kindly link back to this post for the recipe.

Sharing is caring! Email this to someonePrint this pagePin on PinterestShare on YummlyShare on FacebookShare on Google+Tweet about this on Twitter

I know it’s December, and December is the month for all things mint chocolate, but I can’t help but share these pumpkin cupcakes with you guys. I made these for thanksgiving this year and they were a hit!

IMG_2332 copy

IMG_2338 copy

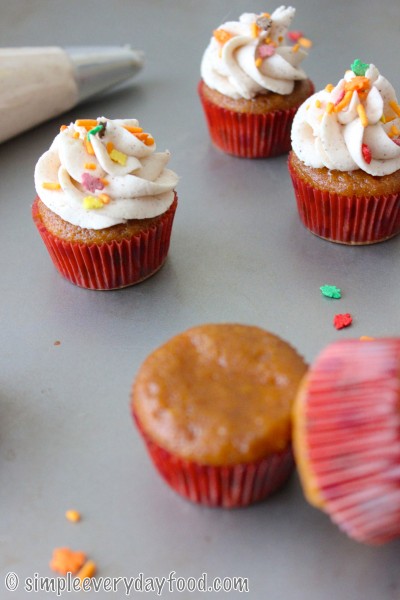
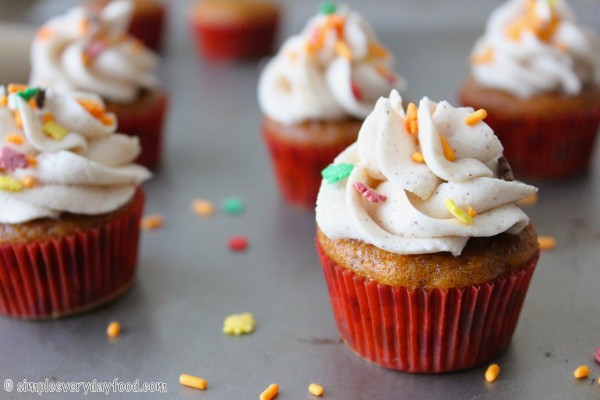
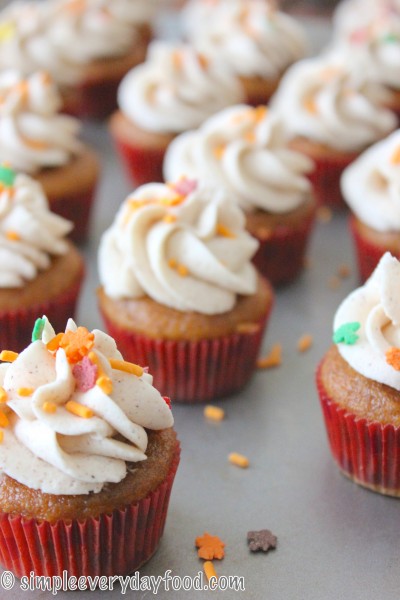
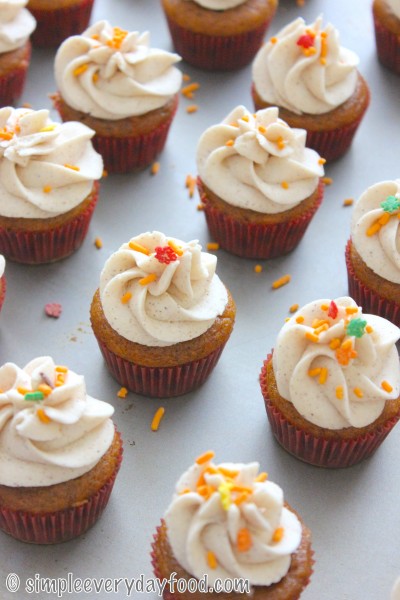
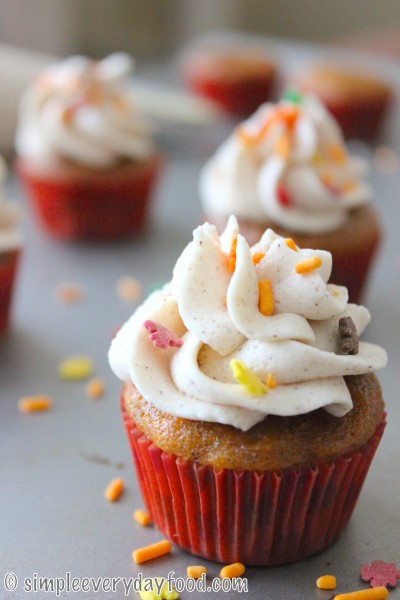
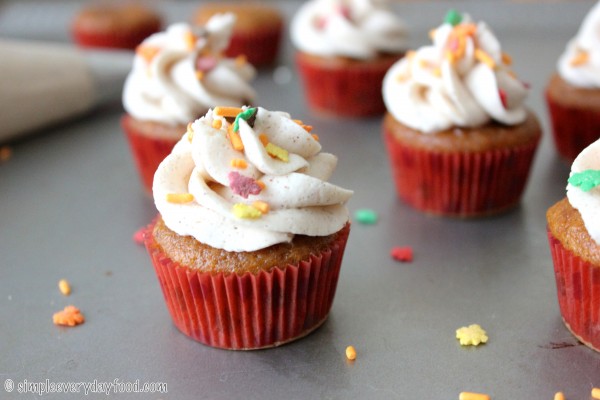
I’ve never made mini cupcakes before, but I found some cute Thanksgiving mini cupcake liners at Michael’s a few months back, and decided what better cupcakes to make for these than pumpkin ones? And let me tell ya, these babies are GOOD.

I was afraid the cupcakes were going to be slightly on the drier side because of their smaller size, but the pumpkin spiced cream cheese filling kept the cupcakes nice and moist. Every single bite is filled with cinnamon-y, nutmeg-y, pumpkin-y goodness…. oooh yeah, my mouth waters just thinking about them. Good thing this this recipe yielded almost 40 cupcakes, because the other dessert I initially had planned failed miserably (sigh. maybe I’ll try it again some other time). I don’t think anyone (i.e. Brian) minded only having one dessert since these cupcakes were so good and there were so many to go around.

IMG_2351 copy

pumpkin cream cheese cupcakes
Print
Ingredients
  1. 1 cup all-purpose flour
  2. 1 teaspoon pumpkin pie spice
  3. 1 teaspoon baking powder
  4. 1/2 teaspoon cinnamon
  5. 1/2 teaspoon baking soda
  6. 1/4 teaspoon nutmeg
  7. 1/4 teaspoon salt
  8. 1 cup pumpkin puree
  9. 1/2 cup granulated sugar
  10. 1/3 cup brown sugar
  11. 1/2 cup vegetable oil
  12. 2 large eggs
For the filling
  1. 4 ounces cream cheese, at room temperature
  2. 1/3 cup granulated sugar
  3. 1/2 teaspoon pumpkin pie spice
For the vanilla buttercream
  1. 2 sticks unsalted butter, softened
  2. 3 cups powdered sugar
  3. 2 tablespoons milk
  4. 2 teaspoons vanilla extract
  5. 1 teaspoon pumpkin pie spice
Instructions
  1. Preheat oven to 350 degrees. Line a mini cupcake pan with cupcakes liners and set aside.
  2. Using an electric mixer, make the filling first by beating the cream cheese, sugar, and pumpkin pie spice on medium speed until light and fluffy. Transfer to a large Ziploc bag. Snip off a small portion of a corner and set aside.
  3. In a large bowl, combine the flour, pumpkin pie spice, baking powder, cinnamon, baking soda, nutmeg, and salt. Set aside.
  4. In another large bowl, whisk together the pumpkin puree, sugars, vegetable oil, and eggs. Slowly add the dry ingredients into the wet ingredients, stir until just combined.
  5. Scoop small spoonfuls of the batter into the bottom of the cupcake wells, covering about 1/4 of the well (or just enough to where it covers the bottom). Squeeze small dollops (~1/4 teaspoon) of the cream cheese filling mixture into each well. Top with remaining batter to completely cover the filling, making sure each well is only about 2/3 full. Bake for 13-14 minutes, or until a toothpick comes out clean. Remove from oven and cool completely on a wired cooling rack.
  6. While the cupcakes are cooling, make the frosting: using an electric mixer, beat the butter and powdered sugar on medium~medium high speed until light and fluffy. Turn the speed down to low and add the milk, vanilla, and pumpkin pie spice. Beat until combined, then increase speed back up to medium and beat for another 2-3 minutes.
  7. Using an offset spatula or your favorite frosting tip, pipe frosting onto cupcakes and serve immediately. Cupcakes can be stored in an airtight container for 3-5 days.
  8. Makes 35 mini cupcakes
Adapted from Damn Delicious
Simple Everyday Food https://www.simpleeverydayfood.com/
IMG_2354 copy

I’m usually not a fan of eating cream cheese in its regular form (i.e. the mushy form), but I actually really liked the filling – maybe because I figured if I shoved the entire cupcake in my mouth, all the flavors and textures would play out harmoniously in my mouth and I wouldn’t be able to concentrate so much on the mushy cream cheese. And sure enough, it worked, because I’ll definitely be making these again sometime soon.

IMG_2336 copy

IMG_2343 copy

Hey, nobody ever said pumpkin desserts are only for the fall!

Recipe adapted from Damn Delicious

© Simple Everyday Food. All images & content are copyright protected. Please do not use any of my images without prior permission. If you want to republish this recipe, please re-write the recipe in your own words, or kindly link back to this post for the recipe.

Sharing is caring! Email this to someonePrint this pagePin on PinterestShare on YummlyShare on FacebookShare on Google+Tweet about this on Twitter