everyday food made simple

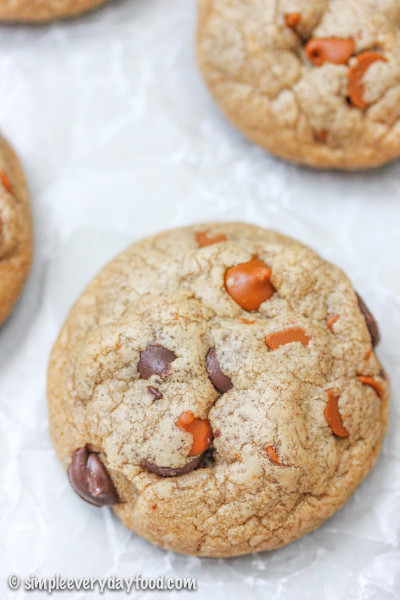
biscoff choco-cinnamon chip cookies

Yesterday was Little B’s due date. Which means in less than two weeks, we will have a ONE year old! Can you believe it? Can you also believe that in this entire year, Brian and I have never left Little B in the hands of a babysitter and gone out for a date? 

Just this past weekend, we started this new thing where we each leave the house for a few hours to go where ever we want and do whatever we want. Whether it’s to run errands in peace, to hang out with friends, to leisurely stroll up and down the aisle of Target (because let’s be honest, that can be a treat in itself sometimes), or to just sit at a coffee shop and read a book – I think it’s important to be able to get away and go something and not have to listen to the Paw Patrol theme song for them umpteenth time.

So what did I choose to do for my first two hours of scheduled freedom? I went to Starbucks, ordered myself a mocha, and read a book. It was heavenly. Part of me felt bad for enjoying that time away from Little B. I mean, I’m a mom, and shouldn’t moms want to spend as much time with their babies as possible? It’s called mom guilt, ya’ll.

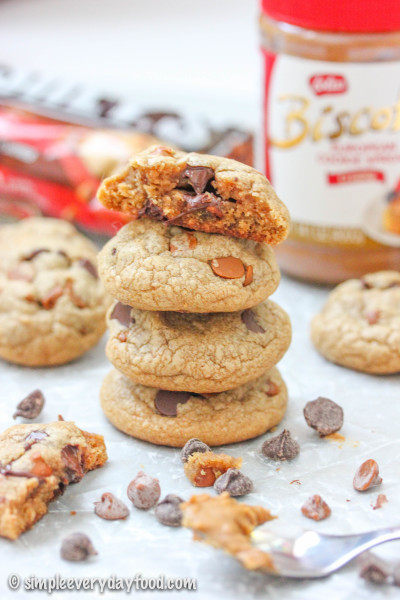
So I sat in a soft, plush sofa by the fireplace and read my book (I’m currently reading The Ladies’ Room), wishing I had some of these soft pillowy Biscoff cinnamon chip cookies to go with my coffee.
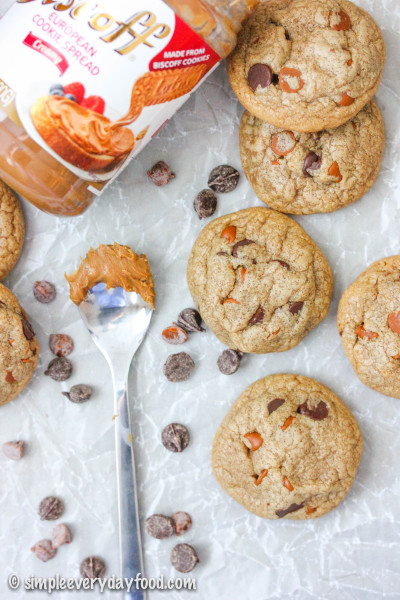
biscoff choco-cinnamon chip cookies biscoff choco-cinnamon chip cookies biscoff choco-cinnamon chip cookies

biscoff choco-cinnamon chip cookies
Print
Ingredients
  1. 1/2 cup (1 stick) unsalted butter, softened to room temperature
  2. 1/2 cup creamy Biscoff spread
  3. 1/2 cup dark brown sugar
  4. 1/4 cup granulated sugar
  5. 1 large egg, at room temperature
  6. 1 teaspoon vanilla extract
  7. 1 and 1/2 cups all-purpose flour
  8. 1/4 teaspoon baking soda
  9. 1/4 teaspoon baking powder
  10. 1/4 teaspoon salt
  11. 1/4 teaspoon cinnamon
  12. 1/2 cup semi-sweet chocolate chips
  13. 1/2 cup cinnamon chips
Instructions
  1. Using an electric mixer, cream together butter, Biscoff spread, and both sugars until light and fluffy. Add in the egg and vanilla extract and beat until combined, scraping the sides occasionally if needed.
  2. In a medium bowl, combine the flour, baking soda, baking powder, salt, and cinnamon.
  3. Add the dry ingredients to the wet ingredients and beat until thoroughly combined. Stir in the chocolate chips and cinnamon chips. Using a medium cookie scoop, drop 1.5 tablespoons worth of dough onto a lined baking sheet. Chill the dough balls for 30 minutes in the refrigerator.
  4. Preheat the oven to 350 degrees, and bake for 10-12 minutes or until golden brown - do not over bake!
  5. Makes 22-24 cookies
Adapted from Buns In My Oven
Simple Everyday Food https://www.simpleeverydayfood.com/
Recipe adapted from Buns In My Oven

© Simple Everyday Food. All images & content are copyright protected. Please do not use any of my images without prior permission. If you want to republish this recipe, please re-write the recipe in your own words, or kindly link back to this post for the recipe.

Sharing is caring! Email this to someonePrint this pagePin on PinterestShare on YummlyShare on FacebookShare on Google+Tweet about this on Twitter

IMG_4520 copy

In case any of you read up on my dilemma of Apple Watch vs. Fitbit from the previous post, I have eliminated one contender – I’ve decided that I’m going to wait on the Apple Watch until it’s market-tested and I have read up on a few reviews and recommendations on people’s opinions on them. Plus I’m sure as technology advances, its future generations will probably be more evolved and have more advanced features that I would want my ideal smart watch to have.

But in the meantime, I’m debating between the Fitbit Charge HR or the Fitbit Surge. I’m also thinking about getting a gym membership at my local 24/7 gym. Advice or suggestions are welcome as always!

So about these brownies… They’re made with dark chocolate, which contain healthy antioxidants. And since antioxidants are known to lower risks of health problems, these brownies are therefore good for you. That correlation totally made sense, right? So you’re welcome – go ahead and have another brownie!

IMG_4501 copy

IMG_4497 copy


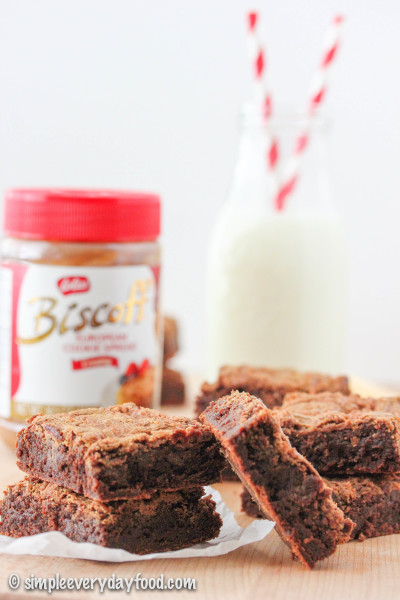
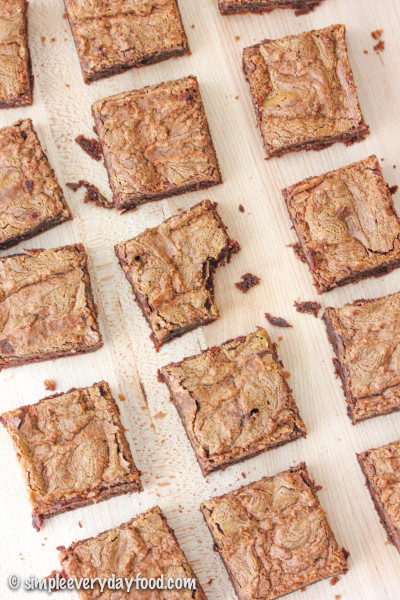
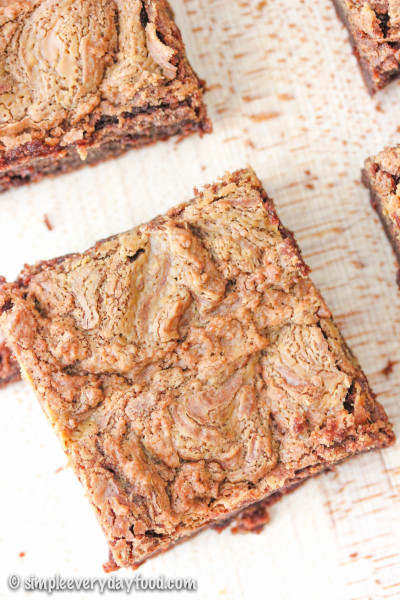
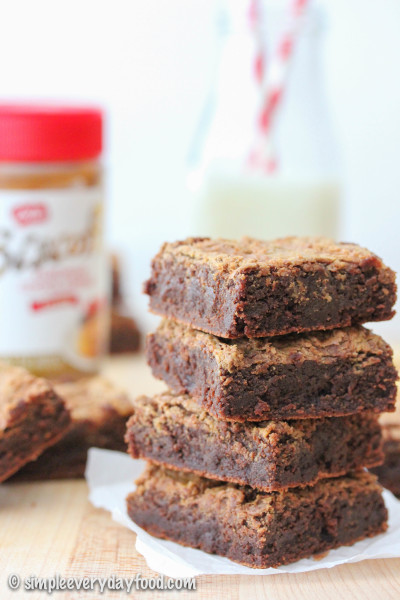
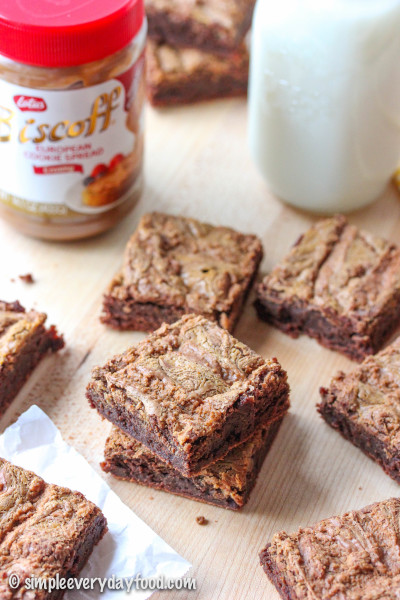
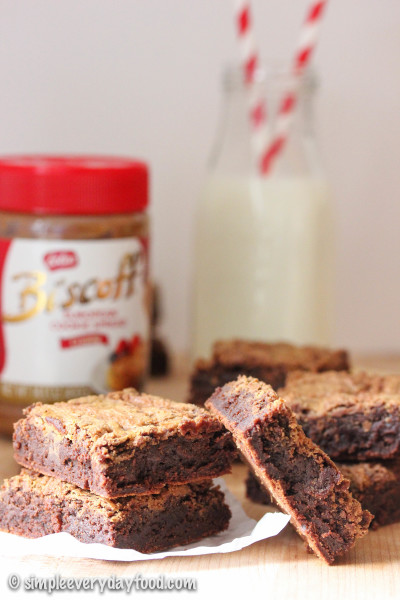
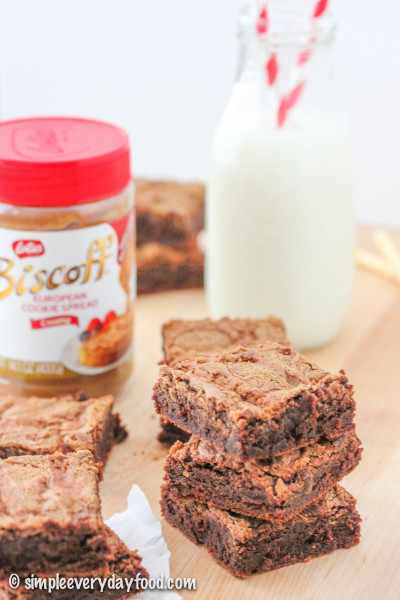
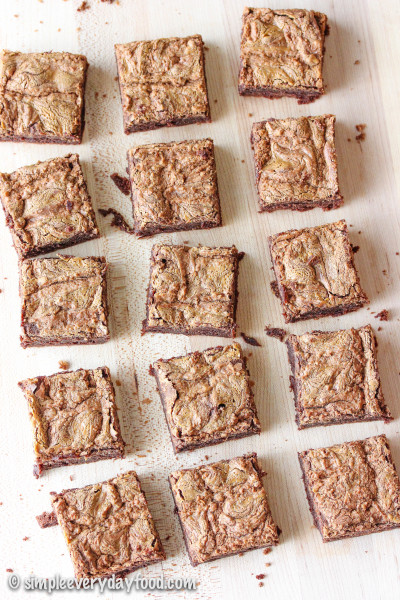
These brownies are so fudgy and delicious! They’re not dense in a it’s-stuck-to-the-roof-of-my-mouth-now-I-need-a-glass-of-milk kind of way, and they’re not light and airy like any ordinary brownie either. The tops are baked to crispy perfection. They still have just the right amount of denseness and chew to them, retaining the texture of a good ol’ fashioned brownie… with a nice thick layer of Biscoff swirls on top, of course. Because Biscoff makes everything taste better.

IMG_4545 copy

IMG_4532 copy

I only used 60% bittersweet dark chocolate for this recipe to offset the sweetness of the sugars and the spread, giving these brownies just the right amount of sweetness while not being overly sweet (read: you can eat more than one!). Don’t worry, although it’s “bittersweet” chocolate, you won’t taste a single hint of bitterness in these at all. I promise.

IMG_4529 copy

IMG_4508 copy

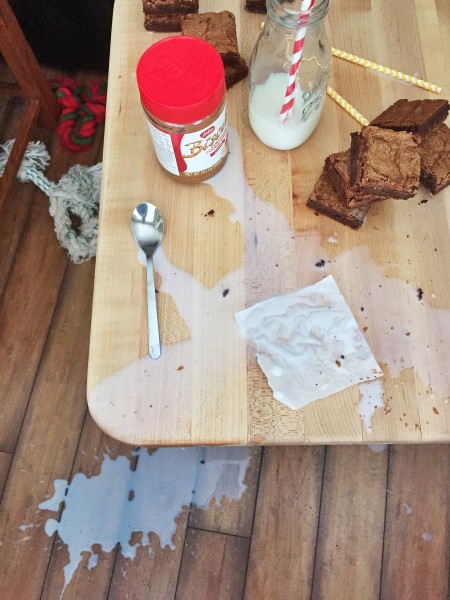
I was having a wonderful photography day, until tragedy struck. I had more plans for these brownies but I was flustered and upset and wanted to cry over spilled milk, so I decided it was time to clean up and put the camera away.

IMG_0369

Fret not, my friends! No brownies were harmed during this tragedy.

[sigh] the foodblogger life can be rough sometimes.

IMG_4482 copy

fudgy biscoff-swirled brownies
Print
Ingredients
  1. 1 cup dark brown sugar, packed
  2. 1/2 cup granulated sugar
  3. 2 cups dark chocolate chips (I used Ghirardelli's 60% bittersweet chocolate baking chips)
  4. 1/2 cup (1 stick) unsalted butter
  5. 4 eggs, at room temperature
  6. 2 teaspoons vanilla extract
  7. 1/2 teaspoon salt
  8. 1 cup all-purpose flour
  9. 1/2-1 cup creamy Biscoff spread
Instructions
  1. Preheat oven to 325 degrees and line a 9x13" baking pan with aluminum foil or parchment paper. Spray generously with cooking spray and set aside.
  2. Place sugars in your electric mixer's mixing bowl. Stir and set aside.
  3. In a small saucepan, melt butter and chocolate chips over low heat, stirring constantly. Remove from heat and pour into your mixing bowl with the sugars. Mix on low speed until combined. Add in the eggs, one at a time, and add in the vanilla and salt. Then add in the flour, 1/2 cup at a time, increasing the speed to low-medium until everything is thoroughly incorporated. Pour batter into the prepared pan and set aside.
  4. In another small saucepan, melt the Biscoff spread over low heat (or melt in a microwave in 15-30 second increments). Pour over the pan and create swirls by running a butter knife through the batter.
  5. Bake for 35-40 minutes, or until a toothpick inserted into the center comes out clean. Remove from oven and let cool completely.
  6. Brownies can be stored in an airtight container at room temperature for up to a week.
  7. Makes one 9x13" pan
Adapted from Biscoff
Simple Everyday Food https://www.simpleeverydayfood.com/
Recipe adapted from Biscoff

© Simple Everyday Food. All images & content are copyright protected. Please do not use any of my images without prior permission. If you want to republish this recipe, please re-write the recipe in your own words, or kindly link back to this post for the recipe.

Sharing is caring! Email this to someonePrint this pagePin on PinterestShare on YummlyShare on FacebookShare on Google+Tweet about this on Twitter

I hope everyone had a wonderful 4th that was celebrated by spending time with family, nice weather, and plenty of good food! It’s funny that in our family, we (and by “we”, I mean “I”) usually plan an excessively long list of things I want to make for the holidays despite the fact that it’s usually the two of us. It’s not one of those “oh these are the things I want to make, but I probably won’t make everything”.  Noooooo siree! I’m the one who plans and executes. If I want to make it, I will make it.

You should’ve seen the list I made for Thanksgiving last year – it was ridiculous. I think I had 8-9 things on the menu just to feed the two of us, from appetizers to side dishes to dessert – we were covered in the event of a zombie apocalypse and we couldn’t leave the house for 3 weeks. There was so much food that we barely had enough counter space to put everything!

The big holiday itself usually gets a lot of attention and planning ahead, but not everyone plans for breakfast the morning after when everyone wakes up from the food coma. In case you’re still looking for a easy breakfast option for tomorrow, I’ve got you covered!

IMG_3098 copy

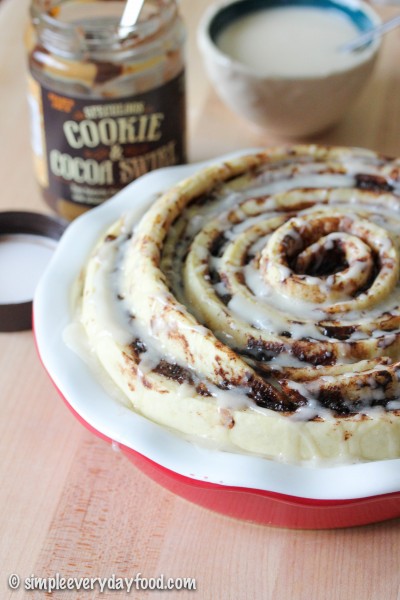
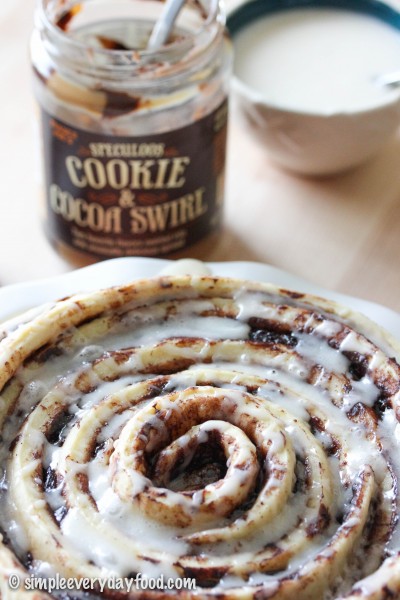
These cinnamon rolls can be easily made the night before, so when you wake up and want breakfast, you only have to wait less than 30 minutes for a piping hot, fresh out-of-the-oven, mouth-watering, gooey, sweet cinnamon roll! And let me tell you, it’s totally worth the wait, because these are deeeelish!

Chocolate + cookie butter + maple glaze + fluffy rolls = it’s practically heaven! I could eat this every weekend.

IMG_3103 copy

I’m personally a big fan of overnight cinnamon roll recipes, simply because I my stomach doesn’t have the patience to wait long for food in the morning. All the hard work is put in the night before, so all you have to do is throw it in the oven, make the glaze, wait, and enjoy the next morning – pretty easy, eh?

IMG_3095 copy

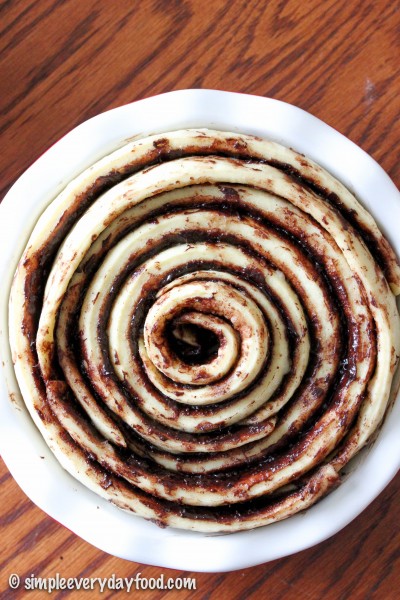
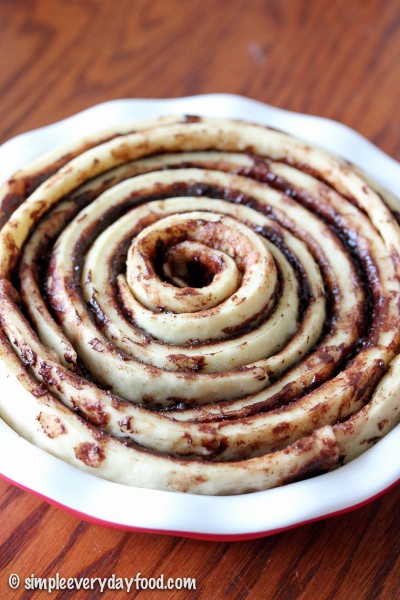
[loosely coil the strips to allow room for the dough to rise overnight]

IMG_3092 copy

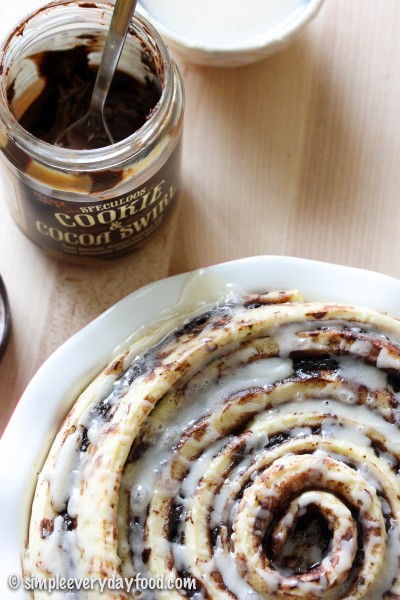
This giant spiral cinnamon roll is so pretty to look at, and even more fun to eat. You can either cut it into wedges and serve it like you would cake, or you can do what we did, and peel off the strips as you go. I highly recommend the latter, simply because it’s always fun when you get to eat with you hands, and eating it this way kind of reminds me of tearing off little pieces of bubble tape gum from when I was little (remember those? The gum whose flavor only lasts 5 seconds?).

IMG_3105 copy

giant spiral cinnamon roll with vanilla maple glaze
Print
For the roll
  1. 2 and 3/4 cup all-purpose flour
  2. 3 tablespoons granulated sugar
  3. 1 teaspoon salt
  4. 1 package instant yeast
  5. 1/2 cup water
  6. 1/4 cup skim milk
  7. 3 tablespoons unsalted butter
  8. 1 egg, at room temperature
For the filling
  1. 2/3 cup chocolate cookie butter (I used Speculoos chocolate cookie butter from Trader Joe's), softened slightly by microwaving it for 10-15 seconds
  2. 2 tablespoons ground cinnamon
For the glaze
  1. 1 cup powdered sugar
  2. 1 tablespoon heavy cream
  3. 1 tablespoon pure maple syrup
  4. 1 teaspoon pure vanilla extract
Instructions
  1. To make the dough, set aside 1/2 cup flour. In a large electric mixer bowl, combine the remainder of the flour, sugar, salt, and yeast together. Set aside.
  2. In a microwavable bowl, heat the water, milk, and butter together until the butter is melted and the mixture is hot to touch. Stir the butter mixture into the flour mixture over medium-low speed. Increase the speed to medium, add in the egg and just enough of the reserved flour until the dough is soft, pulls away from the sides of the bowl, and is no longer sticky (I used the entire 1/2 cup, but you may not have to use it all).
  3. Knead the dough for 3-4 minutes on a lightly floured surface. Form the dough into a ball and place in a lightly greased bowl. Cover and let sit for 30 minutes. In the meantime, spray a 9" pie pan with nonstick cooking spray and set aside.
  4. After 30 minutes, roll the dough out on a lightly floured surface into a 15x12" rectangle. Spread the slightly softened cookie butter over the top, then sprinkle the ground cinnamon.
  5. Using a pizza cutter, cut the dough into six 2" wide strips (cut the the long way). Loosely roll up one strip (kind of like a fruit roll-up) and place in the center of the pan. Wrap the remaining 5 strips loosely around the center one, starting each strip at the end of the previous one so the end product looks like a giant spiraled cake.
  6. Loosely cover the roll with aluminum foil and let rise in a warm, draft-free area overnight.
  7. The next morning, bake cinnamon roll at 350 degrees for 30-35 minutes or until lightly browned. I covered the top with aluminum foil 15 minutes into baking to prevent excessive browning on top.
  8. Remove the cake and let cool for 10 minutes. In the meantime, make the glaze by whisking all the glaze ingredients together until smooth. Drizzle over the rolls prior to serving.
  9. Serve immediately, or cover it tightly with foil and store up at room temperature for up to 3 days.
Adapted from Sally's Baking Addiction
Simple Everyday Food https://www.simpleeverydayfood.com/
Recipe adapted from Sally’s Baking Addiction

© Simple Everyday Food. All images & content are copyright protected. Please do not use any of my images without prior permission. If you want to republish this recipe, please re-write the recipe in your own words, or kindly link back to this post for the recipe.

Sharing is caring! Email this to someonePrint this pagePin on PinterestShare on YummlyShare on FacebookShare on Google+Tweet about this on Twitter