everyday food made simple

A few weeks ago, I started my surgery and anesthesia rotation for my internship. As much as I love emergency medicine, there’s just something about surgery and anesthesia that is equally as exciting to me. There’s actually a lot of similarities between the two – they both require constant diligent observation of your patient, you need to be on your toes at all times, and you have to be able to quickly adapt treatments to the status of your patient. There’s no room for slacking and not paying attention to how your patient is acting or how they’re reacting to the treatments you gave them – vital signs can quickly change without warning and you are responsible for either fixing the problem, or notifying the veterinarian about the status of your patient.

I’ve been fortunate enough to work with a group of amazingly talented technicians that are very patient and knowledgeable and willing to teach. It truly has made my internship a great experience so far!

You know what else is great? This cookie.

IMG_2234 copy

IMG_2248 copy

IMG_2222 copy

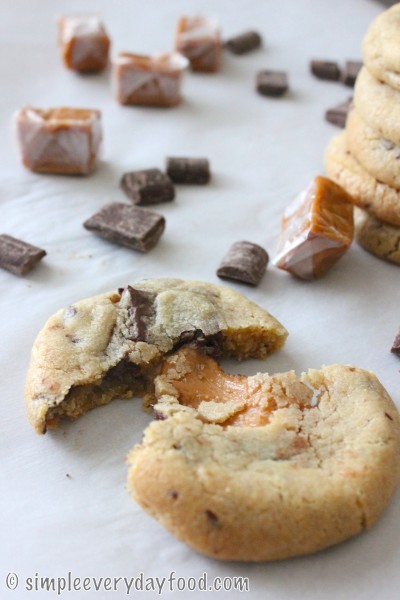
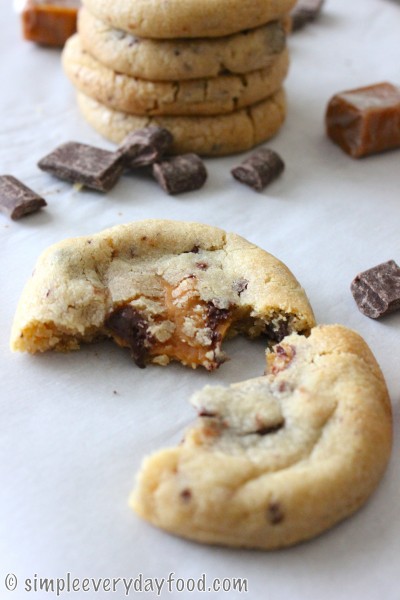
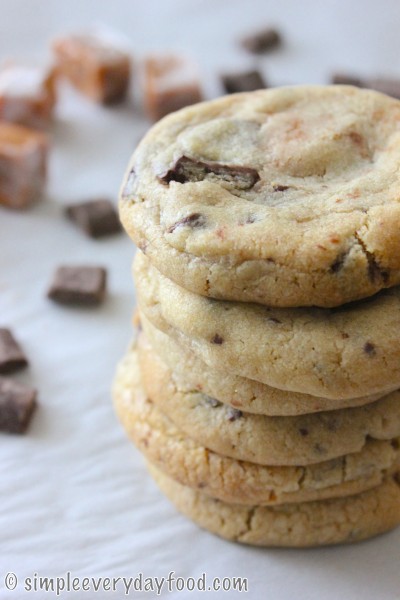
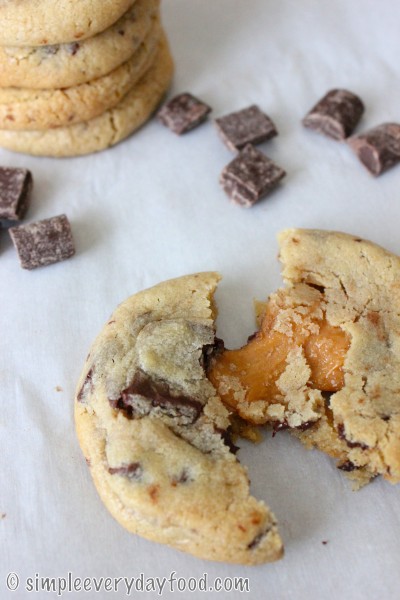
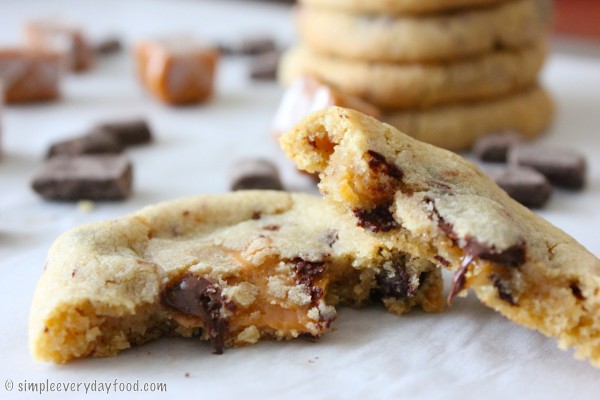
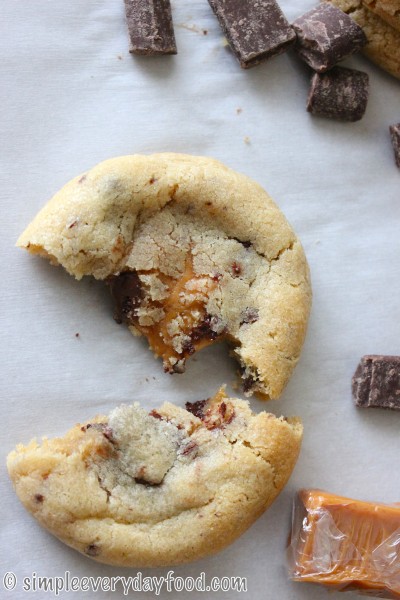
Soft chocolate chunk cookies with a gooey caramel-filled center that are super easy to make. Dark chocolate shavings are added in addition to chocolate chunks to make sure chocolate is tasted in every single bite. In my personal opinion, these cookies are the best straight out of the oven after they’ve had a chance to slightly cool down a little. That’s when the cookie is still warm and soft, and the caramel is still gooey on the inside. The caramel is the star of the show and is what surprises people when they first take a bite into it. Once the cookies completely cool, the caramel is going to harden a bit and lose its gooey texture, but I found out that throwing them in the microwave for 5-10 seconds is just enough to melt the caramel and transform them back into the warm, soft, gooey chocolate chunk cookie again.

IMG_2231 copy

IMG_2240 copy

chocolate chunk caramel cookies
Print
Ingredients
  1. 1 and 1/2 sticks of unsalted butter, softened to room temperature
  2. 1 and 1/2 cups brown sugar
  3. 1/2 cup granulated sugar
  4. 2 eggs
  5. 4 teaspoon vanilla extract
  6. 4 cups all-purpose flour
  7. 4 teaspoons cornstarch
  8. 2 teaspoons baking soda
  9. 1 teaspoon salt
  10. 1 and 1/2 cups semi-sweet chocolate chunks
  11. 1/2 cup dark chocolate, chopped
  12. 1 bag of caramel candies - unwrap about 20 of them and cut them in half
Instructions
  1. Preheat oven to 350 degrees. Line baking sheets with parchment paper or silicone baking mats and set aside.
  2. In a large bowl, combine the flour, cornstarch, baking soda, and salt. Gently stir to mix and set aside.
  3. Using a stand mixer, cream together butter and sugars until light and fluffy, about 2 minutes, then add in the eggs and vanilla extract and beat until combined.
  4. A little bit at a time, add in the flour mixture and mix until everything is thoroughly combined.
  5. Fold in the chocolate chunks and finely chopped dark chocolate with a spatula. I cheated and stirred them in by turning on my mixer onto the "stir" function.
  6. Scoop about 1.5 tablespoons worth of cookie dough, then make a slight indent in the middle by using your thumb and place one halved caramel candy in the center, then make sure the cookie dough is rolled up in a ball so the caramel candy isn't showing. Repeat until all dough has been used up. Cut up more caramel candies if needed.
  7. Before you put them in the oven, slightly flatten them a bit with the palm of your hand. Bake for 11-13 minutes.
  8. Remove from oven and let cool on the baking sheet before transferring them to a wired cooling rack.
  9. Bake for 11-13 minutes. They will look super soft but they continue cooking after you remove them from the oven. Store in an airtight container for up to 7 days.
  10. Makes about 48-50 cookies
Adapted from Table For Two
Simple Everyday Food https://www.simpleeverydayfood.com/
I was quite surprised that the recipe yielded almost 50 cookies. I was able to keep some at home, bring some to class to share, and bring some to work as well. Everybody loved them!

IMG_2246 copy

Also, if you have kids who are always eager to help in the kitchen, this is also a good recipe to get them involved! After the cookie dough is made and scooped into balls, you can have the kids help with stuffing the centers with caramels. There’s really no chance of “screwing” up, and it’ll also make them feel as if they contributed.

Happy baking!

Recipe from Table For Two

© Simple Everyday Food. All images & content are copyright protected. Please do not use any of my images without prior permission. If you want to republish this recipe, please re-write the recipe in your own words, or kindly link back to this post for the recipe.

Sharing is caring! Email this to someonePrint this pagePin on PinterestShare on YummlyShare on FacebookShare on Google+Tweet about this on Twitter

Every year when the Packers come in town to play the Vikings, Brian and his little buddies have a little boys weekend they call the “Norsemen weekend”. Every year someone plans and makes t-shirts for everyone, then when the weekend finally comes around, they hang out, catch up on Saturday night.. then on Sunday, they tailgate all day and go watch the game at the Metrodome.

When my friends and I tend to either go shopping or go eat when we get together, Brian and his friends, well.. they watch football. I guess it’s what brings guys closer. Whatever works I guess.

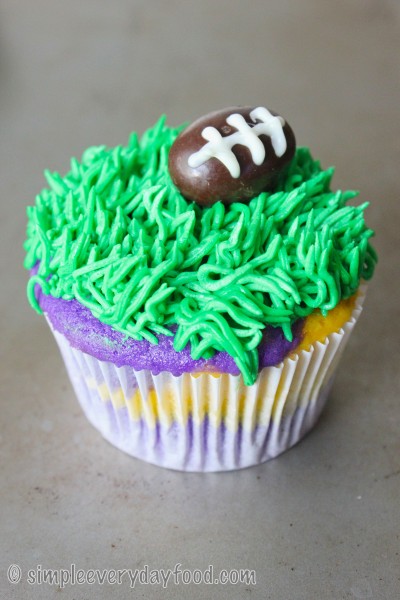
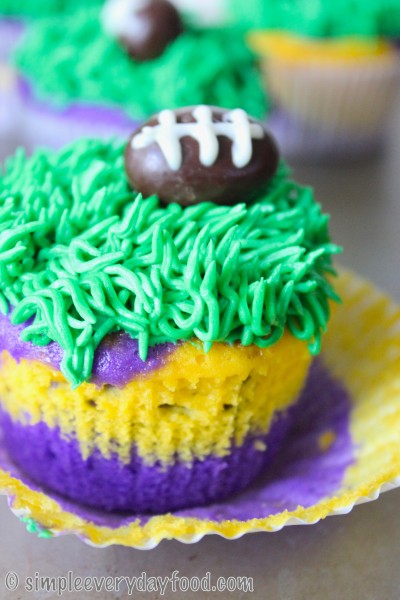
About two months prior to this weekend, Brian said to me one day, “You know what you should do this year for our Norsemen trip? You can make us purple and gold cupcakes for tailgating!” So not only do I have to stay at home by myself all weekend, I have to make him cupcakes.

IMG_2118 copy

IMG_2132 copy

Doesn’t sound like such a good deal for me, if you ask me.

Well, as the weekend came closer, I decided what the heck – I’ve had a baking itch for a few weeks now, so not only would baking Vikings cupcakes satisfy my itch, it’d also be something nice to do for him and his buddies. Even though today would’ve been the only day I could sleep in all week, and despite the fact that I have a gazillion things to do for school, I decided to get up early and make cupcakes.

IMG_2097 copy

IMG_2128 copy

Just me, the kitchen, and Pandora. It truly was the best therapy.

And let me tell you, these cupcakes turned out to be exactly how I envisioned them to be!

IMG_2113 copy

IMG_2137 copy

I really should win a Wife Of The Year award for this.

Looking for football game day fingerfoods? Here are a few you might like…

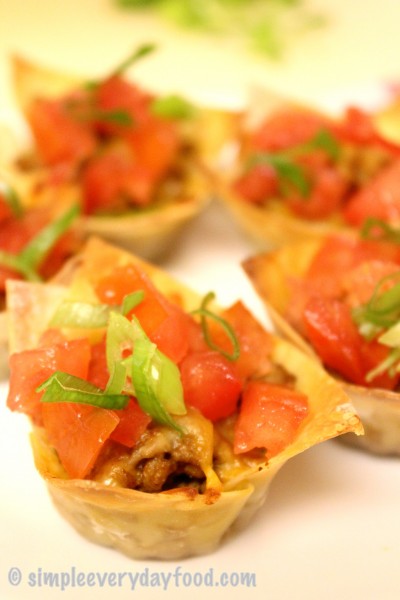
Mini taco cups (my most popular pin on Pinterest!)

IMG_1703

Wonton wrapper wrapped mozzarella sticks

IMG_2017 copy

Hot cheesy corn dip

IMG_1714

Sharing is caring! Email this to someonePrint this pagePin on PinterestShare on YummlyShare on FacebookShare on Google+Tweet about this on Twitter

Have you ever looked at a recipe and just knew it was going to turn out to be delicious?

Well, a few weeks ago I got that feeling and it took me by surprise – I never like to get too overconfident when I’m in the kitchen just to avoid the disappointing letdown if something doesn’t turn out the way I had it pictured in my head. However…. when I saw this recipe, something in my head told me it was going to turn out great – so great that I needed to make two of them so I can bring one to work to share with my coworkers.

I’m glad to tell you that that little voice in my head was right, and I’m sooooo incredibly glad that I made two coffee cakes. I know those coworkers that got to try it were glad I made two also!

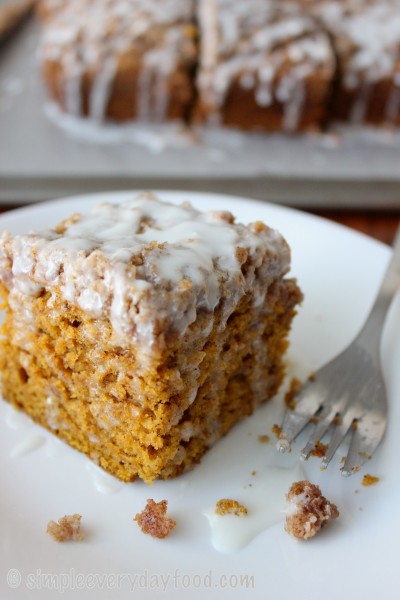
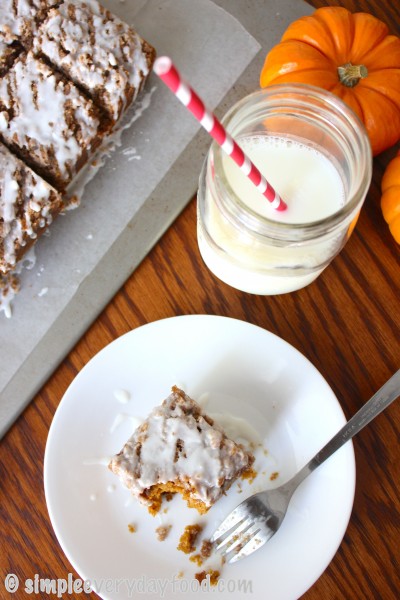
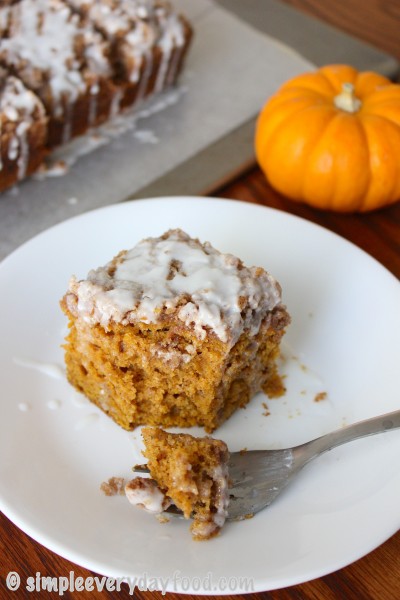
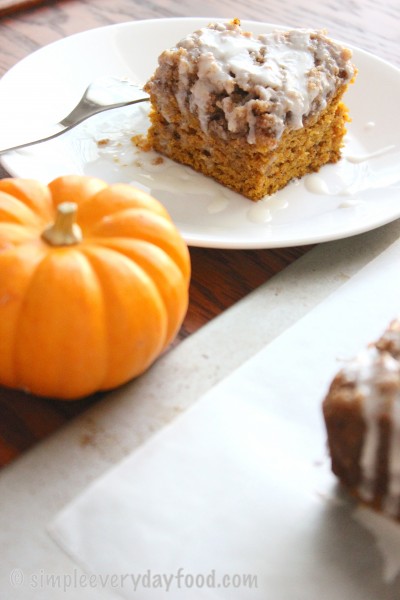
Enter Part 4 of my latest obsession with pumpkin desserts – a rich, moist pumpkin coffee cake complete with a thick, crumbly layer of streusel topping and a vanilla glaze.

IMG_1855 copy

When I had my mind set on making two of these cakes, I pre-measured the streusel ingredients (minus the butter) and dry ingredients into separate tupperware bowls the night before, just to make my life easier when I’m ready to make them the next day. I have to say, it really did save me quite a bit of time on baking day, because all I had left to do was to measure out the wet ingredients and add the two together. I’m totally going to be prepping this way from now on!

These cakes were also made with a little love from Brian… here’s the story: when I decided on making two cakes, I realized that we would be short of pumpkin puree and ground cloves. The syrup we had on hand also expired August of 2011… so I sent him to Target to pick things up for me while I got things ready. You know baking season is in full swing when Target has absolutely no ground cloves whatsoever. None. So being the loving husband that he is, he drove to Wal-Mart just to get me the ground cloves that I needed. That deserves a pat on the back in my book :)

IMG_1863 copy

IMG_1881 copy

glazed pumpkin coffee cake
Print
For the streusel
  1. 1/2 cup all-purpose flour
  2. 1/4 cup cold unsalted butter
  3. 1/2 cup light brown sugar
  4. 1/4 teaspoon salt
  5. 2 teaspoons ground cinnamon
For the cake
  1. 2 cups flour
  2. 1 teaspoon baking soda
  3. 1/2 teaspoon baking powder
  4. 1/2 teaspoon salt
  5. 2 teaspoons ground cinnamon
  6. 1/2 teaspoon ground nutmeg
  7. 1/4 teaspoon ground cloves
  8. 1 cup pumpkin puree
  9. 1/2 cup light brown sugar
  10. 1/2 cup vegetable oil
  11. 1/4 cup maple syrup
  12. 1/4 cup milk
For the glaze
  1. 1 cup powdered sugar
  2. 1-2 tablespoons pumpkin spice coffee creamer or milk
Instructions
  1. Preheat the oven to 350 degrees. Spray a 9x9 baking pan with nonstick spray and set aside.
Make the streusel
  1. Combine the flour, brown sugar, salt, and cinnamon together in a small bowl. Using a pastry cutter or a fork, add in the cold butter and mix until you get pea-sized clumps of butter. Set aside.
Make the cake
  1. In a large bowl, add in the flour, baking soda, baking powder, salt, cinnamon, nutmeg, and cloves. Mix until combined. Using a medium bowl, add in the pumpkin, brown sugar, oil, maple syrup, and milk. Mix. Add the wet ingredients to the dry ingredients and mix until combined. Do not overmix.
  2. Pour the batter into the baking pan, spreading out the batter with a spatula to create an even surface. Generously sprinkle the streusel topping onto the cake, pressing them slightly down into the batter.
  3. Bake the cake for 30 minutes, or until an inserted toothpick comes out clean. Remove the cake from the oven and let cool.
Make the glaze
  1. While the cake is cooling, make the glaze by whisking the powdered sugar and 1 tablespoon of creamer/milk together until smooth. If it's too thick, add another tablespoon of creamer/milk. Add more creamer/milk until desired consistency is reached. Drizzle over cake and enjoy!
  2. Store cake in an airtight container for up to 5 days.
Adapted from Sally's Baking Addiction
Simple Everyday Food https://www.simpleeverydayfood.com/
IMG_1872 copy

When you mix everything up, the batter will be thick – don’t panic! That’s totally normal and it’ll turn out great in the end, trust me. What makes the dessert over-the-top amazing is the thick layer of streusel topping. I think I could probably bake a whole cake pan of the streusel and be okay with it. If you have pumpkin spice creamer on hand (which I did), use that instead of milk to make the glaze  for a more intense pumpkin flavor! If you don’t have pumpkin creamer, you don’t have to go out and buy a whole bottle of it – using milk would work just fine too. Depending on how thick/thin you like your icing, add less/more milk to the powdered sugar accordingly. I went a little pumpkin-creamer-happy on one and the glaze turned out to be a little thinner than I would’ve liked. Either way, it’s not going to affect the taste or texture of your cake – it’s just a matter of personal preference.

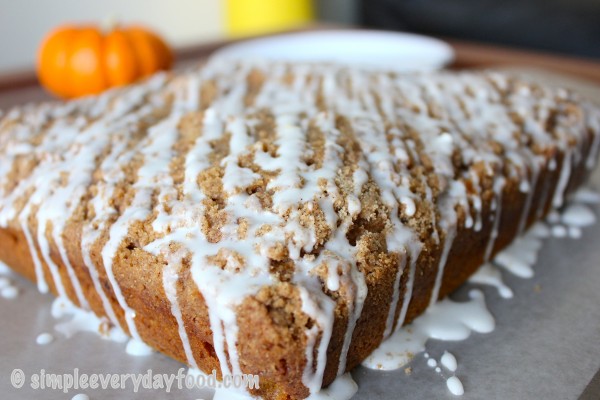
Vanilla glaze dripping down the sides… don’t you want to just reach through the screen and catch some of that glaze with your finger?!

IMG_1856 copy

IMG_1878 copy

This cake can either be served warm or at room temperature, so there’s no need to wait for it to cool! It’s a good thing no cooling is required, otherwise I would probably have to leave the house for an hour so I wouldn’t be tormented by constant wafts of delicious smells!

Happy baking!

Recipe adapted from Sally’s Baking Addiction

© Simple Everyday Food. All images & content are copyright protected. Please do not use any of my images without prior permission. If you want to republish this recipe, please re-write the recipe in your own words, or kindly link back to this post for the recipe.

Sharing is caring! Email this to someonePrint this pagePin on PinterestShare on YummlyShare on FacebookShare on Google+Tweet about this on Twitter

Have you ever set a list of goals of what you need to accomplish by a certain day, only to realize that you’ve gotten little to none of it done when the day comes?

Here’s the thing: When my quarter break started, I wrote down a list of things that I wanted to get done before the new quarter started. Well, my break has been over for almost a week, the new quarter has started already, and more than half of the things on my list still hasn’t been crossed off yet. The garage is still a mess, the vacuum and Keurig filters haven’t been cleaned, I have piles and piles of laundry that needs to be done, and I haven’t gotten a chance to spend quality time with my Kindle (i.e. read a book).

Where the heck did my time go? More importantly, what have I been doing with my time?! Well, I guess having a list of 3-4 recipes I wanted to make during break doesn’t really make matters better either.

Oh well. Baking comes first. Studying and laundry can come second (until I run out of socks).

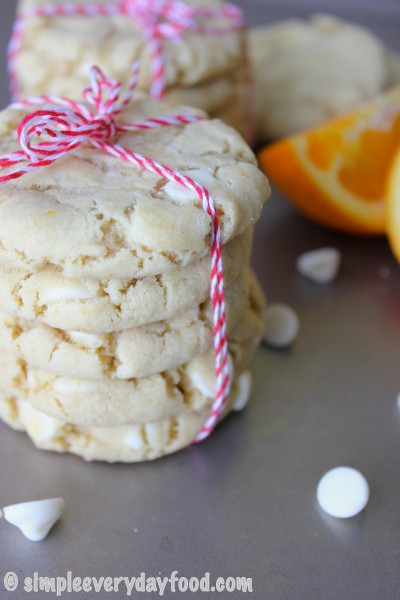
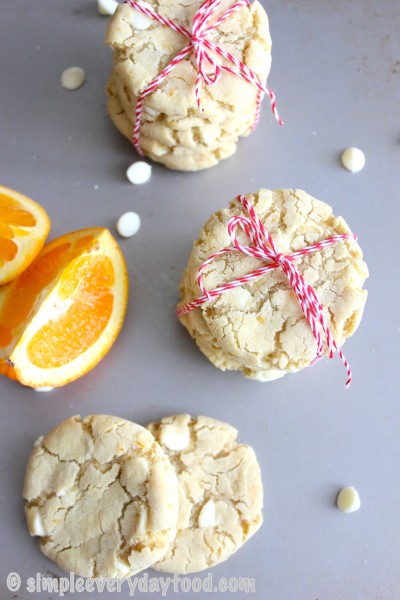
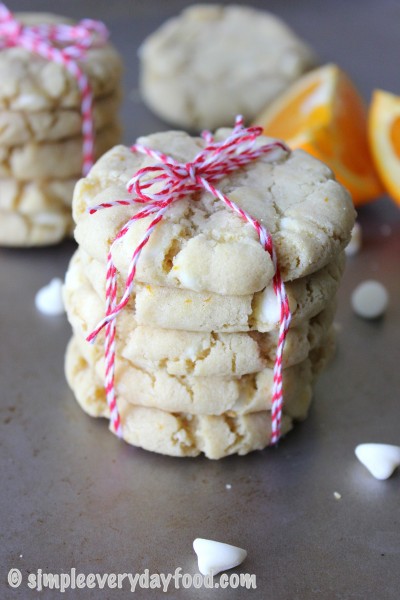
Good thing these cookies are super easy to make! And what’s even better is that they taste great too!! Remember about a month ago I made these orange creamsicle puppy chow? Well, I turned them into a cookie, and they taste equally as good – or in Brian’s words, “the best cookie [I’ve] ever made”.

IMG_1905 copy

IMG_1897 copy

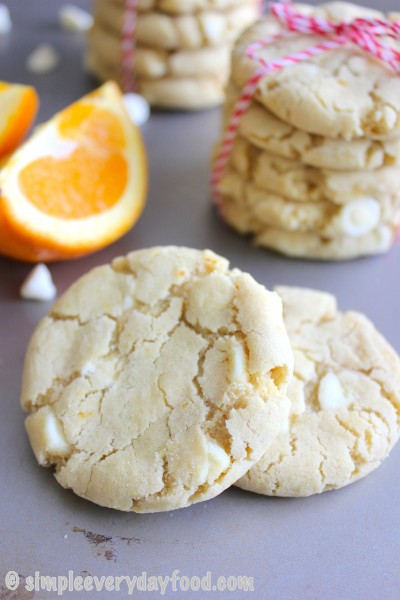
These cookies are soft and chewy, bursting with bright citrus-y flavors, and white chocolate chips are guaranteed in every single bite. Seriously, when I was rolling these into little dough balls, there were times I thought I was rolling balls of white chocolate rather than balls of cookie dough… As with my pumpkin chocolate chip cookies, I baked these for 8 minutes, slightly flattened them out with the back of a spoon, and baked them for another 1-2 minutes. Flattening the cookies out in between gives them the cracks and crinkles that I adore so much in cookies.

IMG_1907 copy

soft and chewy orange creamsicle cookies
Print
Ingredients
  1. 2 and 1/2 cups all-purpose flour
  2. 3/4 teaspoon baking soda
  3. 1/2 teaspoon salt
  4. 1 cup unsalted butter, softened to room temperature
  5. 1/2 cup granulated sugar
  6. 1/2 light brown sugar
  7. 1 large egg, to room temperature
  8. 1 teaspoon vanilla extract
  9. 2 tablespoons orange zest
  10. 1 (12 oz) bag white chocolate chips
Instructions
  1. Preheat oven to 375 degrees. Line baking sheets with parchment paper or silicone baking mats.
  2. In a medium sized bowl, combine the flour, baking soda, and salt. Set aside.
  3. Using an electric mixer, cream the butter and sugars until light and fluffy. Beat in the egg and vanilla extract, then gradually add in the dry ingredients. Mix under medium speed until combined. Stir in the orange zest and chocolate chips.
  4. Using a medium cookie scoop (I used one that holds about 1.5 tablespoons of dough), scoop dough out onto the prepared baking sheet. Roll into balls with your hands.
  5. Bake cookies for about 8 minutes, take them out of the oven, slightly flatten them with the back of a spoon, then bake for another 1-2 minutes or until they start to slightly brown around the edges. Let cool on baking sheet for 5-10 minutes, then transfer to a wired cooling rack for them to completely cool.
  6. Store in airtight container for up to 7 days.
  7. Yields 30-32 cookies.
Adapted from The Girl Who Ate Everything
Simple Everyday Food https://www.simpleeverydayfood.com/
IMG_1896 copy

IMG_1891 copy

So when you’re missing summer this fall/winter season, make these! Or you can make these too. Or you can make both, because you can never have too many cookies, right?

Recipe from The Girl Who Ate Everything

© Simple Everyday Food. All images & content are copyright protected. Please do not use any of my images without prior permission. If you want to republish this recipe, please re-write the recipe in your own words, or kindly link back to this post for the recipe.

Sharing is caring! Email this to someonePrint this pagePin on PinterestShare on YummlyShare on FacebookShare on Google+Tweet about this on Twitter

I think I have a problem, guys. Now that I’ve caved in and made my first pumpkin dessert of the year, I can’t seem to stop. I have a bunch of pumpkin recipes lined up on my “make before the end of October” list already!  I made these a few days ago, and today I’ve already made my 3rd pumpkin dessert in 2 weeks. Don’t worry, that recipe will also be on Simple Everyday Food here soon too.

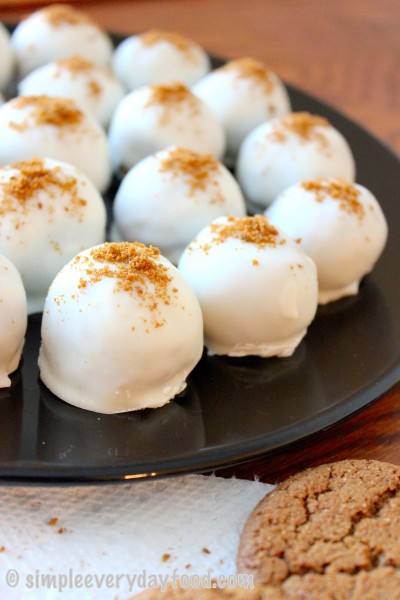
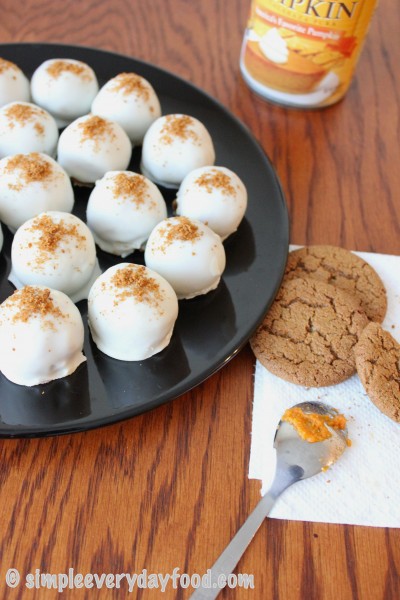
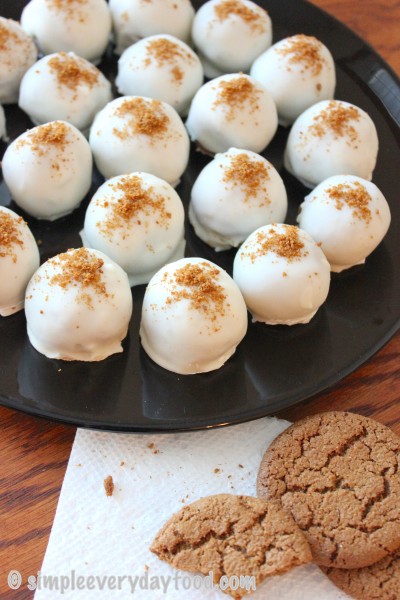
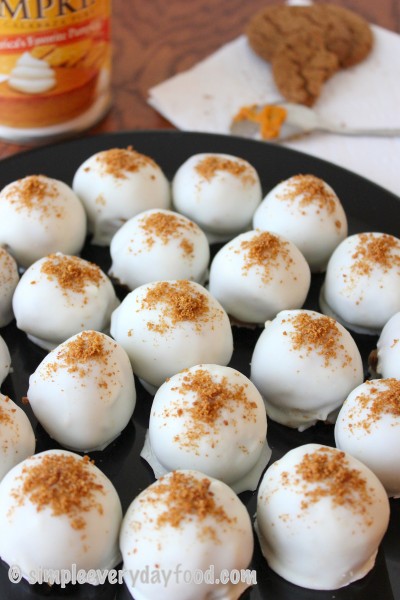
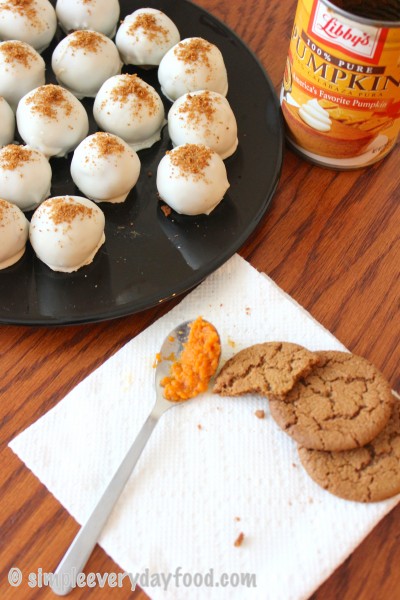
I present to you today: pumpkin n’ spice cream cheese truffles

IMG_1827 copy

IMG_1831 copy

IMG_1826 copy

Yep, you heard that right. Pumpkin + gingersnap cookie crumbs + pumpkin spices + cream cheese + almond bark. These little balls of deliciousness are bursting with plenty of pumpkin flavor! Smooth, velvety pumpkin n’ spice mixture encased in a thin, crunchy white chocolate-y almond bark.

‘Tis the season, right?

The whole process of making these can take a good 3-4 hours, but the result is totally worth it! You first mix all the filling ingredients in a bowl. I chose to use an electric mixer to make sure everything was thoroughly incorporated. Then you freeze the filling for at least an hour. Then you take the filling out, roll them into balls, freeze them for at least two more hours. If they don’t seem hard enough, freeze them longer. Then you melt your almond bark and coat the truffle balls in them and throw them in the fridge until ready to serve. Waiting for everything to set will be the hardest part! It’s truly a test of patience, but I promise it’ll totally be worth it :)

IMG_1833 copy

IMG_1840 copy

pumpkin n' spice cream cheese truffles
Print
Ingredients
  1. 1/3 cup pumpkin puree (not pumpkin pie filling)
  2. 1 and 1/2 cups gingersnap cookie crumbs, finely pulsed, plus an extra 1-2 tablespoons for garnish
  3. 3 tablespoons powdered sugar
  4. 1/2 teaspoon cinnamon
  5. 1/8 teaspoon ground nutmeg
  6. 1/4 teaspoon ground ginger
  7. 1/8 teaspoon salt
  8. 4 oz reduced fat cream cheese
  9. 1 cup white chocolate chips
  10. 12 oz vanilla almond bark
  11. 1 tablespoon shortening
Instructions
  1. Using an electric mixture, combine the pumpkin puree, cookie crumbs, powdered sugar, cinnamon, ginger, nutmeg, salt, and cream cheese together.
  2. Melt the white chocolate chips using a double boiler. Add the white chocolate in with the rest of the filling, combine until smooth.
  3. Transfer the mixture into a small bowl and freeze for an hour or until filling is fairly hardened.
  4. Using your hands, roll the filling into 1" balls, and set them on a parchment-lined baking sheet. Freeze until hardened, about 2 hours.
  5. Once the balls are frozen, melt the almond bark and shortening using a double boiler, stirring occasionally until smooth. Using a spoon and a fork, dunk a filling ball into the almond bark until it's completely covered. Remove the ball from the almond bark using the fork, and remove the ball from the fork using the spoon onto the parchment-lined baking sheet. Repeat for all filling balls. Top each ball with a pinch of gingersnap crumbs before the coating hardens.
  6. Place the coated balls in the refrigerator until ready to serve.
  7. Store in airtight container for up to a week.
  8. Makes about 20 truffles
Adapted from Gimme Some Oven
Simple Everyday Food https://www.simpleeverydayfood.com/
The magic ingredient in these truffles are the gingersnap cookie crumbs. They share a lot of similar spices as those found in the traditional “pumpkin spice”, so not only does the cookie crumbs give the extra “umph” to the pumpkin spice, it also serve as a binding agent to bind all the wetter ingredients together.

Because the filling balls are made up of ingredients that don’t hold their shape up well under heat, you’ll have to work quickly when you’re ready to coat them with almond bark. Since I melt my almond bark over a double boiler, I found out that my filling balls tend to start to slowly fall apart if I leave them in the coating mixture too long.

They’re not as cake-y as the traditional truffles I’m used to making due to the amount of wet ingredients required (i.e. pumpkin puree), but the soft velvety texture sort of reminds me of pumpkin pie. Everyone that was lucky enough to try them raved about how good they were!

IMG_1848 copy

Poor Bentley wanted to be my taste tester… it was pure torture.

IMG_1847 copy

Bring on the fall baking season!

Recipe adapted from Gimme Some Oven

© Simple Everyday Food. All images & content are copyright protected. Please do not use any of my images without prior permission. If you want to republish this recipe, please re-write the recipe in your own words, or kindly link back to this post for the recipe.

Sharing is caring! Email this to someonePrint this pagePin on PinterestShare on YummlyShare on FacebookShare on Google+Tweet about this on Twitter