everyday food made simple

I am determined to make as many lemon-flavored recipes as I can before the summer ends. In case you missed it, here are some of the “summery” recipes I have made within the past 3 months:

overnight blueberry sweet rolls with lemon glaze

IMG_2819 copy

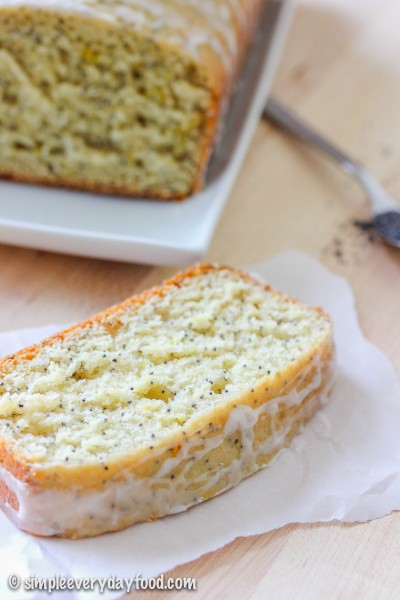
lemon poppy seed loaf cake

IMG_3514 copy

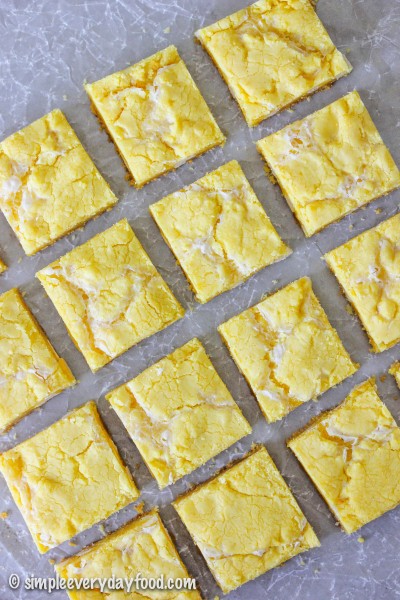
lemon gooey bars

IMG_3451 copy

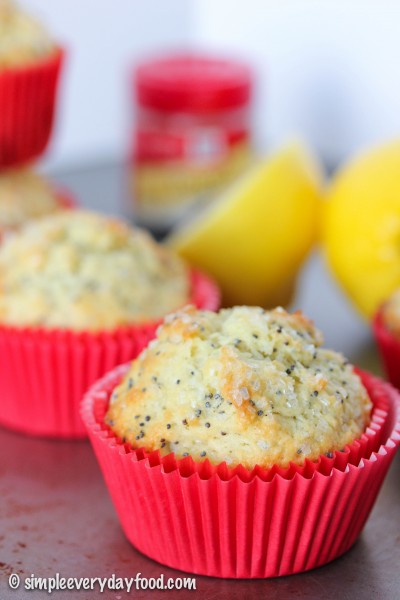
And now I present to you: lemon poppy seed muffins!
IMG_3338 copy

IMG_3360 copy     

My breakfast eating habits seem to go in phases. I tend to eat a lot of the similar things for breakfast weeks in a row, then I’ll get sick of it, move on to something else, and eat that for a few weeks until I get sick of that and find something else to obsess over. A few weeks ago, I was eating breakfast burritos every morning like they were going out of style, then it was smoothies.

Lately, it’s been muffins. Specifically, homemade muffins.

IMG_3344 copy

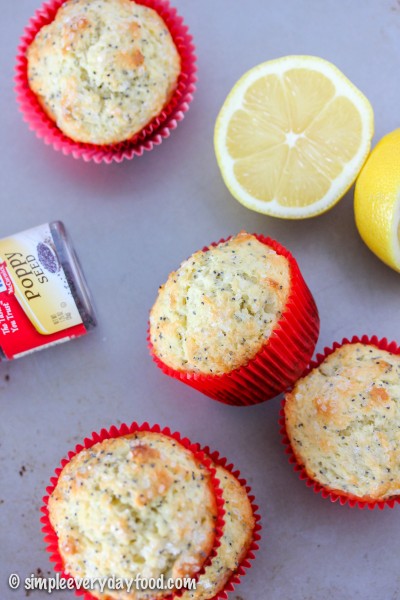
These muffins are not only delicious and require no fancy electric mixer, but they also freeze very well, meaning that you can make them in huge batches, freeze them, and reheat them in the mornings when you’re rushing out the door. What I have been doing is taking a few out to thaw out in the fridge overnight, then heating them up in the microwave the next morning.
IMG_3354 copy

IMG_3348 copy

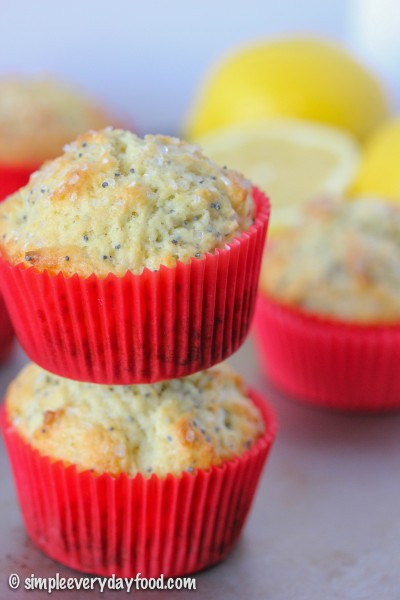
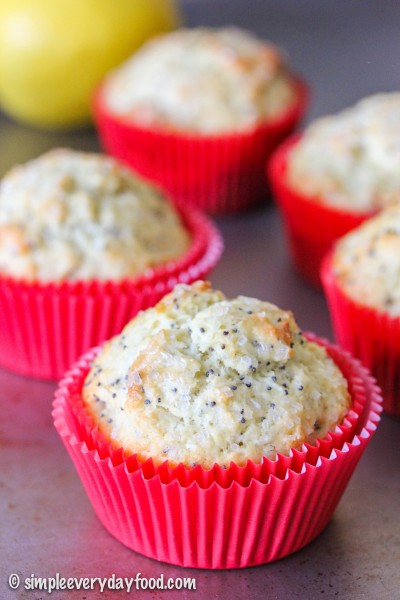
Reheating them doesn’t take away any of the textures of flavors! The insides remain moist while the muffin tops remain crunchy thanks to the sparkling sugar topping (the best part of a muffin!). Every bite is is citrusy and lemony, while the earthy poppy seeds pop in your mouth. The different textures create a delicate balance, like a well-rehearsed dance in your mouth… are you salivating yet?
IMG_3333 copy

One thing to note before making these is to make sure everything is at room temperature. Make sure your melted butter is not scorching hot and has cooled down prior to adding the eggs – unless you’re a fan of scrambled eggs in your lemon poppy seed muffins…. the batter will also be pretty thick, so roll up your sleeve and use those muscles! BUT – do not overmix! Overmixing will cause the muffins to be dense and dry and not as tasty.

Fill the muffin tins about 3/4 full and generously sprinkle the tops with some sparkling sugar. If you do decide to freeze them, throw them in the microwave and heat until the insides are completely heated through prior to serving.

lemon poppy seed muffins
Print
Ingredients
  1. 2/3 cup granulated sugar
  2. Zest and juice of 1 lemon, separated
  3. 2 cups all-purpose flour
  4. 2 teaspoons baking powder
  5. 1/4 teaspoon baking soda
  6. 1/2 teaspoon salt
  7. 3/4 cup plain Greek yogurt
  8. 2 eggs, at room temperature
  9. 1 teaspoon pure vanilla extract
  10. 1/2 cup (1 stick) unsalted butter, melted and cooled
  11. 2 tablespoons poppy seeds
  12. sparkling sugar, optional
Instructions
  1. Preheat oven to 400 degrees. Line a muffin pan with liners and set aside.
  2. In a large mixing bowl, rub the sugar and lemon zest together with your fingertips until fragrant (or until the sugar granules are moist). Add in the flour, baking powder, baking soda, and salt. Mix until combined.
  3. In a separate bowl, thoroughly whisk the Greek yogurt, eggs, vanilla, lemon juice, and melted butter together. Pour the liquid mixture into the flour mixture and stir just until combined. DO NOT OVERMIX (the batter will be thick). Gently stir in the poppy seeds. Divide the batter evenly into the muffin cups, filling each about 3/4 full. Sprinkle tops with sparkling sugar, if desired.
  4. Bake for 16-18 minutes until the tops are just starting to brown, or until an inserted toothpick comes out clean. Remove from oven and let cool for 10 minutes before removing them onto a wired cooling rack to cool completely.
  5. Muffins can be stored in an airtight container for up to 5 days at room temperature, or frozen to be eaten at a later date.
  6. Yield ~15 muffins
Notes
  1. If reheating the frozen muffins, each microwave is different so the time it takes to reheat may differ.
Adapted from Two Peas and Their Pod
Simple Everyday Food https://www.simpleeverydayfood.com/
Recipe adapted from Two Peas and Their Pod

© Simple Everyday Food. All images & content are copyright protected. Please do not use any of my images without prior permission. If you want to republish this recipe, please re-write the recipe in your own words, or kindly link back to this post for the recipe.

Sharing is caring! Email this to someonePrint this pagePin on PinterestShare on YummlyShare on FacebookShare on Google+Tweet about this on Twitter

Is anyone else sad that it’s already mid-August and summer is coming to an end? Where did my summer go? I made a whole list of summer to-dos at the beginning of the summer, and there are so many things I haven’t got to cross off the list yet!

But let’s try to be positive here – even though summer is ending, it doesn’t mean that it’s going to be 20 degrees and snowing the next day (but you just never know in Minnesota). There’s always the Minnesota State Fair, all things pumpkin and apples and cinnamon, the beautiful fall foliage, and plenty of crisp fall days ahead of us!

But as long as it’s 80 and sunny, I will be clinging on to every last day of summer. This includes the making of all things that scream summer that are bursting in summer flavors! Like this lemon gooey bar.

IMG_3451 copy

IMG_3462 copy    

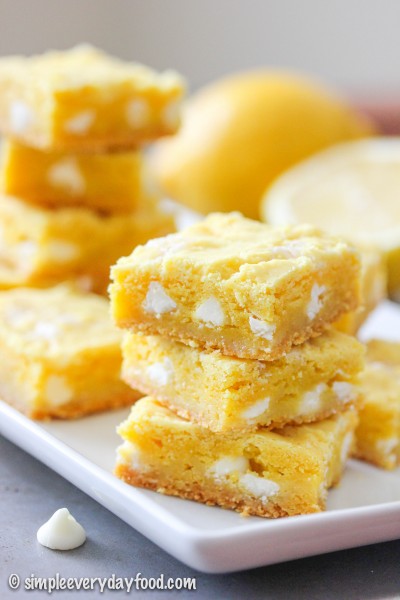
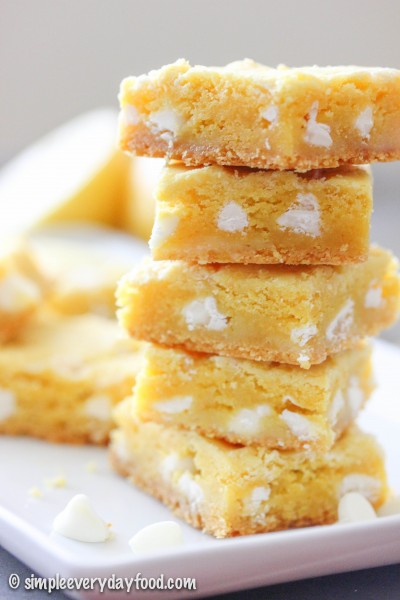
This lemon gooey bar tastes exactly what it sounds like – lemony and gooey. If I could’ve called it “The Amazingly Delicious Soft and Gooey Melt-In-Your-Mouth Lemon Bars”, I totally would’ve. Soft lemon bars sprinkled with plenty of white chocolate chips… every bite is melt-in-your-mouth amazing! I brought some to work to share with some lemon-loving coworkers and I’m pretty sure the pan was gone within the hour. Word sure travels fast around the hospital when there are sweets involved!

IMG_3465 copy

IMG_3438 copy

These bars are made in a similar manner to the peppermint gooey bars I made last winter. If you haven’t tried those yet, I do highly recommend you do so sometime!

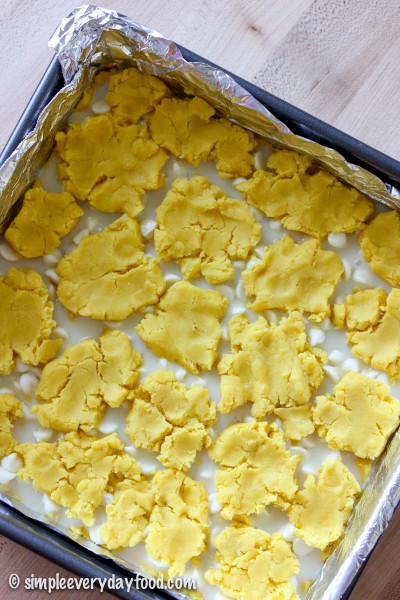
So you’re going to make the dough first, pressing half of it into the bottom of the pan. Then do a little bit of drizzling of some sweetened condensed milk and a bit of sprinkling of some white chocolate chips. Tear the rest of the dough into little pieces, pressing them on top. Don’t worry if the pieces don’t cover the whole pan completely – they will expand and stretch out once you put them in the oven.

IMG_3426 copy

IMG_3433 copy

The entire process is super straightforward and simple, but you know what the most difficult thing about making these bars is? The waiting. I hate waiting, but believe me when I tell you these taste way better when you actually wait patiently for them to cool completely. I highly recommend running a few errands and getting out of the house while they cool so you’re not tempted to check on these bars every 3 minutes (not that I’m speaking from personal experience or anything… ahem).

IMG_3458 copy

lemon gooey bars
Print
Ingredients
  1. 1/2 cup (1 stick) unsalted butter, softened to room temperature
  2. 1 box (16.25 oz) lemon cake mix (I used Duncan Hines)
  3. 1 egg, at room temperature
  4. 1/2 cup sweetened condensed milk
  5. 1/2 cup white chocolate chips
Instructions
  1. Preheat oven to 350 degrees. Line a 9x9" baking pan with aluminum foil and spray generously with nonstick cooking spray.
  2. Using an electric mixer, stir butter over medium speed until fluffy. Mix in the cake mix and egg. Beat until texture resembles cookie dough.
  3. Place about half of the dough in the bottom of the pan, press to form the crust, making sure all corners and sides are covered with dough. Sprinkle the white chocolate chips evenly over the dough and drizzle with the sweetened condensed milk. Drop balls of remaining dough evenly over the top. Press lightly. Don't worry if the entire surface isn't covered by the dough balls - the dough will expand once cooked in the oven.
  4. Bake for 28-32 minutes, or until the tops are slightly browned. Cool completely before cutting into squares. Once completely cooled, bars can be stored in an airtight container for up to 5 days.
Adapted from Crazy for Crust
Simple Everyday Food https://www.simpleeverydayfood.com/
Recipe adapted from Crazy for Crust

© Simple Everyday Food. All images & content are copyright protected. Please do not use any of my images without prior permission. If you want to republish this recipe, please re-write the recipe in your own words, or kindly link back to this post for the recipe.

Sharing is caring! Email this to someonePrint this pagePin on PinterestShare on YummlyShare on FacebookShare on Google+Tweet about this on Twitter

IMG_3514 copy

Has anyone else been sucked into the World Cup frenzy? Just like any other major international sporting event, the World Cup is one that I always look forward to, and this year was no exception.

My sister and I got into soccer way back in 2002. Unlike the U.S., every time the World Cup rolls around, it’s a big deal in Taiwan – all sorts of World Cup-related merchandise can be seen around every street corner. My sister and I’s favorite team (even til today) is Germany. I remember we’d set our alarms and wake up at 3 a.m. to watch them play. Because we lived in a small apartment, we’d tip toe around the house in the middle of the night, trying to rub the sleepiness away from our eyes, and muting the TV because we were afraid to risk waking up our parents and getting sent back to bed. We’d watch in silence, whispering to each other during the game, and silently cheer on our team. After the game was over, we’d put the remote right where we found it and sneak back into bed, waking up the next morning tired and exhausted (yeah, we had it down to a science).

Sounds crazy, but at that time, it was all so worth it.

For the past two World Cup games, I had to watch them by myself here in the U.S. while my sister caught the games back in Taiwan. We still watch the games, text each other about the results, and cheer on our team together. Some things just never change.

Now, onto this recipe..

IMG_3493 copy

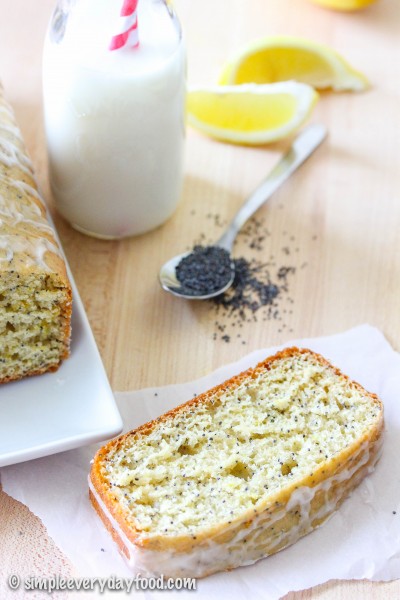
Can I just say how good this loaf cake is? The cake itself is soft and moist, the lemons give it a sweet yet tangy flavor, and the poppy seeds inside almost pops in your mouth. None of the flavors are heavy and overpowering – every component does its part to make this a light, summery recipe. The glaze on top is really optional, although I do highly recommend it as it adds an extra punch of lemon flavor to it, and the fact that no on ever turns down a layer on yummy sugary glaze on top of any kind of dessert.

IMG_3506 copy

The best part? You can eat it for breakfast, as a afternoon (or mid-morning) snack, or even as a light dessert after dinner. I placed it under the “breakfast” category simply because I ate it more for breakfast as opposed to dessert, even though no one ever said you can’t eat cake for breakfast…..

IMG_3497 copy

lemon poppy seed loaf cake
Print
For the cake
  1. 2 cups all-purpose flour
  2. 2 tablespoons poppy seeds
  3. 1 and 1/2 tablespoons lemon zest
  4. 3/4 teaspoon baking powder
  5. 3/4 teaspoon baking soda
  6. 1/4 teaspoon salt
  7. 1 tablespoon vegetable oil
  8. 1 egg, at room temperature
  9. 1 tablespoon vanilla extract
  10. 2/3 cup granulated sugar
  11. 1/3 cup plain Greek yogurt
  12. 2 tablespoons fresh lemon juice
  13. 6 tablespoons milk
For the glaze
  1. 4 tablespoons powdered sugar
  2. 1/4 teaspoon almond extract
  3. 1 teaspoon milk
  4. 1/2 teaspoon lemon zest
Instructions
  1. Preheat oven to 350 degrees. Coat a 9x5" loaf pan with nonstick cooking spray and set aside.
  2. In a medium bowl, whisk together the flour, poppy seeds, lemon zest, baking powder, baking soda, and salt.
  3. In a large bowl, combine the oil, egg, and vanilla extract. Mix to combine. Then whisk in the sugar, yogurt, and lemon juice until thoroughly incorporated. Alternate between adding the flour mixture and the milk (I added 1/3 of the flour, 1/2 of the milk, 1/3 of the flour, 1/2 of the milk, then the remaining 1/3 of the flour).
  4. Pour the batter in the loaf pan and bake for 45-50 minutes, or until an inserted toothpick comes out clean. If you notice the top is browning too fast, cover the pan with a tented tin foil after the first 30-40 minutes.
  5. Cool the pan for at least 15 minutes, then turn onto a wired cooling rack to cool completely.
  6. While the cake is cooling, prepare the glaze by whisking all the glaze ingredients in a small bowl. Drizzle over the top of the cooled caked. Cake may be sliced and stored in an airtight container for up to 5 days.
Adapted from Amy's Healthy Baking
Simple Everyday Food https://www.simpleeverydayfood.com/
Recipe adapted from Amy’s Healthy Baking

© Simple Everyday Food. All images & content are copyright protected. Please do not use any of my images without prior permission. If you want to republish this recipe, please re-write the recipe in your own words, or kindly link back to this post for the recipe.

Sharing is caring! Email this to someonePrint this pagePin on PinterestShare on YummlyShare on FacebookShare on Google+Tweet about this on Twitter