everyday food made simple

My little boy turned FOUR yesterday! Can you believe it? I can’t. I can’t believe we’ve had this little rascal for pretty much four years already.

11012942_10106329980560150_9159722262717385275_n

IMG_7040

He may be the best decision both Brian and I have made together. Even though him and I had a little rough start during his first year (there was a alpha-struggle in the beginning as well as a minor anxiety attack that almost made me give him back to his breeder), he has grown into such a loving happy boy that we can no longer imagine our lives without him.

11888094_10106561455372770_984215001477800652_n

FullSizeRender 11

He has so much personality, bring us so much joy, makes me look forward to coming home after a long day of work, pushes our limits at times, tests our patience, and has taught us how to be good, caring, loving parents. Our love for him really is unconditional, and there’s no doubt in my mind that he’s going to be the best big brother for our little nugget.

11903964_10106618502709450_8832350090227358418_n

So to keep up with tradition, I’ve decided to make him some yummy homemade treats to celebrate his birthday.

IMG_6678 copy

IMG_6676 copy

IMG_6669 copy

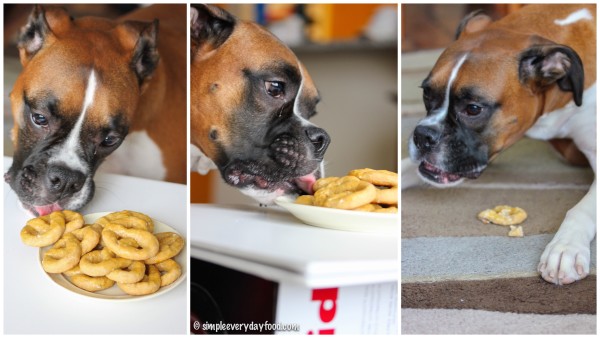
Bentley was not shy at helping himself to a couple of these during the photo shoot…

IMG_7100

IMG_6700 copy

IMG_6702 copy

You can find treats (and other dog-friendly treats) from previous years here.

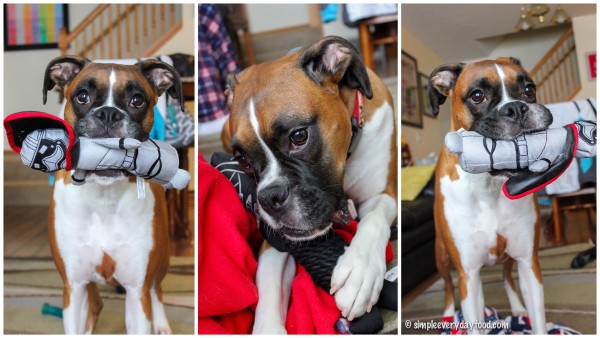
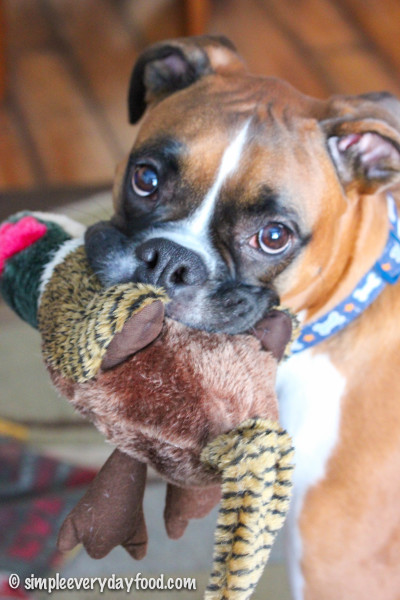
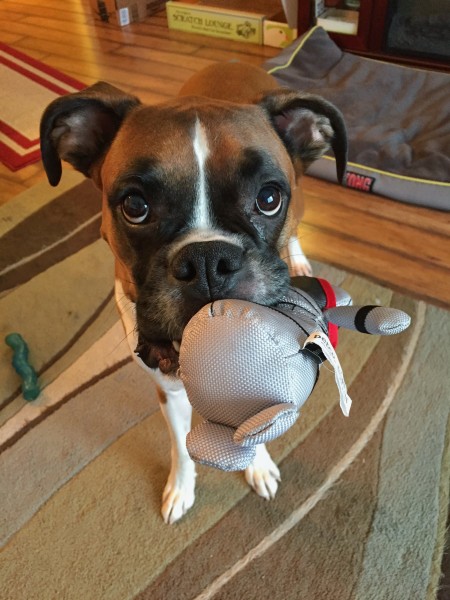
He also got two brand new toys that has kept him occupied for two days straight.

IMG_7102

IMG_6618 copy

(yes, he’s spoiled…)

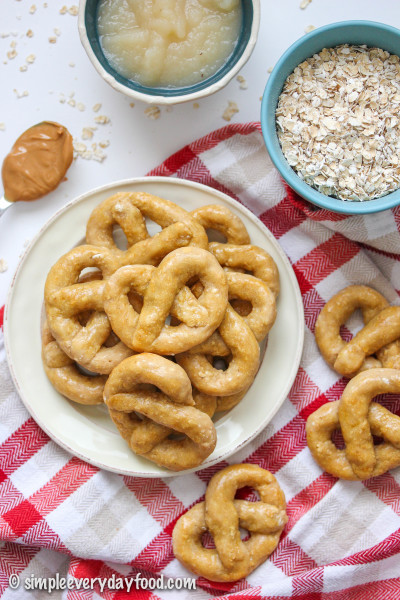
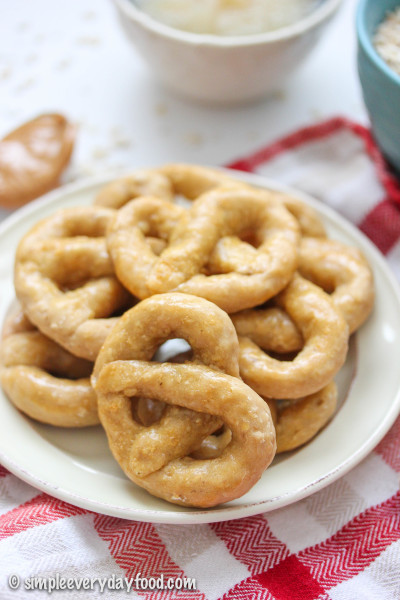
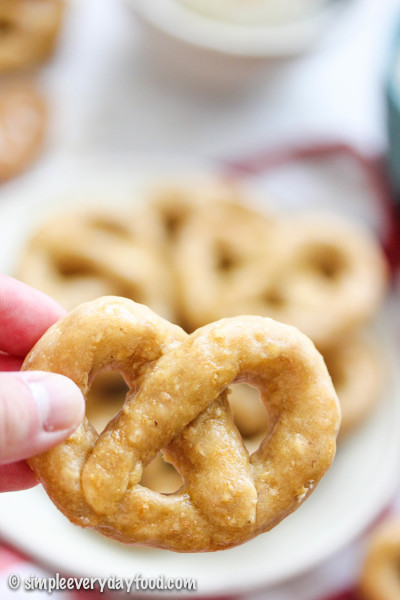
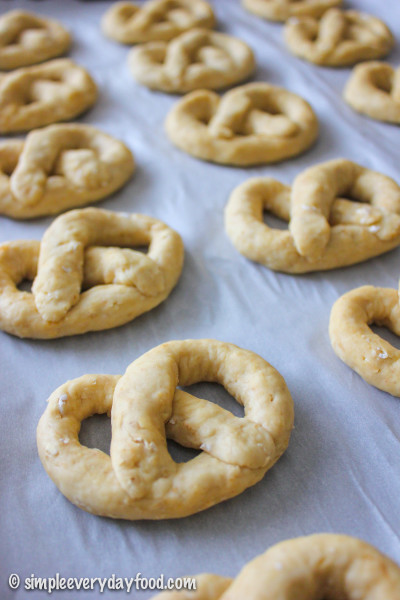
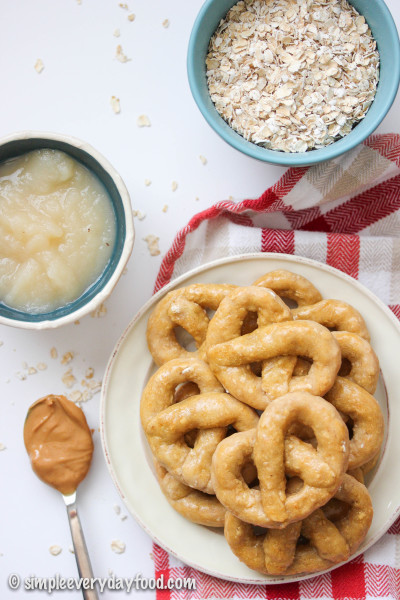
Just like all the other dog treats I’ve made in the past, these pretzels don’t contain any butter, sugar, artificial flavors, or preservatives of any kind. It’s cheap, easy to make, and you know exactly what goes in it. Not to mention they’re almost cute enough for people to eat! And I bet you probably have most of the ingredients sitting around in your pantry already!

IMG_6631 copy   IMG_6628 copy

IMG_6664 copy

So go ahead and make these for your beloved four-legged friends, even if it’s not their birthday. Shouldn’t their constant companionship and unconditional love for you deserve something as tasty as homemade dog treats?

peanut butter, apple, and oats dog pretzels
Print
Ingredients
  1. 2 cups all-purpose flour, plus more if needed
  2. 3/4 cup quick cooking oats
  3. 1 large egg, beaten
  4. 1 cup all natural (no sugar added) applesauce
  5. 3 teaspoons peanut butter - make sure it does NOT contain xylitol
Instructions
  1. Preheat oven to 350 degrees. Line a baking sheet with parchment paper or a silicon baking mat. Set aside.
  2. In a large bowl, combine the flour and oats and mix well. Add in all but 1 tablespoon of the beaten egg to the flour, reserving the rest of the egg for later. Then add in the applesauce and peanut butter.
  3. Mix everything together with a wooden spoon until the dough starts to come together (I actually found it easier to use my hands to incorporate all the ingredients). The dough should not be sticky to the point where it sticks to your hands. If it is, add in a few tablespoons of flour and mix some more until the dough is pliable and not sticky.
  4. Scoop the dough using a medium cookie scoop (~1.5 tablespoons) and roll the dough into an approximate 10" rope. Shape the "rope" of dough into a U shape, then take the ends of the "U" and fold it back down, cross-crossing it in the middle to form it into a pretzel. Repeat for the rest of the dough.
  5. Once all the pretzels are made, brush the tops with the remaining 1 tablespoon of beaten egg. Bake for 25-30 minutes until pretzels are hard and golden brown on top. Remove from oven and let cool for 5 minutes before transferring them to a wired cooling rack. Store in an airtight container for up to 1 week.
  6. Makes 18 pretzels
Notes
  1. * Some dogs may have allergies to certain ingredients - consult your veterinarian prior to making these if this is the case.
Adapted from The Cookie Rookie
Simple Everyday Food https://www.simpleeverydayfood.com/
Recipe adapted from The Cookie Rookie

© Simple Everyday Food. All images & content are copyright protected. Please do not use any of my images without prior permission. If you want to republish this recipe, please re-write the recipe in your own words, or kindly link back to this post for the recipe.

Sharing is caring! Email this to someonePrint this pagePin on PinterestShare on YummlyShare on FacebookShare on Google+Tweet about this on Twitter

Let’s all pause for a moment and discuss how important it is for you to make these for breakfast this weekend. I’ve made a few variations of breakfast rolls that I’ve shared with you in the past (you can find them here, here, here, and here), but today we’re ditching the rolls and making something I’ve never made before… pull-apart bread.
IMG_4424 copy

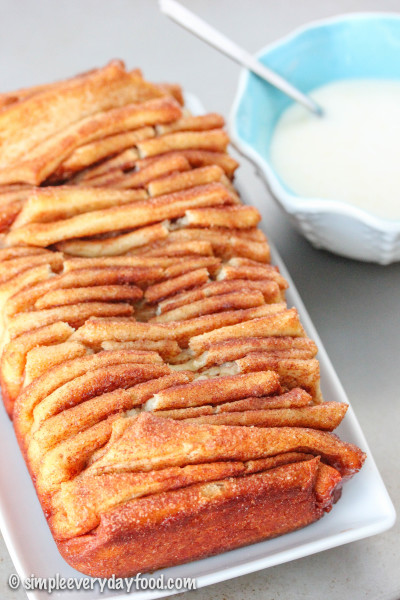
And before we get too crazy with the variations, let’s start with a simple and classic flavor: cinnamon + sugar with a vanilla glaze/dipping sauce.

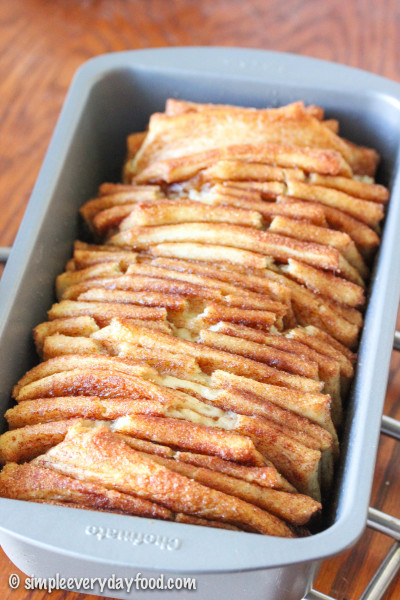
The beauty of the pull-apart bread is its non-uniformity. No matter how exact you cut all your dough squares, not every piece of those squares is going to rise in the same exact way. The result is this beautiful vertically layered bread with pieces sticking out in every which way, making it that much more fun to peel away a piece, dunking it in the sticky sweet glaze, and shoving it in your mouth.
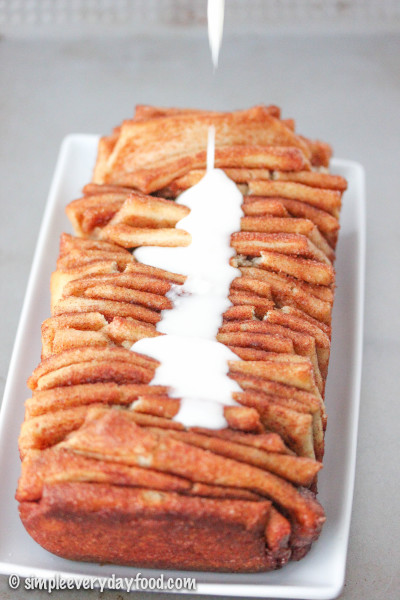
IMG_4444 copy

IMG_4458 copy

I’ll forewarn you that this post is a little bit lengthy, but please don’t let the number of steps intimidate you or hold you back from making this! I took step-by-step photos for you to go along with each step (located at the end of this post) to make the instructions easier to understand. I also added a few comments of my own (which I italicized) based on my own preference for you to use as a reference. There’s a lot of “making and waiting” involved, but once you get things started it goes by fast. Please trust me when I tell you that you need to make this bread because it’s actually pretty easy to make and it’s so fun to eat!
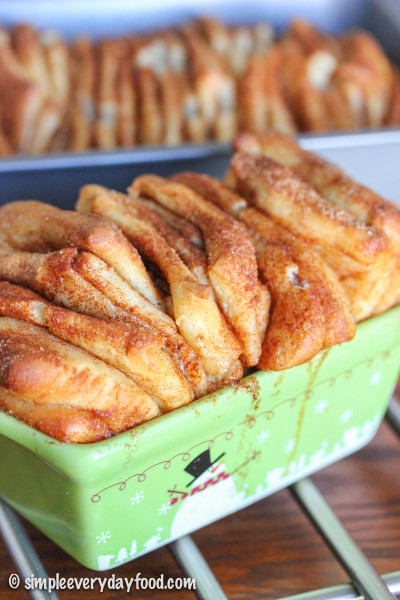
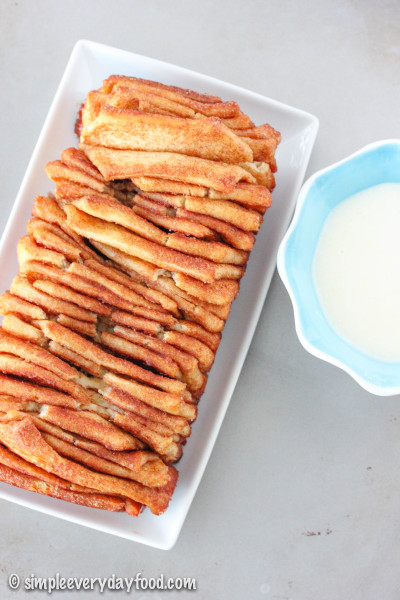
IMG_4400 copy

IMG_4437 copy

On a semi-related note: this was my very first time taking step-by-step photos for a recipe that  required a few more steps than the usual posts that appear here on SEF, and it really made me appreciate all the talented food bloggers out there that include photos for each step in very post (my favorite is probably Simply Scratch – Laurie’s blog is beautiful and inspiring) – it really is a lot harder than it seems! It doesn’t help that my kitchen has zero natural lighting, so I had to run back and forth between the living room, dining room, and kitchen the entire time, trying to beat the sun and finding the best angle to shoot these photos.

Hats off to all the bloggers out there that take such wonderful step-by-step photos for people like me to admire and learn from.

cinnamon pull-apart bread
Print
For the dough
  1. 2 cups skim milk
  2. 1/2 cup vegetable oil
  3. 1/2 cup granulated sugar
  4. 1 teaspoon vanilla extract
  5. 2 and1/4 teaspoons (1 packet) active dry yeast
  6. 4 and 1/2 cups all-purpose flour, divided
  7. 1/2 teaspoon baking powder
  8. 1/2 teaspoon baking soda
  9. 2 teaspoons salt
  10. 1/2 cup (1 stick) unsalted butter, melted and cooled
For the cinnamon sugar mixture
  1. 1 and 1/2 cups granulated sugar
  2. 3 tablespoons ground cinnamon
  3. 1/2 teaspoon ground nutmeg
For the icing
  1. 1 and 1/2 cups powdered sugar
  2. 1/4 cup heavy whipping cream
  3. Pinch of salt
Instructions
  1. To make the dough, combine milk, oil, vanilla extract, and 1/2 cup sugar in a large saucepan. Heat it until very hot but not boiling. Turn off heat and allow to cool slightly until it's just warm to the touch. Sprinkle in the yeast and add 4 cups of flour. Stir to combine, then put lid on the pot and allow to rise for 1 hour in a warm, draft-free area until doubled in size.
  2. During this time, generously coat a 9 x 5 x 3-inch loaf pan with the melted butter and set aside. In a medium bowl, combine the ingredients for the cinnamon sugar mixture and set that aside as well.
  3. After 1 hour, stir in additional 1/2 cup flour, along with the baking powder, baking soda, and salt. If dough is overly sticky, stir in up to an additional 1/2 cup of flour - I added in 1/4 cup increments. the dough should be slightly sticky but should not stick to your hands as you handle it.
  4. Roll out dough onto a floured surface into a roughly 12 x 20" rectangle. Brush on melted butter so that it covers all the dough (I totally didn't skimp on this step - the butter is what makes the cinnamon sugar mixture stick to the dough!).
  5. Sprinkle a generous coating of the cinnamon sugar mixture onto the buttered dough... it may seem like a lot, but let's face it - there's no such thing as too much cinnamon sugar! Reserve about 2-3 tablespoons of the mixture.
  6. Cut the dough vertically into approximately 2" wide strips (you'll get about 6-8 of 'em), then stack all the strips into one stack. Cut the stack of strips into 2" wide squares. Tilt your loaf pan vertically and start stacking your dough squares into your buttered loaf pan. Don't cram too many squares in your pan since you'll need to allow room for them to rise some more... you may have some squares leftover.
  7. Sprinkle the tops with more cinnamon sugar... because there's never enough of that stuff! Cover with a dish towel and allow to rise in a warm place for 30-45 minutes, or until dough have risen to double the size.
  8. In the meantime, preheat oven to 350 degrees. Place the pan in the oven and bake for 30-35 minutes or until the center is cooked through. Check dough at 20 minutes to make sure the top isn't browning too fast.. if it is, cover with aluminum foil for the remainder of the baking time.
  9. Remove the pan from the oven when it's done and let cool for 20 minutes. Run a knife along the edges and take the bread out of the pan and transfer to a serving plate. Mix together the icing ingredients and drizzle over the top*. Serve warm and enjoy!
Notes
  1. * If desired, you can reserve about half of the glaze and use it as a dipping sauce.
Adapted from The Pioneer Woman
Simple Everyday Food https://www.simpleeverydayfood.com/
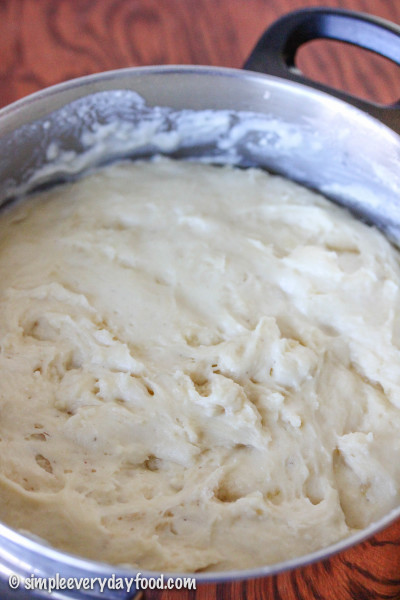
1. To make the dough, combine milk, oil, vanilla extract, and 1/2 cup sugar in a large saucepan. Heat it until very hot but not boiling. Turn off heat and allow to cool slightly (I made this before I purchased a candy thermometer and used the old-school touch-and-feel method. It’s “cool” enough when you can stick your hand in it without getting burned – think warm bath water). Sprinkle in the yeast and add 4 cups of flour. Stir to combine, then put lid on the pot and allow to rise for 1 hour in a warm, draft-free area until doubled in size (below are the Before and After shots).
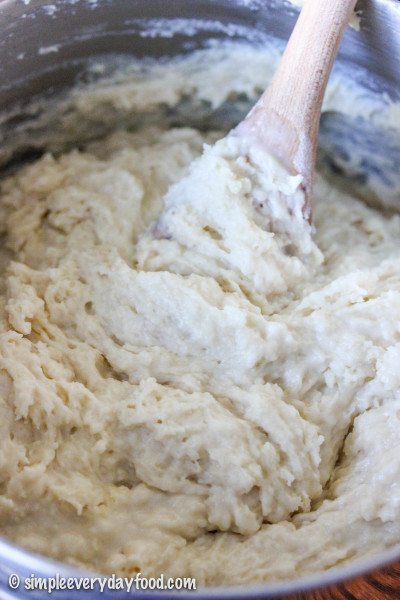
IMG_4304 copy   IMG_4309 copy

2. During this time, generously coat a 9x5x3-inch loaf pan with the melted butter and set aside. In a medium bowl, combine the sugar, cinnamon, and nutmeg. mix, and set aside.

3. After 1 hour, stir in additional 1/2 cup flour, along with the baking powder, baking soda, and salt. If dough is overly sticky, stir in up to an additional 1/2 cup of flour – I added in 1/4 cup increments. the dough should be slightly sticky but should not stick to your hands as you handle it.

4. Roll out dough onto a floured surface into a roughly 12×20″ rectangle. Brush on melted butter so that it covers all the dough (I totally didn’t skimp on this step – the butter is what makes the cinnamon sugar mixture stick to the dough!).
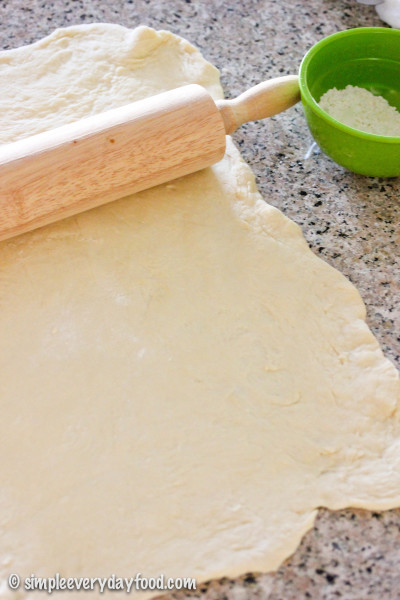
IMG_4320 copy

5. Sprinkle a generous coating of the cinnamon sugar mixture onto the buttered dough… it may seem like a lot, but let’s face it – there’s no such thing as too much cinnamon sugar! Reserve about 2-3 tablespoons of the mixture.
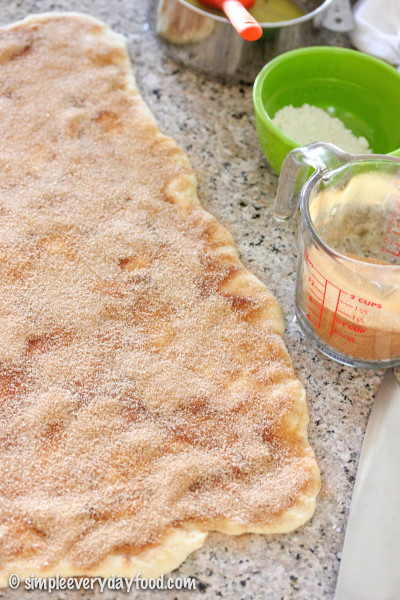
IMG_4331 copy

6. Cut the dough vertically into approximately 2″ wide strips (you’ll get about 6-8 of ’em)…
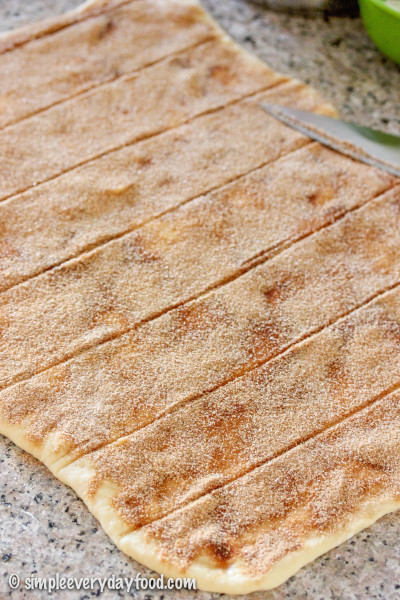
IMG_4339 copy

7. …Then stack all the strips into one stack.
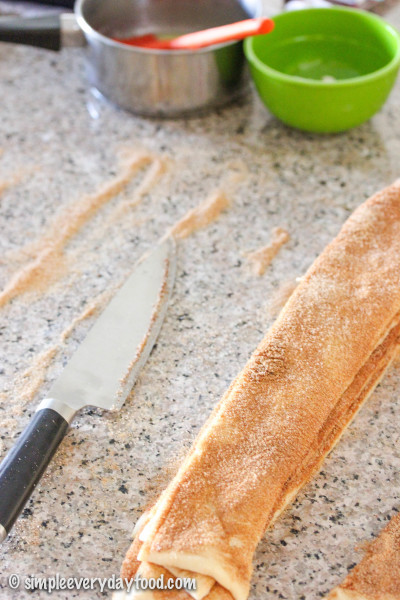
IMG_4347 copy

8. Cut the stack of strips into 2″ wide squares (if you’re OCD like me, you’d take a ruler and measure and score marks on your dough prior to cutting. I also trimmed off the edges so I’m left with nicely uniformed squares… because uniformity is what makes my world go round).
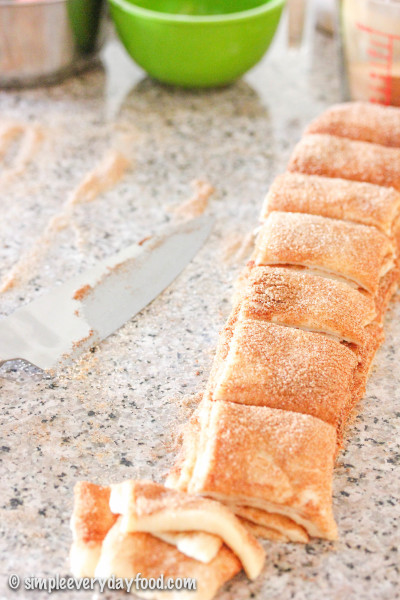
IMG_4354 copy

9. Tilt your loaf pan vertically and start stacking your dough squares into your buttered loaf pan. Don’t cram too many squares in your pan since you’ll need to allow room for them to rise some more… you may have some squares leftover (I used my leftover squares and some of the trimmed edge pieces to make a mini pull-apart loaf!).
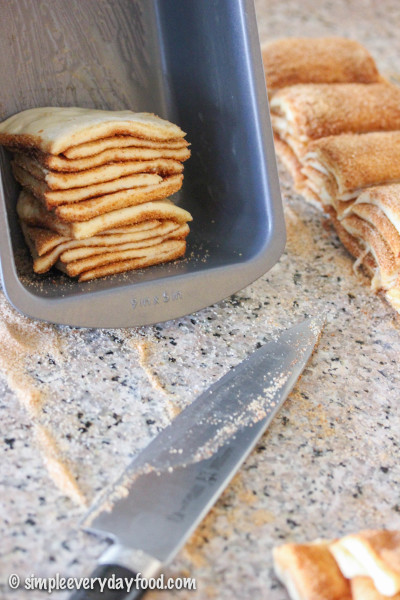
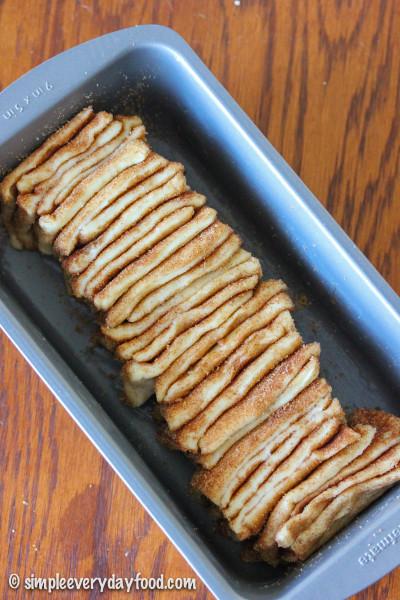
IMG_4358 copy   IMG_4378 copy

10. Sprinkle the tops with more cinnamon sugar… because there’s never enough of that stuff! Cover with a dish towel and allow to rise in a warm place for 30-45 minutes, or until dough have risen to double the size.
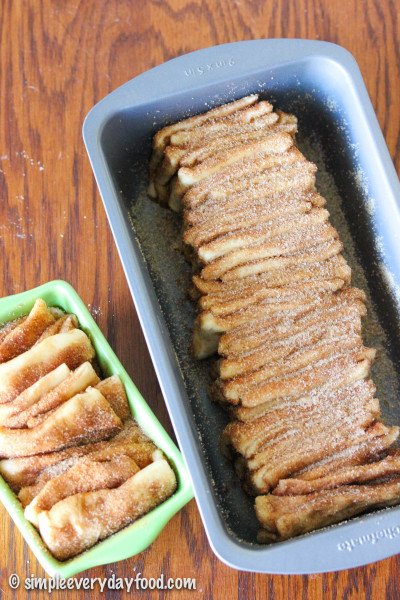
IMG_4388 copy

11. In the meantime, preheat oven to 350 degrees. Place the pan in the oven and bake for 30-35 minutes or until the center is cooked through. Check dough at 20 minutes to make sure the top isn’t browning too fast.. if it is, cover with aluminum foil for the remainder of the baking time.

12. Remove the pan from the oven when it’s done and let cool for 20 minutes. Run a knife along the edges and take the bread out of the pan and transfer to a serving plate. Mix together the icing ingredients and drizzle over the top. Serve warm and enjoy!

Recipe adapted from The Pioneer Woman

© Simple Everyday Food. All images & content are copyright protected. Please do not use any of my images without prior permission. If you want to republish this recipe, please re-write the recipe in your own words, or kindly link back to this post for the recipe.


Sharing is caring! Email this to someonePrint this pagePin on PinterestShare on YummlyShare on FacebookShare on Google+Tweet about this on Twitter

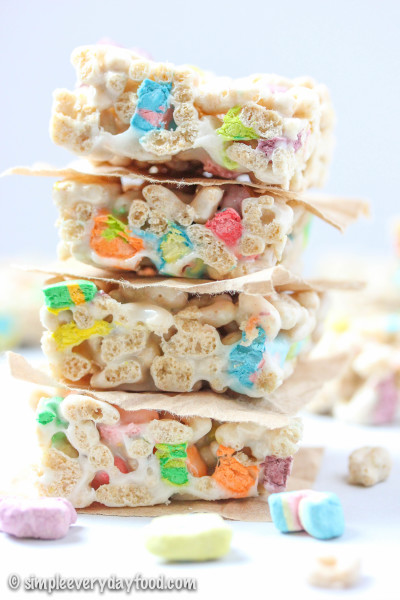
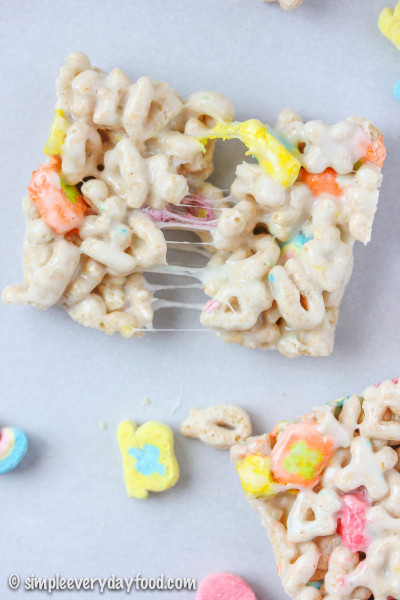
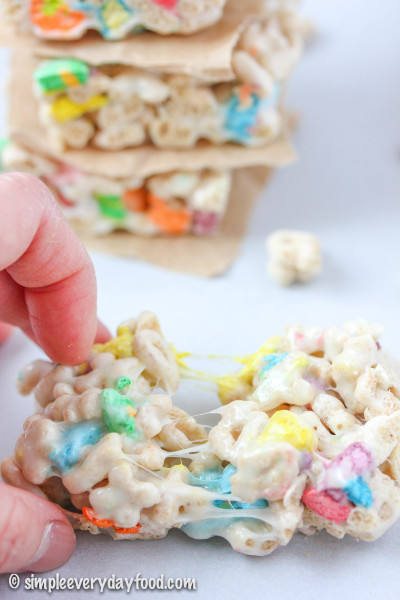
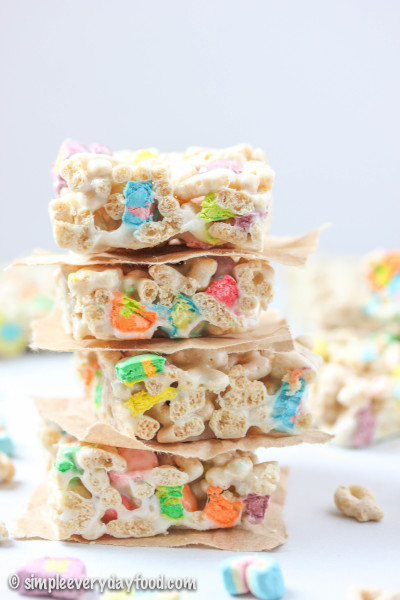
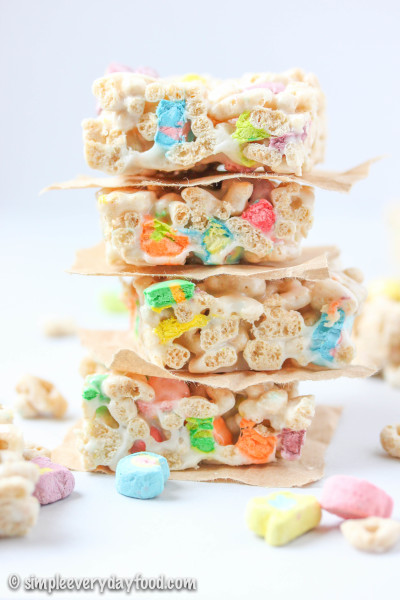
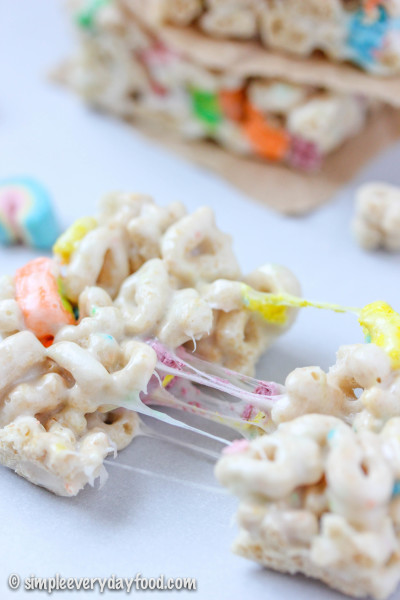
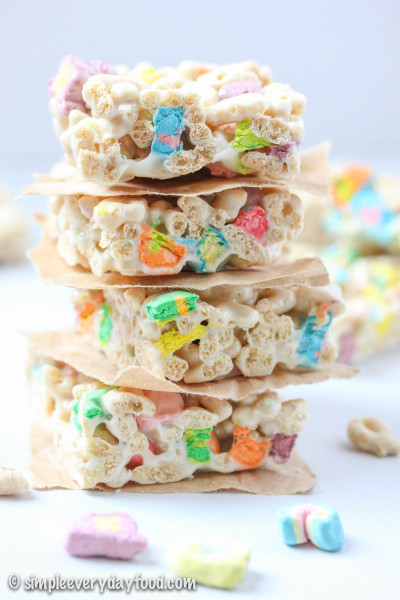
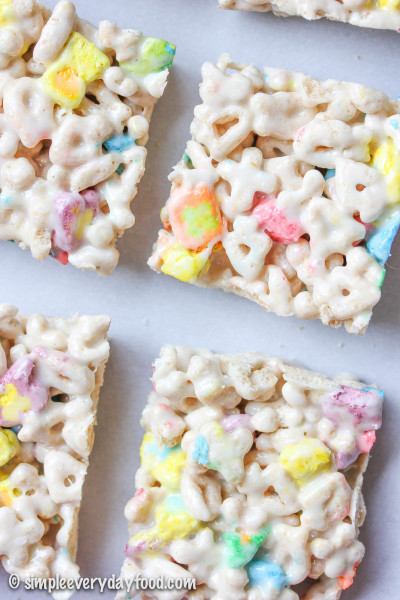
lucky charms bars

I know I’m a little late in the game, but I finally watched Big Hero 6 and I loved it! Have you seen it yet? I’ve heard so much about it when it first came out, but never really put too much thought into it until a coworker of mine brought it for me one day and told me it was her daughter’s new favorite movie.

There were definitely parts of the movie that I totally wasn’t expecting to happen, but there were also a lot of other parts of it that were cute and made me smile.

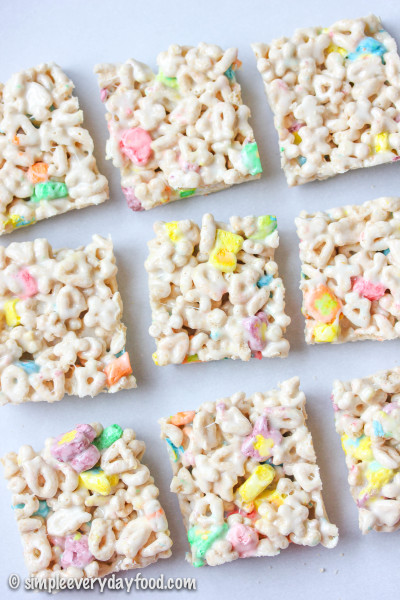
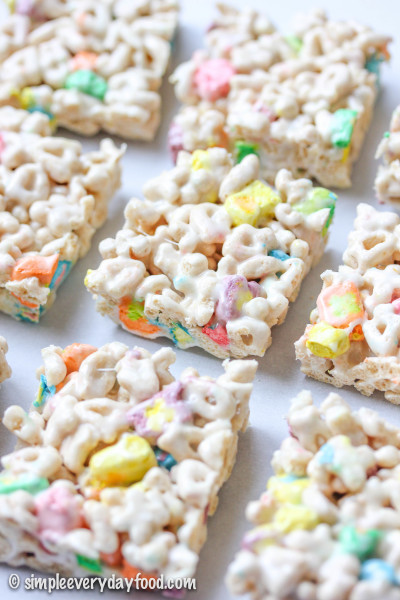
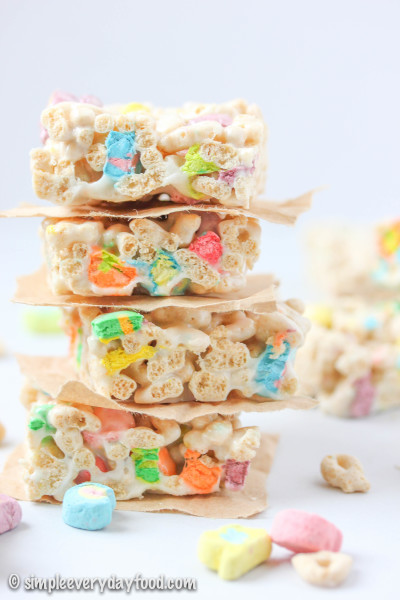
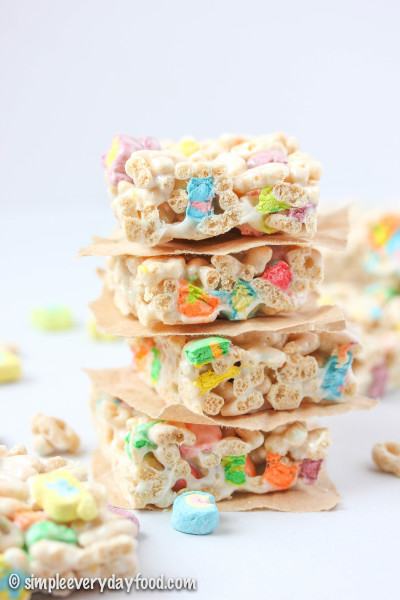
Baymax totally reminded me of a giant walking talking marshmallow, which in turn reminded me that I needed to share these ridiculous bars I made a while ago that involved sticky gooey marshmallows….

lucky charms bars   lucky charms bars

Marshmallow treat bars are probably one of the easiest things to make – they only require a few ingredients, they don’t require any special equipment or powering on the oven, and a batch of these things is usually enough to feed a crowd. Cheap, quick, and easy is the kind of desserts I like to bring to a potluck.

lucky charms bars

lucky charms bars

I’m sure we’ve all had terrible marshmallow treats before. You know, the kind that may have sat out for a few days too long? The kind that’s not at all soft and gooey when you bite into it? The kind that scrapes a layer of epithelial tissue off the roof of your mouth that leaves the top of your mouth raw and sore for days? Yeah… if you’re looking for that kind of a marshmallow treat (WHYYYYYY would you ever want a rock hard marshmallow treat would be beyond me), this recipe is not it.

lucky charms bars

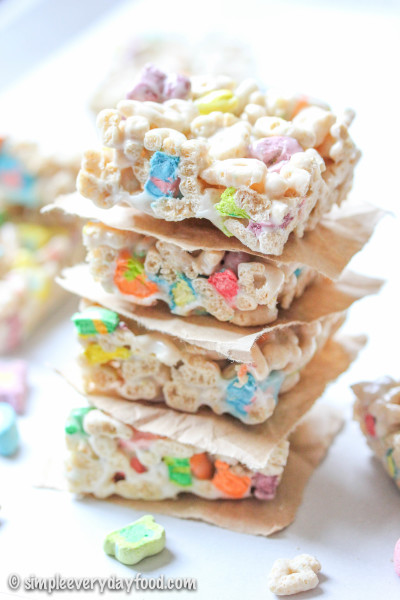
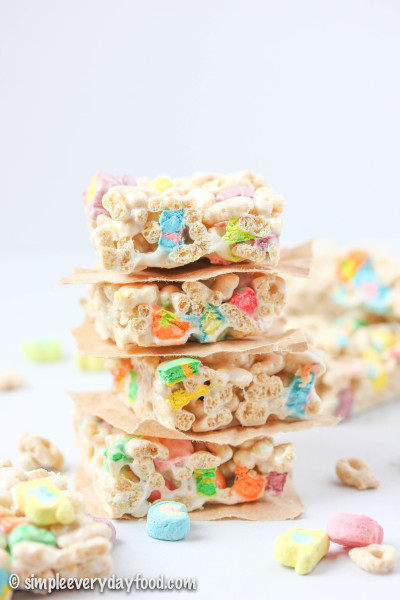
They’re oh so soft, so chewy, so gooey, so sweet, and so so so delicious. Not to mention on top of the 5 cups of marshmallows that goes into it, there’s more than plenty colorful Lucky Charms marshmallows in them, which makes them yummy to eat, and even prettier to look at.

lucky charms bars

lucky charms bars   lucky charms bars

This was only the second time I’ve ever made marshmallow treats. The last time I made them a few years ago, I’m pretty sure I got sticky marshmallow goo all over my hands and hair, my bars were hard, and Brian landed himself a trip to the ER that ended with 7-8 stitches on his toes… but that’s a whole ‘nother story for a different day.

Although my marshmallow bars weren’t a huge success that day, I did learn a few things that day about making these treats that I’m going to share with you, so listen up!

lucky charms bars   lucky charms bars

The single most helpful tip I learned was to grease EVERYTHING that will be coming in contact with the cereal/marshmallow mixture – that includes every single inch of the pan, the spatula you’ll be stirring with, and your hands if you’re using them to press the cereal treats into the pan rather than wax paper.

lucky charms bars

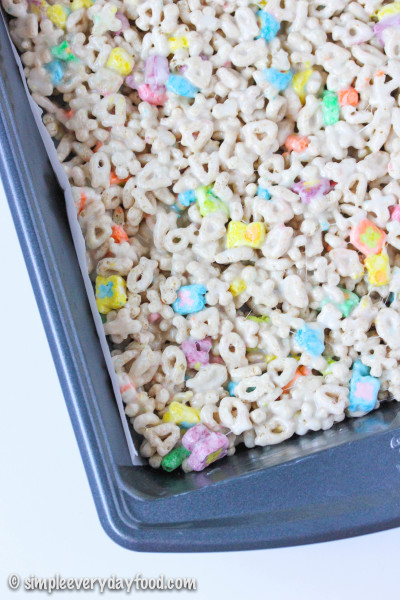
I actually lined my baking pan with parchment paper for easy removal of the bars once they cool. That way you can lift the entire pan of marshmallows onto a cutting board to cut them into squares rather than trying to cut them up while they’re in the pan.

lucky charms bars

When you’re pouring your cereal/marshmallow treats into the pan, don’t press them too hard into the pan. The more you try to cram them together, the denser they’ll get, and the harder they will become once they cool. If you’re not into greasy hands, you can also gently press them in with a sheet of wax paper.

lucky charms bars

lucky charms bars

These really do taste best if you eat them the same day they’re made, but they will still taste great the day after. I wouldn’t recommend storing them for more than two days, unless you’re purposely trying to end up with dry, hard marshmallow bars.

lucky charms bars   lucky charms bars

Sorry for the photo overload, my friends. I was having an indecisive day!

lucky charms bars
Print
Ingredients
  1. 4 tablespoons unsalted butter, plus more for greasing the pan
  2. 5 cups mini marshmallows
  3. 6 cups Lucky Charms cereal
Instructions
  1. Lightly coat a 9x13" baking pan with butter, line with parchment paper (the butter will help the parchment paper stick to the pan), then grease the parchment paper with another thin coat of butter. Set aside.
  2. Melt butter in a large pot over low heat. Add the marshmallows and stir until the marshmallows are completely melted. Remove from heat and stir in the Lucky Charms with the buttered spatula until combined.
  3. Pour cereal mixture into the prepared greased baking pan, pressing the tops gently with waxed paper* and let cool. Remove the bars from the pan using the parchment paper and transfer onto a cutting board. Cut into squares and serve. Bars can be stored at room temperature in an airtight container for up to 2 days.
  4. Makes one 9x13" pan
Adapted from A Pumpkin & A Princess
Simple Everyday Food https://www.simpleeverydayfood.com/
 Recipe adapted from A Pumpkin And A Princess

© Simple Everyday Food. All images & content are copyright protected. Please do not use any of my images without prior permission. If you want to republish this recipe, please re-write the recipe in your own words, or kindly link back to this post for the recipe.

Sharing is caring! Email this to someonePrint this pagePin on PinterestShare on YummlyShare on FacebookShare on Google+Tweet about this on Twitter

Lately I’ve been thinking about getting a Fitbit Charge HR. I already own a FitBit Flex, but I’m really digging the additional functions the Charge HR provides (heart rate monitoring, time display, automatic sleep detection, etc). But as I added it into my shopping cart and typed in my credit card information one day, I suddenly remembered that the iWatch is scheduled to come out sometime this year, and that’s when the internal debate began…

I’m sort of an Apple geek – all my electronic toys have the little half-bitten apple logo on it. When I initially heard of this iWatch, I laughed and vowed I would never need a wrist gadget that did a lot of the things my phone could do. “Why do I need a watch like that when I can just use my Fitbit?” Buuuut… after reading all about its features, I’m kind of ashamed to admit that I have since changed my mind and I now want a iWatch, especially since it also contains a pretty cool health & fitness app within.

Question: Do any of you guys have the new Fitbit Charge HR? Do you recommend it? Are you planning on getting the iWatch when it comes out? Why or why not? I’d like to hear your opinions!

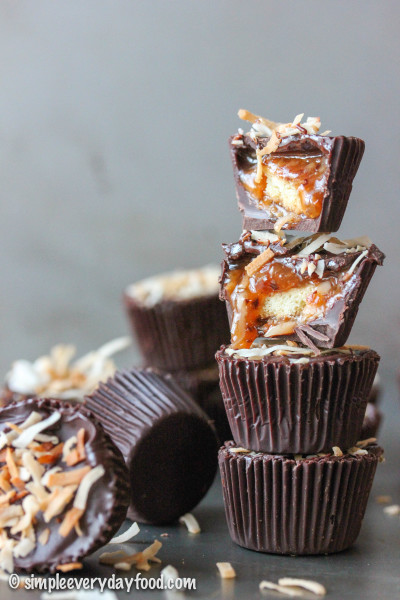
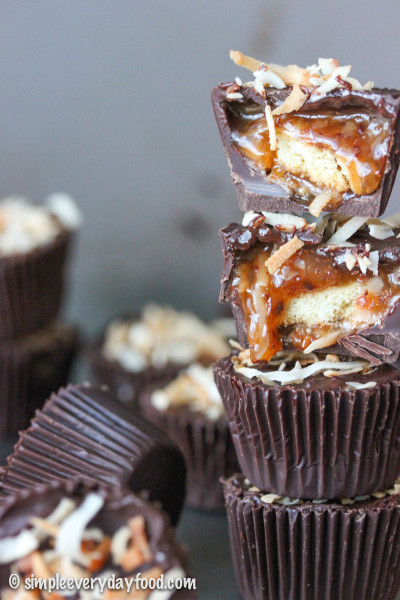
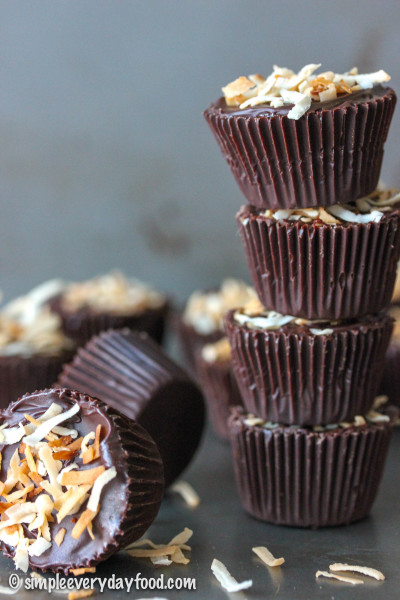
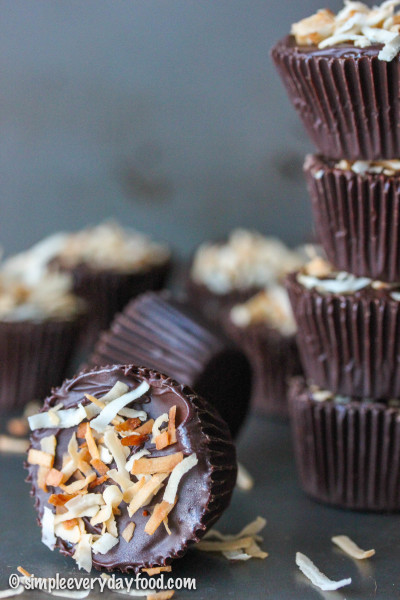
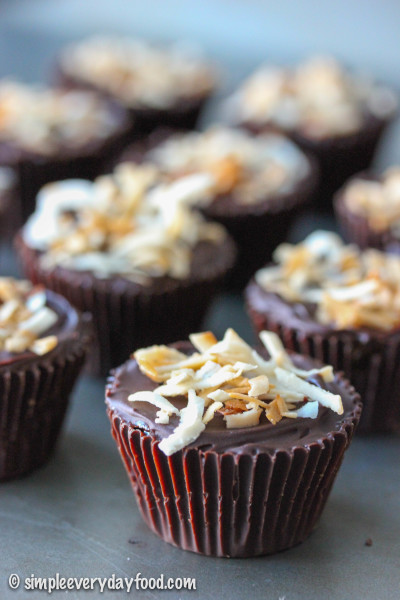
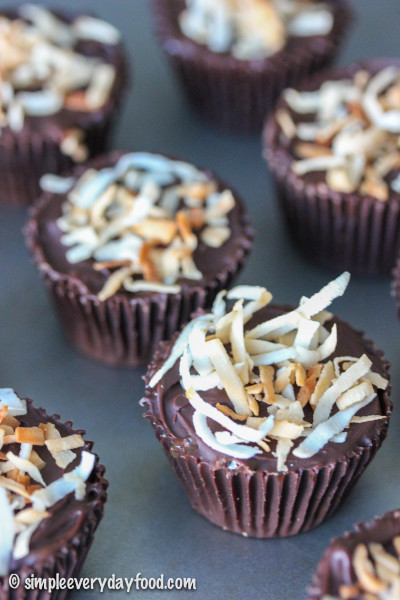
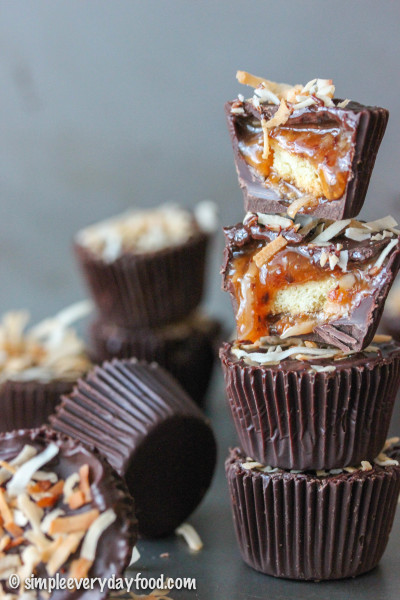
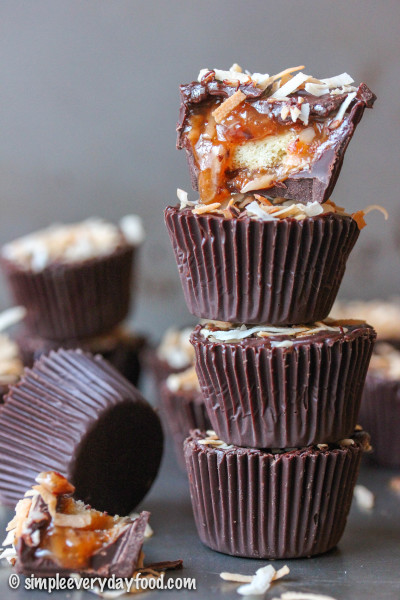
Maybe the reason why I’m thinking so much about activity trackers is because I may have accidentally ate a few too many of these Samoa cookie chocolate cups.. they’re little chocolate cups filled with gooey sweet and salty caramel coconut mixture and a bite-sized piece of shortbread cookie, all in this little chocolate cup… and oh boy are they dangerous!

IMG_5134 copy

IMG_5126 copy

IMG_5110 copy     

They don’t require any sort of mixer, and they don’t require any baking. It may seem like a long process to make them, but there’s a lot of waiting around in between steps, which is perfect for getting miscellaneous things done around the house… or spending some time on Pinterest…. or finding things to buy online… or taking a few of those silly BuzzFeed quizzes…

IMG_5079 copy

IMG_5115 copy

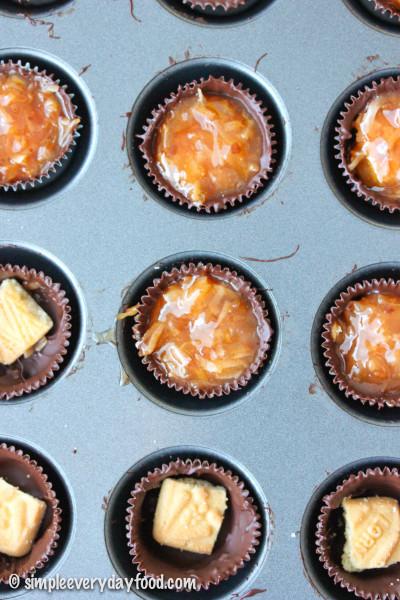
First you melt the chocolate and spread the chocolate around in the liners so it covers everysingleinch of it. Freeze those babies for half an hour (this would be the time to do those things we previously talked about). Then add a little bit of the caramel coconut mixture on the bottom of each cup and top with a little bite of the shortbread cookie.

Are you still following me?

IMG_5060 copy

Top the cookies with more caramel coconut and sprinkle the tops with some sea salt, if the salty-sweet combo is your kind of thing. Freeze some more (patience, grasshopper!).

IMG_5063 copy

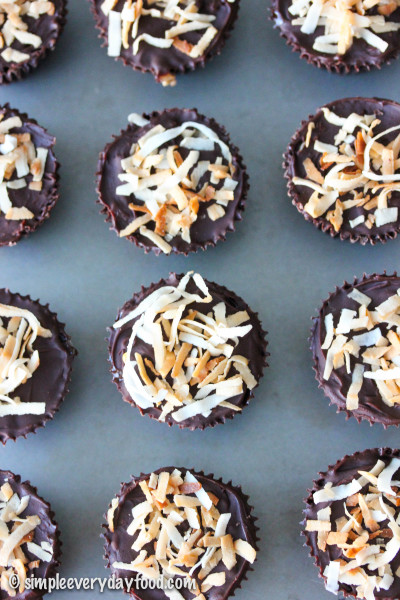
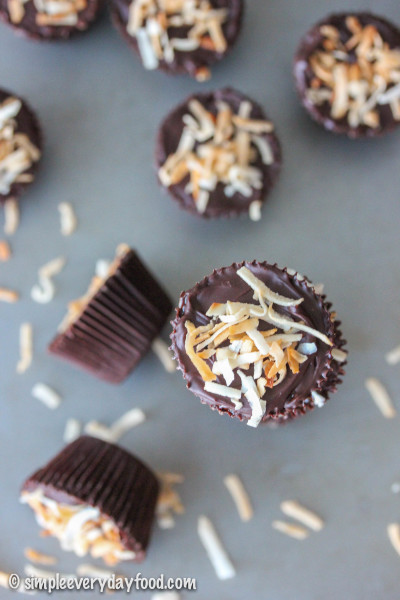
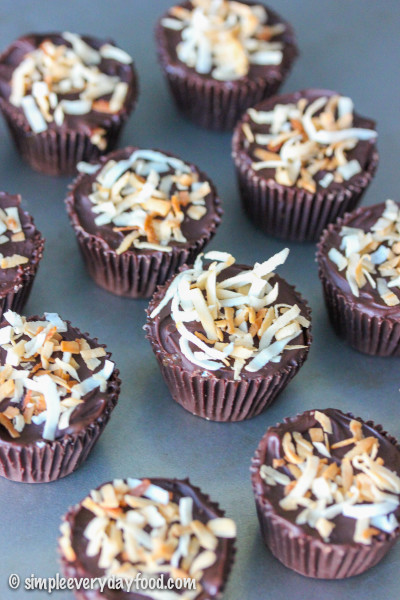
Then top it up with more melted chocolate and garnish with toasted coconut flakes. Freeze a little bit longer (almost there!), then EAT and DEVOUR!

IMG_5109 copy

IMG_5088 copy

I will not be responsible for the amount of chocolate cups you eat in one single sitting. Nor will I be responsible if you end up with a stomach ache after eating half the pan… just sayin’.

IMG_5085 copy

IMG_5090 copy

But just look at that ooey gooey caramel-y deliciousness! I mean, how can you resist?!

I apologize for the over abundance of pictures…

IMG_5124 copy

IMG_5146 copy

samoa cookie chocolate cups
Print
Ingredients
  1. 2 and 1/2 cups semi sweet chocolate chips
  2. 1 and 1/4 cups sweetened coconut flakes
  3. 1 cup caramel syrup
  4. 6 shortbread cookie squares, cut into quarters
  5. Sea salt, for sprinkling, if desired
Instructions
  1. Line a 24 mini muffin pan with liners and set aside.
  2. Using a double boiler, melt 2 cups of the chocolate chips, stirring occasionally until smooth. Drop 1-2 teaspoons of melted chocolate into each liner, spreading the chocolate up the sides of the liner using a pastry brush or a spoon. Make sure the sides are nicely coated. Freeze for 30 minutes.
  3. In the meantime, toast the coconut flakes in a nonstick pan over medium heat. Once you notice the flakes are starting to brown, stir constantly until most of the coconut flakes turn golden brown in color. Be careful not to burn them! Remove from heat and reserve 1/4 cup for garnish.
  4. Combine the caramel sauce and the remaining cup of coconut flakes in a medium bowl and mix well. Remove the frozen chocolate cups from the freezer and spoon ~1/2 teaspoon of the caramel/coconut mixture on the bottom of each cup, top with a quarter piece of the shortbread cookie, then top with ~1 teaspoon of the caramel mixture. Sprinkle tops with a little bit of sea salt (if desired). Freeze for another 30 minutes.
  5. Melt remaining 1/2 cup of chocolate chips over a double boiler (or in the microwave) until completely melted and smooth. Remove chocolate cups from freezer, and cover each cup with a thin layer of the melted chocolate, smoothing the tops with a spoon if needed. Garnish with the reserved toasted coconut flakes. Freeze for an additional 15 minutes. Chocolate cups can be stored either at room temperature, in the fridge, or in the freezer in an airtight container, depending on your preference!
  6. Makes 24 chocolate cups
Adapted from The Housewife In Training
Simple Everyday Food https://www.simpleeverydayfood.com/
Recipe adapted from The Housewife In Training

© Simple Everyday Food. All images & content are copyright protected. Please do not use any of my images without prior permission. If you want to republish this recipe, please re-write the recipe in your own words, or kindly link back to this post for the recipe.
Sharing is caring! Email this to someonePrint this pagePin on PinterestShare on YummlyShare on FacebookShare on Google+Tweet about this on Twitter

Warning: lots and lots of cute puppy pictures ahead! :)

 My baby boy turned THREE (!!!) a few days ago! Oh man, where did the time go?!

IMG_1324

IMG_5313 copy

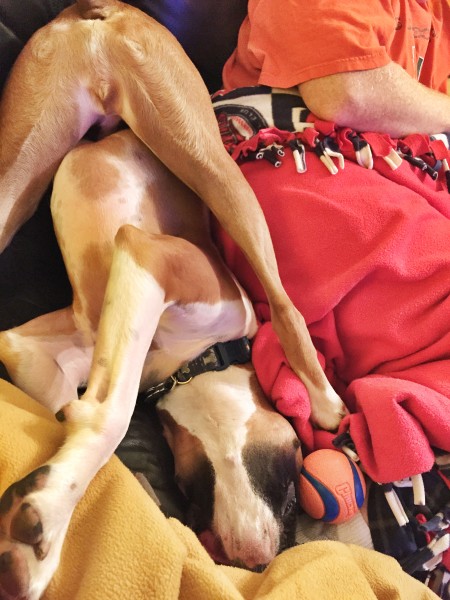
It’s been a fun-filled year for Mr. Bentley. He discovered the tastiness of blueberries, popcorn, cheese, and ice cream.

IMG_0853

IMG_8327

He still loves to be outside in the summer – I think if it were up to him, he’d be outside every single minute when it’s at least 60 degrees. But he did realize how wonderful it is to just lay outside and soak up the sun, and that not every single minute needs to be about running around.

IMG_9578

IMG_8215

IMG_8421

He’s mellowed out a bit since last year, but there are still days where all he wants to do is be goofy and crazy.

IMG_9951

IMG_8629

IMG_9777

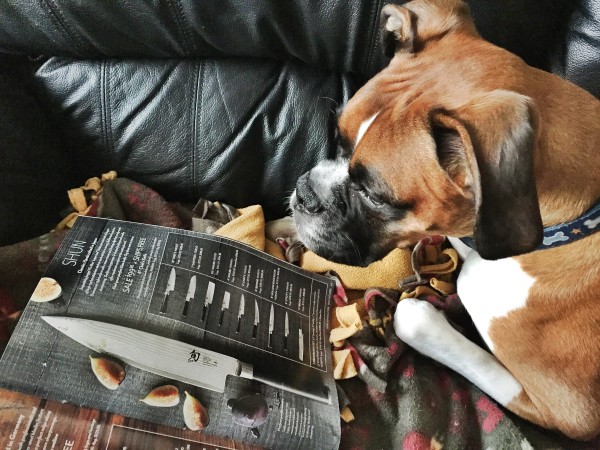
He loves looking through Sur la Table catalogs that we receive in the mail…

IMG_0203

He loves staring at us while we eat at the dinner table…

IMG_0625

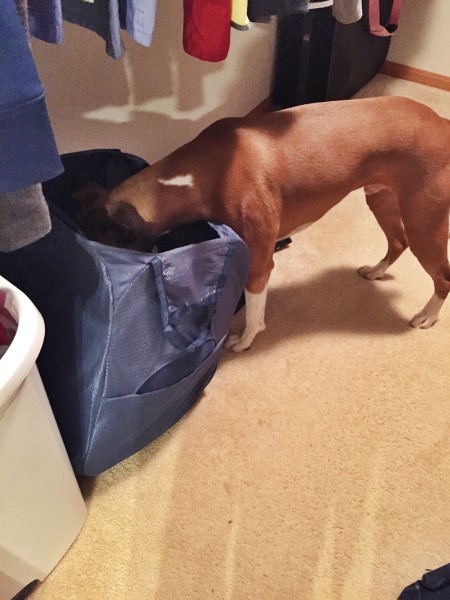
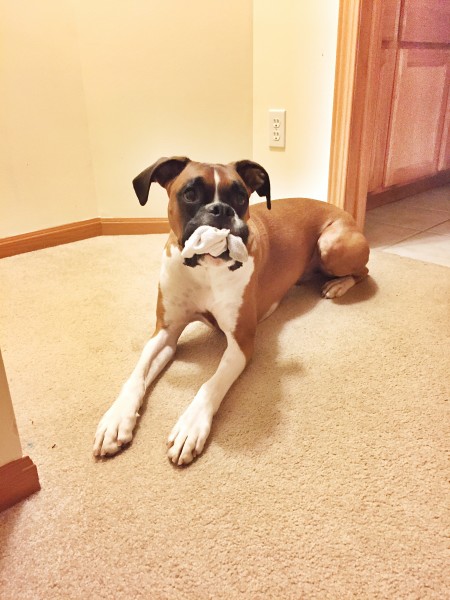
And his new (annoying) naughty habit involves trying to rip socks off of our feet. For some reason it has to be dirty socks. You can throw a pile of clean, fresh-out-of-the-dryer socks at him and it wouldn’t phase him. But a pair of socks on your feet? He’ll rip those off and run around the house with them like it’s some sort of game. I’ve even caught him multiple times with his head in my hamper, digging for socks.

IMG_0809

IMG_1120

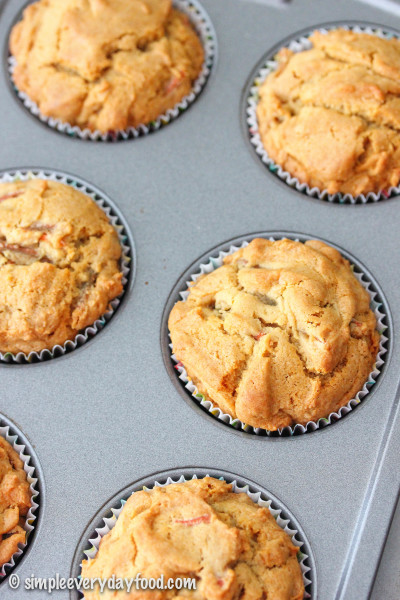
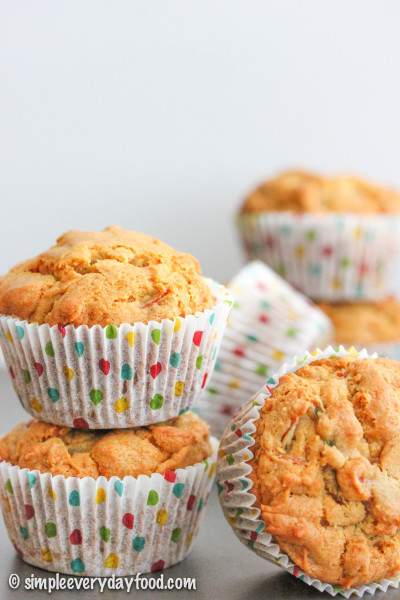
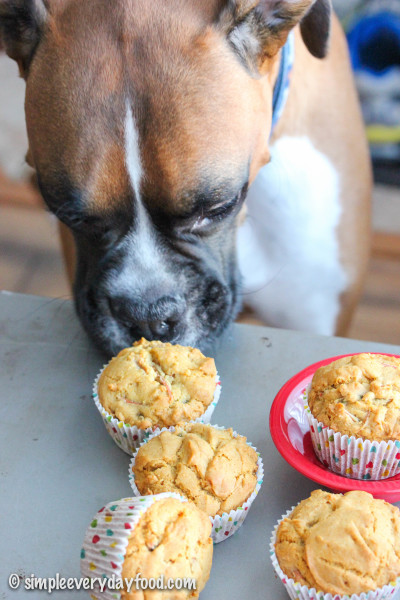
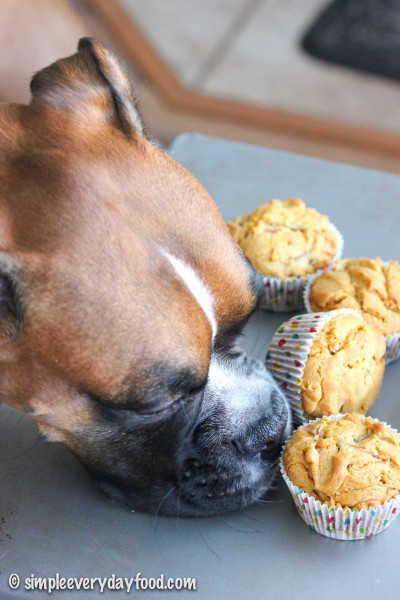
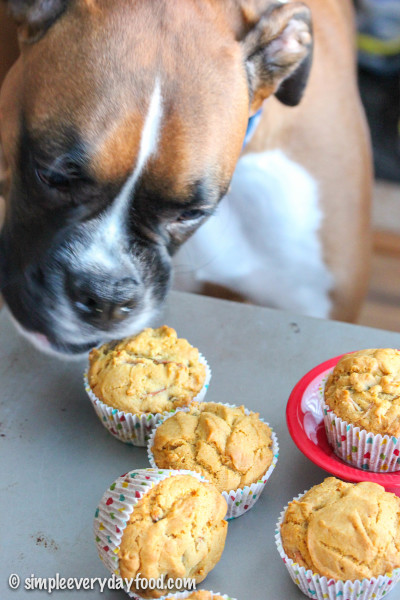
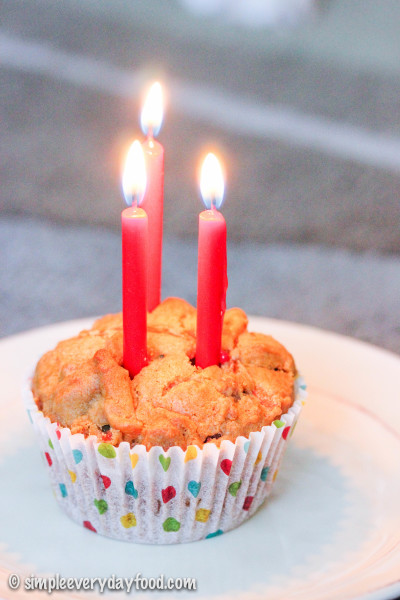
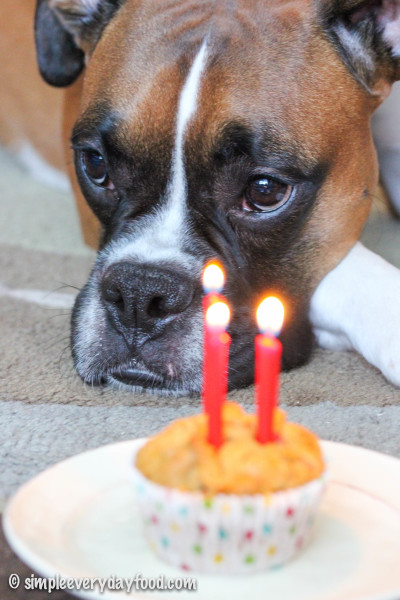
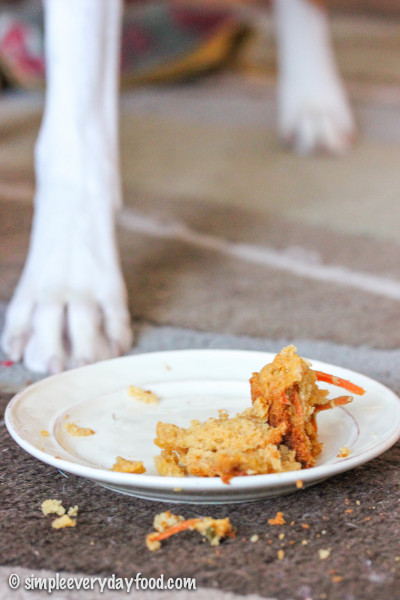
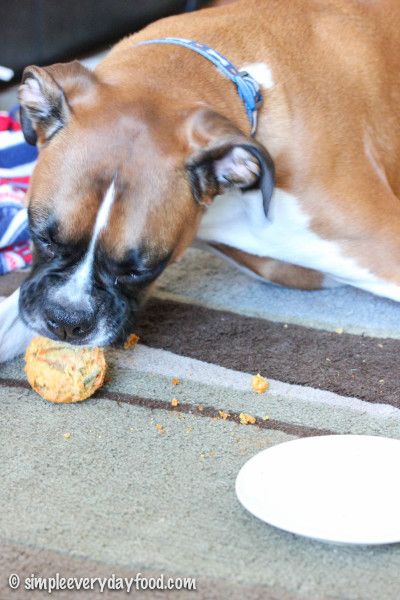
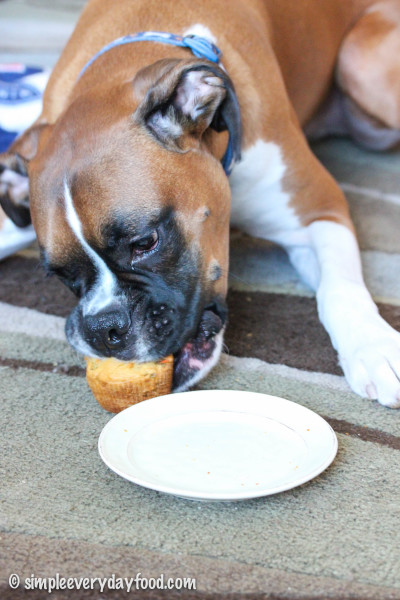
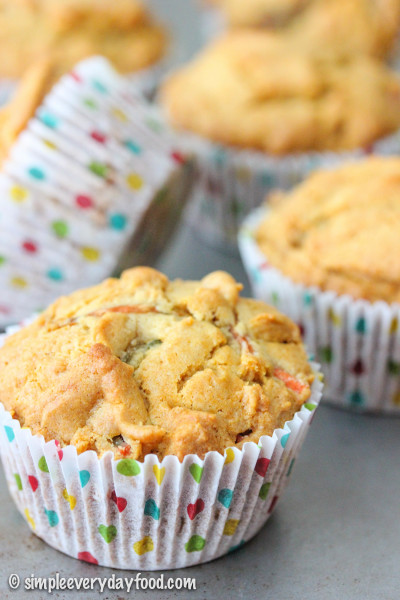
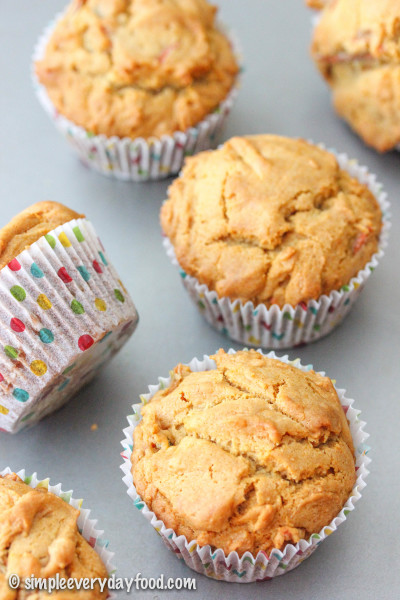
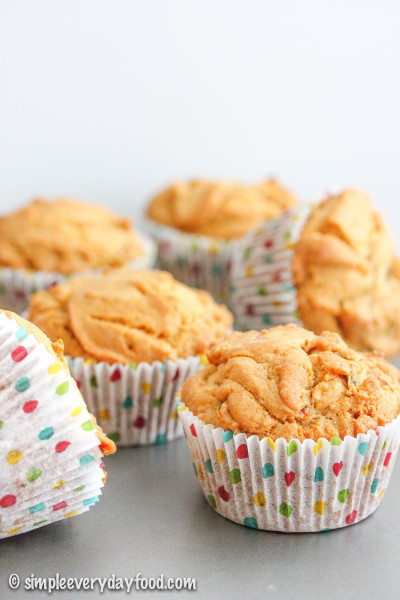
Considering how much I love this boy of mine, it only made sense that I made him something (with love!) for his birthday. These turned out more like muffins instead of the cupcakes I initially envisioned, so I scratched the frosting idea. I don’t think Bentley minded, because he snatched one off the baking sheet right in front of me as I was taking pictures of them!

IMG_5276 copy

IMG_5305 copy

IMG_5315 copy     IMG_5318 copy

IMG_5316 copy     IMG_5319 copy

IMG_5321 copy     IMG_5326 copy

IMG_5338 copy     IMG_5333 copy

This recipe is super simple to make and only requires a few ingredients that you probably already have sitting around in your house. It also only requires a few mixing bowls, a whisk, and a spatula… Add ingredients in bowl, mix, spoon into muffin tins, and bake – no rocket science here!

 IMG_5285 copy

IMG_5289 copy

IMG_5306 copy

IMG_5355 copy

The batter only yields 6 muffins, which is a perfect amount! Bentley’s sharing a few with his friends, because he certainly doesn’t need all 6 muffins to himself, and it’s always more fun to share food with friends. And like I said last year, if your dog has certain dietary restrictions, please consult your veterinarian before making these.

IMG_5369 copy

IMG_5297 copy

And if you want a little frosting on top of these for your furry friend, you can definitely use the easy frosting recipe I used last year.

It’s been a great three years and I can’t imagine life without him. Thank you for being such a great puppy, Bentley! We love you!

IMG_5307 copy

peanut butter & carrot doggie muffins
Print
Ingredients
  1. 1 cup all-purpose flour
  2. 1 teaspoon baking soda
  3. 1 large egg, at room temperature
  4. 1/4 cup creamy peanut butter
  5. 1/4 cup vegetable oil
  6. 1/4 cup honey
  7. 1 cup shredded carrots
Instructions
  1. Preheat oven to 350 degrees. Line 6 muffin tins with cupcake liners and set aside.
  2. In a small bowl, combine the flour and baking soda. Set aside. In a medium bowl, combine the egg, peanut butter, vegetable oil, and honey. Whisk until thoroughly combined, then stir in the shredded carrots. Add the dry ingredients to the wet ingredients and mix until fully incorporated.
  3. Divide batter evenly between the prepared muffin tins and bake for 25-27 minutes, or until an inserted toothpick comes out clean. Remove from oven and let cool prior to serving. Muffins can be stored in an airtight container for up to 5 days.
  4. Makes 6 muffins
Notes
  1. * If your dog has certain dietary restrictions, please consult your veterinarian before making these.
  2. ** And please do not feed your dog all 6 of these muffins in one setting! :)
Adapted from Romp Rescue
Simple Everyday Food https://www.simpleeverydayfood.com/
Recipe adapted from Romp Rescue

© Simple Everyday Food. All images & content are copyright protected. Please do not use any of my images without prior permission. If you want to republish this recipe, please re-write the recipe in your own words, or kindly link back to this post for the recipe.

Sharing is caring! Email this to someonePrint this pagePin on PinterestShare on YummlyShare on FacebookShare on Google+Tweet about this on Twitter