everyday food made simple

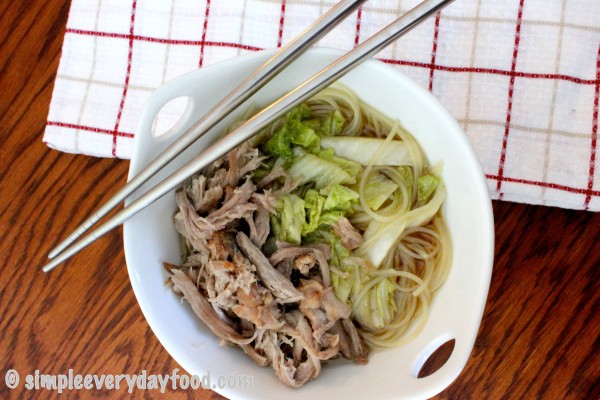
This is perhaps the best thing I have ever made in the Crockpot. Ever. Now granted I haven’t made a whole lot of different things in the Crockpot, but this one is amazing (if I may say so myself) and it will definitely be a repeat for my next busy homework-filled day.

IMG_1530

I’ve been finding the perfect recipe for a traditional Chinese/Taiwanese noodle soup broth, and I think this might be it. It literally brought me back home and I think I almost shed a tear when I tasted it for the first time today. I almost felt like I was transported back in time: finding some tiny little hole-in-the-wall noodle shop on the streets of Taiwan, sitting with my family at a small table on metal stools, waiting for our food to be cooked. Most of these restaurants only have big industrial fans during the hot summer months, so we usually sit somewhere near a fan. As if we weren’t hot enough, we usually all order noodle soup (I think I order noodle soup half the time not because of the noodles, but simply because I love the “soup” part of it).

Noodle soup has a special place in my heart. It’s usually something that can made within 15, 20 minutes with a variety of ingredients, so we ate a lot of it growing up, especially when my parents didn’t have much time to cook after coming home from work. Now when I say “noodle soup”, I don’t mean the American “chicken noodle soup”. The Asian version is very different and in my (biased) opinion, tastes way better :)

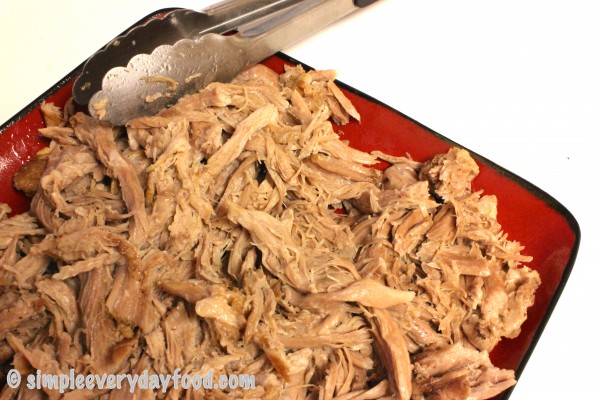
Anyway, back to soup… I used a pork butt roast for this rather than a pork shoulder – you can definitely use a pork shoulder if you’d like. The pork butt is slightly fattier, but it also gives the broth an amazing flavor as well.

IMG_1528

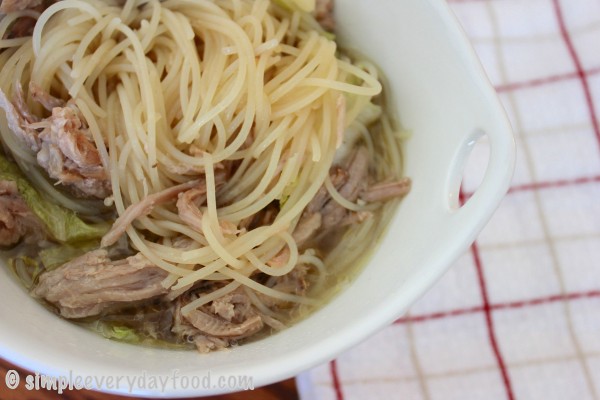
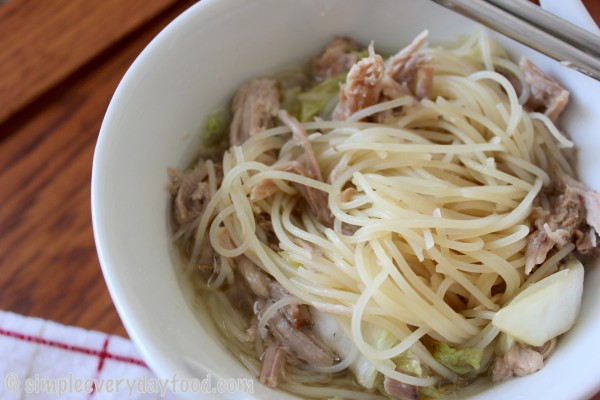
The combination of soy sauce, ginger, garlic, and star anise play an important part in making this a true authentic Taiwanese/Chinese dish. I added about 1.5 cups of water after taking the roast out to dilute the broth a little bit more; however, if you prefer your broth on the more concentrated and salty side, feel free to omit the additional water. I used Napa cabbage as my vegetable simply because that was all my grocery store had at the time, but if you prefer bok choy, that’ll work as well.

IMG_1538

slow cooker asian pork and noodle soup
Print
Ingredients
  1. 3 cups low-sodium chicken broth
  2. 1/4 cup soy sauce
  3. 3 tablespoons light brown sugar
  4. 3 cloves garlic, smashed
  5. 1-2" piece ginger, peeled and sliced
  6. 2 pieces star anise
  7. 1/4 teaspoon salt
  8. 3 pounds pork butt roast
  9. 1.5 cups water
  10. 2 cups Napa cabbage, chopped
  11. 3-4 oz dried Mai-Fun noodles
Instructions
  1. In a 5-6 quart slow cooker, combine the chicken broth, soy sauce, brown sugar, garlic, ginger, star anise and salt. Add the pork, then cover and cook on low 8 hours, or until pork is fork tender.
  2. Remove pork and place on a large plate. Shred with a fork and set aside.
  3. Add the water, Napa cabbage, and noodles to the slow cooker, making sure they are submerged. Cover and cook for 30 more minutes, or until noodles are done.
  4. Divide the noodles, Napa cabbage, and pork among bowls, then ladle in the broth.
  5. Serves 3
Adapted from Food Network
Simple Everyday Food https://www.simpleeverydayfood.com/
Not only is the flavor of this soup very nostalgic to me, it also makes the house smell like a little hole-in-the-wall Taiwanese noodle place. I placed the roast in the slow cooker this morning before leaving for class, and when I came back 8 hours later, I could smell the deliciousness before I even opened the front door. Not to mention finding a recipe this delicious that only requires a Crockpot is always a win in my book!

IMG_1540

Enjoy!

Recipe slightly adapted from Food Network

© Simple Everyday Food. All images & content are copyright protected. Please do not use any of my images without prior permission. If you want to republish this recipe, please re-write the recipe in your own words, or kindly link back to this post for the recipe.

Sharing is caring! Email this to someonePrint this pagePin on PinterestShare on YummlyShare on FacebookShare on Google+Tweet about this on Twitter

First off, can I just say that I would love to meet whoever invented the Crockpot and give them a hug? It’s probably one of the best inventions of the 20th century, and it’s days like today that I’m thankful for its existence.

IMG_1525

Coming into this weekend, I was super behind on all the homework and projects and reading that I had to do by Monday. Owning and operating a food blog and having to write a certain number of posts per week can be quite challenging when you’re taking five classes that have a ton of homework and don’t have enough hours in the day to cook and take pictures and blog (whew)… But fear not, my dear readers, I came up with a brilliant idea of being able to make home-cooked meals and getting homework done at the same time!

Enter our lovely Crockpot.

It’s the perfect way of eating at home and getting stuff done! I probably spent about 15-20 minutes prepping for this meal, and left the Crockpot to do the rest of the cooking. No need to spend hours prepping or slaving away over the stove. There’s really not even a whole lot of dishes to clean up afterward either (which means more time to study). I felt bad wasting this lovely day away by not grilling something outside, but sometimes getting stuff done is just a little bit more important than blogging (I can’t believe I just said that).

slow cooker pulled pork sandwiches
Print
Ingredients
  1. One 3-3.5 lb pork roast
  2. 1 medium onion, sliced
  3. 2 teaspoons light brown sugar
  4. 1 teaspoon paprika
  5. 2 teaspoons salt
  6. 1 teaspoon garlic powder
  7. A dash of cayenne pepper
  8. A pinch black pepper
  9. 3/4 cup apple cider vinegar
  10. 1/4 cup water
  11. 8 oz tomato sauce
  12. Dash hot sauce, such as Tabasco
  13. 1 teaspoon sugar
  14. 2 tablespoons Worcestershire sauce
  15. 12 whole wheat slider buns
  16. Your favorite kind of barbeque sauce
Instructions
  1. Place the sliced onions in the bottom of a 5- to 6-quart slow cooker. Mix the brown sugar, paprika, garlic powder, cayenne pepper, salt and pepper and rub it over the pork roast. Place roast in Crockpot over the onions.
  2. In a medium bowl, combine the vinegar, water, tomato sauce, 1/2 teaspoon black pepper, hot sauce, sugar, and Worcestershire sauce. Pour over the roast. Cover and cook on low for 8 hours, or until meat is tender and is easily shredded with a fork.
  3. Remove roast from Crockpot and shred finely with a fork.
  4. Assemble sandwiches by placing desired amount of pork in between the buns. Add your favorite barbeque sauce on top of the meat or simple drizzle extra juices for extra juiciness.
  5. Serves 3-4
Adapted from Food Network
Simple Everyday Food https://www.simpleeverydayfood.com/
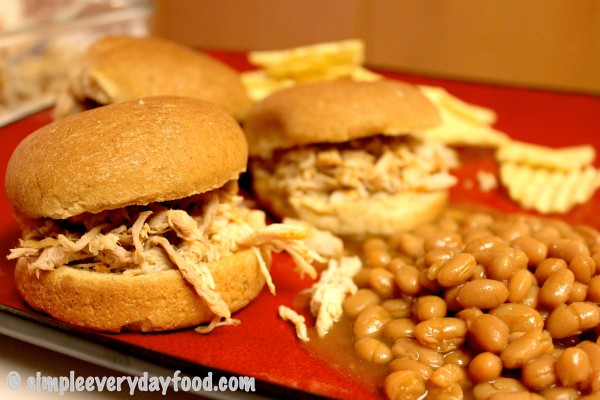
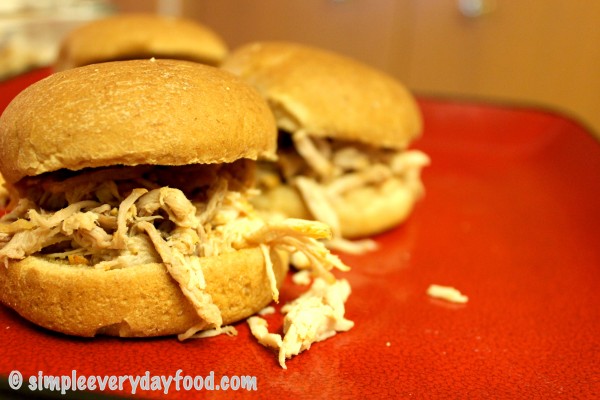
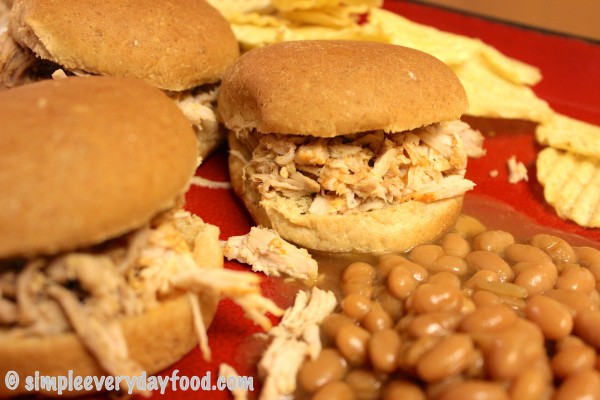
We bought little slider buns instead of regular hamburger buns, since mini foods are always way cuter (and more fun to eat) than regular-sized foods, but feel free to use regular hamburger buns if that’s what you have around the house. If you prefer not to add the barbeque sauce on your sandwich, you can spoon a little bit of the leftover juice/sauce over the meat instead.

IMG_1523

The pork itself is very light in flavor, but the addition of the barbeque sauce gives it an extra tang and makes it more like a “barbeque pulled pork sandwich”, if that’s what you’re going for.

Baked beans, pulled pork sandwiches, and potato chips. Sounds like a summer meal to me.

IMG_1526

Enjoy!

Recipe adapted from Food Network

© Simple Everyday Food. All images & content are copyright protected. Please do not use any of my images without prior permission. If you want to republish this recipe, please re-write the recipe in your own words, or kindly link back to this post for the recipe.

Sharing is caring! Email this to someonePrint this pagePin on PinterestShare on YummlyShare on FacebookShare on Google+Tweet about this on Twitter

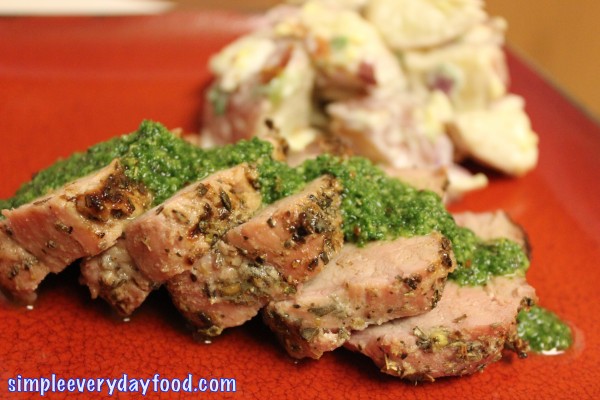
As I promised, here’s the second recipe of last night’s dishes – a very simply seasoned tenderloin with a garlicky sauce.

IMG_1152

I partially wanted to make something that involved garlic because I found this cute little thing at the store yesterday! It’s a way better (and more eye appealing) than our old “Philadelphia cream cheese garlic storage container“! And we can actually proudly display it on our counter now!

IMG_1127

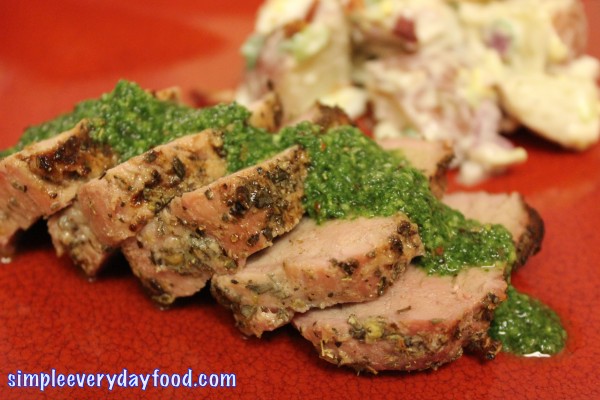
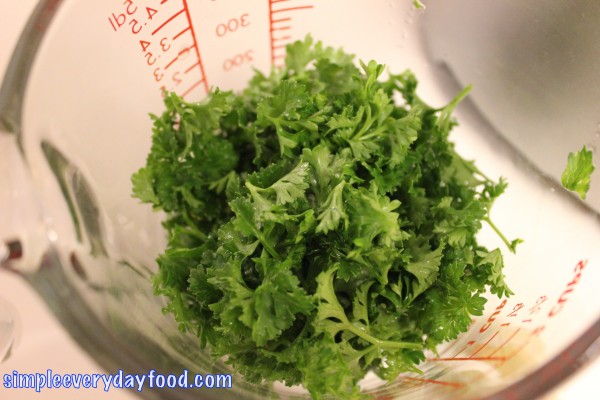
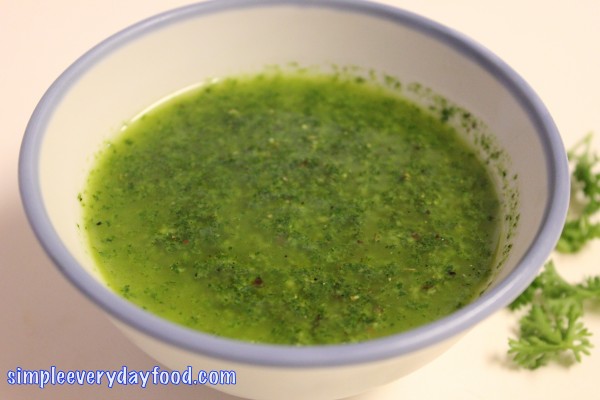
Although this tenderloin is juicy and tender by itself, the sauce kicks the whole dish up a few notches. Green sauces, unlike other colored sauces, are usually associated with words like “fresh” and “healthy“. And why wouldn’t they? They’re usually made with some sort of an herb, garlic, light seasoning (salt and pepper), with little sugar and other processed condiments.

IMG_1125

IMG_1148

pork tenderloin with garlic herb sauce
Print
Ingredients
  1. 1 cup packed flat leaf parsley
  2. 2 cloves garlic
  3. 1/2 cups EVOO, plus more for brushing
  4. 3 1/2 teaspoon dried oregano
  5. 1 tablespoon red wine vinegar
  6. A dash of crushed red pepper (omit if you're not a fan of spiciness)
  7. 1 1.5-pound pork tenderloin
  8. 1/2 teaspoons garlic powder
  9. Salt and pepper
Instructions
  1. Using a food processor, pulse the parsley and garlic. Then add in the EVOO, 1/2 teaspoon dried oregano, vinegar, red pepper, 1/2 teaspoon salt, and a pinch of black pepper. Transfer to a bowl and set aside.
  2. Prepare a charcoal grill so it's nice and hot.
  3. Brush the pork with some EVOO and rub with 1 teaspoon salt, 3 teaspoons dried oregano, and the garlic powder.
  4. Place tenderloin on the grill, turning often, and cook until the meat thermometer registers 145 degrees, about 25-30 minutes.
  5. Remove from grill and let rest for 20 minutes. Thinly slice and drizzle with the herb sauce.
Adapted from Rachel Ray Magazine
Simple Everyday Food https://www.simpleeverydayfood.com/
Not only does this green garlic sauce taste good, it also makes the whole dish look like something you can order at a restaurant.

IMG_1155   

After we both had our share last night, there were a few pieces left, and I wasted no time on calling dibs on them for lunch today!

And yes, I’m still working on that gigantic bowl of potato salad… I had to try my hardest to pull myself away from that bowl so I can have some room for coffee later.

….”just one more bite!

[five bites later….]

“Okay, just one last bite! This is going to be my last bite!”

Enjoy!

Sharing is caring! Email this to someonePrint this pagePin on PinterestShare on YummlyShare on FacebookShare on Google+Tweet about this on Twitter

Since last time I tried a dry rub recipe on some ribeyes and they turned out to be super amazing, I figured I’d try a different dry rub recipe for pork tenderloins today.

IMG_0864

Despite the fact that it rained all day here in the Twin Cities, it was almost as if Mother Nature knew we had plans to grill out tonight and gave us some nice (but chilly) weather in the end :)

Thank goodness the skies cleared up – if it would’ve kept on raining, we would’ve had to quickly find a Plan B for dinner. And being the strong Type A person that I am, a last-minute Plan B would not bode well with me (especially when I’ve already gotten everything ready to go). Type A people like to make plans, and stick to their plans. They don’t do well when plans do not go as planned…. in the end, everything ended up going as planned, so I I’m a happy camper.

IMG_0852

IMG_0856

IMG_0859

grilled pork tenderloin
Print
Ingredients
  1. Pork tenderloin, about 1.5 pounds
  2. 2 teaspoons EVOO
  3. 1 tablespoon paprika
  4. 2 teaspoons salt
  5. 1/2 teaspoons black pepper
  6. 1 teaspoon brown sugar
  7. 1 teaspoon ground cumin
  8. 1 teaspoon mustard powder
  9. 1/2 teaspoon garlic powder
  10. 1/2 teaspoon onion powder
Instructions
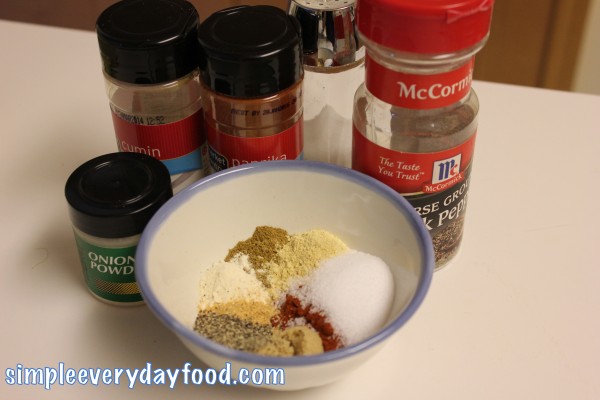
  1. In a small bowl, combine the paprika, salt, pepper, brown sugar, ground cumin, mustard powder, garlic powder, and onion powder.
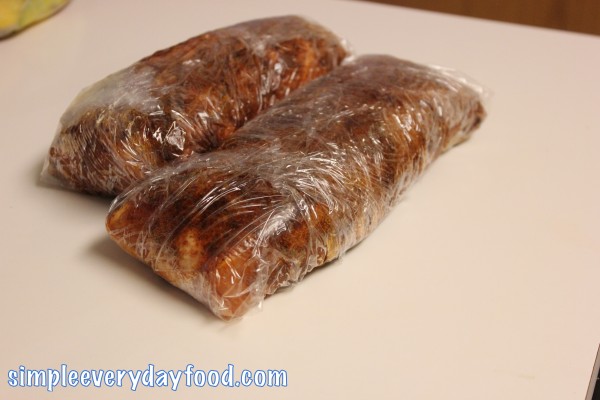
  2. Rub the EVOO over the pork tenderloin, then generously coat with the spice rub. Wrap the pork tenderloin in plastic wrap and place in the fridge for 3-6 hours.
  3. Remove the pork from the fridge about 30 minutes before grilling.
  4. Using a charcoal grill, set it up so the coals are nice and hot.
  5. Place the pork over direct heat. Cook for about 20-30 minutes (depending on the size of the pork), turning once halfway, or until a thermometer inserted into the thickest part registers 140-145 degrees.
  6. Transfer to cutting board and let rest for 15 minutes.
  7. Slice the pork and serve.
Adapted from Food Network Magazine
Simple Everyday Food https://www.simpleeverydayfood.com/
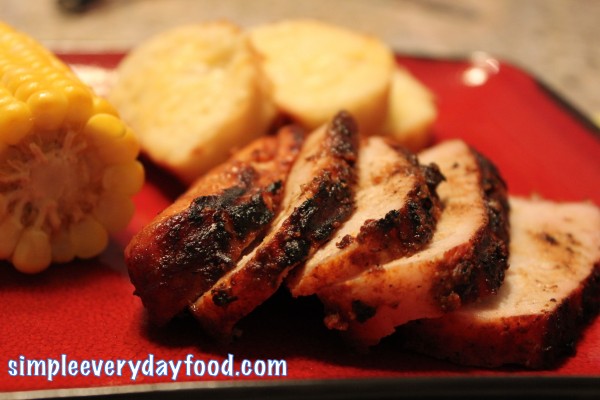
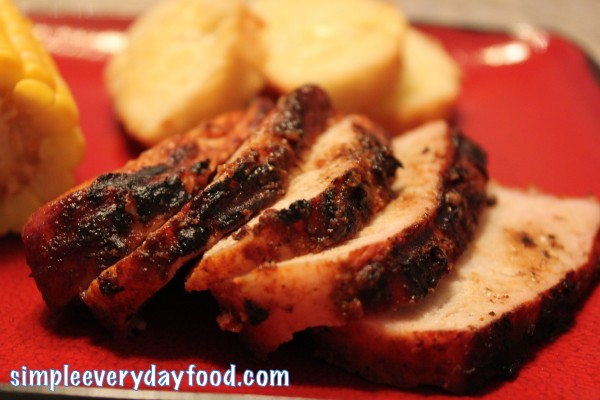
Anyway… what’s not to like about pork tenderloin? These babies were so juicy, tender, and full of flavor. The dry rub gave it a crusty crust on the outside, and the charcoals gave it a nice smoky flavor on the inside. Along with the corn on the cob and cheesy bread to go along with it, who says you can’t have restaurant-quality meals at home?!

IMG_0863

Yep, it was good – definitely a repeat for whenever summer decides to show up in Minnesota. I’m glad we decided to buy two tenderloins, so now we’ve got plenty of yummy meals for the next few days. Next time, I’m going to be sitting on the patio soaking up some sun with some lemonade while the hubs makes me dinner :)

Enjoy!

Recipe adapted from Food Network Magazine

Sharing is caring! Email this to someonePrint this pagePin on PinterestShare on YummlyShare on FacebookShare on Google+Tweet about this on Twitter

Just when I thought spring was right around the corner, I checked the forecast for the next 5 days and saw this:

forecast

Ugh. I need to move. I guess today would be the last day to get to use the grill for the next few days (they’re calling for rain for the entire weekend as well). Good thing we planned ahead and decided to throw some chops on the grill for a quick dinner. Yay for planning ahead!

IMG_0770

IMG_0773

I have a few rub recipes I’ve been itching to try all winter, waiting for some nice sunny days to grill out. Since I didn’t get to enjoy the nice warm weather we had this past weekend, today seemed to be the perfect day to try a new recipe out, and I sure didn’t have to ask the hubs twice if he wanted to fire up the grill….

IMG_0774

Disregard the teriyaki marinated chicken that’s on the other side of the grill the hubs was making for his work lunches….

Ever since the hubs found out that sometimes trying new things really isn’t that bad (see my post about how he bravely tried my roasted red pepper & pesto penne and liked it), I’m hoping that this summer we’ll be “diversifying” his palate and trying things he’s never even wanted to try before. Since the pesto was a success, I figured we can try a rub that contained similar ingredients to it…

IMG_0780

grilled pork chops with basil garlic rub
Print
Ingredients
  1. 2 thin bone-in pork chops, about 1/2" thick
  2. 2 garlic cloves, peeled
  3. 1 cup fresh basil leaves
  4. 2 tablespoons EVOO
  5. Juice of one lemon
  6. 1 teaspoon salt
  7. 1/2 teaspoon black pepper
Instructions
  1. Using a charcoal grill, set the grill up so the coals are nice and hot.
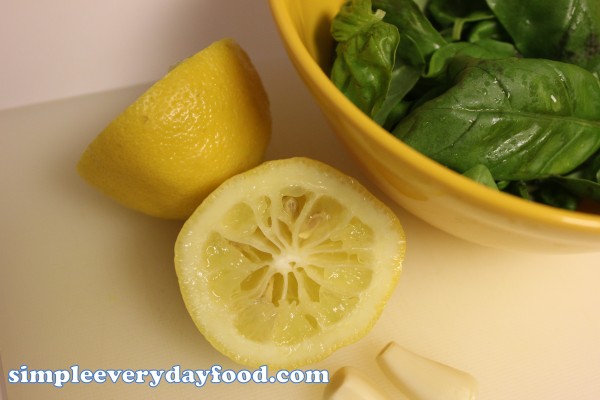
  2. Meanwhile, with the food processor running, drop the garlic cloves through the feeding tube and mince. Stop and add the basil leaves, pulse on high until thoroughly chopped.
  3. Add the EVOO, lemon juice, salt, and pepper. Pulse until everything is mixed well and it turns into a thin, wet rub.
  4. Generously spread basil mixture on both sides of the pork chops. Let sit for 15-30 minutes.
  5. Place chops on grill over direct heat, cook for about 6-8 minutes, turning once halfway through, or until internal temperature reaches 145 degrees.
  6. Remove pork chops from grill and let rest for 3-5 minutes.
Notes
  1. Cooking times may vary based on how hot your coals are and the thickness of your pork chops. If you're unsure if they're done, it's always best to use a meat thermometer.
Simple Everyday Food https://www.simpleeverydayfood.com/
Since we made regular plain whole wheat couscous this time, the juices from the chops gave our otherwise boring couscous a really good flavor. The hubs thought the rub was so good that he said, “I think I like basil!”

It’s almost just as rewarding as hearing your picky 5-year-old say they think your food is amazing. :)

Enjoy!

Sharing is caring! Email this to someonePrint this pagePin on PinterestShare on YummlyShare on FacebookShare on Google+Tweet about this on Twitter